Choosing the Best Office 365 Backup Solution

Who of us today do not use the public cloud either personally or professionally? I can honestly say that for the past 8-10 years I have had files out on the public cloud in some form or fashion and worked for and with businesses that are making use of the public cloud for as long or longer. Cloud storage has totally changed the dynamics of how data is stored and accessed. It also provides us with tremendous flexibility with our data and alleviates some of the worries that were associated with files when they were simply housed in local storage. If you have your files all stored in either your Google Drive or Microsoft One Drive, they are automatically synced to public cloud storage. If a local hard drive fails, you still have your data. However, this now very important reliance on public cloud underscores one of the necessary evils of IT infrastructure and data preservation – backups. The most elementary, traditional, and necessary IT process is the backup process itself which protects data and allows that data to be restored.
Storing data in the public cloud has created a problem of sorts for traditional backup methods. In the public cloud, you don’t control the physical infrastructure so how do you get to your data to back it up? Additionally, it is key with any backup solution to store the backups separately from the data being backed up. How can cloud resources be protected in this way? Let’s take a look at three of the top vendors for protecting both Google’s G Suite and Microsoft’s Office 365 public cloud environments. They are Backupify, Spanning, Altaro, and Spinbackup. These intelligent cloud-to-cloud backup solutions each provide protection for data stored in the public cloud. How do they protect your data? How do they compare? Which solution provides the best value in features/price? We will look at Choosing the Best Office 365 Backup Solution along with the ease of getting each solution configured, UI, options, and also look at backup/restore operations connected to Microsoft Office 365.
Choosing the Best Office 365 Backup Solution
We will take a look at several aspects of each Office 365 backup solution including setup and configuration, UI, backup and restore operations, options, and price. For Backupify, Spanning, and Spinbackup, each vendor has trial versions that allow you to connect to an existing Office 365 subscription. This allows you to try out the feature sets before purchasing the service. You can also try out multiple backup services on a single Office 365 subscription environment at the same time if you want as I did in this trial of the three products tested. The length of the trial terms for each backup solution are as follows.
- Backupify – 15 day trial – https://backupify.com/free-trial
- Spanning – 14 day trial – https://spanning.com/get-started/free-trial/
- Spinbackup – 15 day trial – https://spinbackup.com/free-trial/
- Altaro – Altaro Office 365 Backup – 30 Day Trial – https://bit.ly/38Ayf9b
All three vendors provide easy to get to sign up pages for the trial versions as linked to above. I will walk through this with each below, but for the most part it simply involves connecting their service with your Office 365 environment and granting access permissions.
Backupify Office 365 Backups
One of the major names in the field of public cloud backups is Backupify. Backupify was acquired by Datto in December 2014. Datto is self-proclaimed as the leading provider of business continuity, disaster recovery and managed networking solution for over 5,000 MSP partners worldwide. It offers products that allow backing up G Suite, Office 365, and Salesforce. Specifically, in taking a closer look at what Backupify offers in way of Office 365 backups, the following features are listed for Backupify’s Office 365 backup functionality:
- Backs up Microsoft Exchange, OneDrive, SharePoint, Calendar, and Contacts
- Automatic Backups 3X a day
- SOC 2 Type II audited
- Supports HIPAA compliance needs
- Data encryption both at rest and in transit
- Data controls and monitoring tools, including audit logs, uptime and availability SLAs, and export capabilities
Other benefits include:
- Manage backups, view restores and see various activity from a single dashboard
- Find emails, contacts, files and folders to restore with search functionality
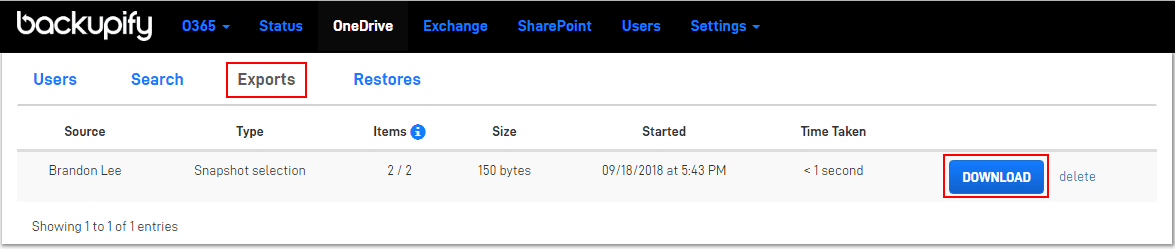
- Restore files to same user, different user, or download them
Backupify Setup and Configuration
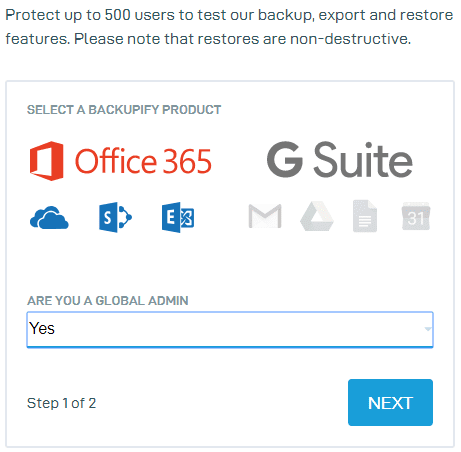
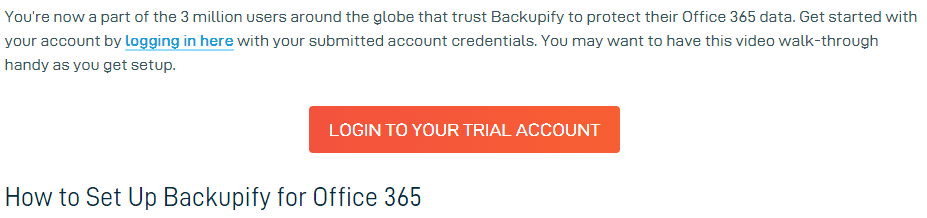
After visiting the trial link on the Backupify website, the process to get up and running is fairly straightforward. The first step on the Backupify site is choosing the service you want to trial – Office 365 or G Suite.
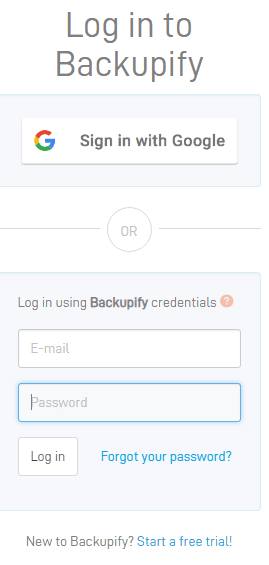
After submitting your email address and password configuration you will be prompted to login to your trial account with Backupify.
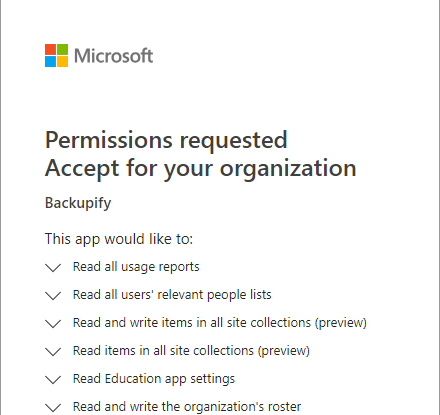
With any of the backup solution services, you will be prompted for permissions to access the environment as you see below with the Backupify service. You will need to allow the permissions request for successfully connecting the service to your Office 365 environment.
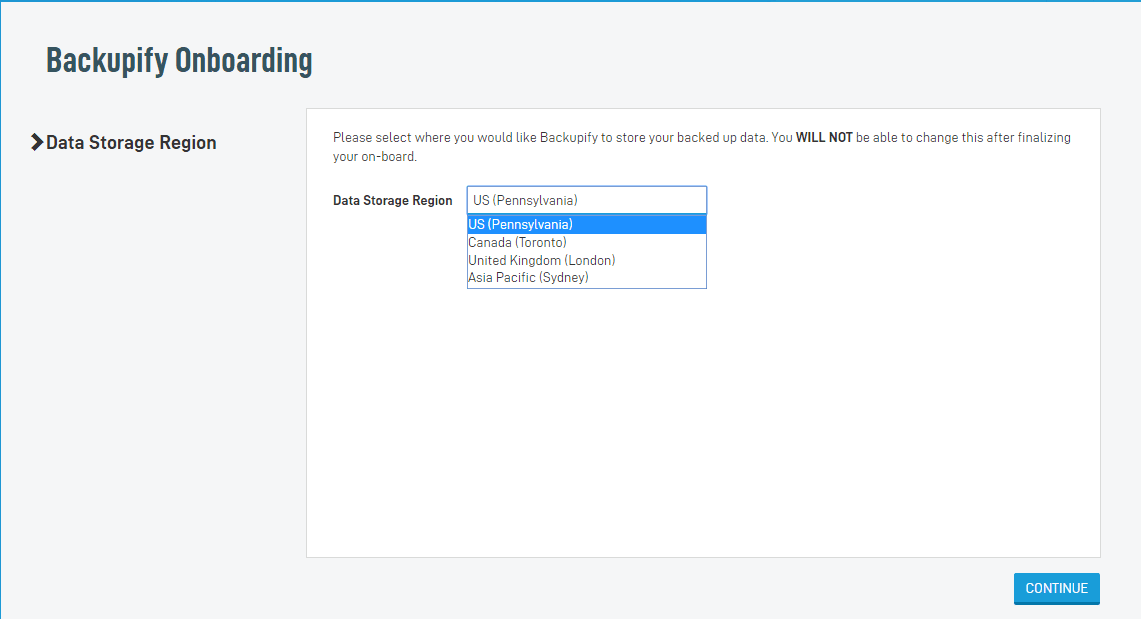
This begins what Backupify calls the Onboarding process which is essentially a setup wizard that allows you to choose your data storage region.
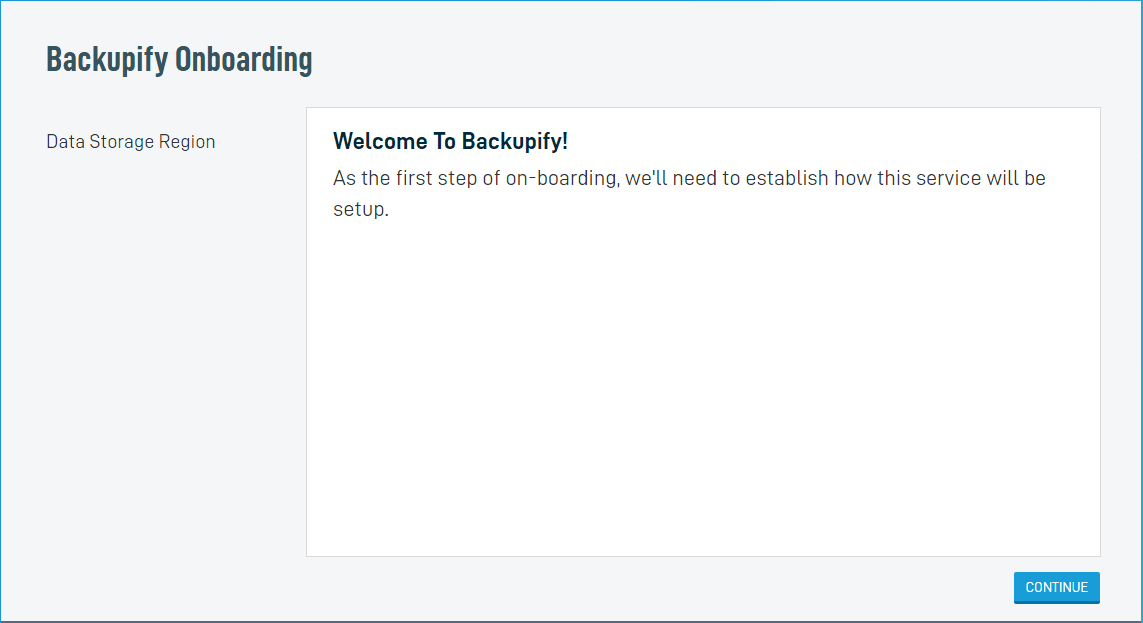
- US (Pennsylvania)
- Canada (Toronto)
- United Kingdom (London)
- Asia Pacific (Sydney)
An important note here about the data store region is that you can’t change this once it is configured. So, make doubly sure where you want to store your data for Office 365 backups.
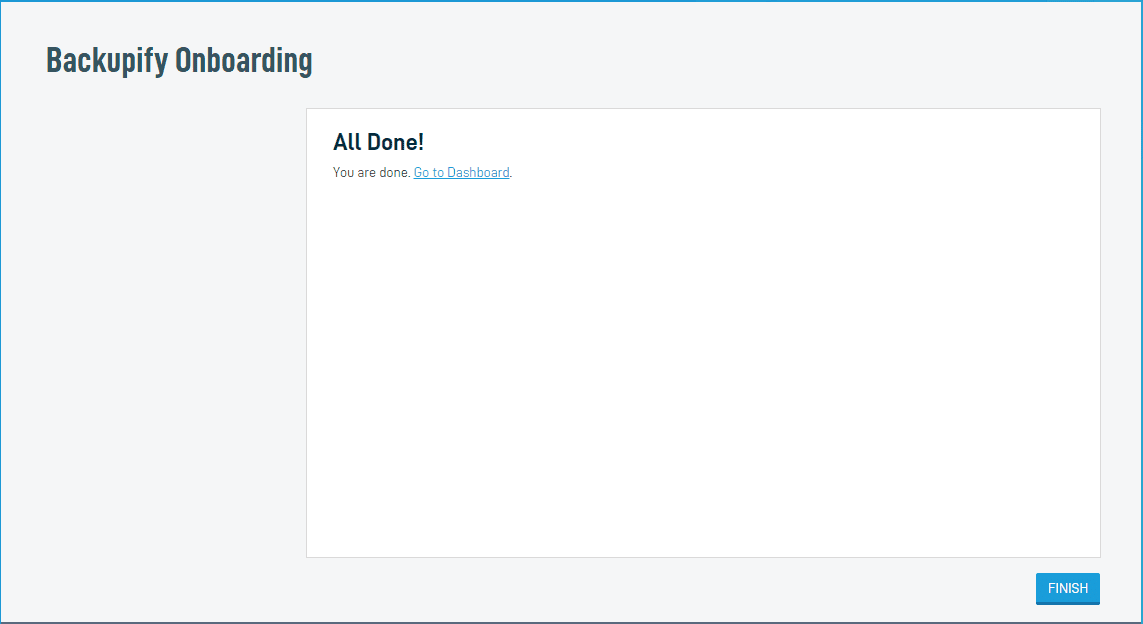
Once the data storage region is selected, you will get the All Done notification.
One of the first settings to note in Backupify is the ability to Auto-Add users from Office 365. This setting would come in handy to make sure you are protecting any users that are added to the Office 365 environment.
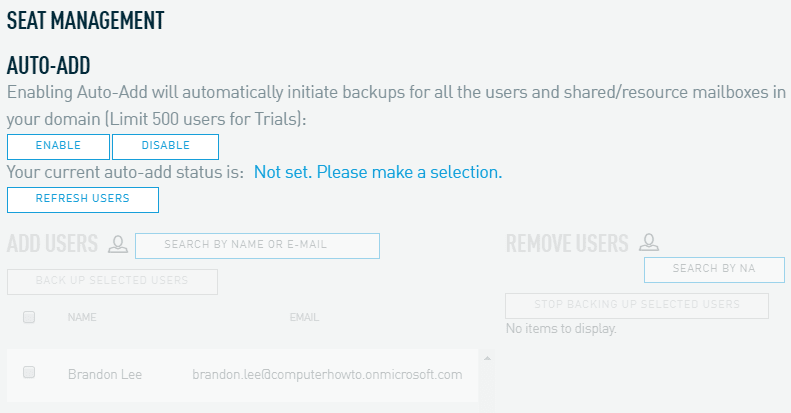
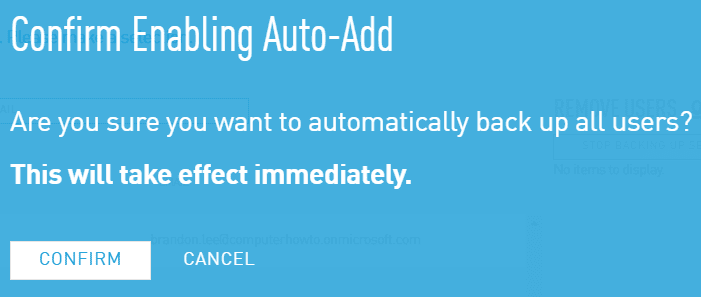
After confirming, the auto-add features, new users are automatically protected in Backupify as they are added in the Office 365 environment.
Backupify UI, Backups Restores and Settings
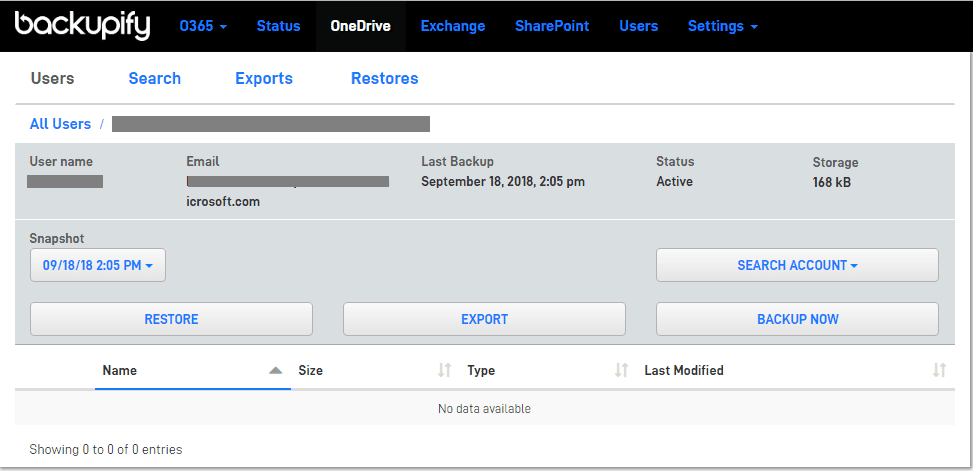
I found the Backupify UI to be fairly uncluttered and easy to navigate around in even without being familiar with the product. The interface with Backupify is fairly vanilla. However, “vanilla” is not a bad thing if the product works, and it does. The UI with Backupify works like a fairly classic menu-driven website where everything is intuitively laid out. With Backupify, the top menus display the various Office 365 applications and the menu directly underneath allows working with users, search, exports, and restores. Using OneDrive as an example for a user, you can see below, you can perform ad-hoc backups, restores, or export files from backups. The Snapshot dropdown menu displays the listing of backup snapshot times to choose from.
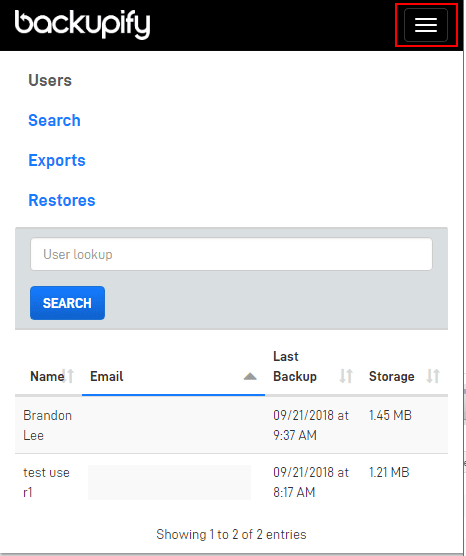
Backupify’s UI is mobile responsive as you can see below.
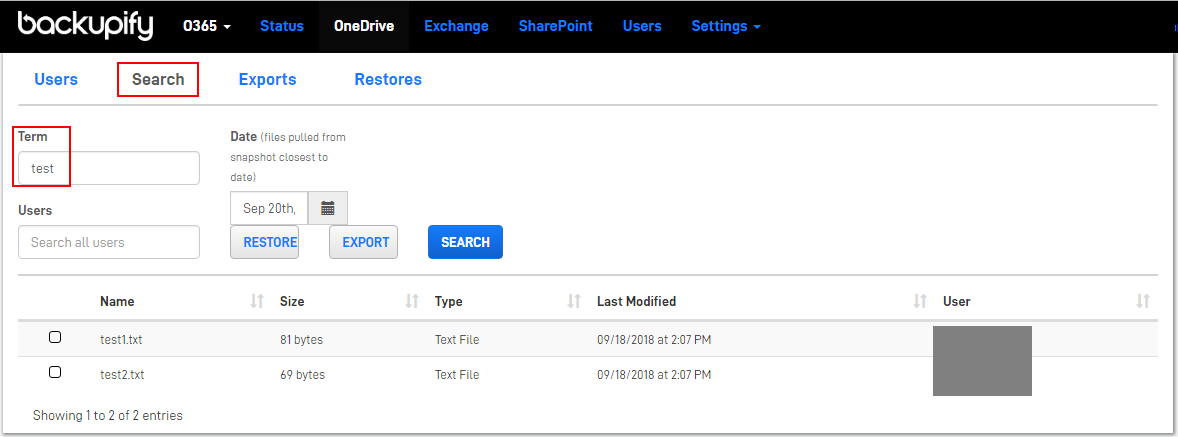
Backupify allows searching for specific files that may be found across or in backups and restore these from the search screen.
Restoring files can be done to the same user account the files were backed up from as well as you can select a different user account as a target for the restore operation.

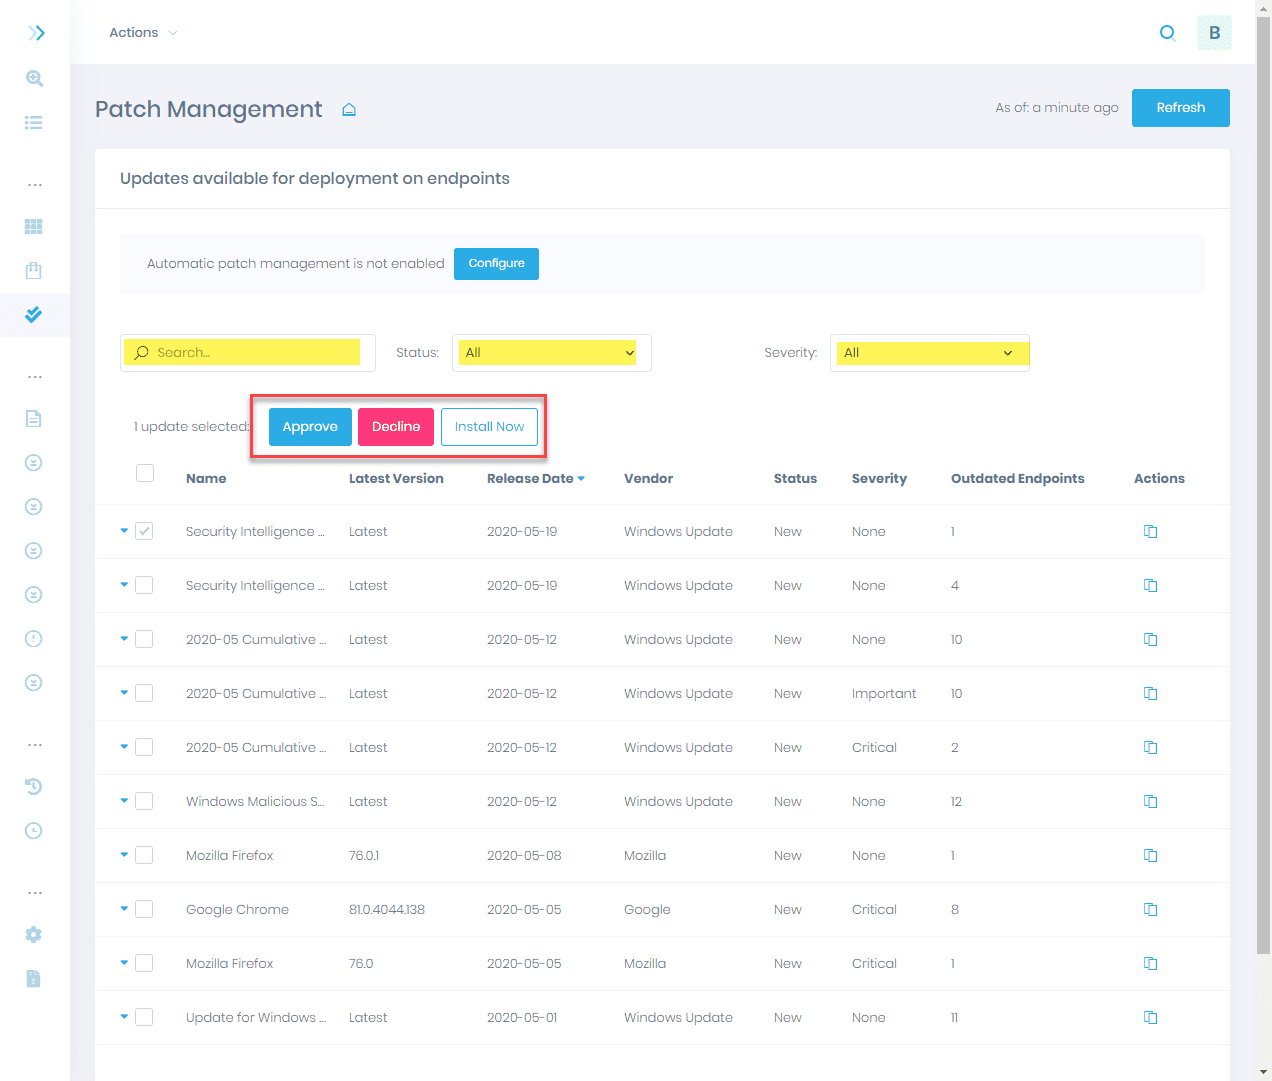
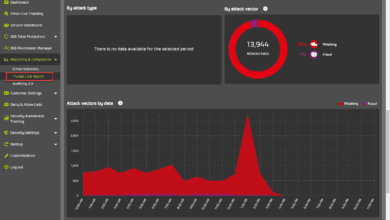
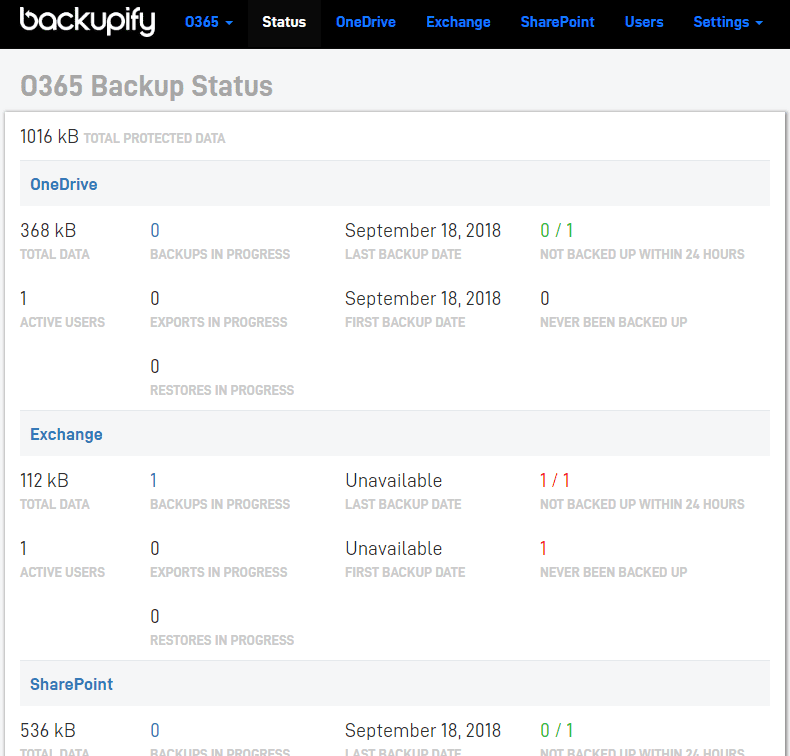
Backupify’s Status screen is a dashboard of sorts that allows seeing current statistics of backups which helps to identify potential issues across the environment with Office 365 data protection. The only thing I will mention here is while the information is great, the interface is a bit clunky and not presented that well.
Under the Settings menu you can manage administrators, configure reporting and choose Advanced Settings. Under the Advanced Setting menu, you can set the Retention period and the Maximum snapshot age in days if you choose Custom Retention period.

The Backupify solution worked really well and was able to do what it was expected to do – perform backups and restores. Additionally, the search feature to search for items allows quickly finding items for restoring. Restores can be performed granularly or in bulk via an entire snapshot restore. Additionally, the retention settings allow granular control on how long data is kept.
Finding pricing for Backupify was a bit difficult as this does not look to be readily published on the site. However, a quick check on the net indicates the following pricing structure, however I was unable to determine the exact differences between the editions:
Professional: $3/month/user
Enterprise: $4/month/user
Enterprise+: $900/month/domain
Spanning Backup for Office 365
Another player in the Office 365 backup space is Spanning. They are described as “enterprise class, automated backup and recovery that you can trust for Office 365 Mail, Calendar, OneDrive, and SharePoint. Some of the self-described features of Spanning include the following.
- Comprehensive Protection – backup for Office 365 Mail, Calendars, OneDrive, and SharePoint in Team Sites, Groups, and Microsoft Teams with no storage limits or number of backups
- Automated – Backups are daily and automated. New content is discovered and backed up.
- Transparent Reporting – Any errors are captured and reported
- Point-in-time restore – You can choose the point-in-time that you want to restore based on the snapshot and versions of your data.
- Granular, search-based restore – Items can be found to restore by searching in the Spanning console which makes restoring files much easier.
- Cross-user restore – Data can be restored into a different account than the account where the data was backed up.
- Activity reporting – Activity is captured and reported for auditing and accounting purposes of user actions which helps to round out the overall security posture.
- Mobile Access – Spanning is mobile device friendly.
- End user self-service – Users can be allowed to find and restore their own lost or corrupt files, folders and data in the various Office 365 applications.
First, let’s take a look at the ease of configuring the Spanning Office 365 backup solution.
Spanning Setup and Configuration
The setup and configuration process with the Spanning solution was similarly straightforward with the Backupify offering.
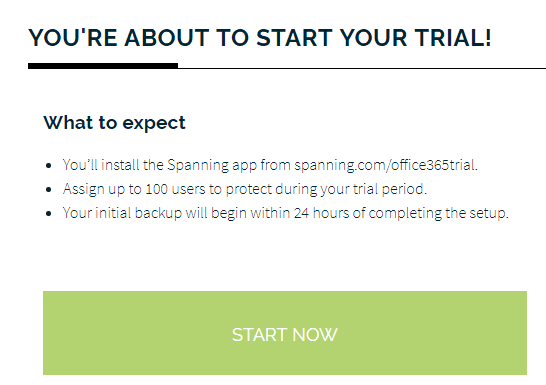
The setup and configuration process with the Spanning solution was similarly straightforward with the Backupify offering.
Spanning UI, Backups and Restores
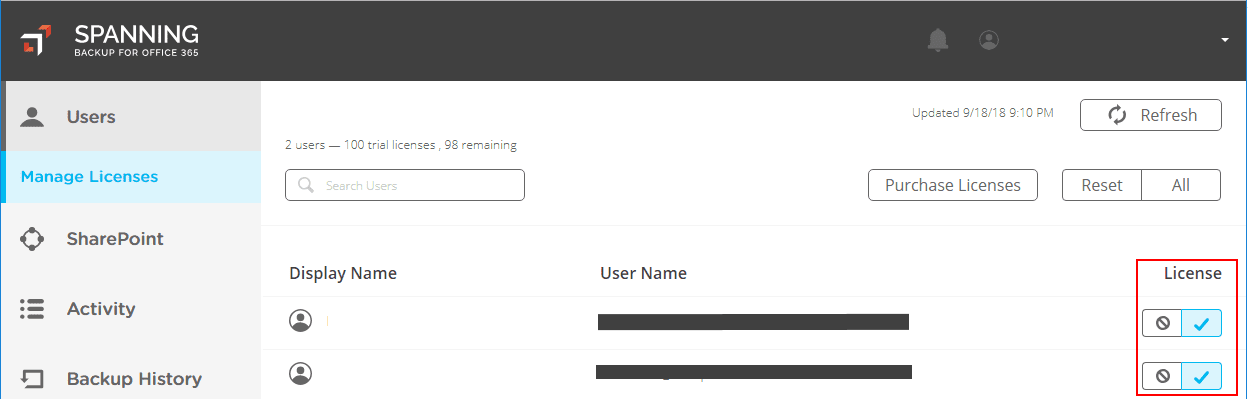
The spanning UI is similar to the Backupify interface in that it is uncluttered and fairly intuitive. The Spanning UI from a desktop perspective is menu driven from the left side of the browser window. I didn’t run into any issues with any of the Spanning functionality within the interface as everything seemed to “just work”. One thing I noticed is that I had to flag on the licenses for the trial users under the Manage Licenses functionality.
The Spanning UI is mobile responsive as you can see below, looking at the OneDrive Screen.

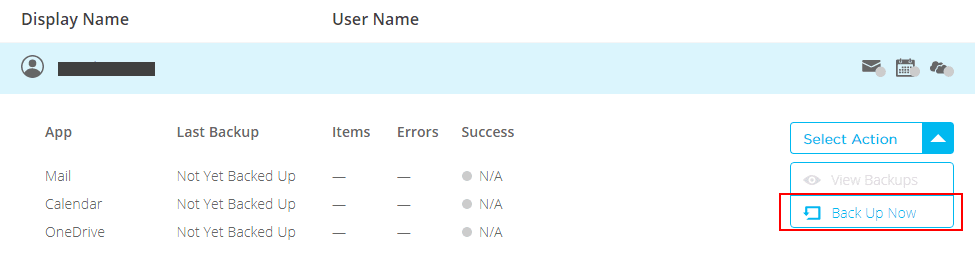
Getting the first backup can be done automatically by waiting on the Spanning backup run or you can perform ad-hoc backups under the users screen and clicking on the user you want to backup. Under the Select Action menu, choose the Backup Up Now option.
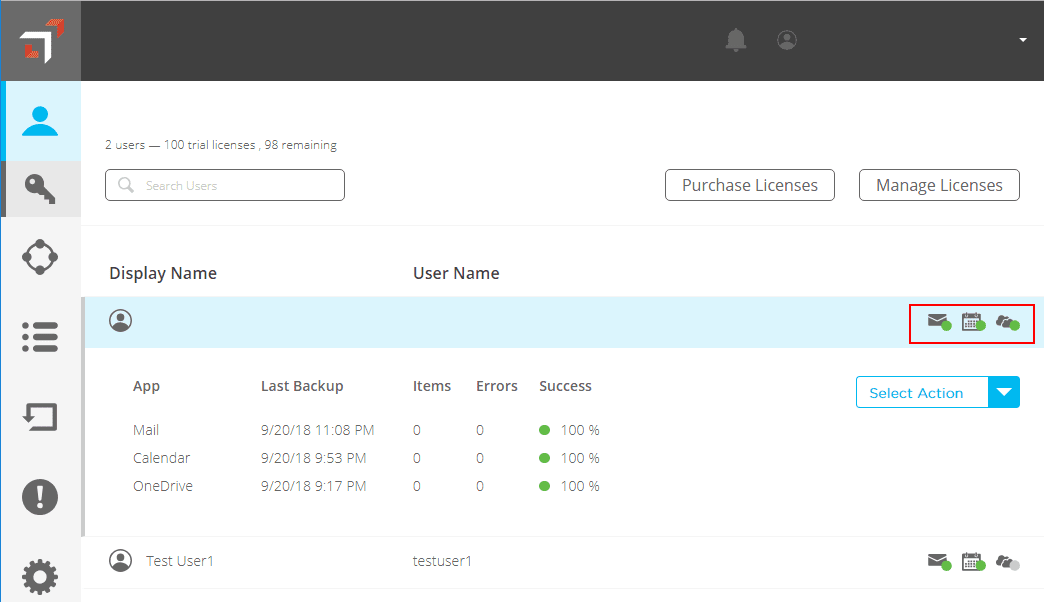
After performing a backup, you will see the green dot indicators on the services for the user – Mail Calendar, and OneDrive.
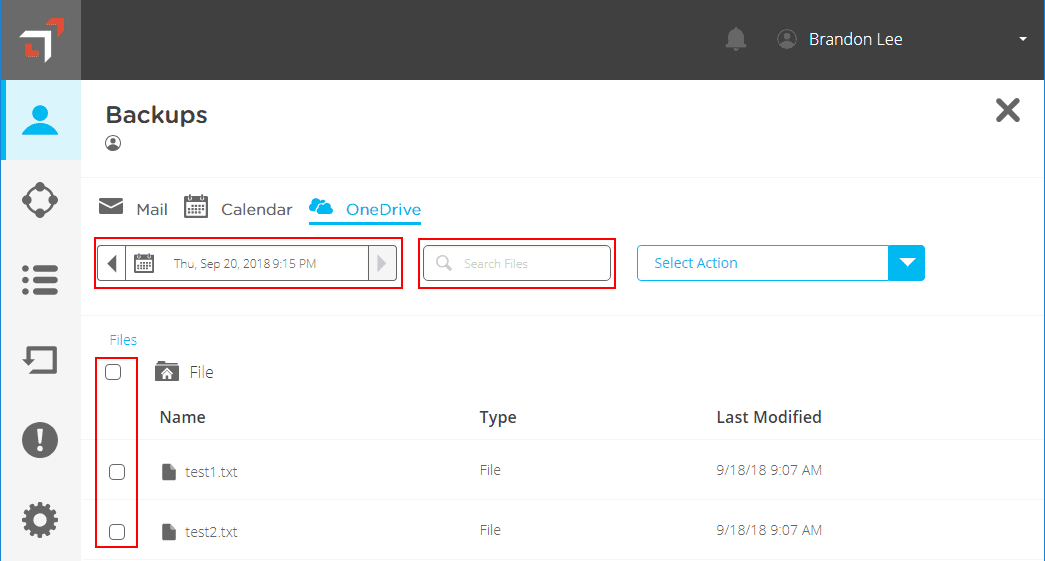
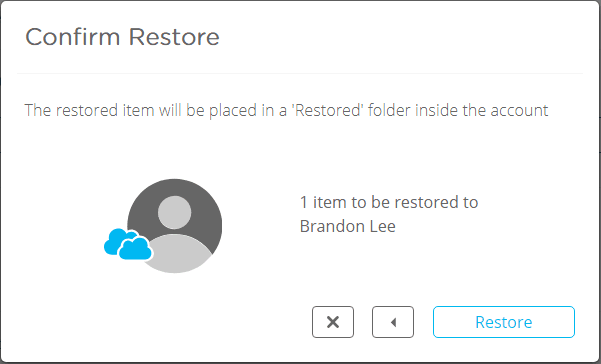
On the same screen, if you select the View Backups under the Select Action dropdown you can perform a restore. I think the flow of the interface here might be a little confusing on where you initiate the restore from. Choose the service you want to restore. Note how you can Search for specific items. Select the item and choose Restore.
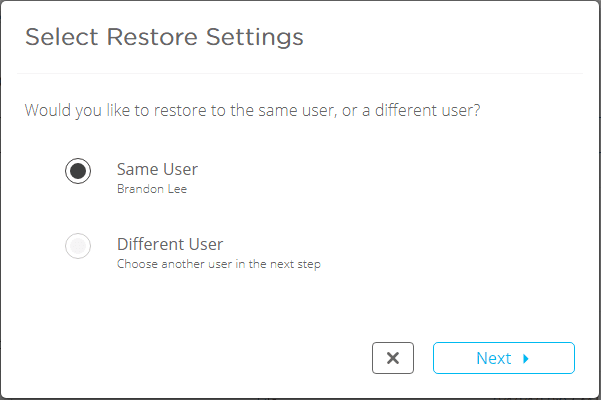
Once you choose to restore, you can select the Same User or Different User.
Spanning contains Activity logging that allows auditing actions that are performed and have been performed in the environment which allows seeing all user prompted activities which is a nice feature.

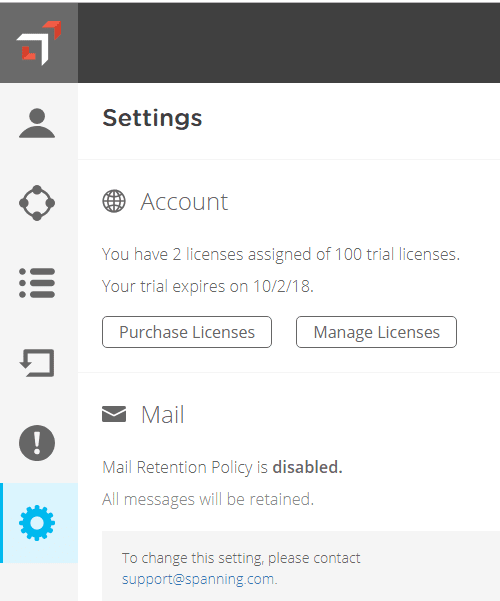
One point to note with Spanning, I did not find a way to change the retention policy for any of the applications. When you visit the Settings screen in Spanning, you see the indication concerning retention that you need to contact support(at)spanning.com to change this setting. I am assuming this is not a Trial version artifact, however, that could be at play.
All in all, the Spanning backup solution for Office 365 worked well, and performed all the tasks that you would assume it would – backing up data and restoring data, both within a user account and between user accounts. The restore functionality is a little confusing to get to on your first attempt, however, fairly easy to find in clicking around. The interface is basic but effective. Items could be restored granularly or in bulk and the process was very straightforward. Pricing for Spanning as published on their site:
$48/user/year
Altaro Office 365 Backup
Altaro is a company that is well-known in the virtualization space for their virtual machine backup solutions. The have introduced an Office 365 backup solution that allows backing up Office 365 Exchange email, OneDrive, and SharePoint. You can manage, configure, and access backups of your Office 365 data from Altaro’s cloud-based management console.
The Office 365 Altaro backups can be configured to run up to four times daily which helps to ensure a low RPO value. Also, they allow performing granular restores of items contained in your backups. Backups are searchable and browsable, encrypted at-rest and in-flight and can be configured with customized privilege access for your various team members.
Where does Altaro store your Office 365 backup data? The target of Altaro Office 365 backups is their Azure secure data storage.
Setting up Altaro Office 365 Backup
Setting up Altaro Office 365 Backup was easy. After signing up for the trial version, they send over a link via email for verifying your account and logging into your Altaro Office 365 Backup dashboard. The first impressions of the interface are really good. The menus are well laid out and easy to find what you are looking for.
 Logging into the Altaro Office 365 dashboard for the first time
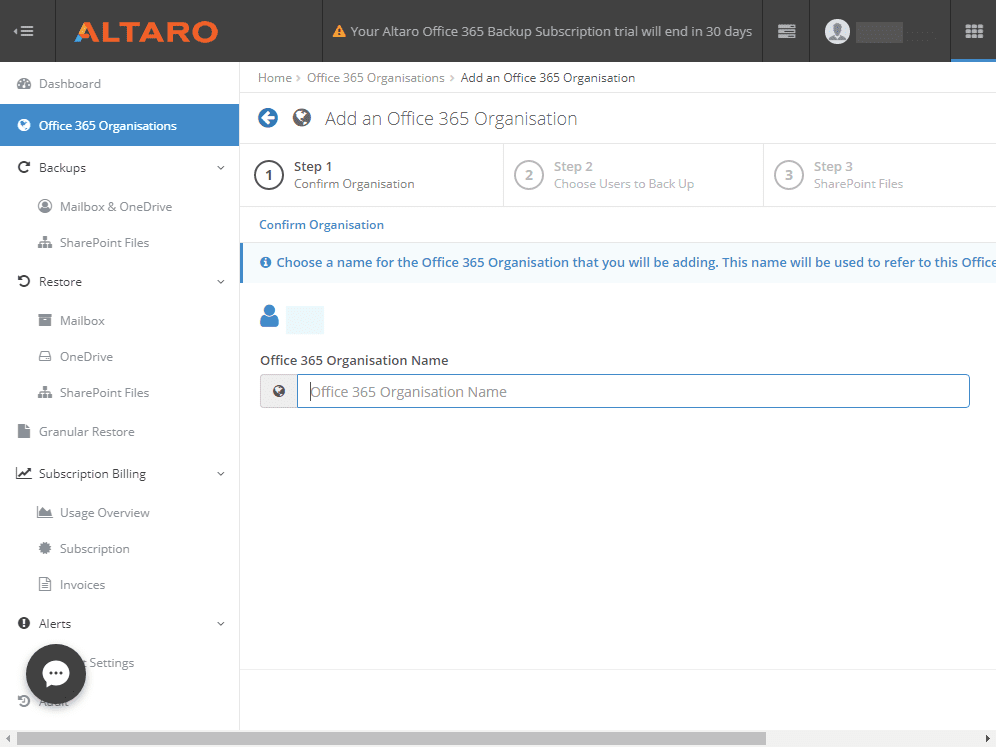
Adding your Office 365 organization into your Altaro Office 365 backup dashboard requires allowing the requested permissions. Click Accept.
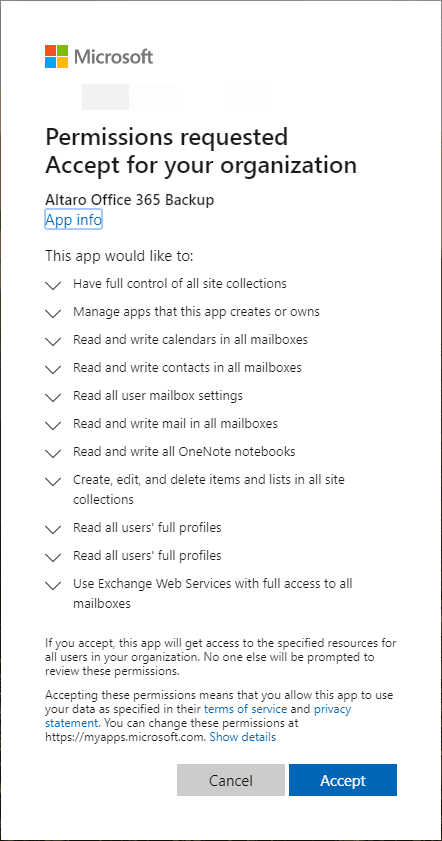 Verifying permissions for Altaro Office 365 Backup
You should see that access has been successfully granted to your Office 365 environment for performing Altaro backups.
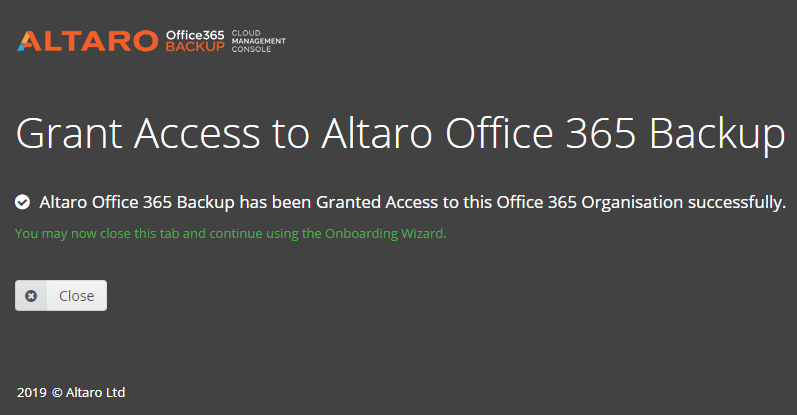 Permissions granted successfully to Altaro Office 365 Backup
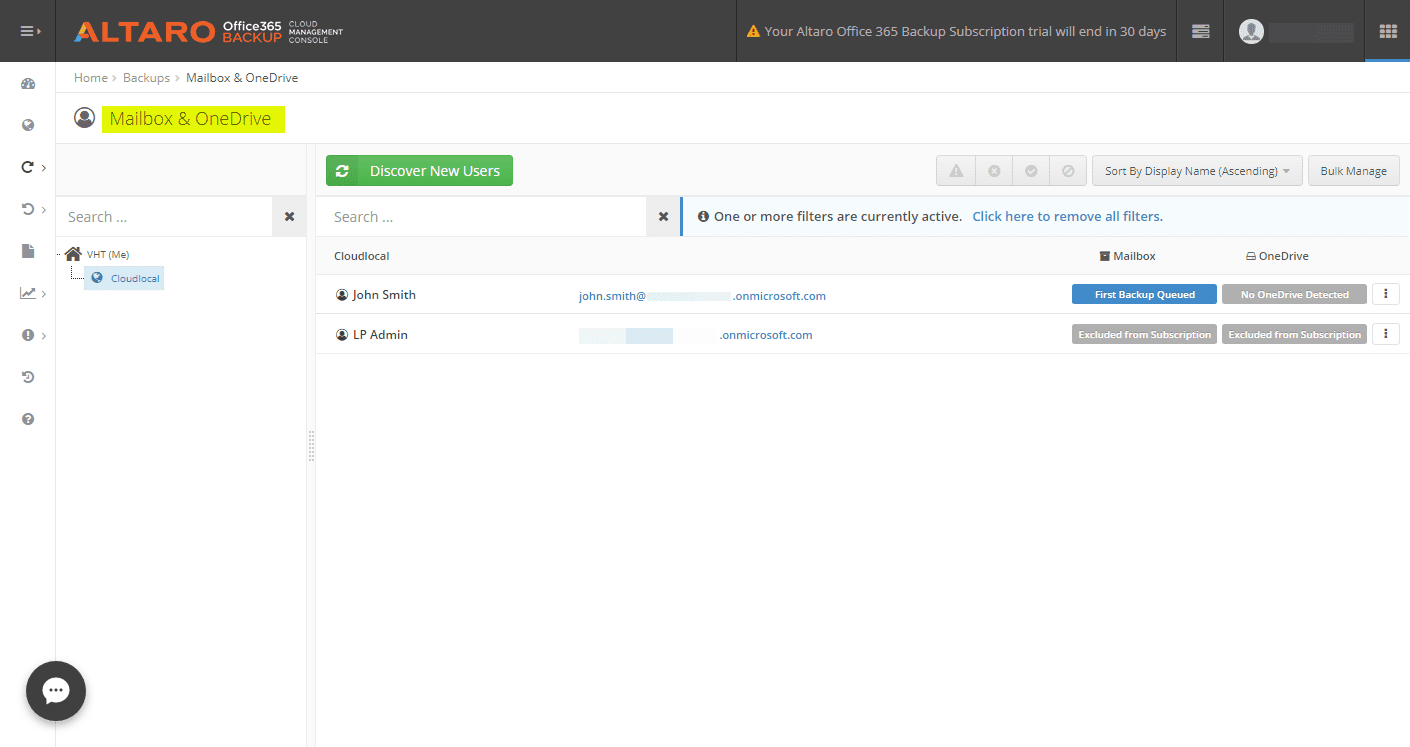 Users are discovered in the environment
Set Altaro to start backing up this mailbox as well as the OneDrive account.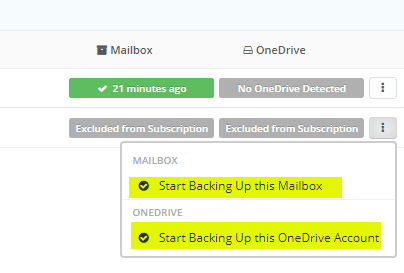 Configure Altaro to backup mailbox and OneDrive
After a successful backup of a user mailbox, you will see the status listed of when the last successful backup job ran for the user. I like how it gives a good visual representation of this as well.
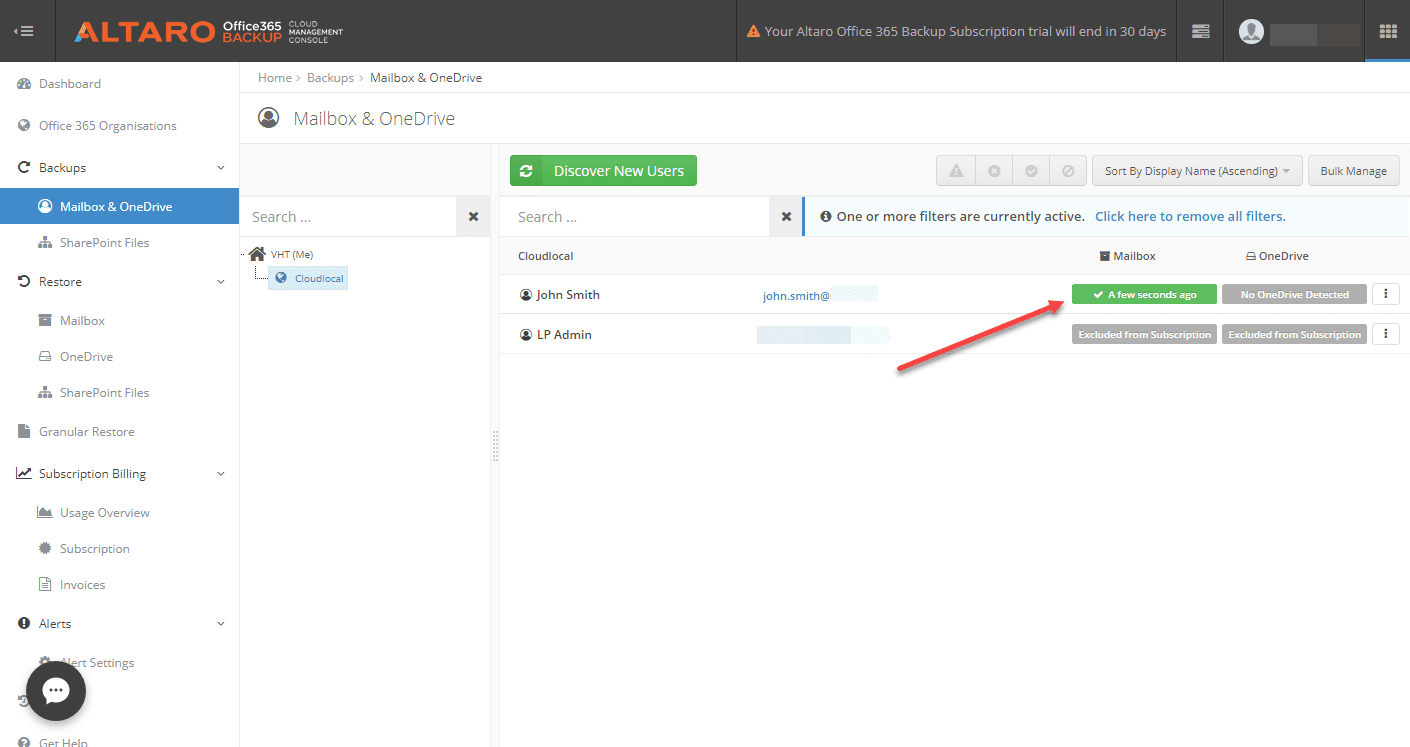 Altaro shows the last time a user mailbox and OneDrive was backed up successfully
The Altaro Office 365 Backup dashboard gives a great overview of the protection of your Office 365 environment.
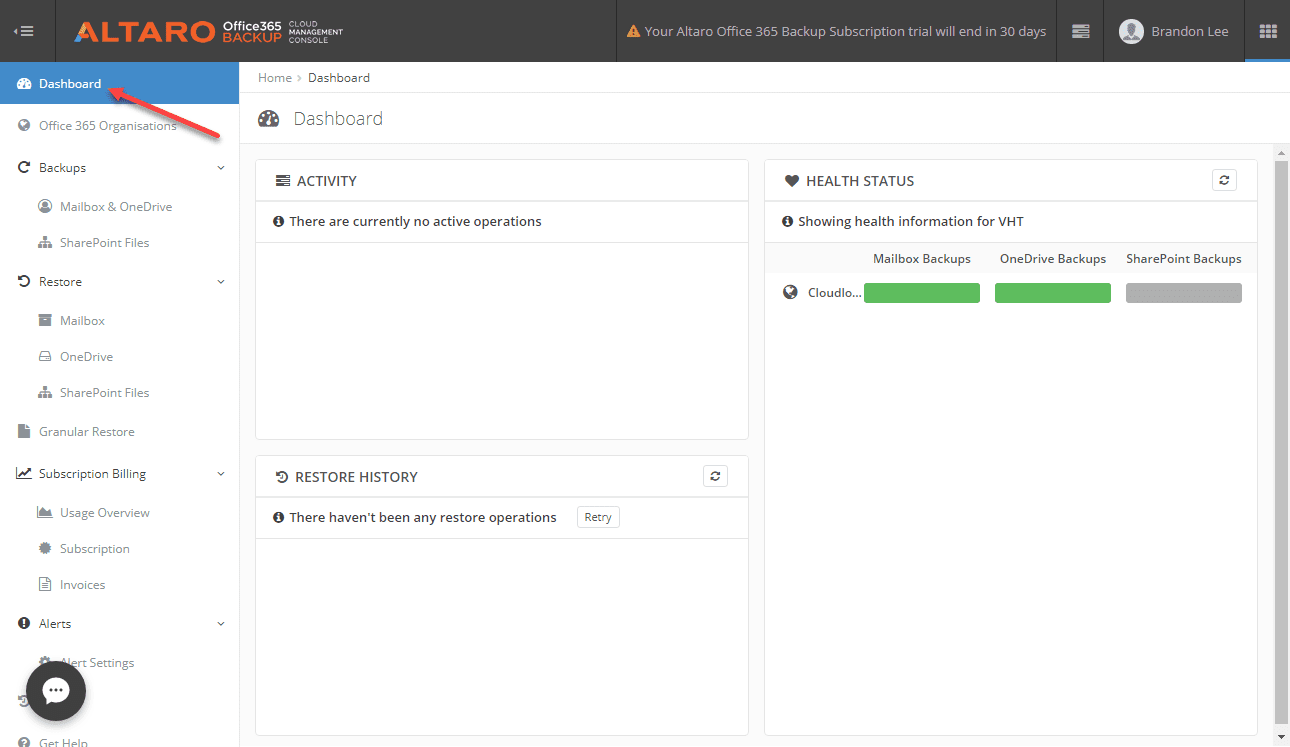 Looking at the overall protection of your Office 365 environment with Altaro Office 365 Backup
Restoring Mailbox Data
After backing up your mailboxes with Altaro Office 365 Backup, the restore operation was very seamless and smooth. It is performed via a “6 step” process that walks you through picking several options, including the mailbox to restore, the version, and other options.
First, pick the Office 365 organization you want to perform a restore in. This is applicable for MSPs especially who may be managing backups for many different Office 365 environments
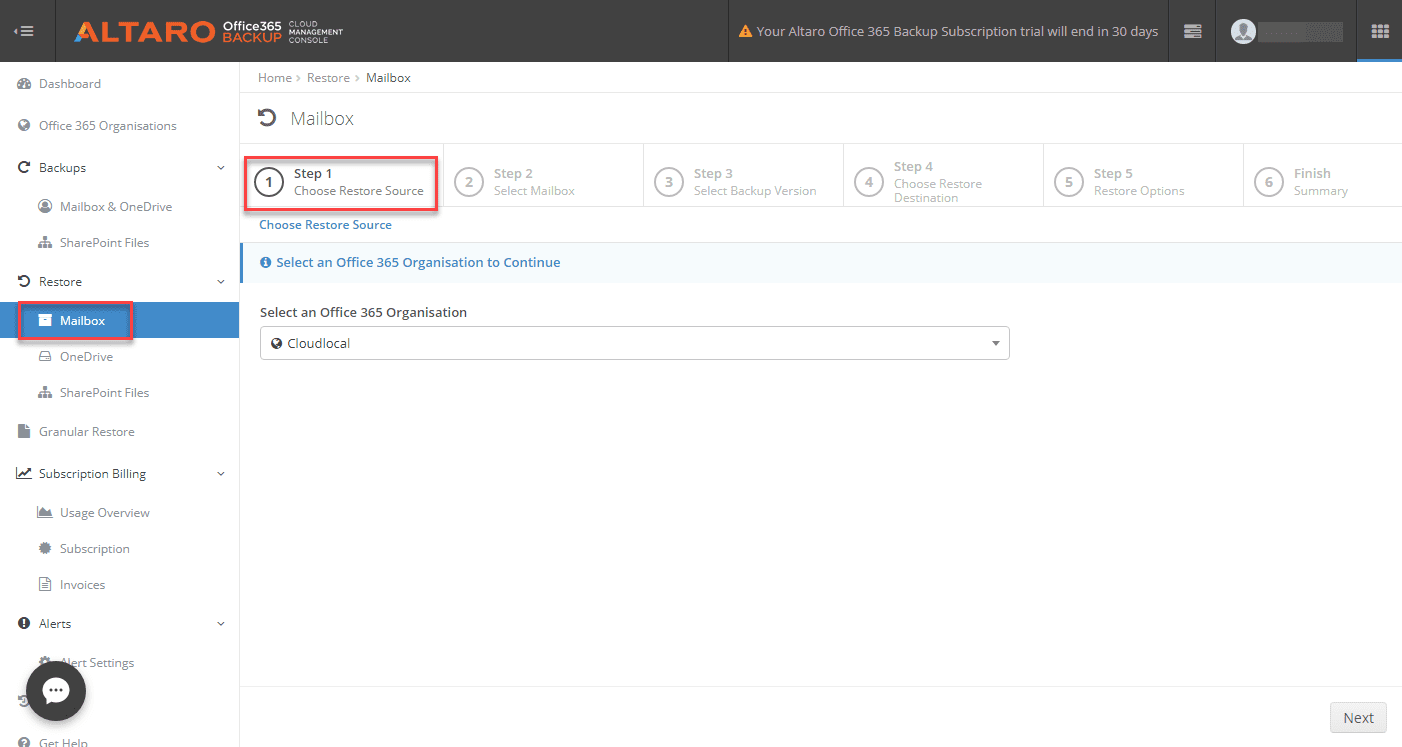 Choose the source organization
Next, select the mailbox you want to restore data to.
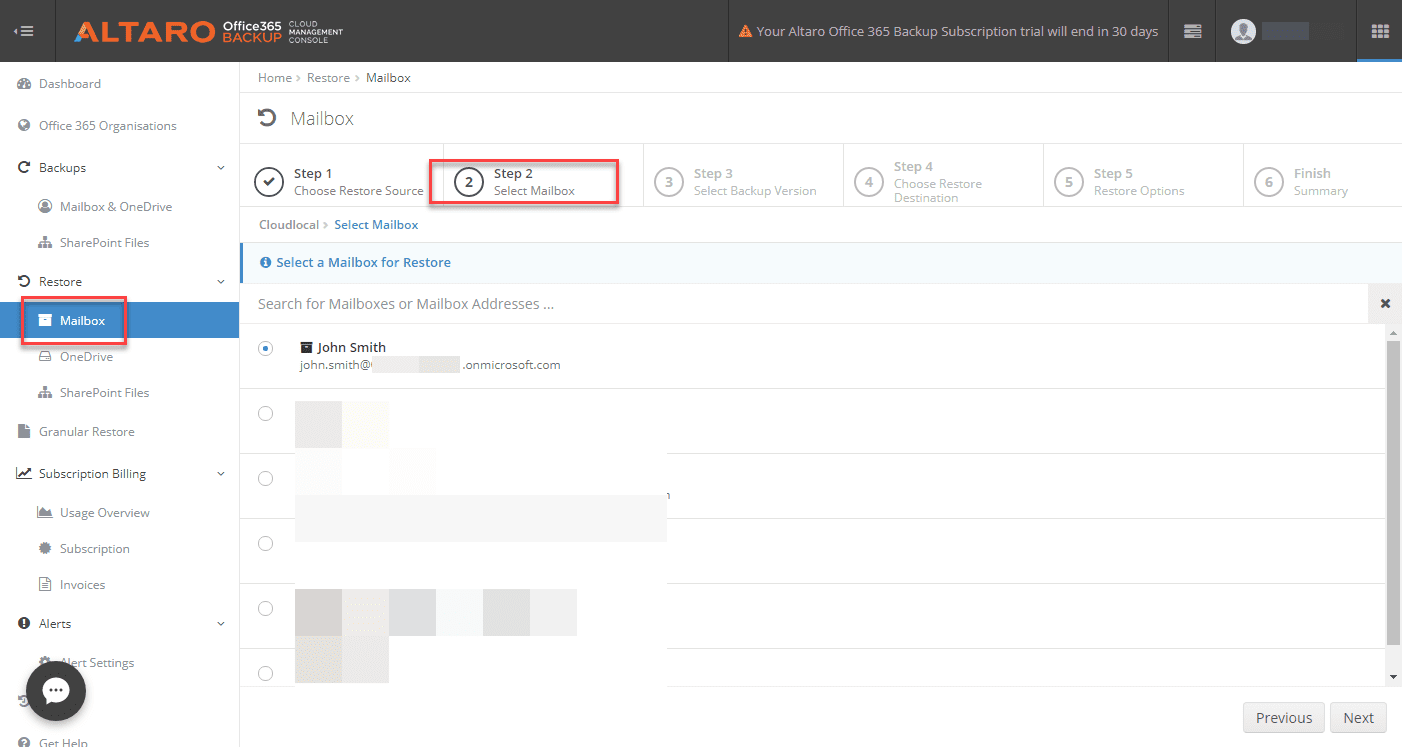 Select the mailbox you want to restore
Next, by way of the dropdown menu under the Choose a Version to Restore, pick the backup version of data you want to restore.
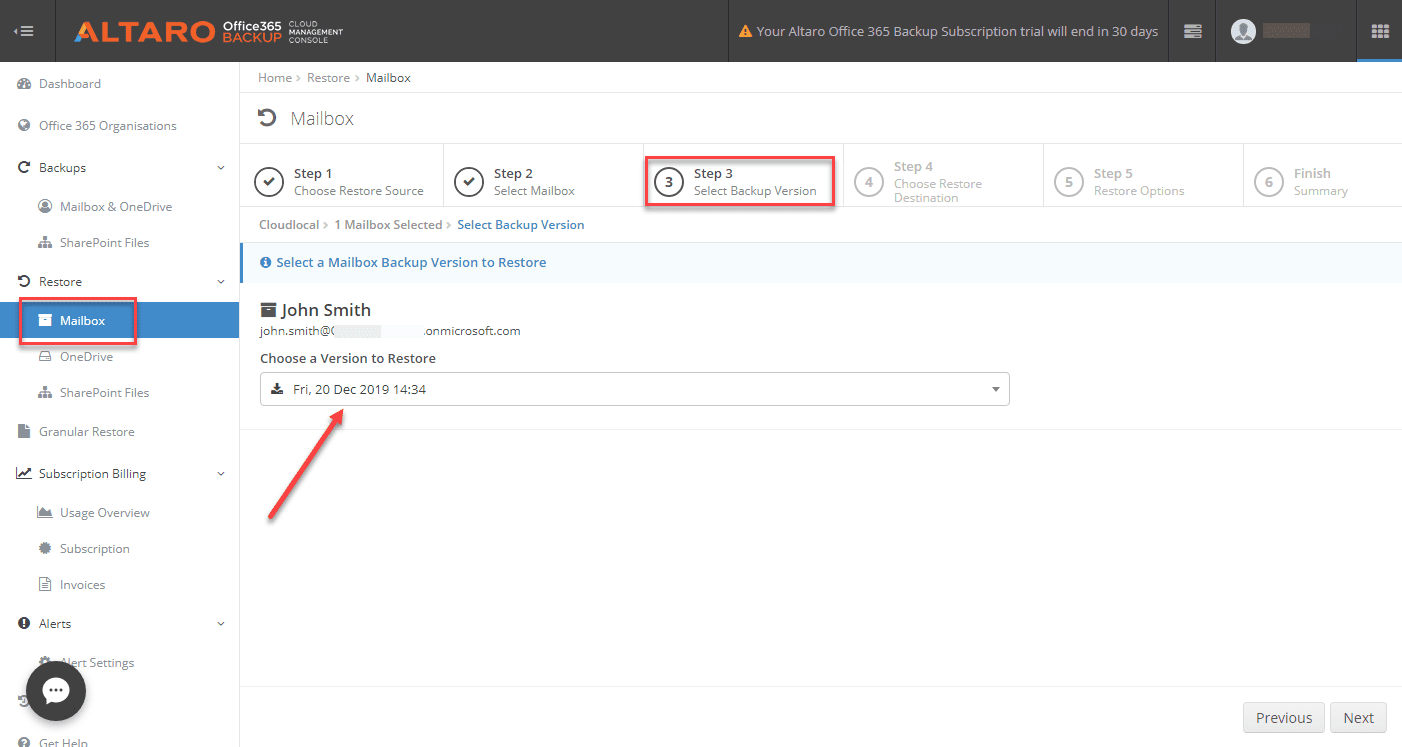 Choose the data version to restore
In step 4, you choose the Restore Destination. I like how Altaro gives you many different options here including restoring items to the same mailbox, restoring to a different mailbox, and even restoring to a PST file or ZIP file.
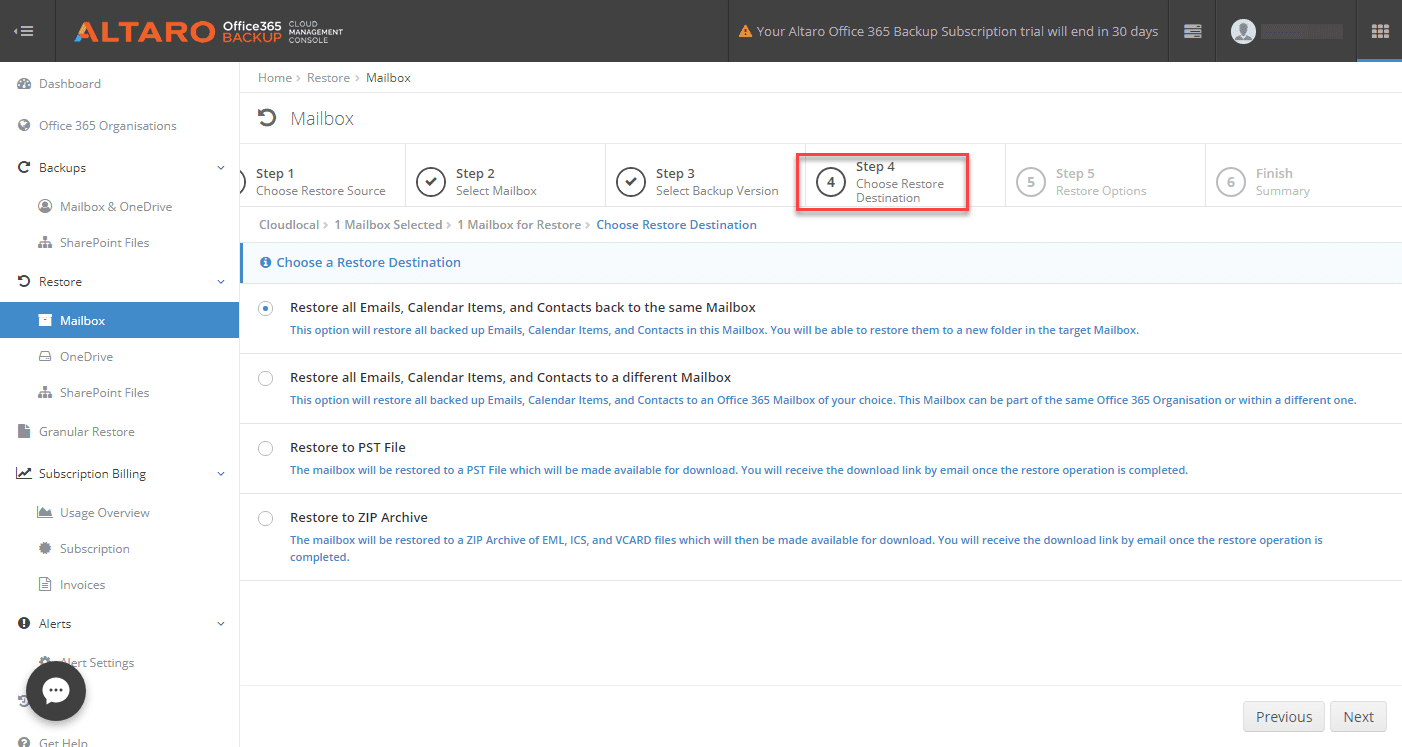 Choose the restore destination
On the Restore Options screen, you can choose whether or not you want to overwrite items or if you want to restore to a different folder in your mailbox. Either option provides good flexibility depending on circumstances of the restore. After making the selections here, you click Restore to being restoring data.
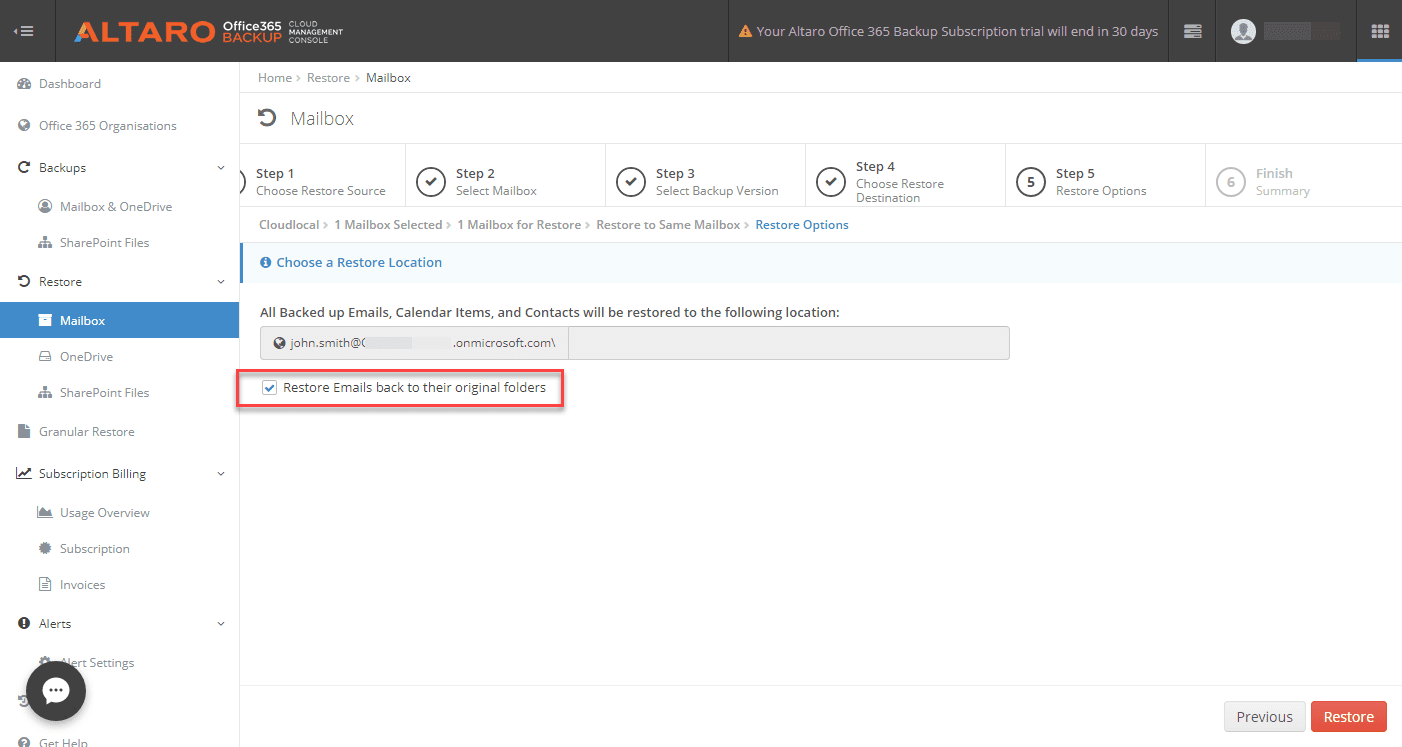
Choose the restore options for the Altaro Office 365 restore and begin the restore
The Finish screen notes the restore has begun and you can monitor it from the Altaro Office 365 backup dashboard.
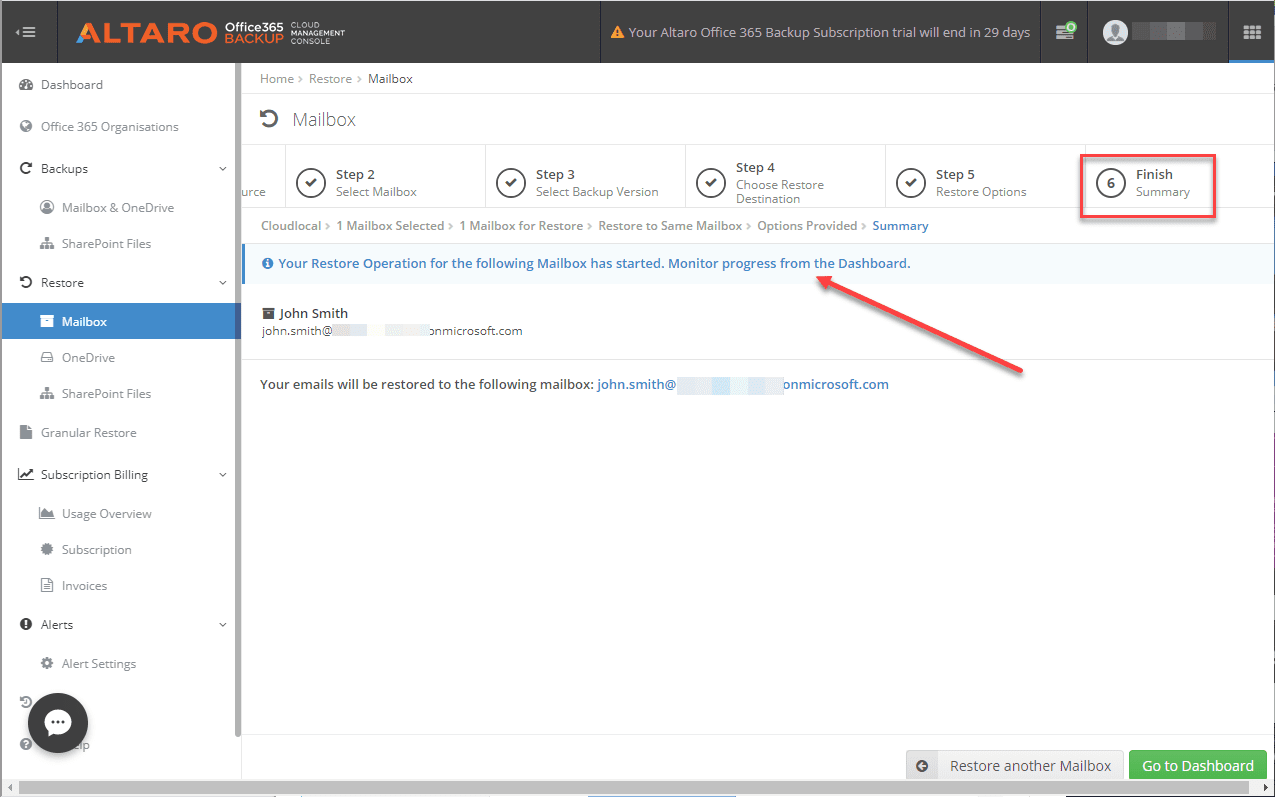 Restore has begun and you can monitor the progress from the dashboard
Altaro also provides the ability to turn on alerting for activity in your Altaro Office 365 backup environment. This allows you to have alerting and visibility to activities in your Altaro Office 365 backup environment.
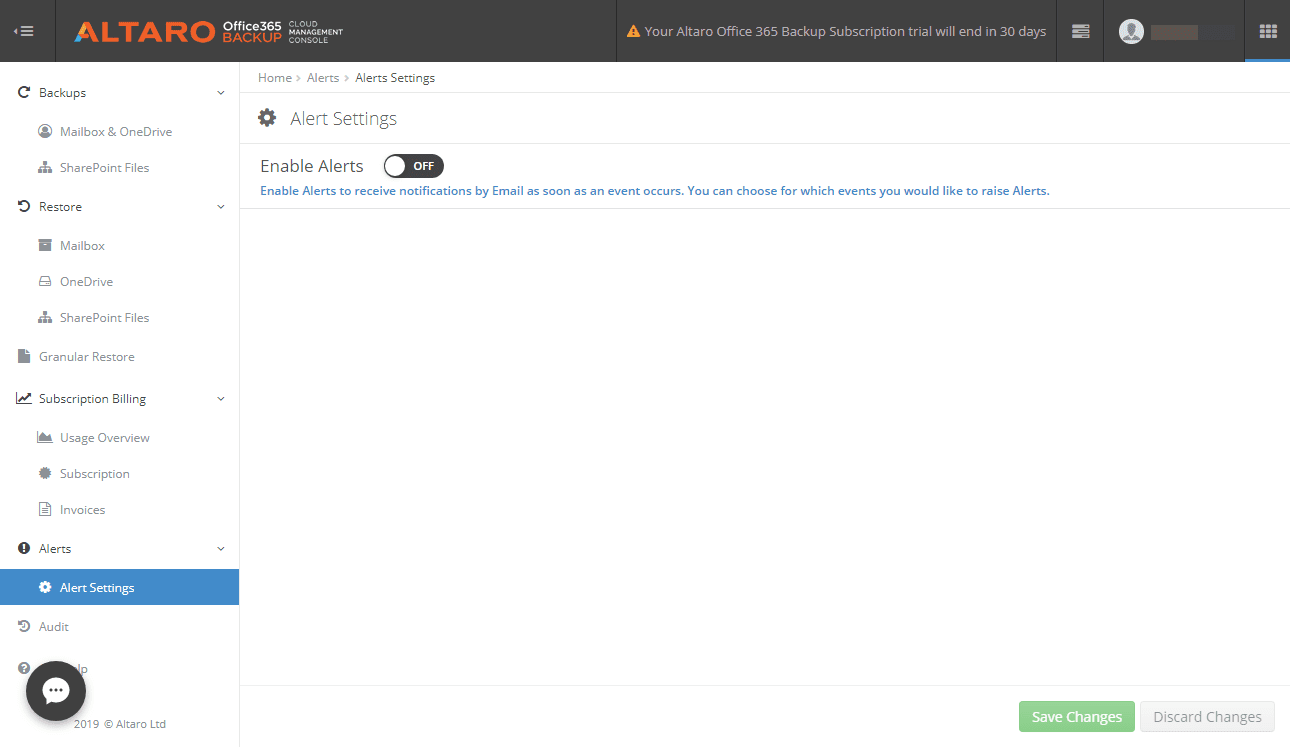 Enabling email alerts for Altaro Office 365
All in all, I found the Altaro solution to be very user friendly, powerful and easy to perform both backups and restores of your Office 365 files. In terms of cost, Altaro offers an annualized or multi-year subscription of their Office 365 backup service that starts at:
- $432 for a 1-year starter pack of up to 10 users (mailboxes only)
Spinbackup Office 365 Backup
Spinbackup has made waves in the world of G Suite environments as a data loss protection solution which is similar to both Backupify and Spanning. However, in the G Suite marketplace, Spinbackup differentiates itself from the other two solutions by adding additional data leak protection features and cybersecurity capabilities on top of the data protection features contained in the solution. Now, Spinbackup is bringing its solution to Office 365 environments. Spinbackup’s solution is available currently in Beta form for Office 365. Spinbackup also provides much more powerful features for organizations who want to control where their data is stored and in which public cloud provider data is stored. Spinbackup Office 365 Beta provides the following features and capabilities.
- Automated Backup – Automated Versioning backup to unlimited secure cloud storage
- Restore – 100% accurate data recovery using the same hierarchy of folders as the original
- Migration – One click data migration from one O365 account to another one
- Reporting – Weekly and monthly reports that monitor status of data protected
- Admin Panel – Allows managing users and licensing in a centralized manner
- Search – Easily search for backed up items for searching for items to recover.
- SOC2 and GDPR compliant – In transit and at-rest encryption
- Utilizes Amazon AWS and Google GCP datacenters
Spinbackup Setup and Configuration
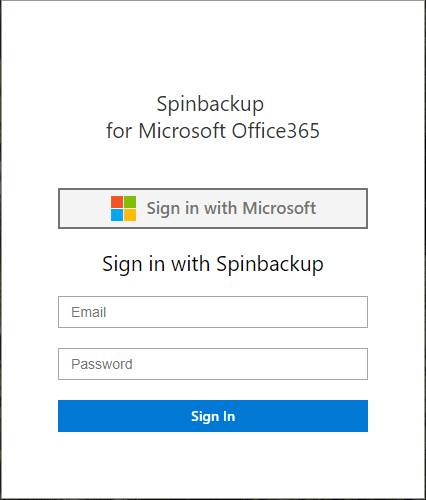
On par with Backupify and Spanning, the steps involved to get Spinbackup up and running is very similar You need to connect the Spinbackup service to the Office 365 environment. Choose to Sign in with Microsoft.
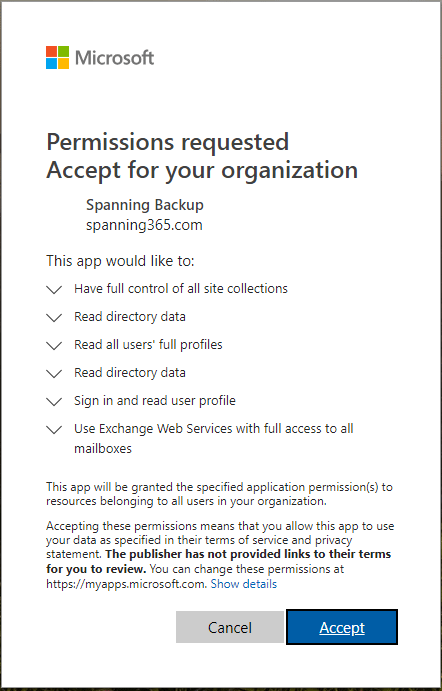
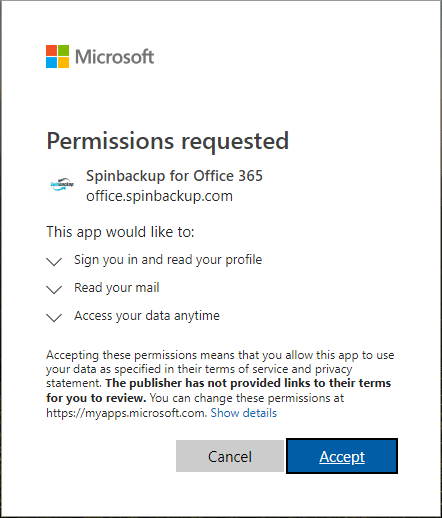
Grant the requested permissions to the Spinbackup application.
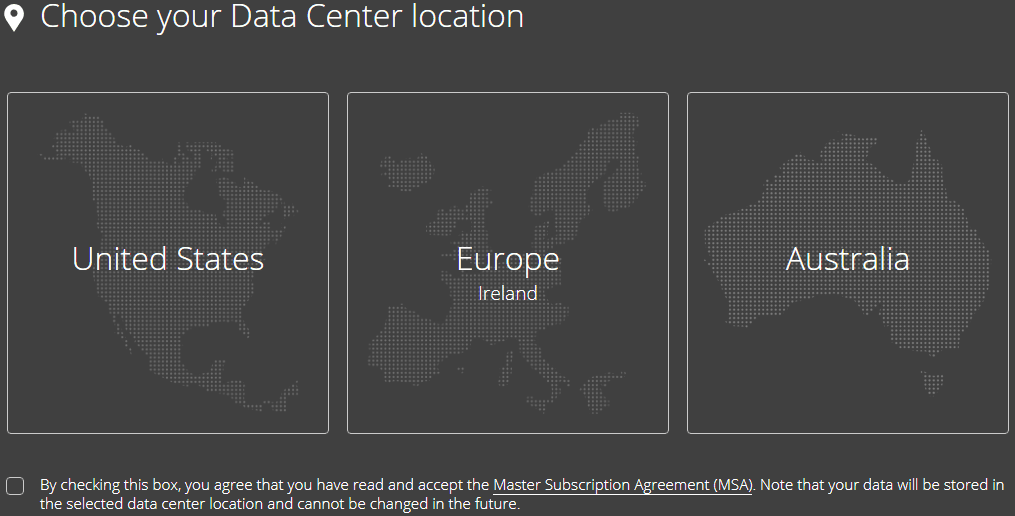
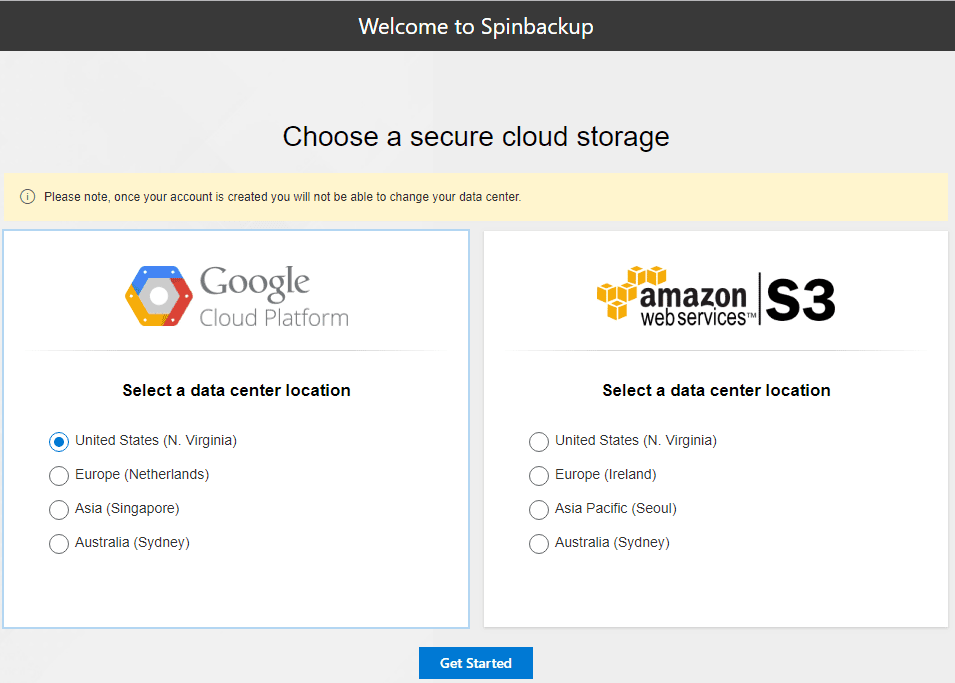
One the Choose a secure cloud storage screen, Spinbackup starts to shine in the options it gives you to store your data including the public cloud vendor as well as the particular datacenter utilized. Currently, the options include Google’s Compute Cloud Storage and
After select the storage public cloud vendor and location, setup the password for the Spinbackup account along with normal personalization information including time zone, etc.
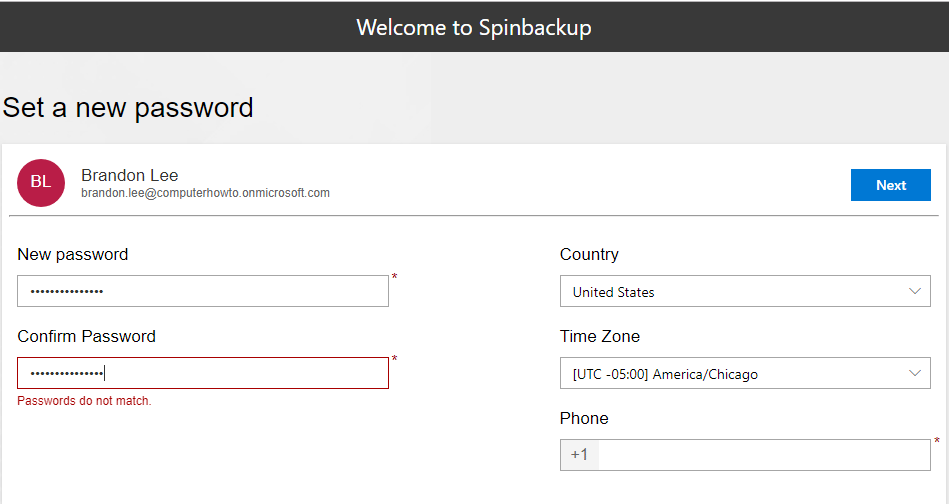
After configuring your password and accepting permissions, the Spinbackup environment is fully configured.
Spinbackup UI, Backups and Restores
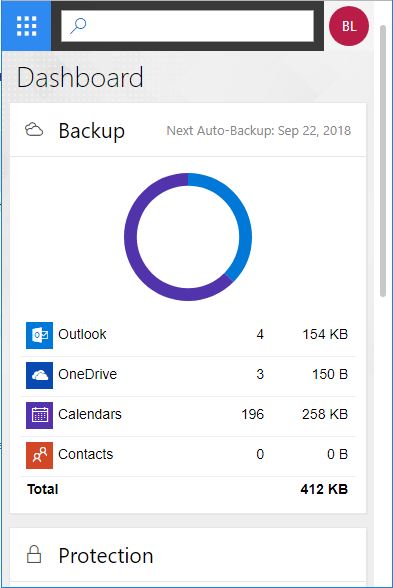
Out of the three solutions tested, I have to say the Spinbackup solution UI is by far the best out of the three. Spinbackup’s solution maintains the look and feel of your Office 365 environment. The Spinbackup Dashboard which is displayed by default provides all the relevant information at a glance that you want to see including the amount of data backed up, the protected users, and the backup activity in the last few days. As you can see the interface fits the Office 365 look and feel with very fluid design and intuitive layout.

The Spinbackup interface is mobile responsive as well making mobile management a breeze.
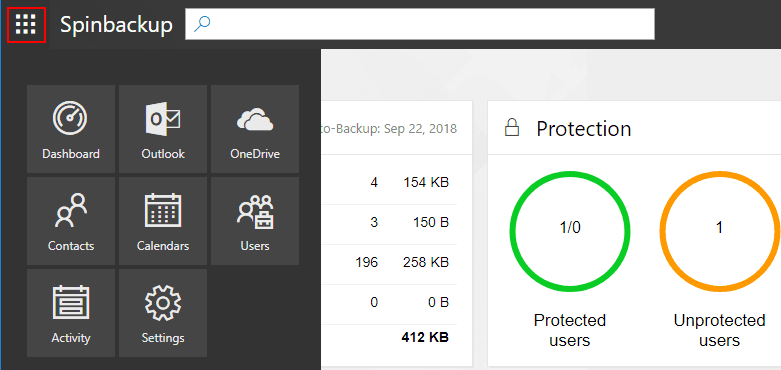
From the left hand menu, the menu explodes to reveal the available options and Office 365 applications protected in the Spinbackup application. Additionally, you can manage users, see activity, and configure global settings.
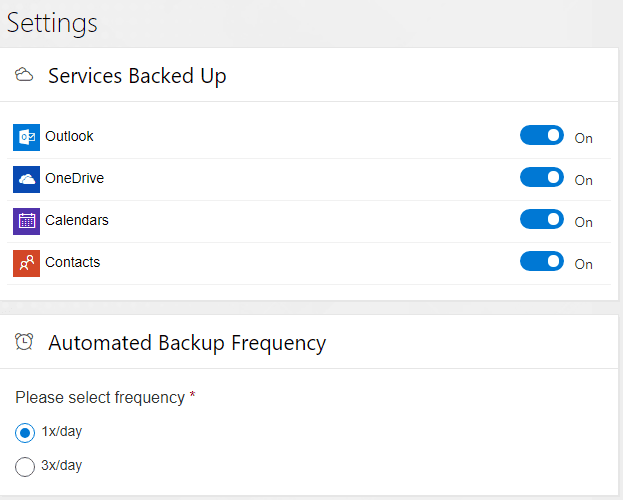
Under the Settings menu, Spinbackup provides a tremendous amount of configurability here. You can select the services backed up globally by flipping the switch on or off. Additionally, something that Spinbackup offers the other two do not is the ability to customize the backup frequency. You can choose either 1X or 3X daily.
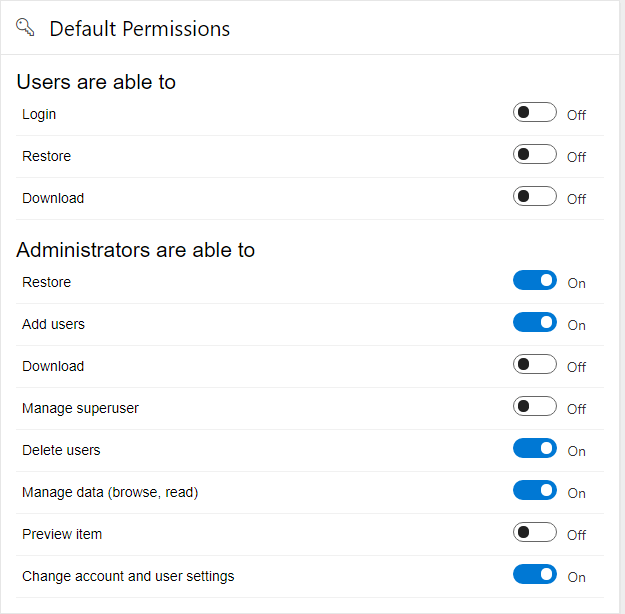
You can also choose the default permissions for the Spinbackup application for both Users and Administrators.
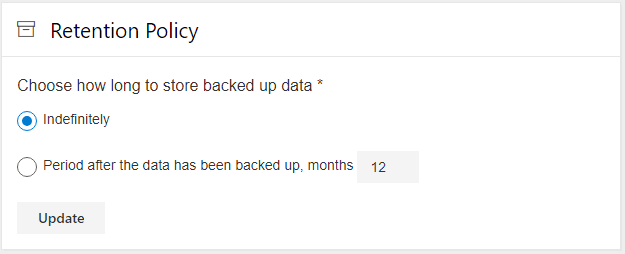
For the Retention Policy, you can choose how long you want to store the backed up data. The default setting is Indefinitely. You can specify a number of months as well.
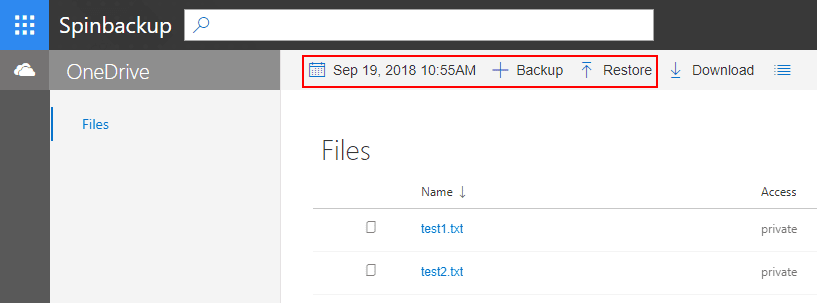
When you choose to restore files, you visit the appropriate application inside the Spinbackup menu such as OneDrive. You will see the files listed in the selected snapshot. Note the snapshot is the date displayed next to the Backup and Restore buttons. If you simply click the Restore button, it will restore the entire snapshot of files. However, you can click and choose items individually as well. Spinbackup also allows you to perform cross-user restores which makes migrations extremely easy.
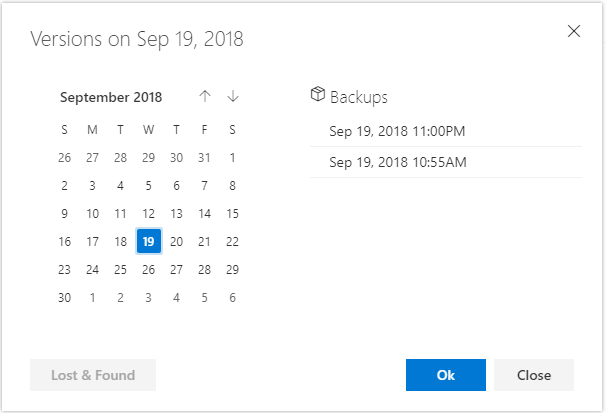
If you click the date, it will bring up the Versions configuration that allows choosing the version of the file you want to restore. Lost & Found allows restoring deleted items as well. The Spinbackup interface makes all of the operations extremely intuitive and easy.
Files are restored as expected with the restore operation.
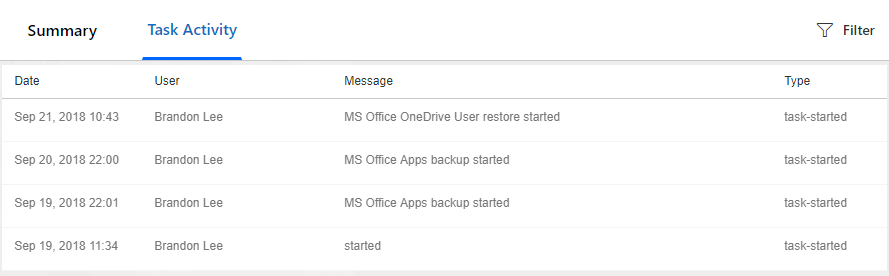
Spinbackup also include a great Activity section that provides both a summary and list of tasks that have been executed for auditing purposes.
The Spinbackup solution is extremely easy and intuitive to work with. The UI interface with the Spinbackup offering is as mentioned earlier IMHO is a better interface than the other solutions tested. The look and feel matches what you expect from Office 365 and all operations are point and click intuitive. The options that you are allowed to configure with Spinbackup in the global settings provide more granular control in permissions, services backed up, backup frequency and also allows retention configuration. Additionally, in thinking about controlling where your data lives and in which provider, Spinbackup is the only solution tested that allows choosing a particular public cloud vendor and specific datacenter.
In looking at Spinbackup’s roadmap and what they have successfully achieved with the G Suite product, there is no question they will be adding additional data leak and cybersecurity features to the Office 365 product. Is security features important to organizations today? According to some recent statistics cited by Forcepoint:
- Information security concerns are seen as the second greatest impediment to Office 365 adoption
- 74% of organizations plan to supplement or replace O365 security with third-party solutions by 2019
- Most organizations are concerned about “shadow IT,” with one in nine “extremely” concerned
In thinking about protecting public cloud environments today such as Office 365, organizations must think about both data protection AND cybersecurity. When choosing a solution that allows meeting both data protection and cybersecurity objectives in the public cloud, Spinbackup stands out as the solution that does that.
Pricing for Spinbackup:
Spinbackup for Office 365 price – $36/user/year
Comparing the Solutions
We have already covered just how important backing up your public cloud data is. I for one utilize the public cloud daily and it allows tremendous flexibility and mobility for most in their working environments. However, having backups of data in environments such as Google G Suite and Office 365 is crucial and protects you from such menacing problems as ransomware that CAN affect your data in public cloud environments, despite many misconceptions. In looking at the three Office 365 solutions, testing and trying them all out, these are some of my observations:
Backupify
Pros:
- Interface is easy to use, intuitive, responsive
- Backs up Mail, Contacts, OneDrive, and Sharepoint
- Allows cross-user restores
- Easy searching of items to restore
Cons:
- Interface has legacy look and feel
- Status dashboard cumbersome to view
- Price is not openly disclosed on site (or not readily available?)
Spanning
Pros:
- Interface is easy to use, intuitive, responsive
- Backs up Mail, Contacts, OneDrive, and Sharepoint
- Allows cross-user restores
Cons:
- To find where you restore files seemed a bit cumbersome, a little buried
- No way to change retention settings
- Interface has a legacy look and feel
Altaro
Pros:
- Easy to setup
- Modern interface provides intuitive and easy to understand functionality
- Provides granular restores, searchable backups, versatile restore options
- Backups run four times daily
Cons:
- There is no way to choose your storage location or even region when signing up
- Altaro is storing Office 365 data in Microsoft’s public cloud which means your backups are stored in the same public cloud as your production data
Spinbackup:
Pros:
- Backs up Mail, Contacts, OneDrive, and Sharepoint
- Modern, fluid design, interface matches Office 365
- Only solution that allows choosing specific public cloud vendor and location
- Only solution that allows configuring backup frequency
- Price – $36 a year is cheapest of three solutions for features
- Future security features coming
Cons:
- Currently in Beta
- Cybersecurity features not in current release
Takeaways
My takeaway for readers is this – whichever solution you choose, do yourself a favor and do choose a solution to backup your data! Backups are necessary for making sure your data is protected, even in public cloud environments. While Backupify, Spanning, and Altaro did a great job backing up and restoring data, for me, Spinbackup offers the best solution for backing up an Office 365 environment based on functionality, features, ease of operations, and price. The ability to control where your data is stored and in which public cloud vendor is a major advantage that Spinbackup is offering over competitors. By choosing Spinbackup to protect their Office 365 environment, organizations are able to choose which public cloud vendor stores their data and where. This allows businesses to have a consistent and homogenous public cloud strategy if they are already aligned with a specific public cloud vendor. There is no question that Spinbackup will be adding additional data leak and cybersecurity features to the Office 365 product which will only strengthen their offering in the Office 365 space. Spinbackup’s solution offers tremendous value, features, functionality, cloud data choices, and options that outpace the competition.