Mount Virtual Media SuperMicro IPMI
In the previous post here, I walked through the SuperMicro IPMI management interface and a few of the options that are available to administrators there for management of their SuperMicro server. One of the more interesting options in the IPMI interface is the ability to mount virtual media. There is a means to do this in the web interface, however, there is a much easier and seemingly better way to do this from the iKVM remote console interface. Let’s look at how to mount virtual media with the SuperMicro IPMI interface.
Mount Virtual Media SuperMicro IPMI
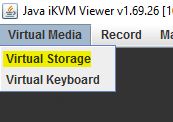
In the iKVM interface, click the Virtual Media menu and then select Virtual Storage
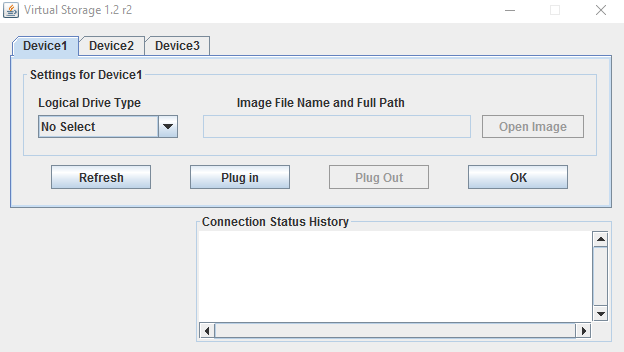
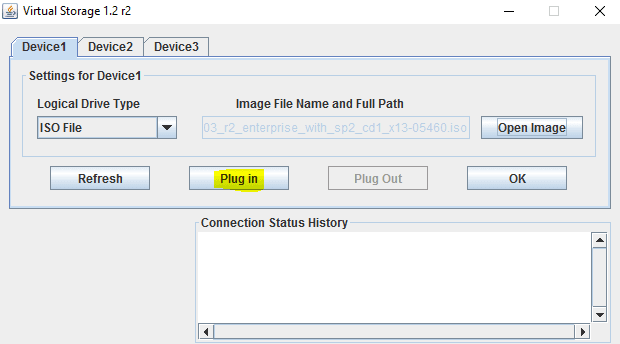
This will bring up the Virtual Storage manager with a tabbed interface including (3) different devices that can be mounted.
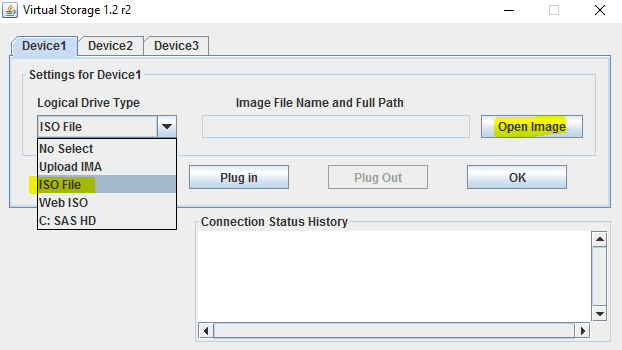
Select Device 1 tab and then under the Logical Drive Type, select ISO File as the type. Then Open Image which will allow you to browse for an ISO file that resides locally on your workstation you are using to view the iKVM console.
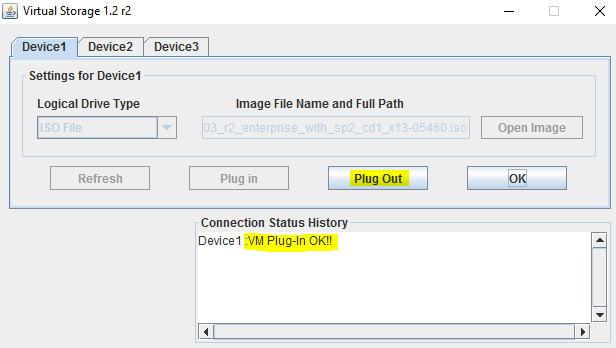
Once you have selected the Image File Name and Full Path you need to click the Plug in button to actually mount the ISO image.
Now that we have clicked the Plug in button, the Connection Status History shows Device1 as VM Plug-In OK!! Also notice we now have the Plug Out button available to unmount the media if need be.
If you are booting the server, the Virtual Media option will be presented if you force a boot into your boot menu to select the device for booting. This is a really great option to have if you need to load an OS on your bare metal Supermicro server remotely.
Final Thoughts
The IPMI interface that comes with a SuperMicro server provides a lot of administrative tools for the administrator who many need to remotely perform certain tasks without console access at that physical location. The Mount virtual media Supermicro IPMI option adds a lot of flexibility and troubleshooting power to the administrator.


