In today’s networks, connectivity is an essential part of successful communication in businesses an enterprise environments. Even though bandwidth is cheap these days, it is still a priority for network administrators to prioritize and limit mission critical traffic and non mission critical traffic. Especially with BYOD devices including smartphones, tablets, and other Internet connected personal devices demanding more and more resources, this is an ever increasing need for making efficient use of available bandwidth.
Most administrators when they start analyzing traffic realize that oftentimes they don’t need extra bandwidth, they simply need to eliminate bandwidth abusers and also prioritize the traffic that needs access above all other network communication. Untangle is a great product that continues to mature into an awesome set of tools all in one package. Even the completely free version contains tools that most other vendors would charge big money for. The premium version of Untangle contains a great product called Bandwidth Monitor that allows administrators to prioritize traffic that goes through the Untangle VM rack. However, if you don’t have the funds to purchase the Bandwidth Monitor rack module, you can still do much good with the QoS piece that is built-in to the free version.
The only downside to the QoS piece is that you have to bypass the traffic that you want to prioritize using bypass rules in order to create customizes QoS rules. The screen even tells you this when you go to create custom rules. In fact in working with a client, we found they couldn’t figure out why their QoS rules were never getting utilized and in looking at the traffic that they were targeting for QoS, it was not bypassed using the bypass rule, so the traffic was never picked up by the built-in QoS. In thinking about this traffic flow, it seems to make most sense to use the QoS for network traffic that you want to boost on your network as most likely you may want to bypass this traffic anyway.
You probably wouldn’t want to look at QoS to penalize a host that you want to be going through your filters as this would be the only way to set a low priority on that node. Most likely you are better off leaving the host or traffic to go through your Untangle rack and allow some of the other rack modules to take care of undesirable traffic such as the free versions of application control and web filter which can snag undesirable traffic for you.
Configure Bypass Rules
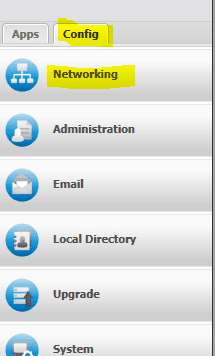
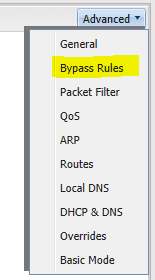
As we mentioned above, to use the QoS capability of Untangle, you must create a bypass rule for the particular traffic you want to prioritize. You do this by going to Config >> Networking >> Advanced >> Bypass Rules.
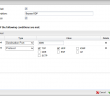
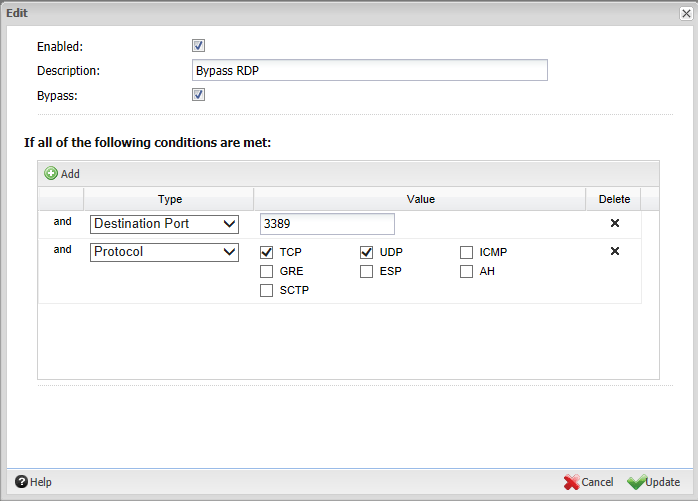
Once you get to your Bypass Rules, you need to Add a new bypass rule that targets the desired traffic. For instance, let’s say that we want to add QoS priority to RDP (Remote Desktop Protocol) traffic. We simply create a new Bypass Rule for RDP and target the correct protocol and port – TCP, 3389.
Create QoS Custom Rules
Now that we have our bypass rules in place for the desired traffic, we can now create an effective QoS rule for this traffic. To get to QoS, navigate to Config >> Networking >> Advanced >> QoS. Then we Add a QoS Custom Rule. Notice the one we have added for RDP traffic below.
![]()
Now, to check and see if the QoS rules are taking effect, on the same QoS configuration page at the bottom, there is the Current Sessions box which shows realtime session data that allows you to see the priority of all the connected session traffic.
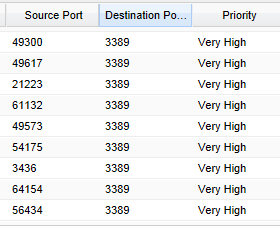
As you can see above, our QoS rule has taken effect as the Destination Port 3389 traffic has a priority of “Very High” as was set in the Qos Custom Rules.
Final Thoughts
Untangle is a great tool for administrators that allows even in its free form to control many different aspects of network traffic. The QoS feature of the free version is a great way to prioritize network traffic to give more precedence to business critical applications, ports, or hosts.
Google is updating how articles are shown. Don’t miss our leading home lab and tech content, written by humans, by setting Virtualization Howto as a preferred source.
About The Author