One of the things I never paid much attention to when I first started using Proxmox was the console option used for accessing my virtual machines. Like most people, I simply clicked the Console button in the web interface and used whatever opened by default. For quick troubleshooting, that worked fine. But after managing more Linux servers, Windows VMs, Kubernetes nodes, Docker hosts, and desktop operating systems in Proxmox every day, I started realizing that the console method you use actually makes a pretty big difference. After experimenting with xterm.js, noVNC, and SPICE across my home lab, I ended up changing the way I access VMs almost entirely depending on the workload. Let me show you what I landed on.
The console options available in Proxmox
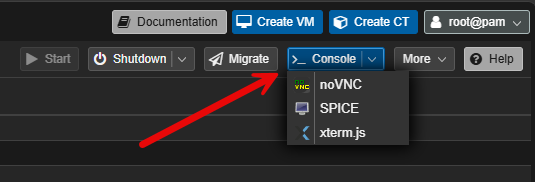
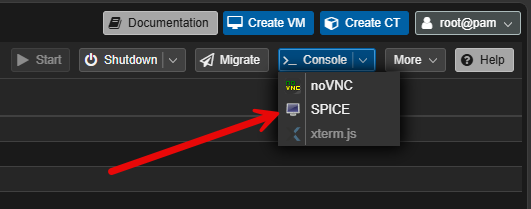
First, what are the console options available in Proxmox by default? Well, Proxmox, gives you three different console options depending on the type of VM or container you are running and what you are wanting to accomplish. These include the following:
- xterm.js
- noVNC
- SPICE
At first glance, they may all seem similar because they let you access the guest operating system from the Proxmox interface. But they are actually designed to work with different OS’es and do different things. Understanding where each one shines can help you to improve your workflow, working with Proxmox and accessing your VMs and containers in the home lab and production envs.
Why mess with the default console?
As I mentioned in the outset, I was like most, I didn’t even think about the console properties or options as it defaulted to noVNC and it seemed to work for the most part on both Windows and Linux environments. However, the turning point for me came after I spent some time working inside Linux VMs running things like Docker, Kubernetes, automation, and infrastructure services.
The noVNC console has a few annoying quirks in these scenarios:
- You don’t have copy/paste functionality
- Keyboard shortcuts sometimes acted weird for me
- Browser responsiveness could lag
- Resizing the console window felt clunky
- Shell interaction did not feel smooth
- Desktop VMs occasionally felt sluggish
None of these issues were major issues necessarily. But when you are doing tasks across all your VMs, all day long, this adds enough frustration to make you want to start figuring out a better way. I started looking at and testing the other console options more seriously and I realized that Proxmox gives you better choices for certain OS’s and tasks.
Why xterm.js is great for Linux servers
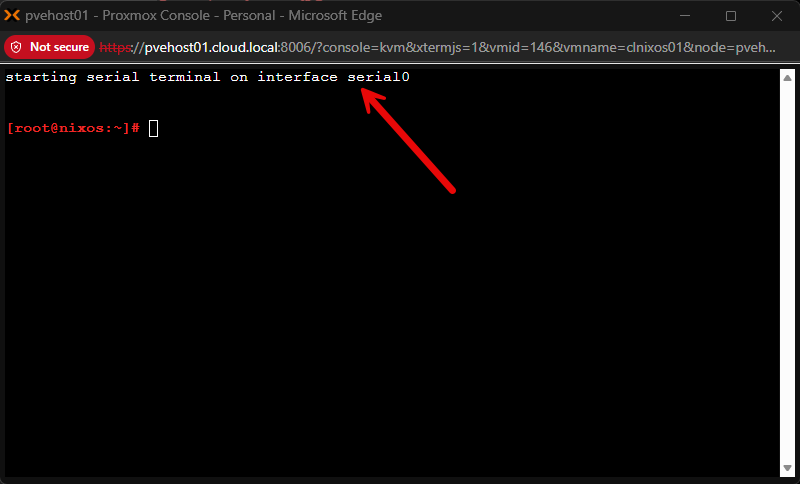
If you work with a lot of Linux VMs and LXC containers like most of us do in a home lab with Proxmox, xterm.js is a great option as a console. When you use xterm.js, instead of it rendering a full GUI console, it gives you a terminal experience right in a browser, and the great thing about it is that copy/paste functionality is enabled by default which is awesome.
The experience feels faster, lighter, and more responsive compared to noVNC when working with command line systems. Below, you can see the connection I have made to a NixOS virtual machine using the xterm.js connection:
Enabling xterm.js for Proxmox console access
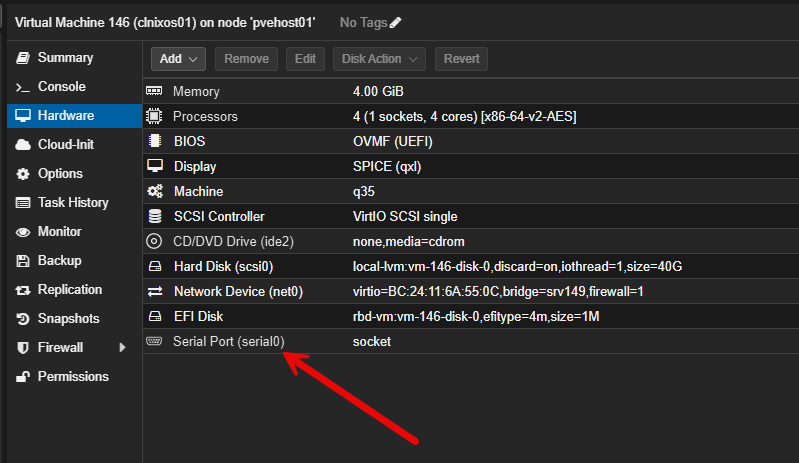
How do you enable this? Well, you have to do a couple of things. First, we have to add a serial port to the VM you want to have xterm.js connectivity to.
Then, we had to add the configuration to our NixOS configuration file to output to the serial port ttyS0:
  # Keep normal VGA/noVNC as the primary console
  boot.kernelParams = [
    "console=tty0"
  ];

  # Add Proxmox xterm.js as an additional serial login console
  systemd.services."getty@ttyS0" = {
    wantedBy = [ "getty.target" ];
    serviceConfig = {
      ExecStart = [
        ""
        "${pkgs.util-linux}/sbin/agetty -L 115200 ttyS0 vt220"
      ];
      Restart = "always";
    };
  };
After you change your configuration, run a rebuild of your config and then reboot the system:
nixos-rebuild boot

reboot
For something like Debian or Ubuntu, you need to edit GRUB:
sudo nano /etc/default/grubFind:
GRUB_CMDLINE_LINUX_DEFAULT="quiet"Change to:
GRUB_CMDLINE_LINUX_DEFAULT="quiet console=tty0"Limitations of xterm.js as a Proxmox console option
xterm.js is not perfect for everything or every console connection. The biggest limitation with using xterm.js is fairly obvious. It is meant to be a terminal only. If you need GUI installers, BIOS interaction, desktop operating systems, GUI troubleshooting, etc, xterm.js is not going to be the tool that you will want to use.
Also, it isn’t complex to setup, but it is a few steps. You have to add the serial port and then also edit your configuration so that your Linux OS will output to the serial console as well. But, I think for Linux administration, it is my favorite out of the three.
Why noVNC is still important
Even though we have mentioned using xterm.js for Linux machines, does this mean the default noVNC no longer has benefits? No, that’s not what we are saying. It still remains one of the most universally compatible console options that you can use in Proxmox. The noVNC console works really well because of the following characteristics:
- It runs entirely in the browser
- It does not require extra software
- It works on nearly every device
- It handles graphical consoles
- It supports BIOS and boot troubleshooting
Let’s face it, this is one of the reasons this console is the default option when you install Proxmox. It just works. When I am quickly checking a VM from another machine, a tablet, or a laptop where I do not want to install additional clients, noVNC is still incredibly useful.
The biggest frustrations with noVNC
While noVNC is the default and definitely is a great all around option that basically works with just about everything, the more VMs I managed, the more I noticed a few annoyances and challenges with noVNC.
Clipboard handling is just not very good in my experience there. You “can” enable clipboard to be the VNC option as shown below. Note the couple of “warnings” you get on this configuration.
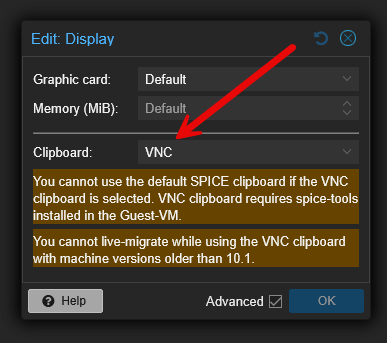
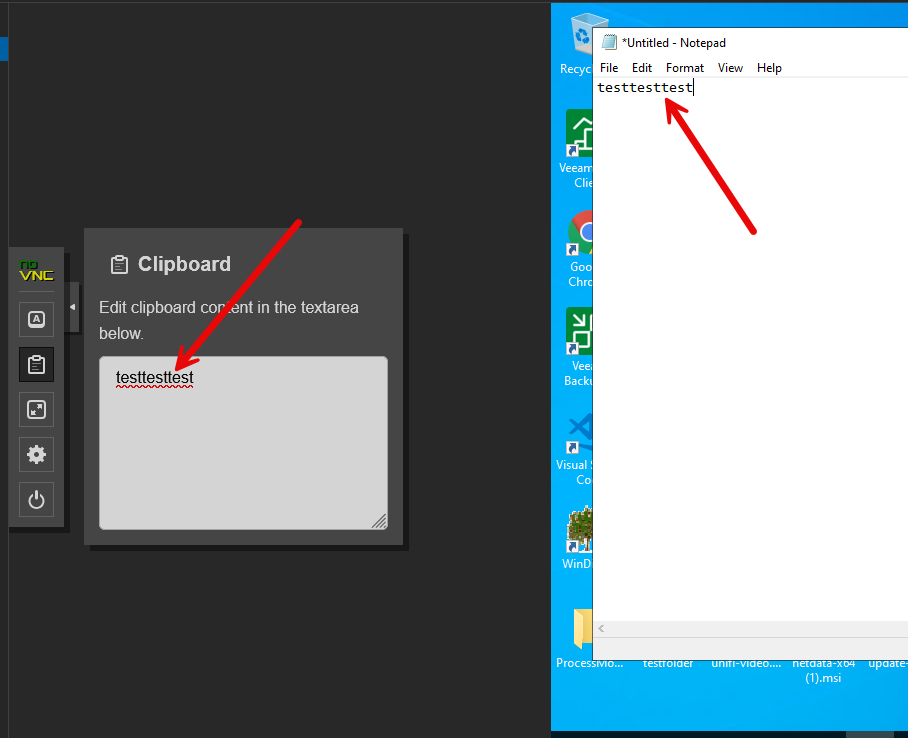
But, I have had mixed results of being able to paste from the clipboard box. So, the way this is supposed to work is you paste text into the clipboard flyout board. Then click inside your VM and you should be able to do the normal CTRL+V and it work. If you want to copy “from” the VM, you can just highlight text in the VM app that you want to copy and then it should appear in the clipboard flyout board.
Keyboard mappings occasionally behave strangely for me aso, especially with the following:
- Function keys
- Alt combinations
- Copy/paste shortcuts
- International keyboard layouts
Performance can also vary depending on the browser you use, latency of the network where you are managing the server, especially if over VPN, etc, host load, GPU acceleration, guest operating system, etc. For occasional access, these issues are not a big deal. For constant day to day administration, though, it can become a headache.
The SPICE console
SPICE was the console option I initially ignored the most I think, simply because I didn’t understand it that well. However, after getting to know the SPICE console better, I can definitely say it has its place in your VM management and workflows. At first, I assumed it was simply another remote console protocol similar to VNC. But after testing it with Windows VMs and Linux desktop systems, I realized it can provide a much smoother desktop experience.
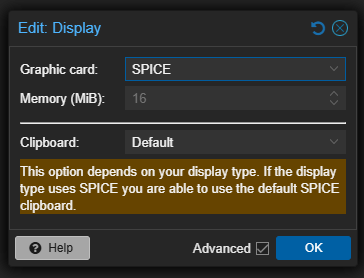
To have the SPICE console available as an option, you need to change the Graphic card to SPICE for your virtual machine. Once you do that, you will still see the noVNC option, but the SPICE console will become available to use.
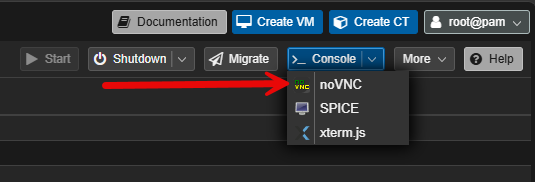
Once you do this, click Console dropdown on your VM, and you should see the SPICE console available.
Now, I mentioned this earlier, but just as an overview of where I think SPICE is a strong option to use as a console, note the following types of VMs that I think you will benefit from enabling it:
- Windows virtual desktops
- Linux desktop VMs
- GUI-heavy workloads
- Multi-monitor environments
- Audio redirection
- Clipboard integration (requires the spice agent)
- USB passthrough
I found the responsiveness of the SPICE console to be better than noVNC with GUI intensive console sessions. Especially over a local network, SPICE will feel more fluid.
SPICE Virt Viewer
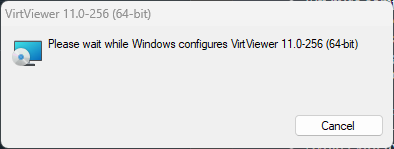
To view the “downloaded” “vv” files when you click the SPICE console option, you need to have the Virt Viewer installed. You can download the virt viewer for Windows, etc from here: Virtual Machine Manager. Then just install it:
SPICE guest tools
One bit of a downside to the SPICE console is that if you want to take advantage of all the features it can provide like copy/paste functionality, you will need to install the SPICE Guest tools in your client operating system. This is a free download from here Download. Below, I am installing the SPICE guest tools in Windows.
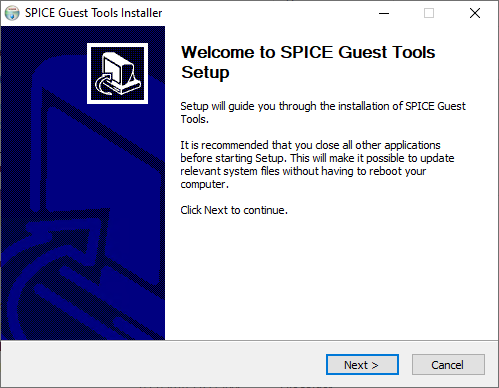
A common question is if you have the QEMU agent installed, does this automatically include the SPICE guest tools? No, these are separate installs.
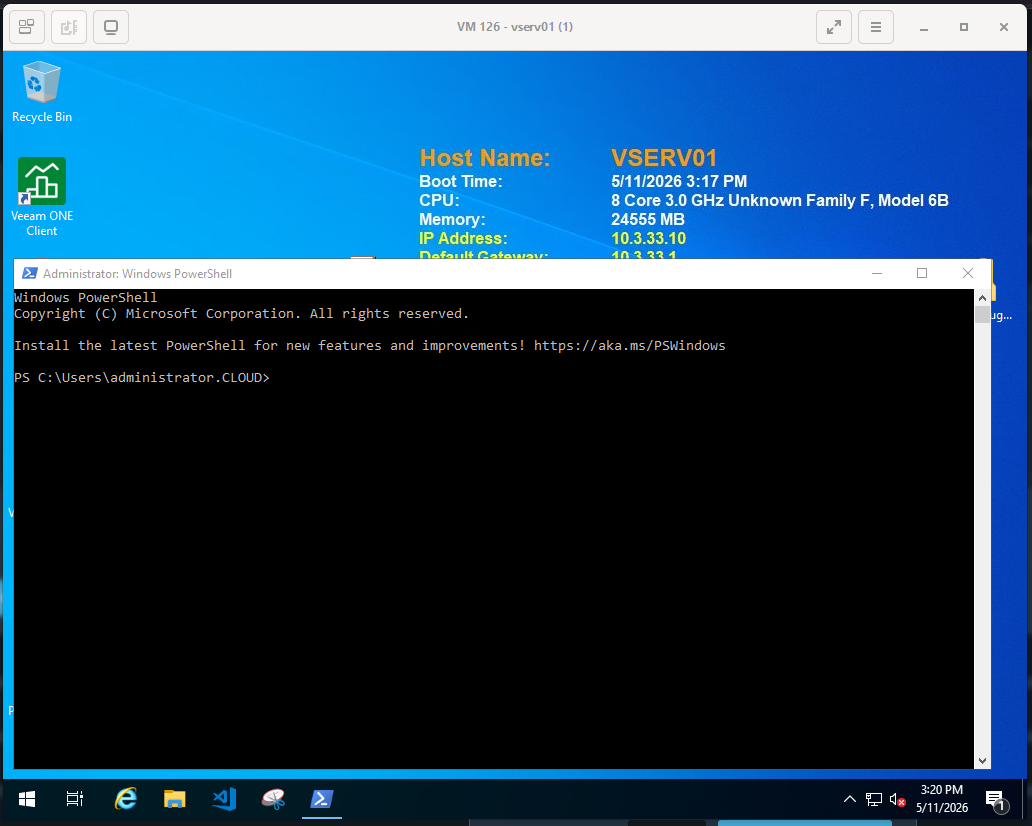
When I switched some of my Windows administrative VMs to SPICE instead of relying on noVNC, the user experience immediately improved interacting with the VM. Mouse movement felt smoother. Desktop interaction became more responsive. Clipboard operations worked better.
The downside of using the SPICE console
As you can probably already tell, the downside of using the SPICE console is the lack of convenience. It is not exactly straightforward to use SPICE like it is with noVNC. You can’t just click the drop down menu for console, select SPICE and you are good to go.
Unlike noVNC, SPICE needs:
- A client application (virt viewer)
- Additional configuration (changing the display setting in the VM)
- Downloading the SPICE config file (this is a “vv” file that virt viewer can open)
- SPICE guest tools in some operating systems (this is required for things like copy and paste functionality)
That extra setup means it is not ideal or even possible for just one off quick access. It has to be a deliberate configuration that you setup for your virtual machine. If I just need to troubleshoot a VM quickly from a browser, noVNC is still easier. But for systems I use regularly, especially desktop-style workloads, SPICE is often worth the extra effort.
What I use now for different workloads
I have put together a table of when I use which console:
| Console type | What I use it for | Why I use it |
|---|---|---|
| xterm.js | Linux server VMs, containers, Kubernetes nodes, Docker hosts, infrastructure appliances, CLI-heavy systems | Lightweight, responsive, and ideal for daily shell administration |
| noVNC | Many things, quick troubleshooting, BIOS access, boot recovery, temporary VM access, browser-only access, convenience-focused workflows | Universally accessible from the browser and great as a fallback console |
| SPICE | Windows VMs, Linux desktop VMs, GUI-heavy applications, long desktop sessions, systems needing clipboard or USB integration | Better desktop responsiveness and integration features compared to noVNC |
Wrapping up
Like everyone else, I just used the default noVNC console for basically all of my VM console access needs. But, as I worked more with Proxmox, and in testing out the functionality of each console type, I found that each of them have their pros and cons that you want to consider. They all I think have a specific use case that they excel in. How about you? What console do you typically use in your environment? Let me know in the comments if you have found different results compared to what I have found in my testing and shared here.
Google is updating how articles are shown. Don’t miss our leading home lab and tech content, written by humans, by setting Virtualization Howto as a preferred source.
About The Author

Hi Brandon,
I really like most of your posts and have learned many things from them, but this one just feels off to me. I have worked with VMware for about ten years professionally now and am looking into Proxmox for the last few month to build up my Homelab.
In my workflow the console is only a “live saver” when network stops working inside of the VM or needs to be configured initially. Once that is done I connect via SSH or RDP depending on the guest OS. There is a great client for that called MobaXterm by Mobatek that allows to do so quickly, create sessions and so on.
Therefore the default console seems to be enough for 99% of my use cases and I still don’t feel any need to start tinkering around with it. Do you really use it that frequently?
Keep up the great work and many greetings from Germany!
Kind regards,
Dennis
Dennis,
Greetings and thank you for the comment! I am like you and mainly access VMs with RDP and SSH and use a product from Devolutions called Remote Desktop Manager (RDM) mostly for access. However, I found that there are important advantages when understanding use of different consoles and can definitely be a life saver when you don’t have network access. If you are troubleshooting a Linux box for example, having the ability to copy and paste long commands into the console that may not have network access is one example. Having all of your console connections setup in a way that allows you to be able to access your VMs in the best way during break glass moments I think is important. Curious if your organization is looking to migrate from VMware to Proxmox?
Thanks Dennis,
Brandon
Hi Brandon,
many thanks for your answer, I will take a look into RDM and compare it to the tool I am currently using (MobaXterm). Of course my organization is also no longer happy with VMware since Broadcom started doing its thing. Until now we sticked to it because we are also using Omnissa Horizon as VDI solution and therefore have been facing the “vendor lock”. But since then Nutanix has become compatibel to Horizon and I think that the this will be our path to go in the next month. But I do really like Proxmox and so I will continue using it in my Homelab of course!
Take care,
Dennis
That’s an interesting point about virtual desktop infrastructure. From my experience, the most important thing is to start small and iterate. Automating one process well is better than trying to automate everything at once.
arcrival2022,
Thanks for the comment, and definitely agree here. Automation is like “eating an elephant” and best to do it one bite at a time. It can be overwhelming otherwise. What tools are you using for automation in your home lab/professionally?
Brandon