
If you are anything like me, your Proxmox environment probably started simple and then slowly evolved over time. Maybe it began with a single node running a few VMs. Then you added shared storage, clustering, high availability, VLANs, backups, containers, and eventually multiple hosts with production-like workloads running in the home lab. The interesting thing about Proxmox is that there are dozens of small optimizations that can quietly make a huge difference. I have been writing about several of these tweaks you can make over the past few weeks. Let’s look at the 5 Proxmox optimizations that are worth doing this weekend and why.
Enable discard on VM disks
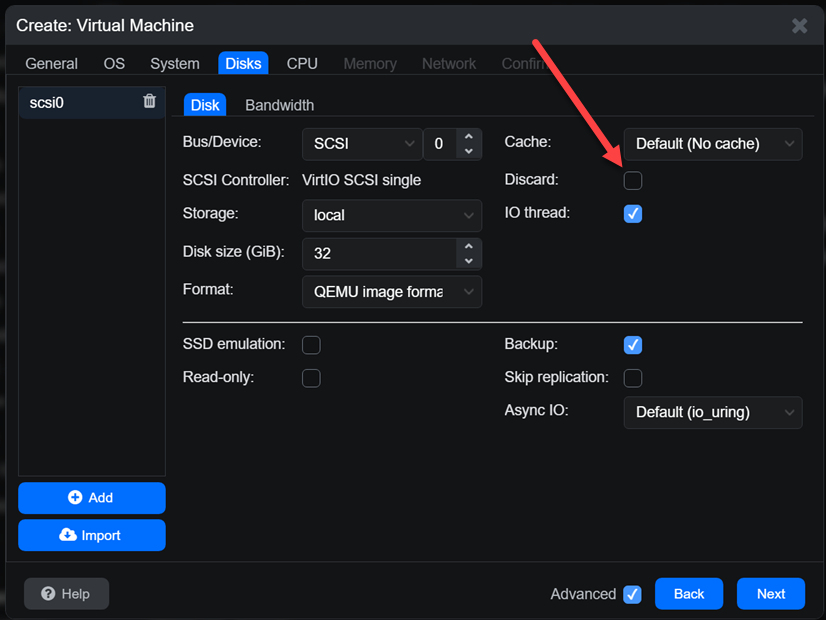
This is one of the easiest Proxmox optimizations to overlook, especially if your VMs were created months or years ago. Without discard enabled, deleted blocks inside guest operating systems are often never reclaimed at the storage layer if you are using thin provisioned storage.
That means your storage use slowly grows over time even though the guest operating system appears to have plenty of free space. I recently noticed this behavior in my own environment when storage utilization kept increasing despite deleting large amounts of data from VMs. The issue turned out to be that discard was not enabled on several VM disks.
When you enable discard and it is working properly, deleted blocks can be passed from the guest operating system down through the virtualization layer to the underlying storage platform. This allows thin provisioned storage to reclaim unused space.
In Proxmox, you can verify this by checking the disk settings of a VM. Under the disk options, make sure the “Discard” checkbox is enabled.
You can also verify the setting from the CLI:
qm config <vmid>You should see something similar to:
discard=onInside Linux guests, you can manually trigger reclaim operations using:
fstrim -avOn Windows guests, you can use the “Optimize Drives” utility or run:
Optimize-Volume -DriveLetter C -ReTrim -VerboseCheck out my full, in-depth blog on this topic here where I go into the ins and outs of enabling this setting and making sure all the storage layers have it enabled for successful unmapping.
Standardize CPU types across the cluster
Another optimization that can go unset or unnoticed is standardizing your CPU types across the cluster. I learned this lesson the hard way after running into live migrations failing between Proxmox hosts. Everything looked healthy in the cluster, but migrations would sometimes fail and this was inconsistent, depending on which host was the target of the migration.
The issue often comes down to CPU feature mismatches. When you use the “host” CPU type in Proxmox, the VM gets direct access to the physical CPU features of that specific node. Many are tempted to run this CPU type across all their VMs. This does provide maximum performance, but it can also create compatibility issues if your nodes are not perfectly identical.
This can also become a problem when you have the following scenarios in your home lab:
- mixing CPU generations
- mixing Intel and AMD
- adding newer nodes to an older cluster
- using mini PCs purchased at different times
- running rolling hardware upgrades
A better approach in many clustered environments is to use a standardized named CPU type that is available in the virtual machine configuration. Some of the newer x86-64-v2, v3, and v4 CPU models are a good balance between compatibility and modern CPU feature support.
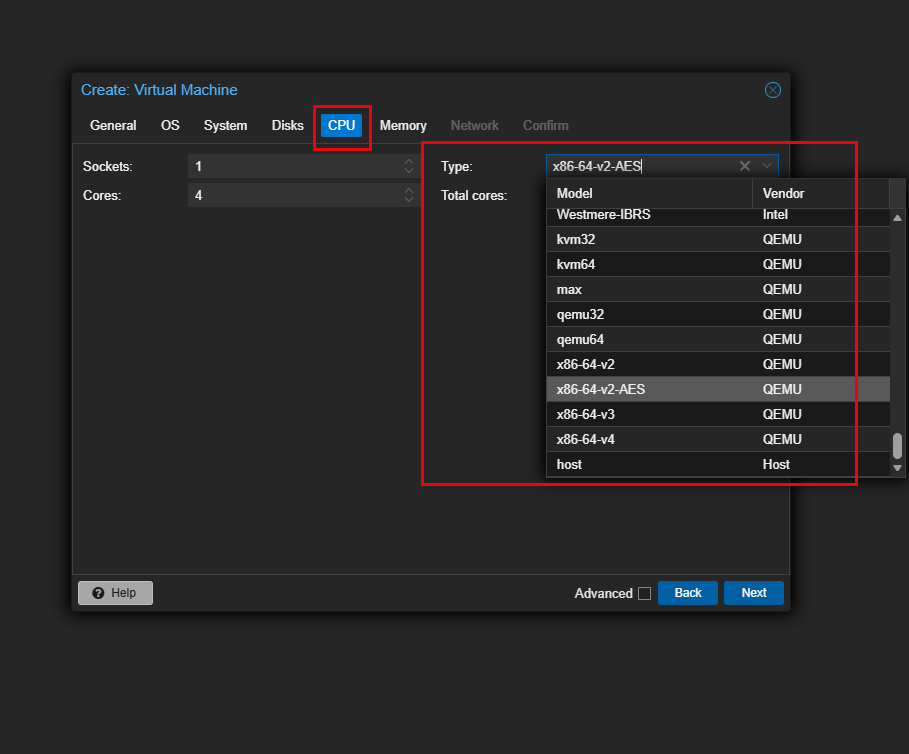
You can configure this in the VM hardware settings or directly in the VM configuration file.
For example:
cpu: x86-64-v3The tradeoff is that you may lose access to some host-specific CPU optimizations. But the improvement I think in migration consistency is worth it in clustered environments and especially in a home lab where we often have different nodes across a cluster. This is one of those optimizations that makes the entire cluster feel more stable over time.
Check out my recent deep dive in this topic here:
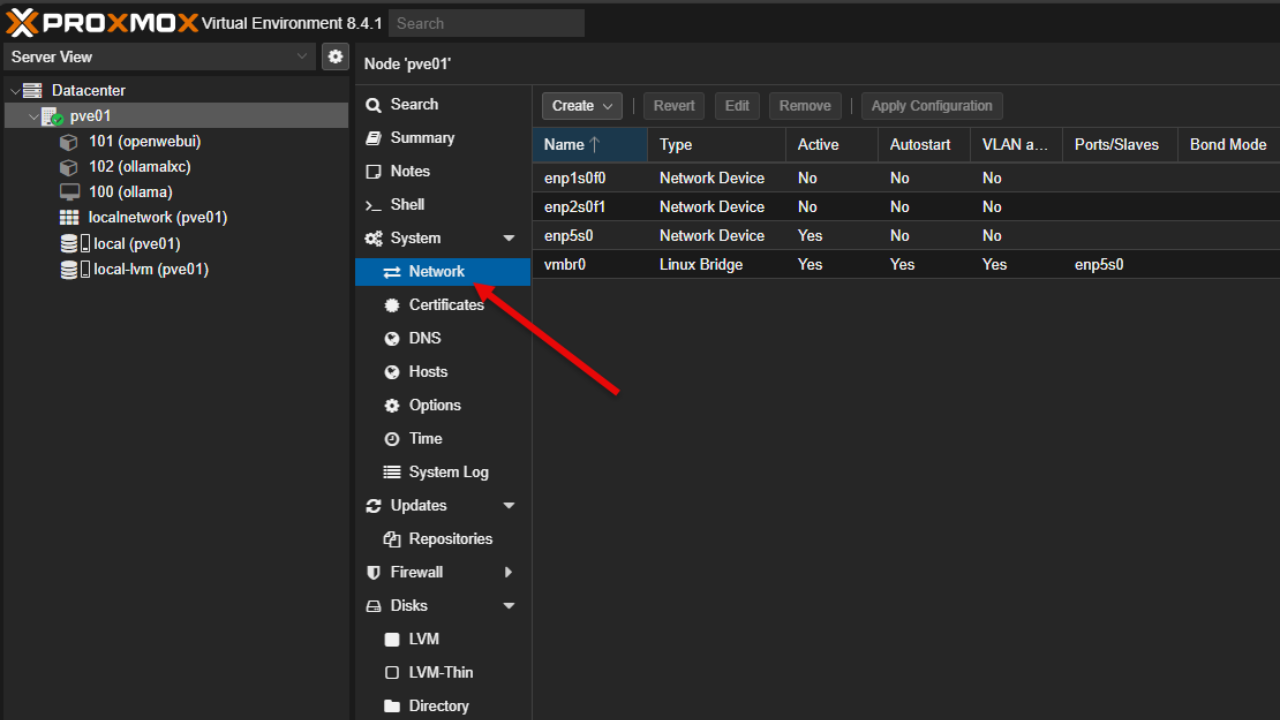
Move networking to Proxmox SDN
This is one after playing around with Proxmox SDN that I can say is definitely worth doing in your home lab or production environment. If you are still managing all your networking strictly through traditional Linux bridges and VLAN interfaces, there is nothing wrong with this. But Proxmox SDN is worth looking at.
I will admit that I initially avoided SDN because I assumed it would add unnecessary complexity. After spending more time with it though, I now think it is one of the most interesting optimizations you can do in Proxmox.
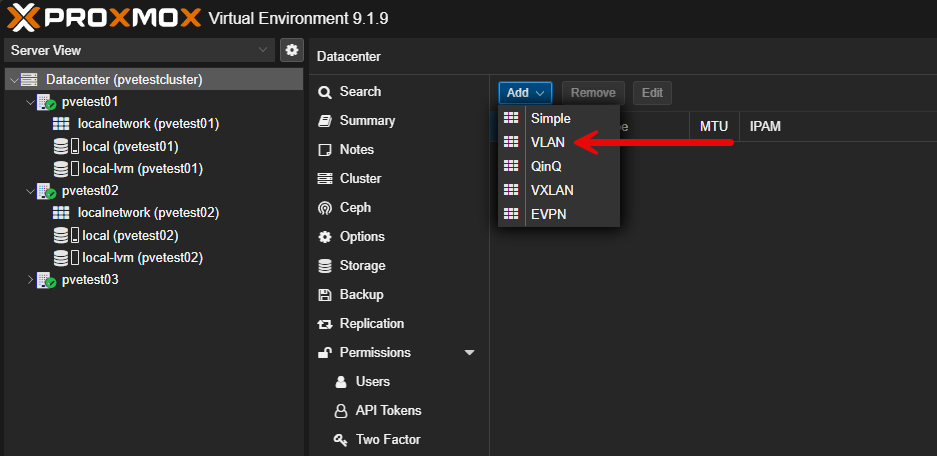
Proxmox SDN gives you centralized management for:
- VLANs
- VXLANs
- subnets
- zones
- DHCP
- IP address management
- multi-node networking consistency
Instead of manually building bridge and VLAN configurations on every node, SDN allows you to manage networking in an easier way and your configurations are automatically copied across to all your hosts in the cluster.
This becomes very useful I think when you are adding additional cluster nodes, migrating VMs, building lab environments quickly, testing overlay networking, preparing hybrid environments, or experimenting with stretched networking.
But, I think one of the ultimate benefits of Proxmox SDN and using it is the consistency it brings. Managing /etc/network/interfaces files between your hosts and making sure these don’t drift over time takes a lot of discipline and care. But with Proxmox SDN, the config is set at the Datacenter level and copied across to all the Proxmox hosts.
Check out my deep dive into Proxmox SDN for home lab in my recent post here:
Enable dynamic HA balancing
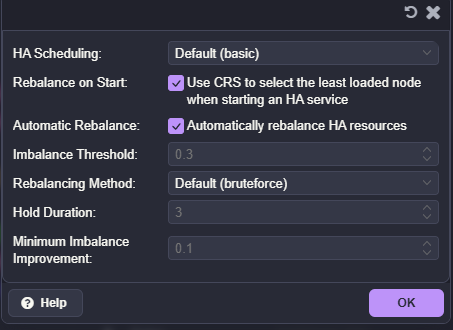
Another exciting tweak to look at optimizing your Proxmox installation with is the new dynamic HA balancing found in Proxmox 9.1.8. In traditional installations, Proxmox HA focused mostly on recovery. If a node failed, VMs would restart elsewhere. While useful, workload balancing itself was still fairly manual across the environment.
The newer dynamic balancing capabilities start moving Proxmox closer toward intelligent workload distribution. With the new feature in 9.1.8, it allows the cluster to do things like redistribute workloads, improve resource utilization, reduce uneven node loading, and better balance compute resources.
I think too, this feature is especially valuable in home labs where nodes often have:
- different hardware capabilities
- different storage performance
- different CPU generations
- varying workload patterns
For example, maybe one node slowly becomes overloaded over time because newer workloads keep landing there. Dynamic balancing can help smooth this out.
Of course, this is not identical to VMware DRS. There are still differences in how aggressively balancing occurs and how workload decisions are made. But, the key point is that it is getting there. Still, I think for home lab users especially, this is a major improvement worth exploring.
Check out my full blog post covering this feature here:
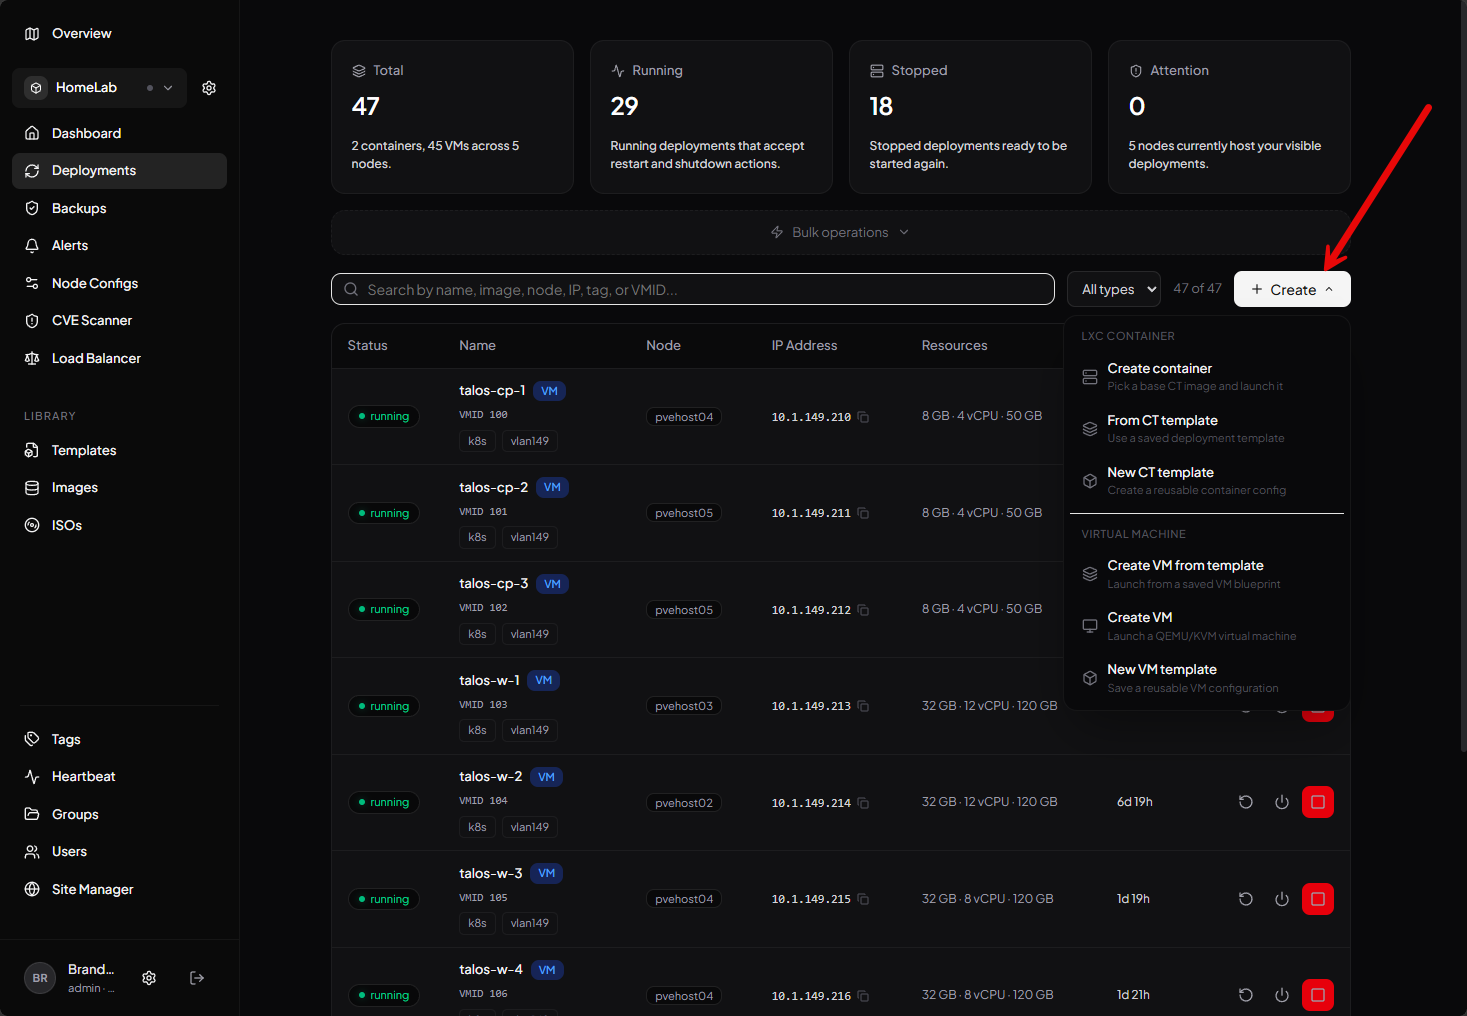
Improve visibility with modern Proxmox tools
Lastly, an optimization that you can make when it comes to managing Proxmox itself is related to the overall management experience. The ecosystem of tools around Proxmox is growing rapidly. It has the excitement that VMware once had (before Broadcom killed it), and this is leading to great new solutions.
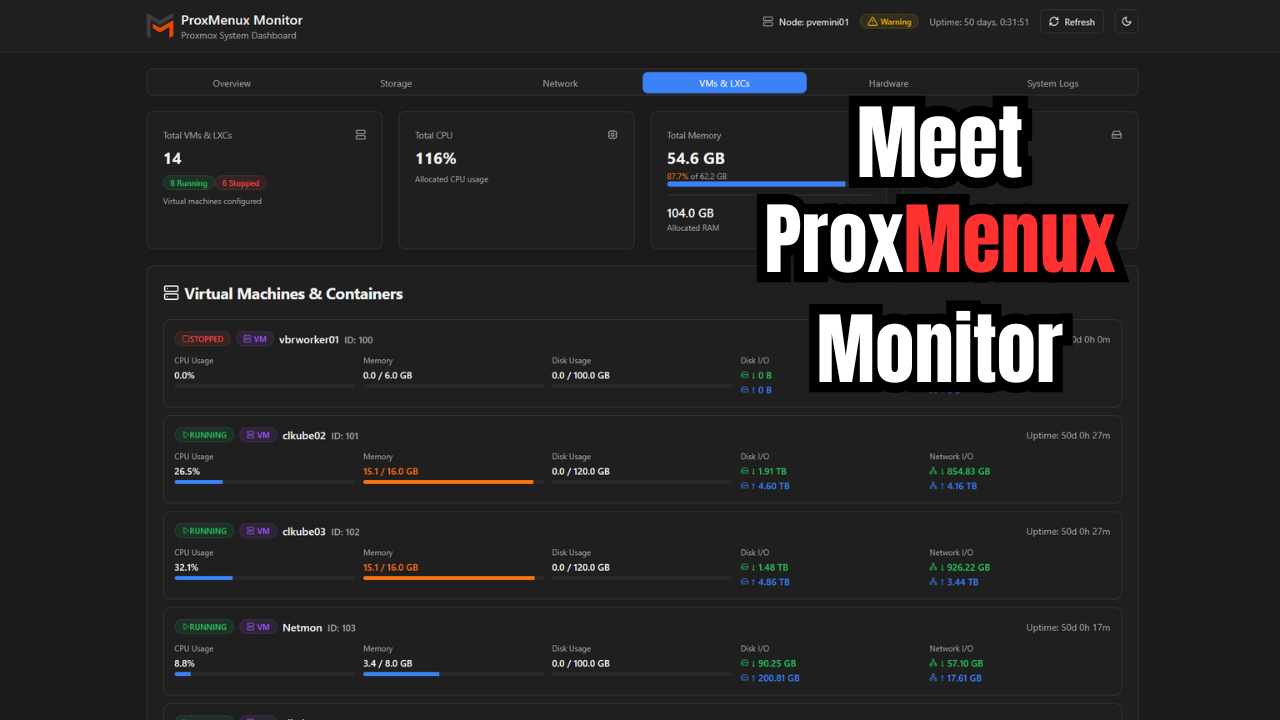
I have been testing several newer Proxmox tools recently that I think definitely make managing my environment easier. A few standout examples include:
- CV4PVE-Report
- CV4PVE-Diag
- Tainer
- PegaProx
Each of these solves different problems. But, what I like about them is that they help fill operational gaps that become more noticeable as your Proxmox environment grows. This is especially true once you go beyond a single node environment, or running a handful of VMs.
I definitely recommend spending some time evaluating which tools actually fit your environment. Just remember, the best tooling setups are usually the simplest ones that solve real operational problems.
Check out my recent post here where I detailed the tools that I have been using lately and why they are beneficial:
Wrapping up
All of these Proxmox optimizations that I have listed here are ones that I have learned from experimenting and learning in the home lab. Proxmox has lots of settings and optimizations that aren’t necessarily understood well for those that are coming across from other hypervisors. Getting to know these better and implementing them will reap tremendous benefits in the home lab and production environments. Let me know in the comments if these settings have been helpful to you and if you are planning on implementing these this weekend or soon.
Google is updating how articles are shown. Don’t miss our leading home lab and tech content, written by humans, by setting Virtualization Howto as a preferred source.
About The Author

Excellent article Brandon. Great low-hanging fruit here for the home lab. Going to revisit some of these in mine.
jodd14,
Excellent! These are low hanging fruit for sure. Lots of nice benefits from implementing them.
Brandon
Another bunle of fantastic tips%tricks, Thank You Brandon great job.
PS just as something intresting from proxmox tools area, have a try of WolfStack defenetly worth a try.
Mario,
Thanks so much for the comment and the tip! I haven’t heard of Wolfstack, will have to check it out! Cheers!
Brandon