
If you have been running Traefik or you have thought about running Traefik, you probably fall into one of two schools of thought. You probably either love Traefik due to the fact that it is so “infrastructure as code” friendly. Or, you hate the fact that it doesn’t really have a GUI for configuration like Nginx Proxy Manager for easy configuration. Let’s face it. Managing YAML files for configuration, including routes, middlewares, TLS certificates, and services can be tedious. This is why I was really interested when I came across Traefik Manager. It is a relatively new project that I think may change the game when it comes to managing Traefik. Let’s take a look at this new tool and see how you can get it running and managing your Traefik installation.
What is Traefik Manager?
Traefik Manager is a self hosted web UI designed to simplify the management of Traefik. Instead of writing and maintaining configuration files manually, it gives you a graphical interface where you can create and manage routes, services, middlewares, and certificates. So if you have a Proxmox Server at home running containers with Traefik sitting in front, this will make the process of management and configuration much easier.
As you can see with the screenshot from the official GitHub repository, it is not just a static dashboard like the Traefik Dashboard that comes with Traefik. This is active in that you can do things like add routes.
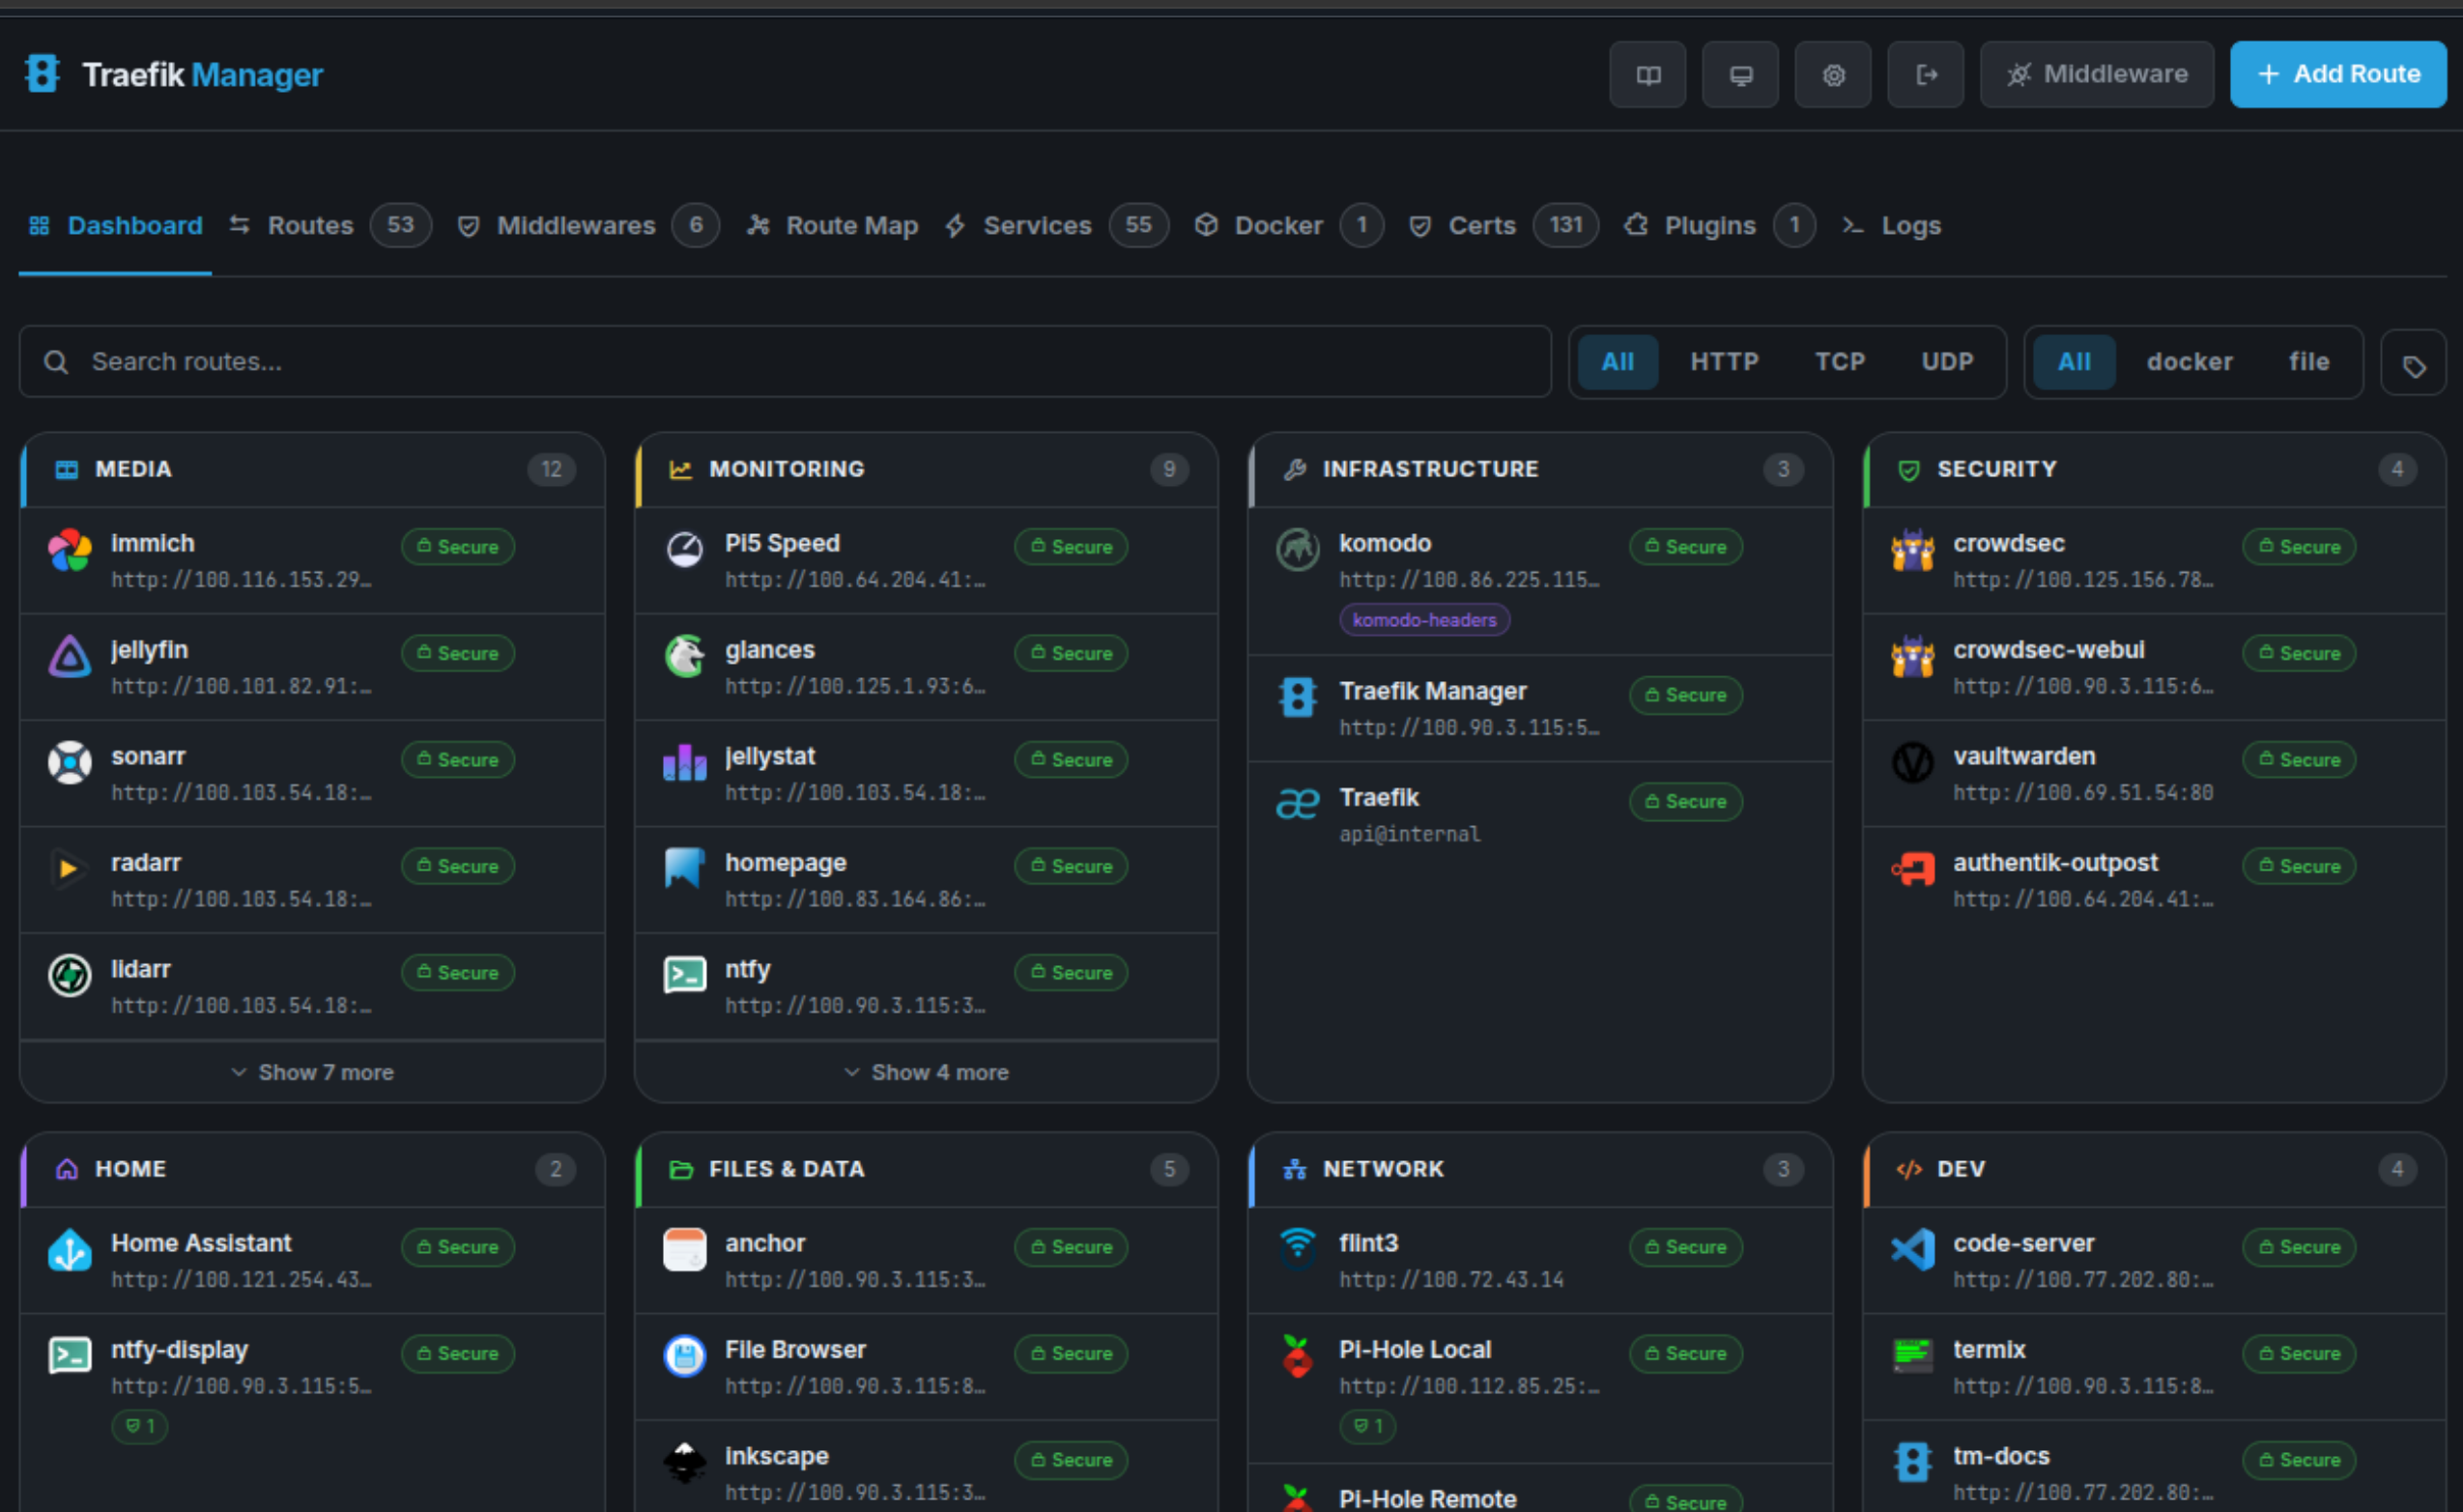
Under the hood, it integrates directly with Traefik’s API and configuration model. It does not replace Traefik. Instead, it acts as a management layer on top of it. The goal of this project is simple. It helps to make Traefik easier to use without changing what it does at its core.
Note the following features:
- Manage routes and services from a web UI instead of editing labels or YAML
- Create and reuse middlewares like redirects, auth, headers, and rate limits
- View TLS certificates, expiration dates, and troubleshoot issues
- Access logs and basic monitoring in the browser
- Back up and restore your configuration
- Secure the UI with OIDC and TOTP
Why I think Traefik Manager matters in a home lab
I think a lot of home labbers, especially those that are just beginning, are intimidated by Traefik. It is definitely not as user friendly as something like Nginx Proxy Manager from the start. I have definitely strongly recommended NPM in the past for those that are starting into their self-hosting journey and want to stand up a reverse proxy for SSL termination, etc.
Nginx Proxy Manager makes this a process of simply point and clicking your way through setting up your Proxy and SSL certs. With Traefik, there are more moving parts and pieces, like editing Docker labels, modifying configuration files, restarting services, and the logs are a bit more complicated to deal with.
I think a UI that is bolted onto Traefik can make that experience much better. Instead of you editing config YAML, you can add routes in just a couple of seconds, attach middleware, visualize your routing config, and also more quickly identify misconfigurations.
For me this is something that really works well with how I manage and configure other parts of my home lab. I like using tools like this that can help you get better visibility and speed in your management and configuration.
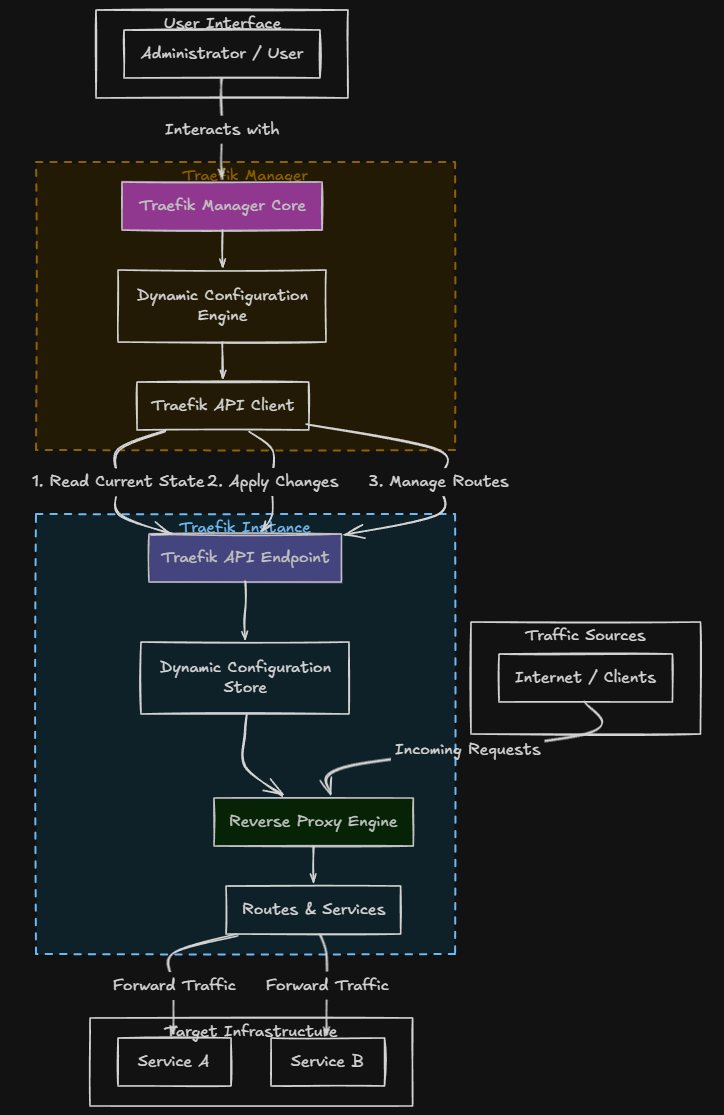
How Traefik manager works
Traefik Manager works by interacting with Traefik’s API and dynamic configuration system. Note the following overview diagram of how Traefik Manager “talks” to Traefik:
Things you need to have configured on the Traefik side
For Traefik Manager to work properly, your Traefik instance needs a few things enabled.
Here is a simplified example:
api:
  dashboard: true
  insecure: trueproviders:
  docker:
    exposedByDefault: falseentryPoints:
  web:
    address: ":80"
  websecure:
    address: ":443"
In a production or internet exposed environment, you should not leave the API insecure. Instead, secure it using authentication or limit access to internal networks.
Installing Traefik Manager with Docker compose
Let’s look at how to install Traefik Manager using Docker compose and see how we can stand it up in our environment.
Here is a basic example to get you up and running.
services:
  traefik-manager:
    image: ghcr.io/chr0nzz/traefik-manager:latest
    container_name: traefik-manager
    restart: unless-stopped
    ports:
      - "5000:5000"
    environment:
      - TM_TRAEFIK_URL=http://traefik:8080
    volumes:
      - ./data:/app/data
A few important notes about this configuration:
- TM_TRAEFIK_URL should point to your Traefik API endpoint
- Make sure Traefik API is enabled in your Traefik configuration
- Persist the /app/data directory so your configuration is not lost
Once you have your compose file ready, you can bring it up with:
docker compose up -d
After that, you should be able to access the UI at:
http://your-server-ip:5000Setup wizard after bringing up the container
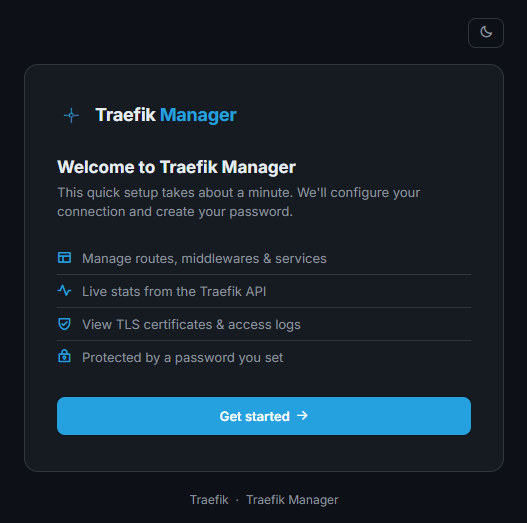
There is a short setup wizard that you will see when you bring up the Traefik Manager container. When you browse out to the address of your container host port 5000, login with the password provided in the logs for Traefik Manager. Then, you will see the following workflow. Click the Get started button.
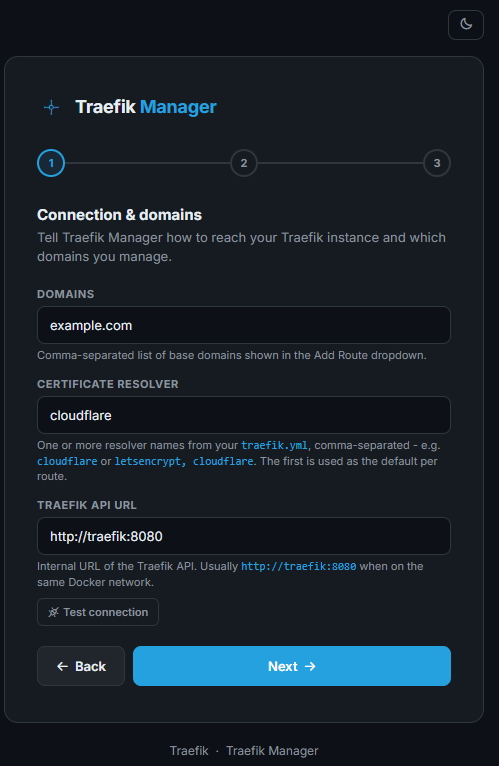
The first box has you input the connection and domains information.
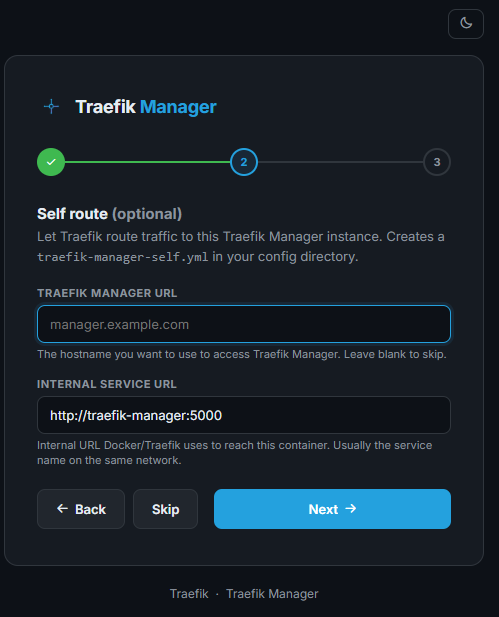
Next, you can configure a self-route to allow Traefik to route traeffic to this Traefik Manager instance. It creates a new YAML file in your config directory called traefik-manager-self.yml.
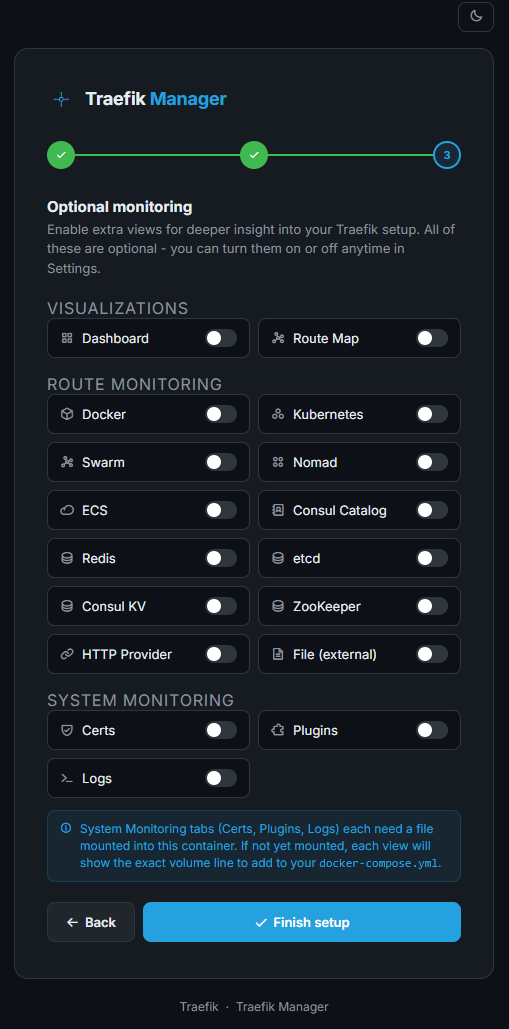
Next, you can configure optional monitoring. Here we can enable extra views for deeper insights into Traefik configuration. These are optional.
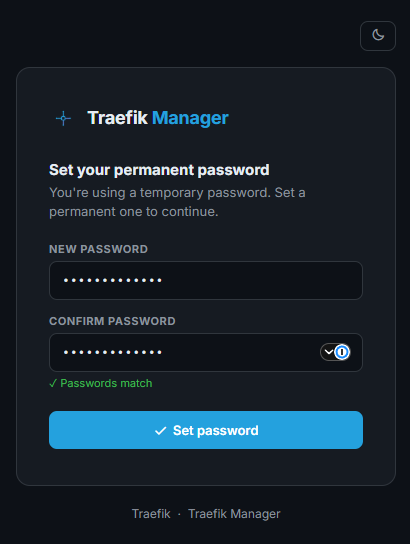
Next, we are asked to change the admin password to something permanent. So, we don’t keep the autogenerated password in the docker logs long. We get it set at the end of the setup wizard.
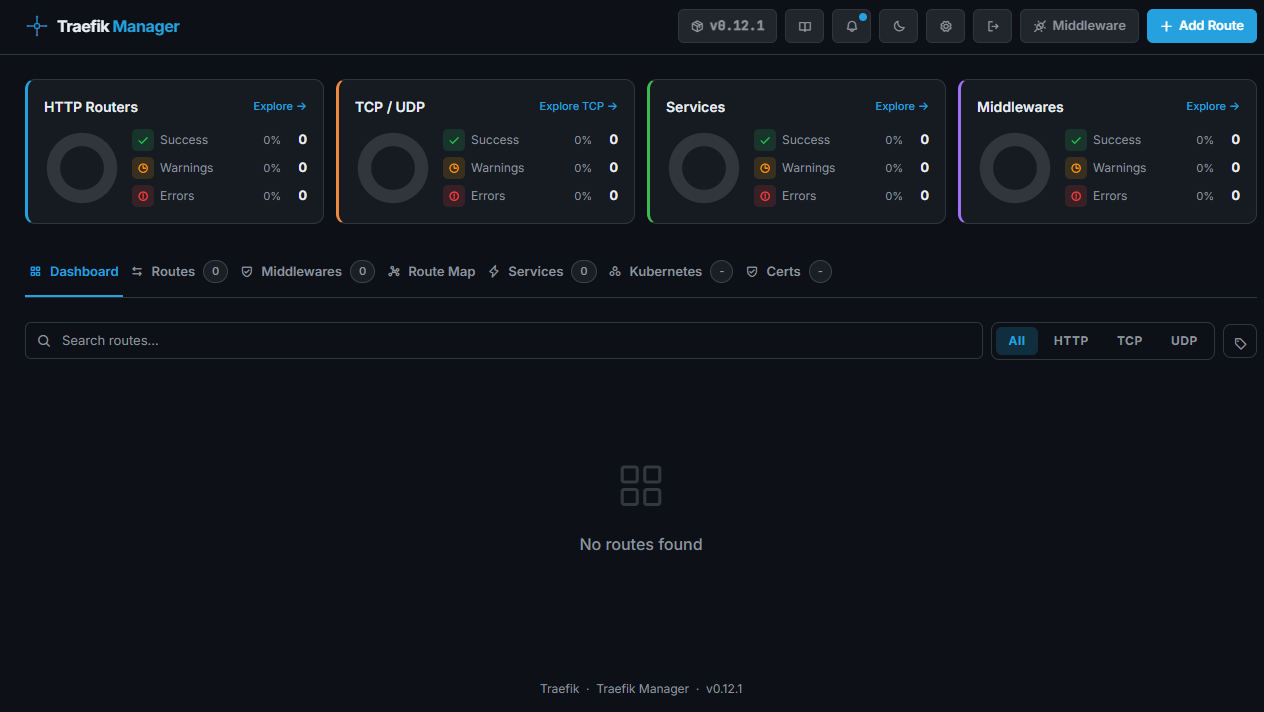
Once you set the password, you are taken to the default dashboard.
Adding routes and middleware
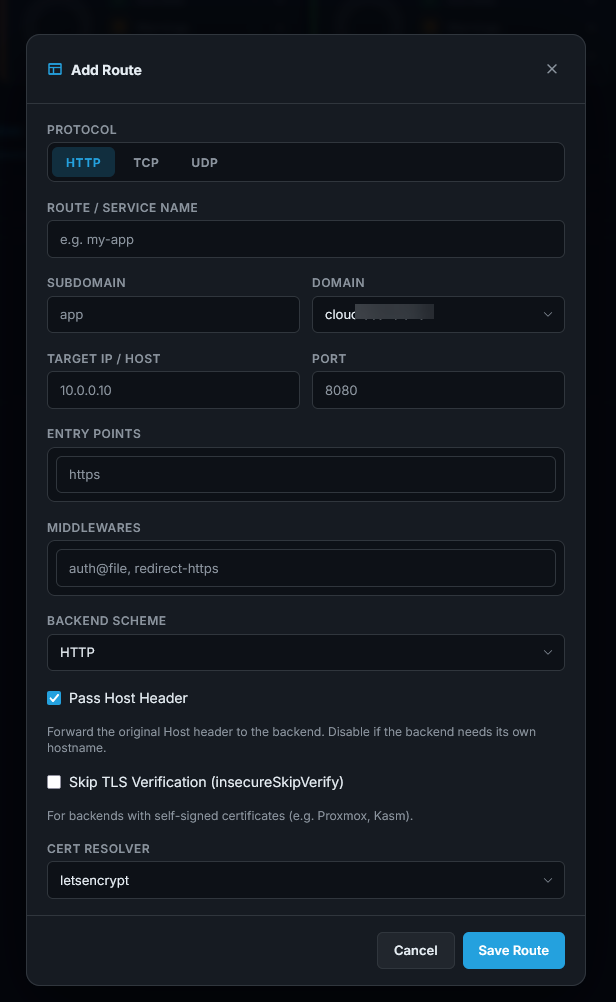
Once you have Traefik Manager up and running, adding routes and Middleware are just a few clicks operation. Below, you can see the configuration dialog box after clicking to Add Route.
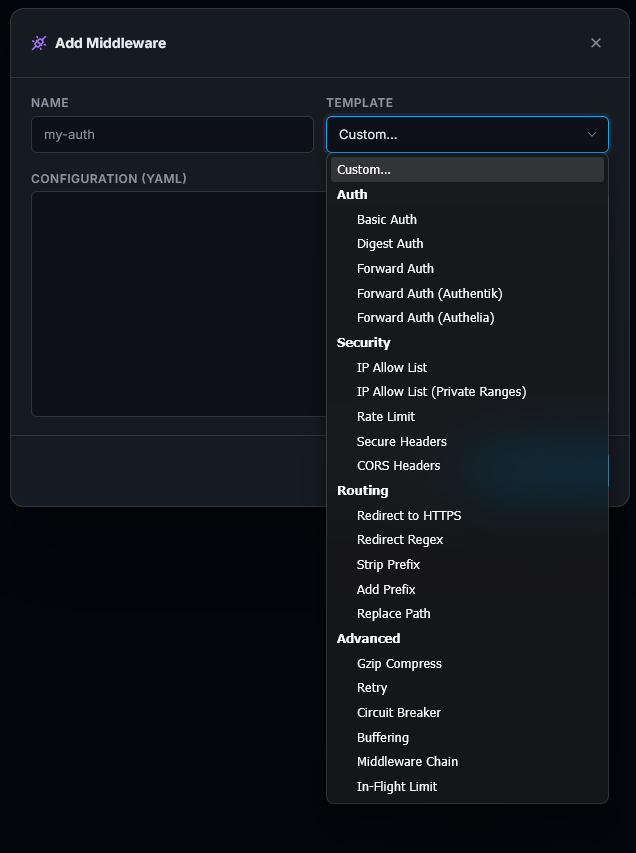
Below is adding middleware using the Traefik Manager. You will see a “Template” dropdown that has a whole list of predefined templates you can readily use in your configuration.
Pros and cons
Below are a few of the pros and cons to think about when using the Traefik Manager in your environment. It isn’t perfect, but definitely has benefits:
| Pros | Cons |
|---|---|
| Makes Traefik much easier to manage | Adds another service to manage |
| Reduces manual YAML editing | Still a relatively new project |
| Provides visibility into routes and certificates | Depends on Traefik API being accessible |
| Speeds up troubleshooting | May not replace advanced configuration use cases |
| Adds backup and restore capabilities | Can be confusing to setup with the configuration |
| Supports modern authentication methods |
Wrapping up
After testing out Traefik manager, I can say that it definitely feels like something that should have been there a long time ago. We all like managing using a GUI as it gives us a quick and easy way to look over everything at a very high level. I think it allows Traefik to still maintain all the strengths that it has in terms of infrastructure as code, but adds the right GUI that allows us to manage things the way that makes sense as well. How about you? Do you run Traefik in your home lab? Is this something that you would consider testing out?
More in this topic


Discuss this in the Community
Google is updating how articles are shown. Don’t miss our leading home lab and tech content, written by humans, by setting Virtualization Howto as a preferred source.
About The Author

https://github.com/getvaier/vaier