
I am constantly surprised by the number of new tools that are getting cranked out for Proxmox. It is hard to keep up sometimes with the growth and expansion of the ecosystem. Many projects have been focused on improving the management experience of Proxmox. We all know and are used to the default Proxmox UI, but it is not known for being the most modern interface that you can use. Over the past few months I ahve been testing more tools that sit on top of Proxmox and enhance management. One project I came across recently is a project called Tainer. It caught my attention right away as it now offers a fully self-hosted version that you can run with Docker. This is a super interesting tool that feels a bit like what Portainer did for Docker but applied to VMs in Proxmox.
What is “tainer” and what problem does it solve?
So what is Tainer exactly? Tainer is an interesting one. It is basically a management layer that sits on top of your Proxmox environment. It like many others out there interacts with the API. The core idea I think is to give you a more modern interface and workflow when managing virtual machines and infrastructure tasks in Proxmox.
If you think about how you use Proxmox today, you are often clicking through nodes, storage, and VM settings. It is very powerful, but it is also clunky in ways. Tainer abstracts some of that and gives you a cleaner, more application-like experience.
It reminds me a lot of how Portainer changed the way many people interact with Docker. Instead of dealing directly with CLI commands or raw configuration, you get a UI that is focused on actions and workflows. This becomes especially useful in home labs where you are experimenting, deploying quickly, and often repeating similar tasks over and over again.
Deploying tainer with Docker
The creators of tainer have been trying to get off the ground with a SaaS version of the solution. However, recently, which I think is a good move, they released it as a self-hostable version that you can run in your own Docker environment.
So, if you don’t trust or want to rely on a hosted platform to manage your Proxmox environment, this is a tool that you can self-host and you have control over all the data using your own dedicated Docker host.
This can be done using Docker run from the command line or Docker Compose. The Docker run command as an example is the following:
docker run -d \
  --name tainer \
  --restart unless-stopped \
  -p 3000:3000 \
  -v tainer-data:/app/data \
  tainersh/tainer:latest
Then, for Docker Compose, you can use the following as an example. Also, the APP_URL is used for password resets. You will want to add the SMTP environmen variables as well for your email communications
APP_URL | Public base URL for password reset purposes |
SMTP_HOST / SMTP_PORT / SMTP_USER / SMTP_PASS / SMTP_FROM | SMTP for password reset emails |
The code:
services:
  tainer:
    image: tainersh/tainer:latest
    ports:
      - "3000:3000"
    volumes:
      - tainer-data:/app/data
    restart: unless-stopped
    environment:
      APP_URL: http://localhost:3000

volumes:
  tainer-data:
If you want to do a bind mount, you can do something like this:
services:
  tainer:
    image: tainersh/tainer:latest
    container_name: tainer
    restart: unless-stopped

    ports:
      - "3000:3000"

    environment:
      APP_URL: http://10.1.149.25:3000

    volumes:
      - /home/linuxadmin/homelabservices/tainer/data:/app/data
After you get your Docker compose file in place, just run the normal:
docker compose up -d
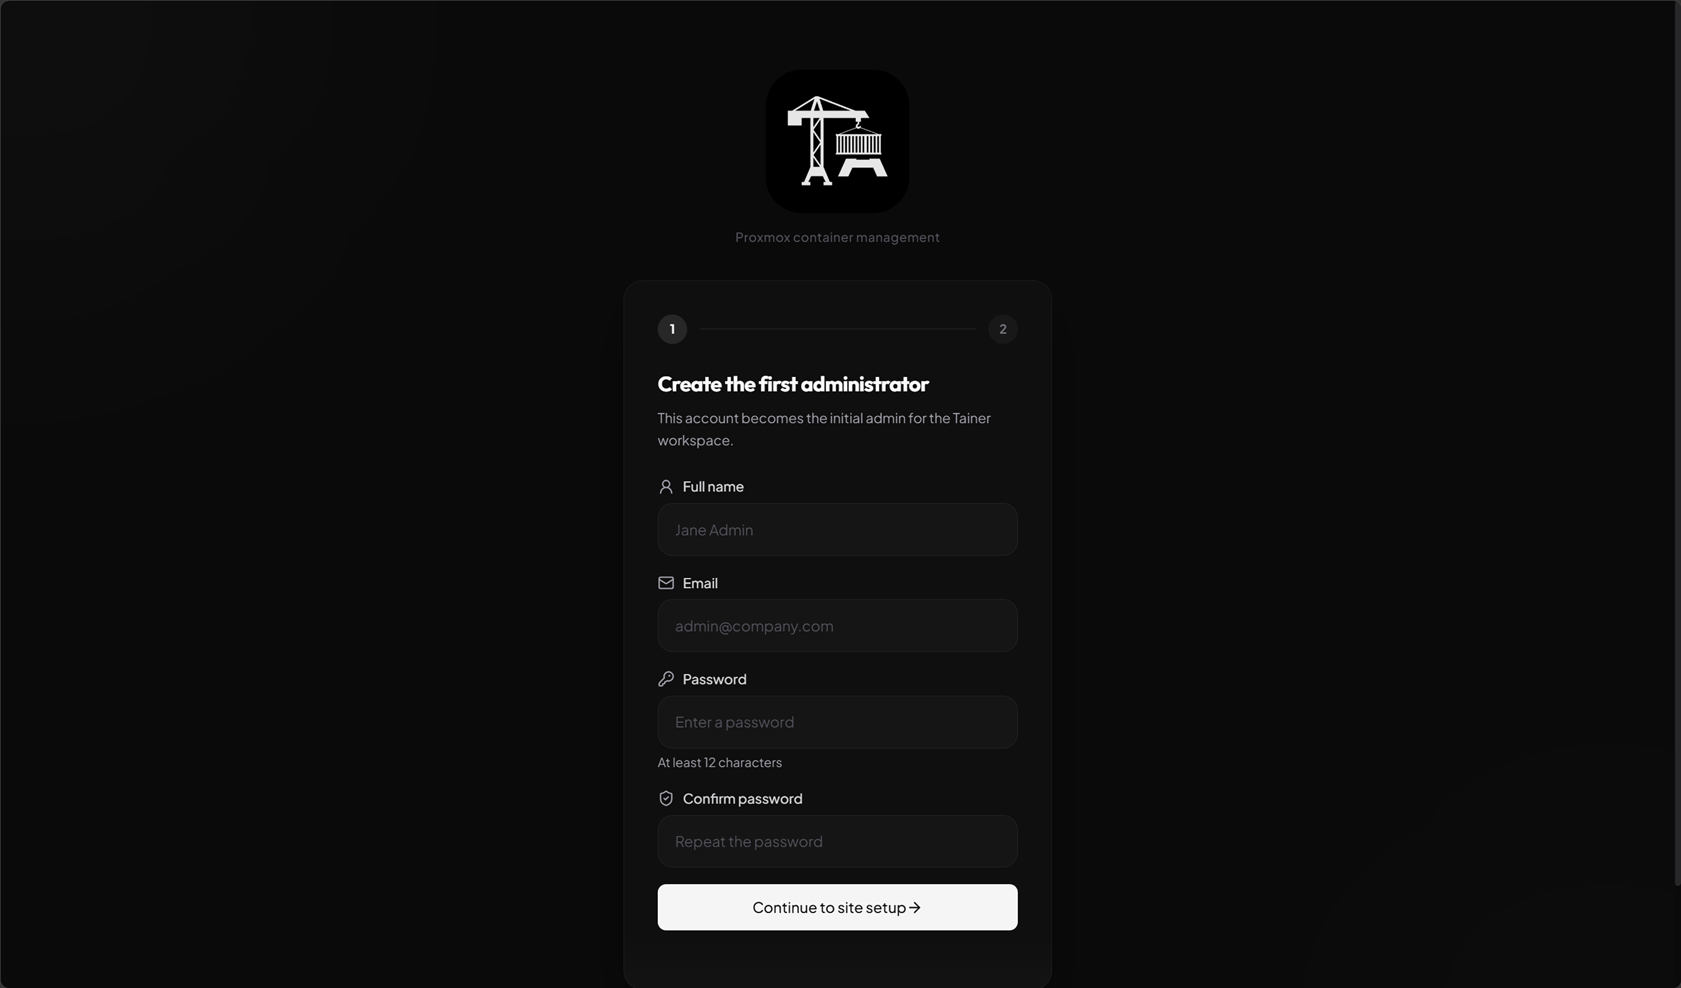
After this, browse out to the IP of your container host that is housing tainer. The first visit, you will be prompted with the following workflow to create the first administrator account.
The next step is to connect your first Proxmox cluster. Here you fill in the basic info required to get connected, including the API URL, username, password, default node, TLS verification, etc.
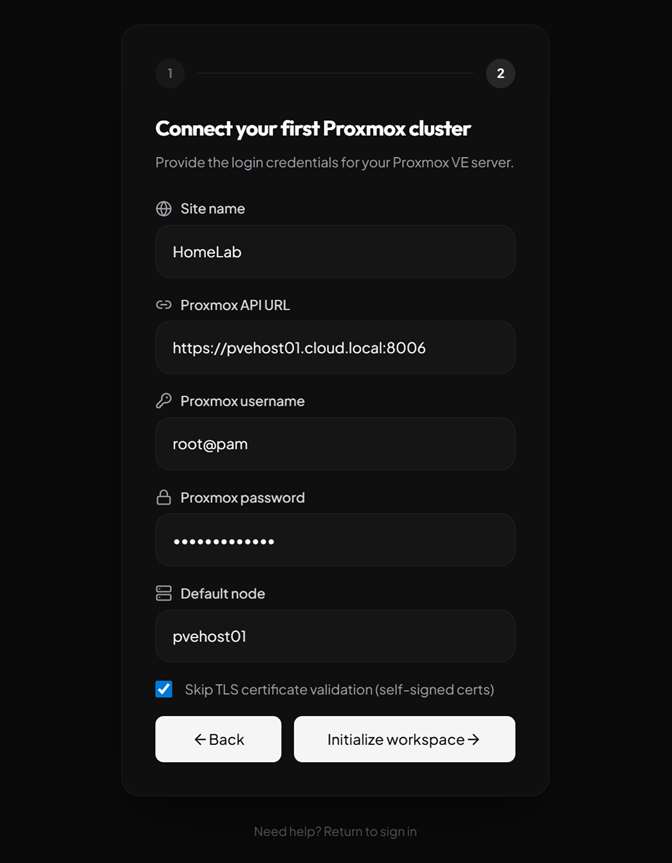
After you click the button above, initialize workspace, it will take you to the dashboard.
First impressions of the tainer interface and features
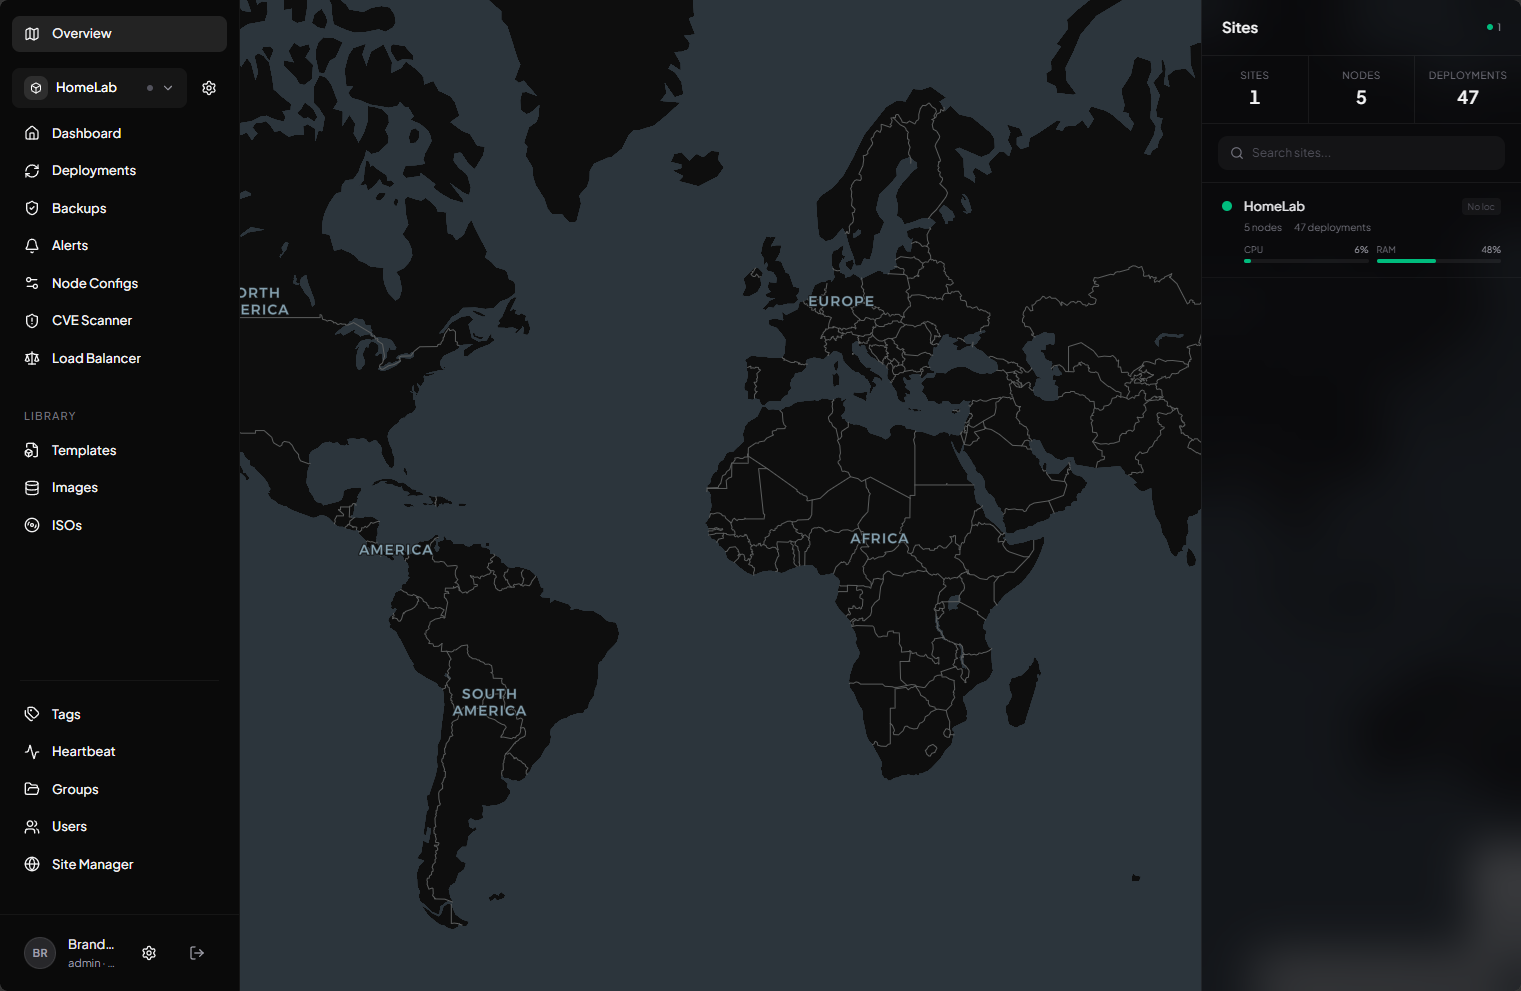
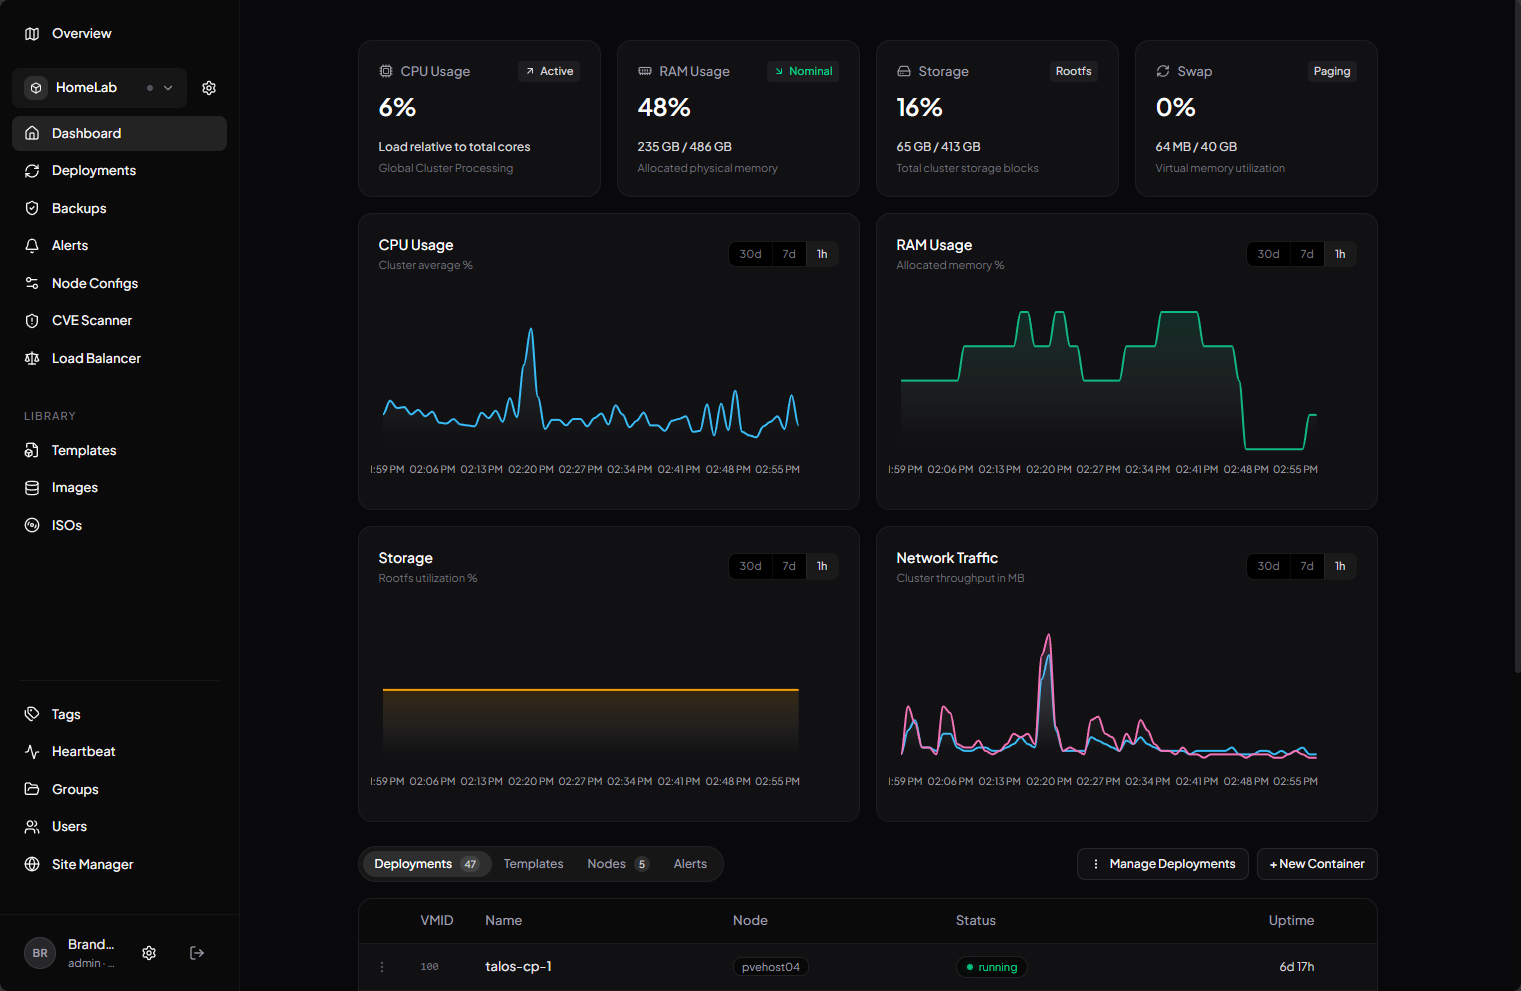
I really like the look and feel of the tainer interface. It is modern and sleek and has a lot of really good functionality in this early release version. The dashboard gives you a high level view of the key performance metrics in the environment, including CPU, memory, storage, and network traffic.
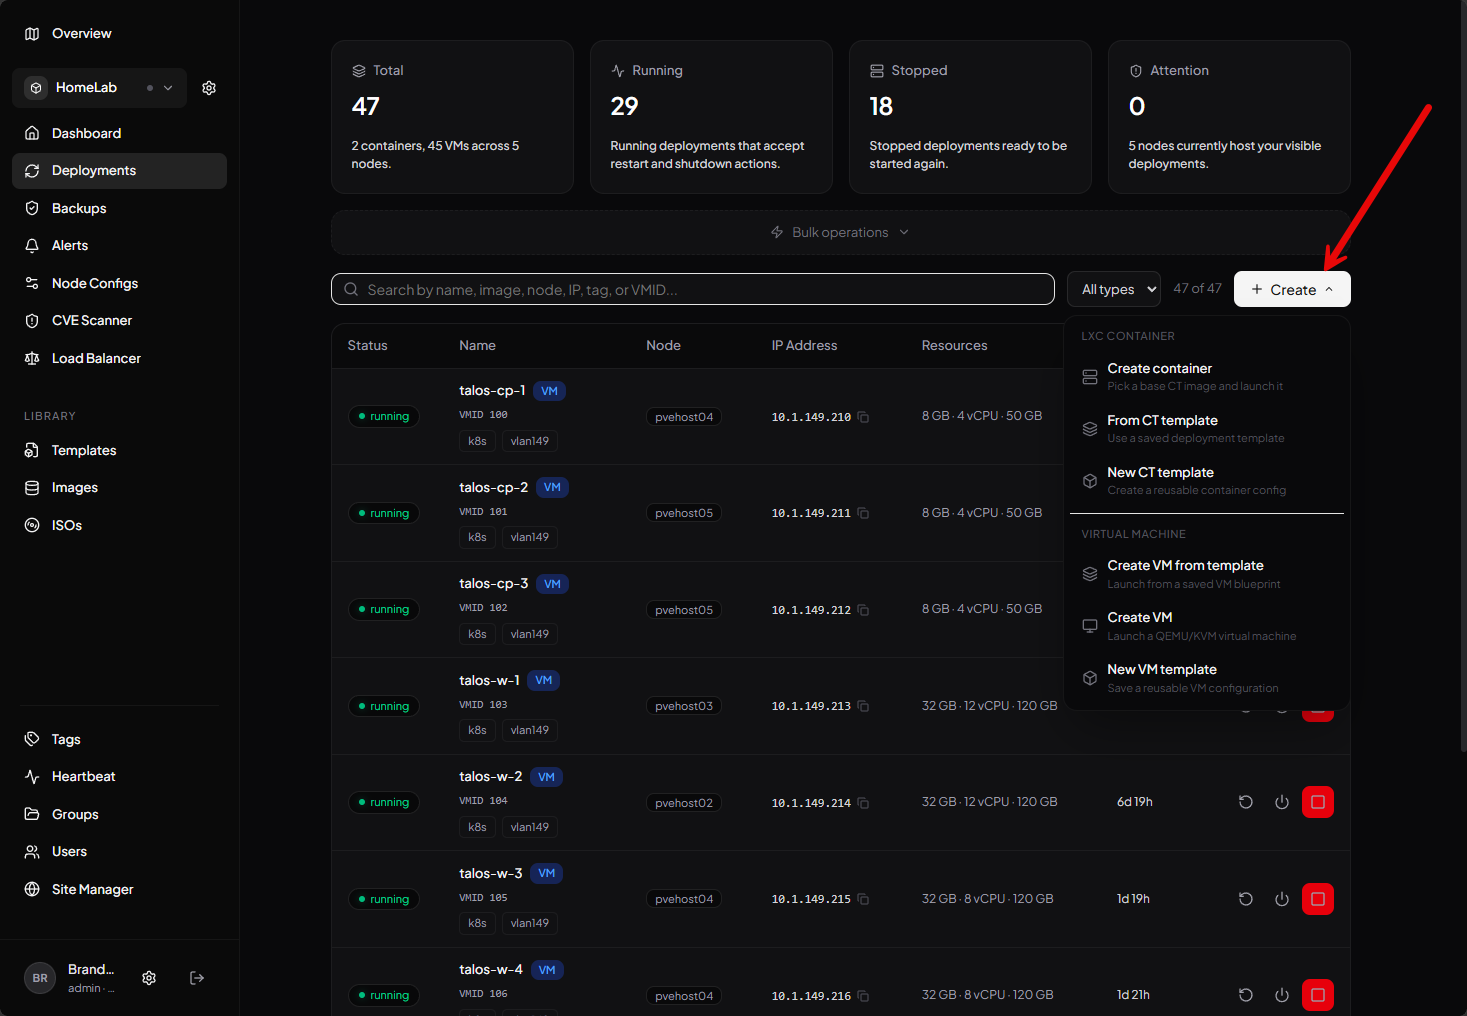
On the deployments page, you have the ability to create containers from templates or just a new container, and the same with virtual machines.
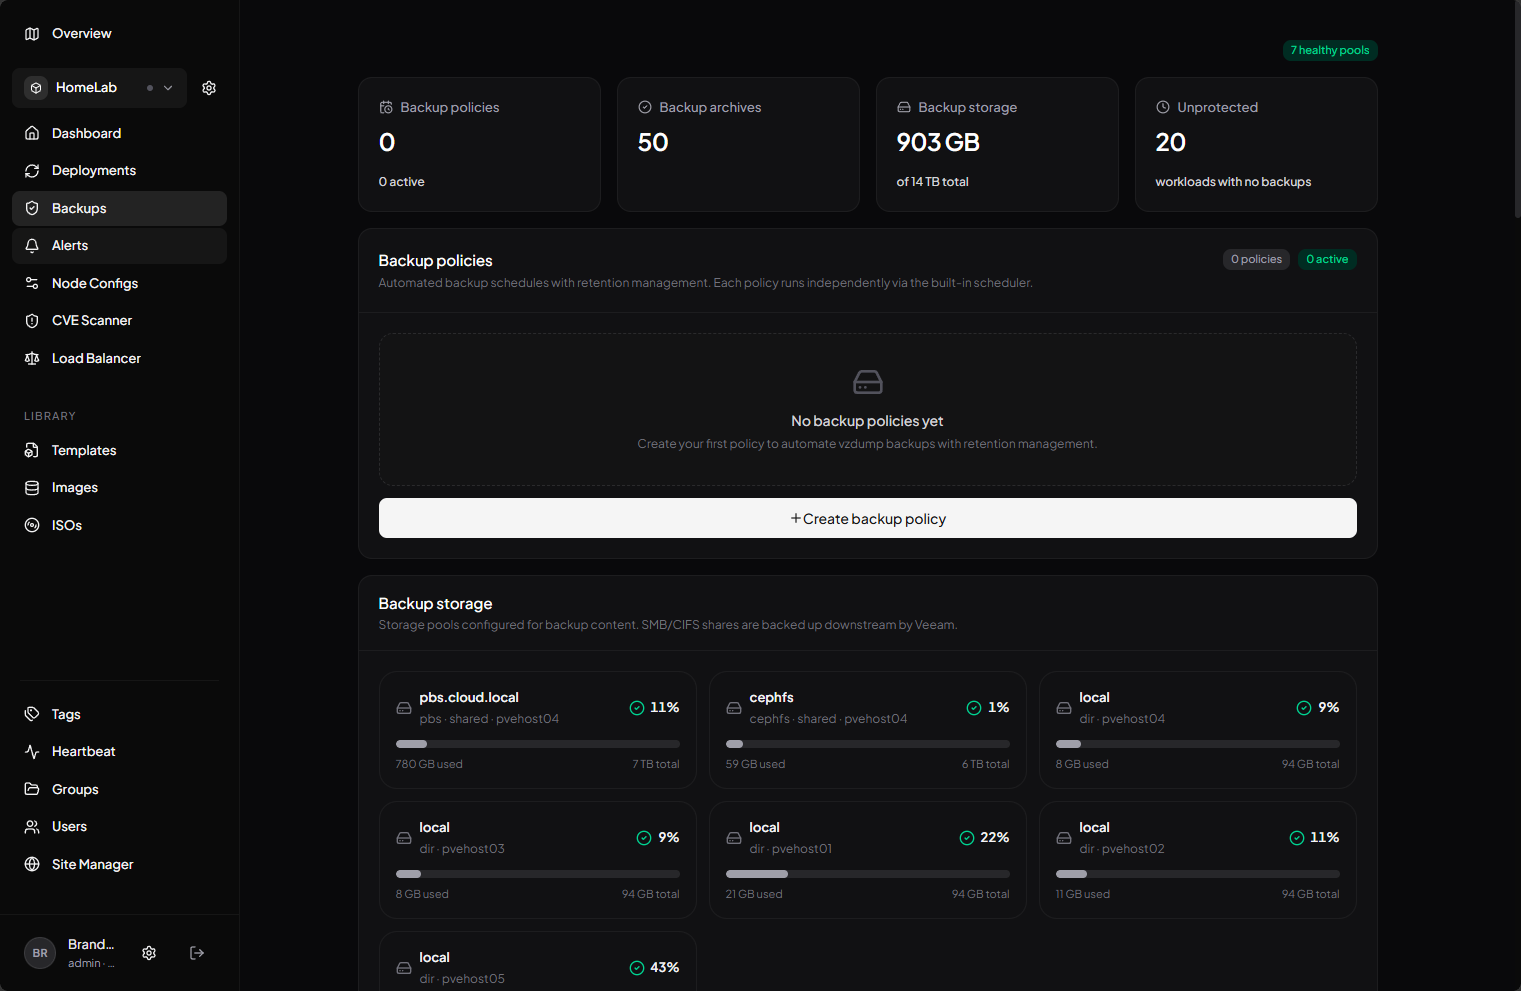
The backups dashboard displays a detailed look at the health of your backups for your Proxmox environment.
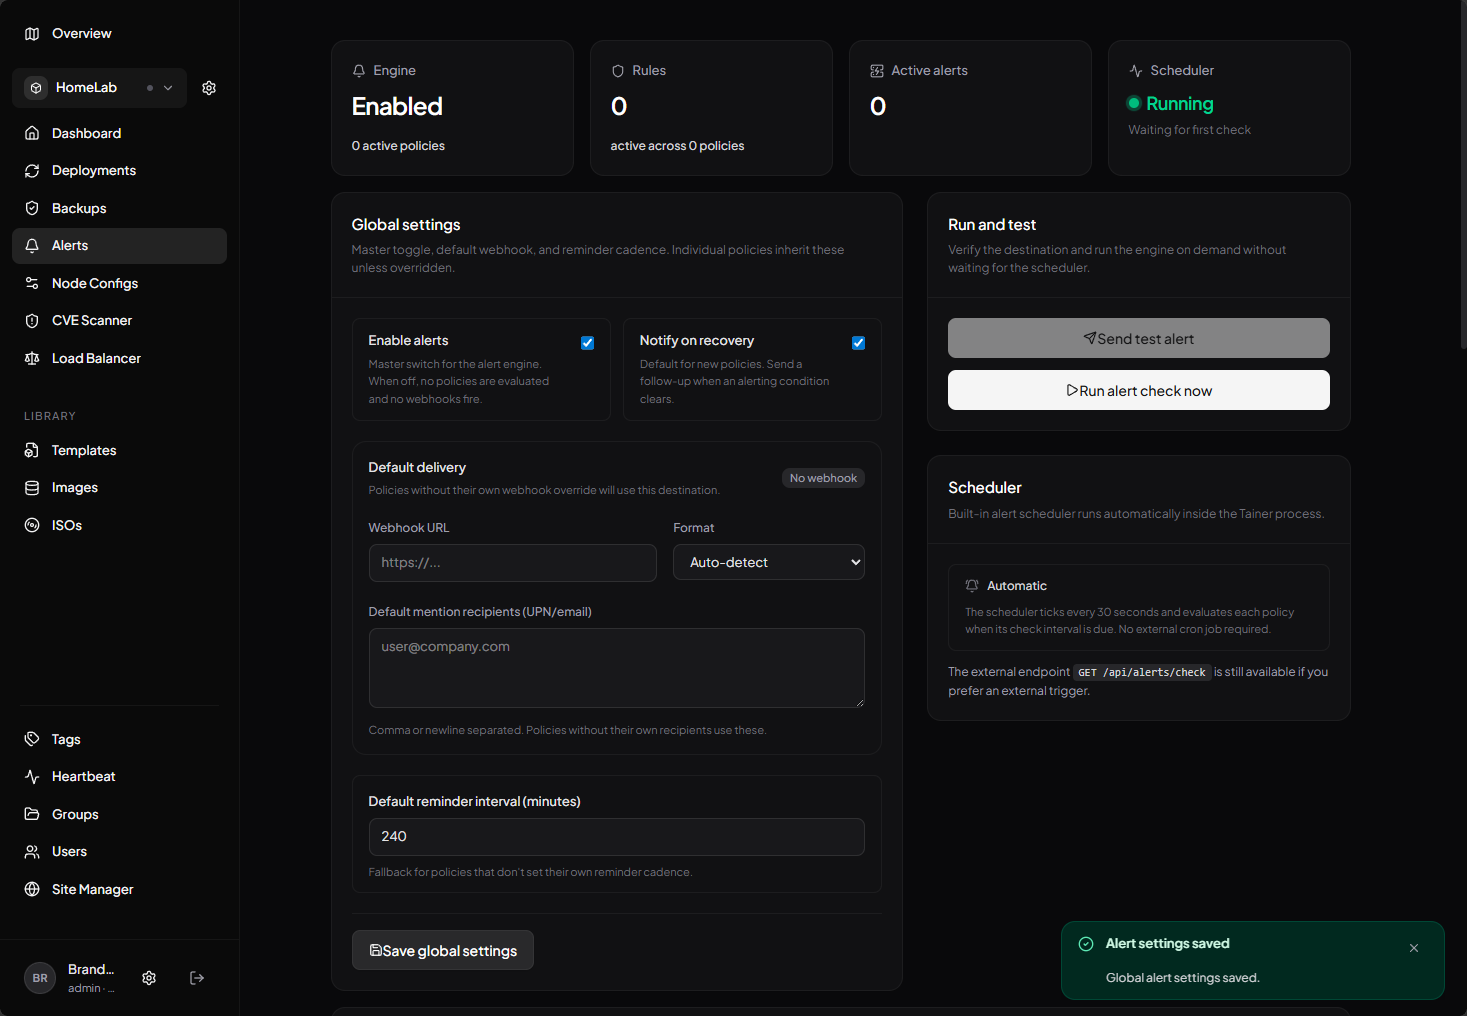
Tainer also lets you setup alerts for the environment. You can alert based on many different metrics and factors. Some of these include:
- High CPU
- High memory
- High disk
- Storage unhealthy
- Storage low space
- Backup stale
- Node high CPU
- Node high memory
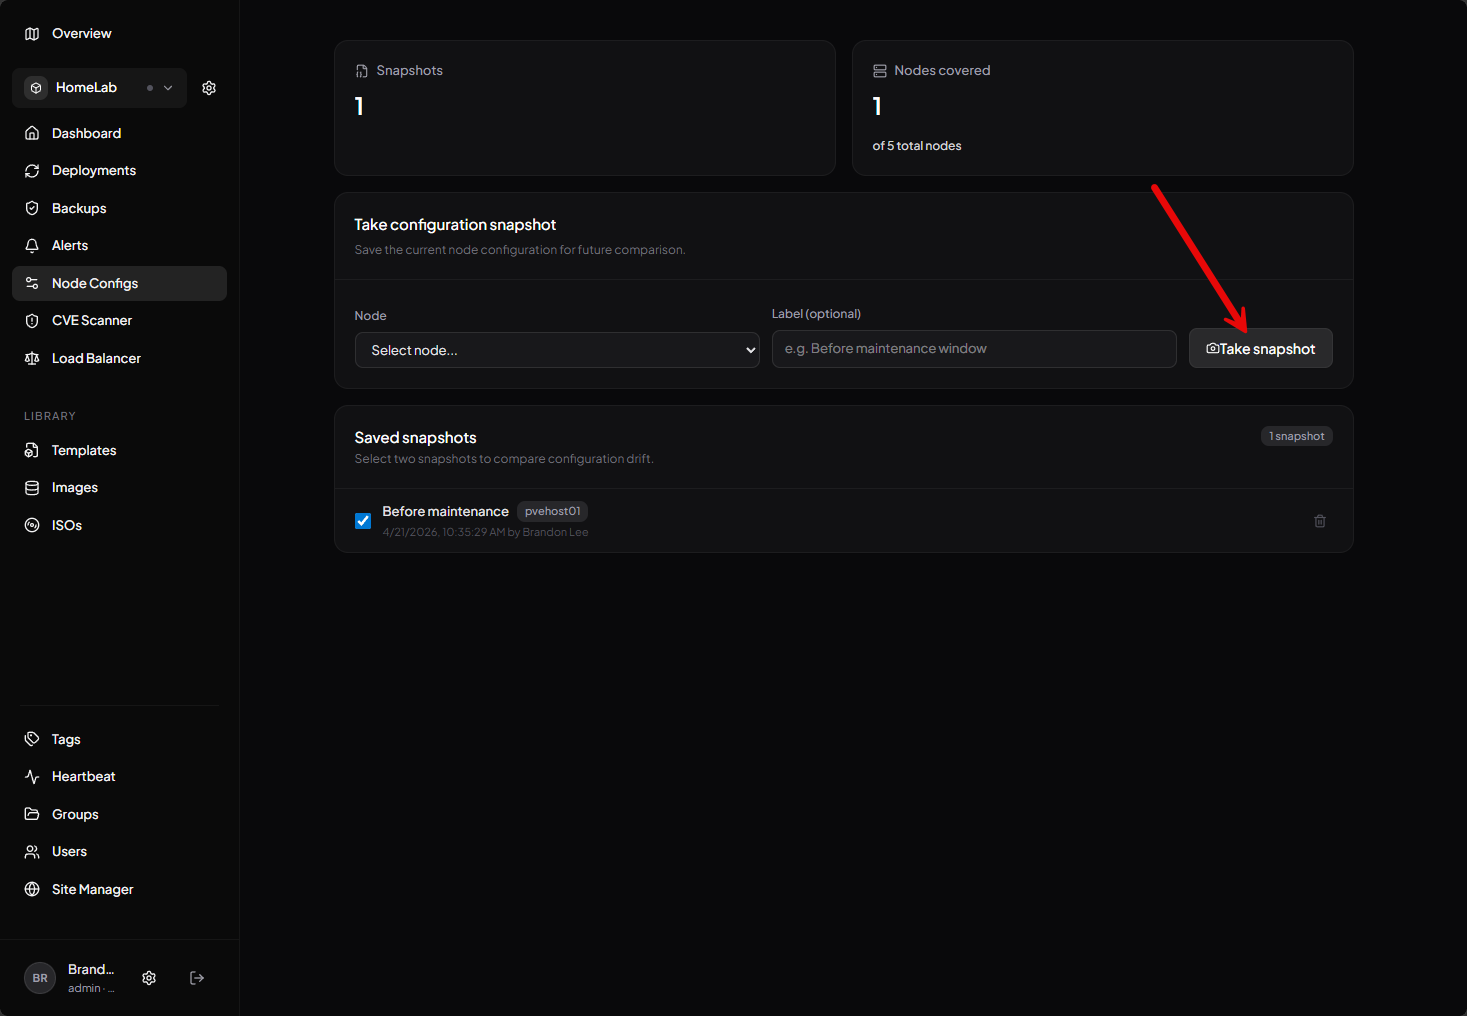
One of the interesting options that is at least in the interface is the Node Configs menu. Here you can take a “snapshot” of the Proxmox host. You select the host you want to “snapshot” and then click the Take snapshot button. It will save the snapshot of the host. I noticed though you can’t really do anything with the snapshot currently or see what it contains. In reaching out to the developer, he mentioned this feature has not been fully developed as of yet but is still being worked on. Very cool though at what this will be able to do for host-level configuration backups.
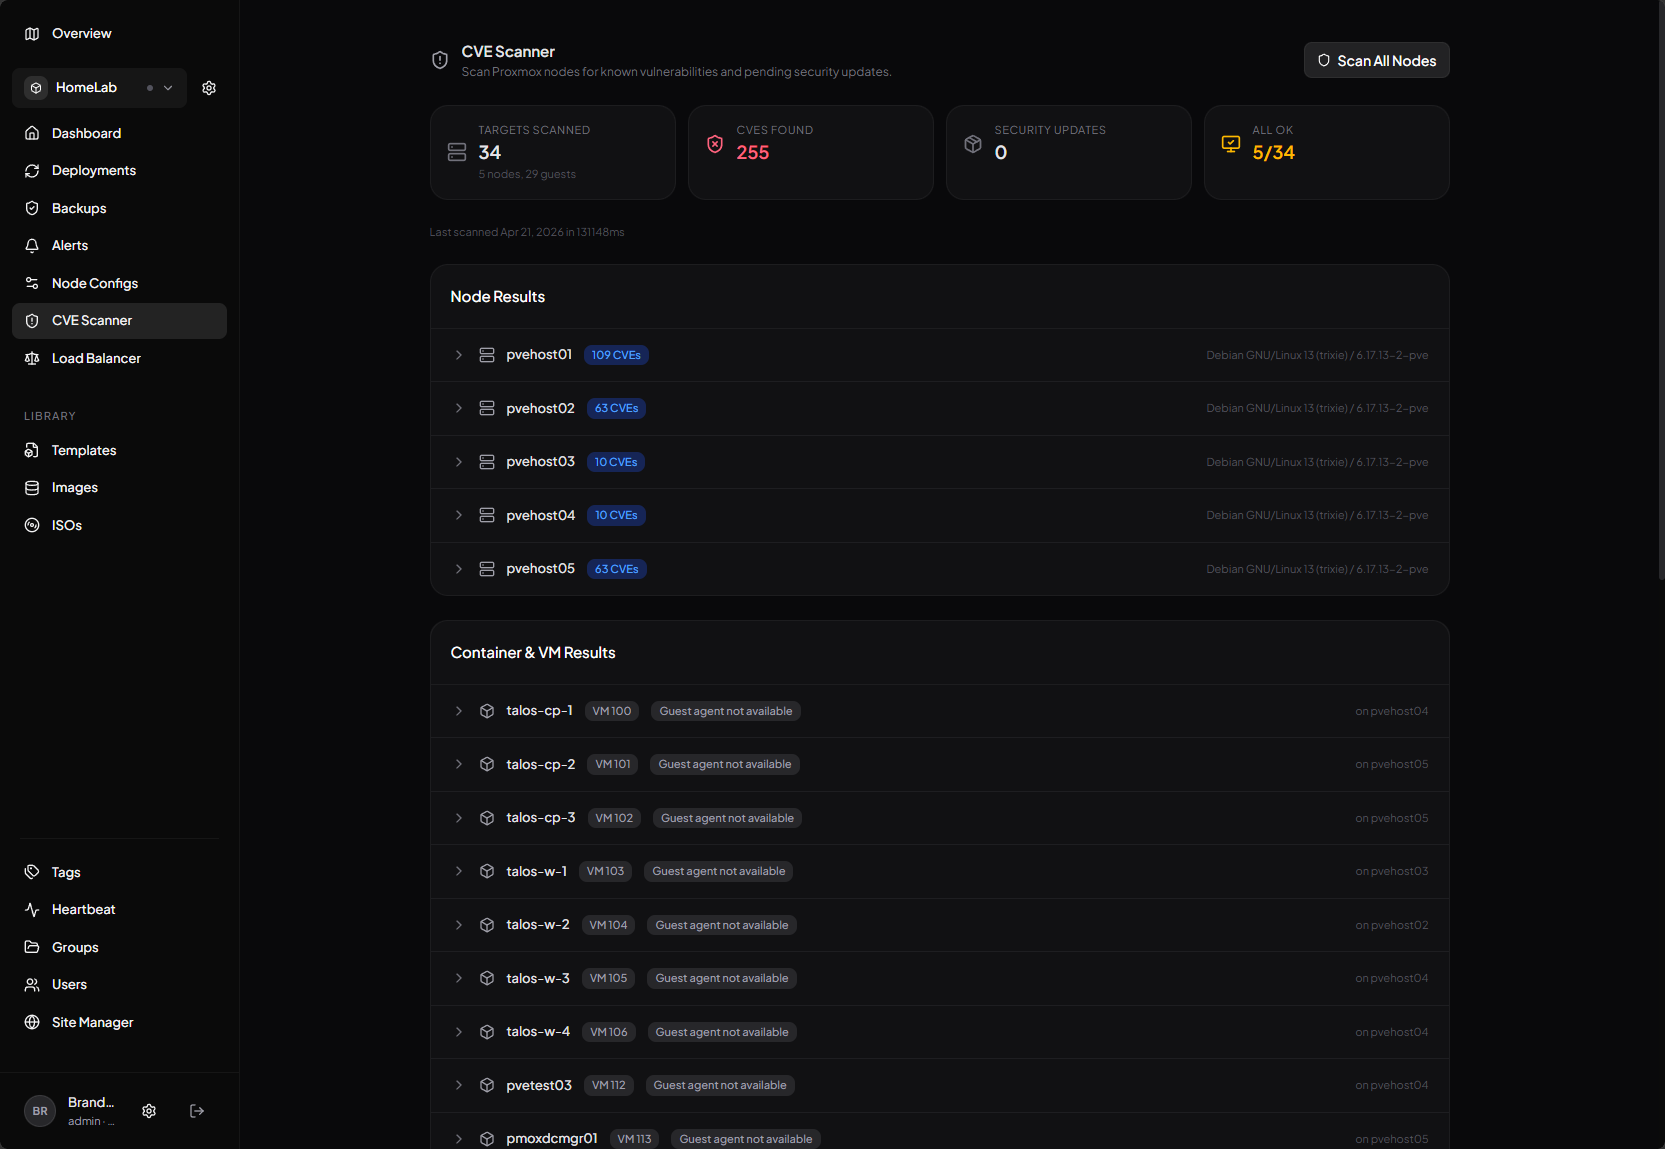
For your security posture, tainer also includes a CVE scanner that is useful to spot vulnerabilities in your hosts, vms, and containers. It also uses debscan for more thorough security scanning.
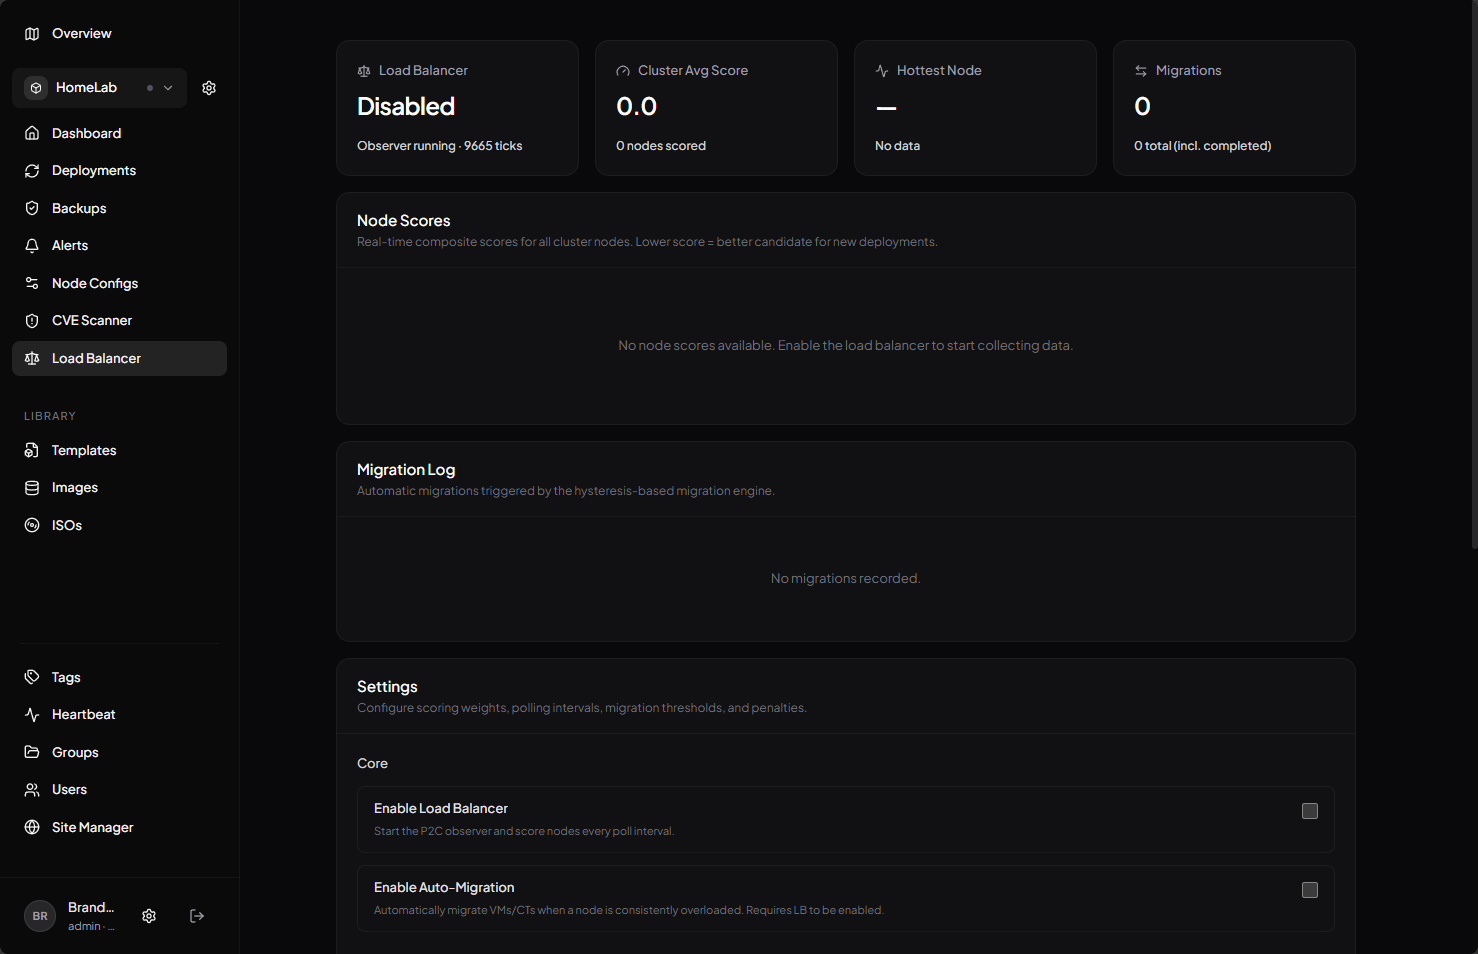
Tainer is also implementing their own load balancing here if you choose to turn on the module. I confirmed with the developer, this isn’t just another implementation of ProxLB, but is their own version of load balancing they are implementing in tainer.
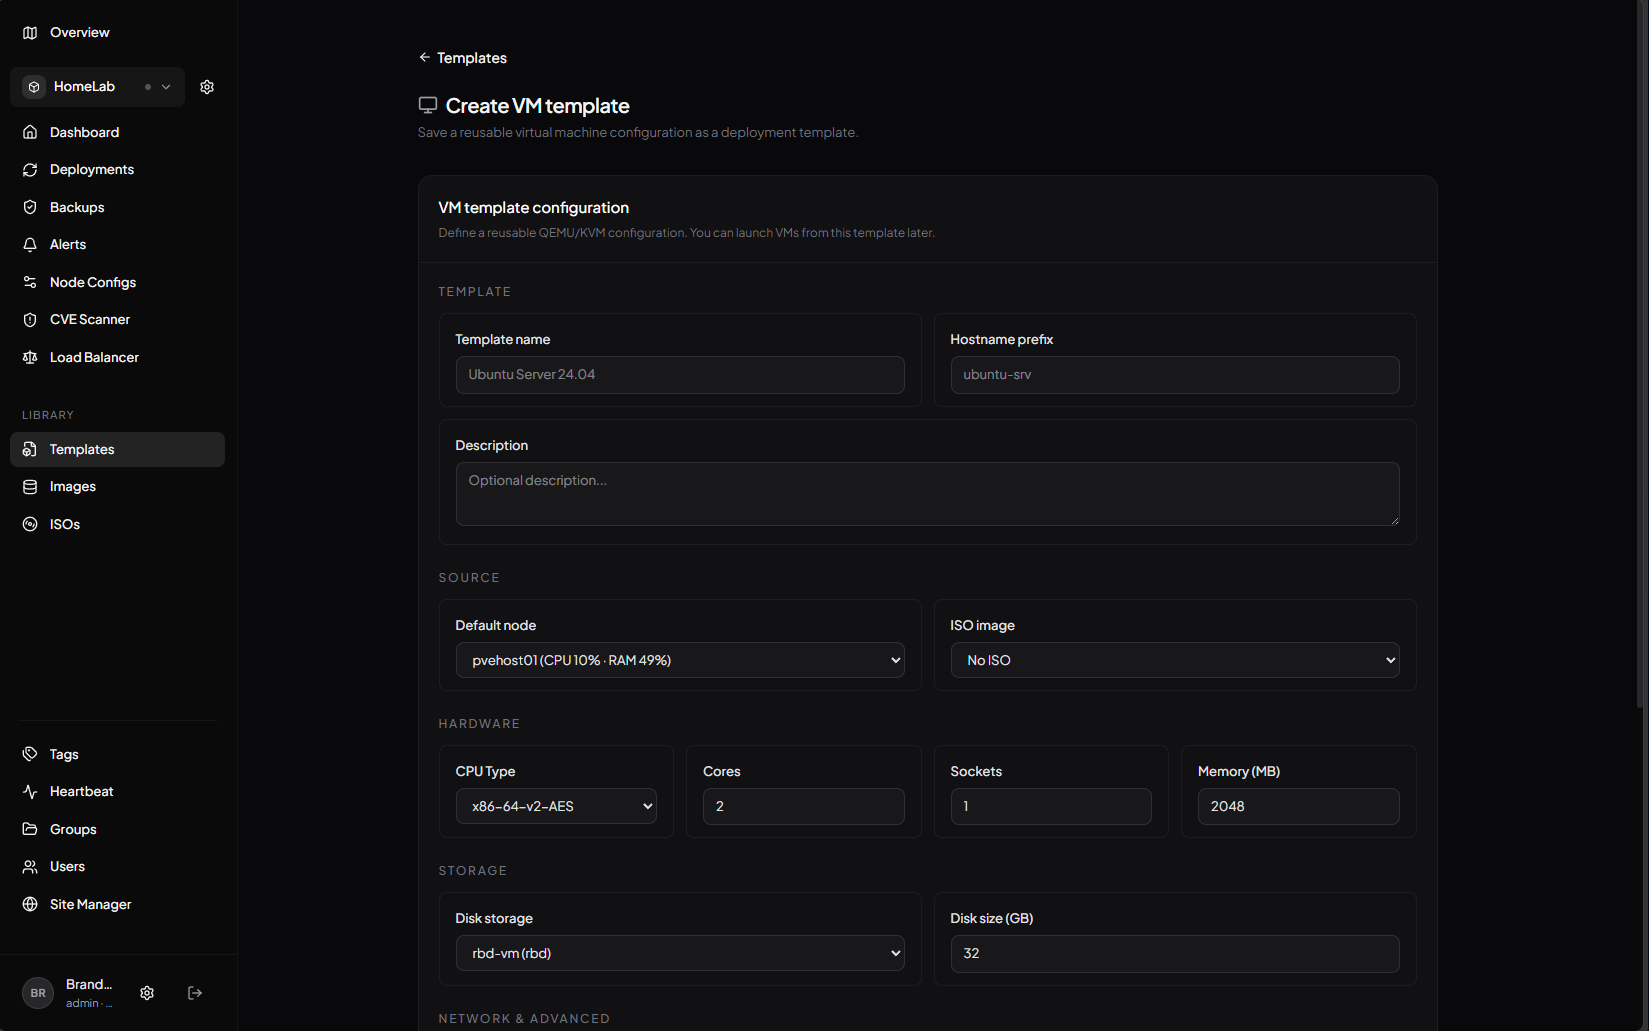
On the templates screen you can manage your deployments quickly and easily. This is more than what you might think. We think of a template as a image of another virtual machine or container for quick deployments. But this takes it a step further in that you can setup all the configuration needed for generating a new VM or container, including the ISO, CPU, memory, disk, network, and other configuration.
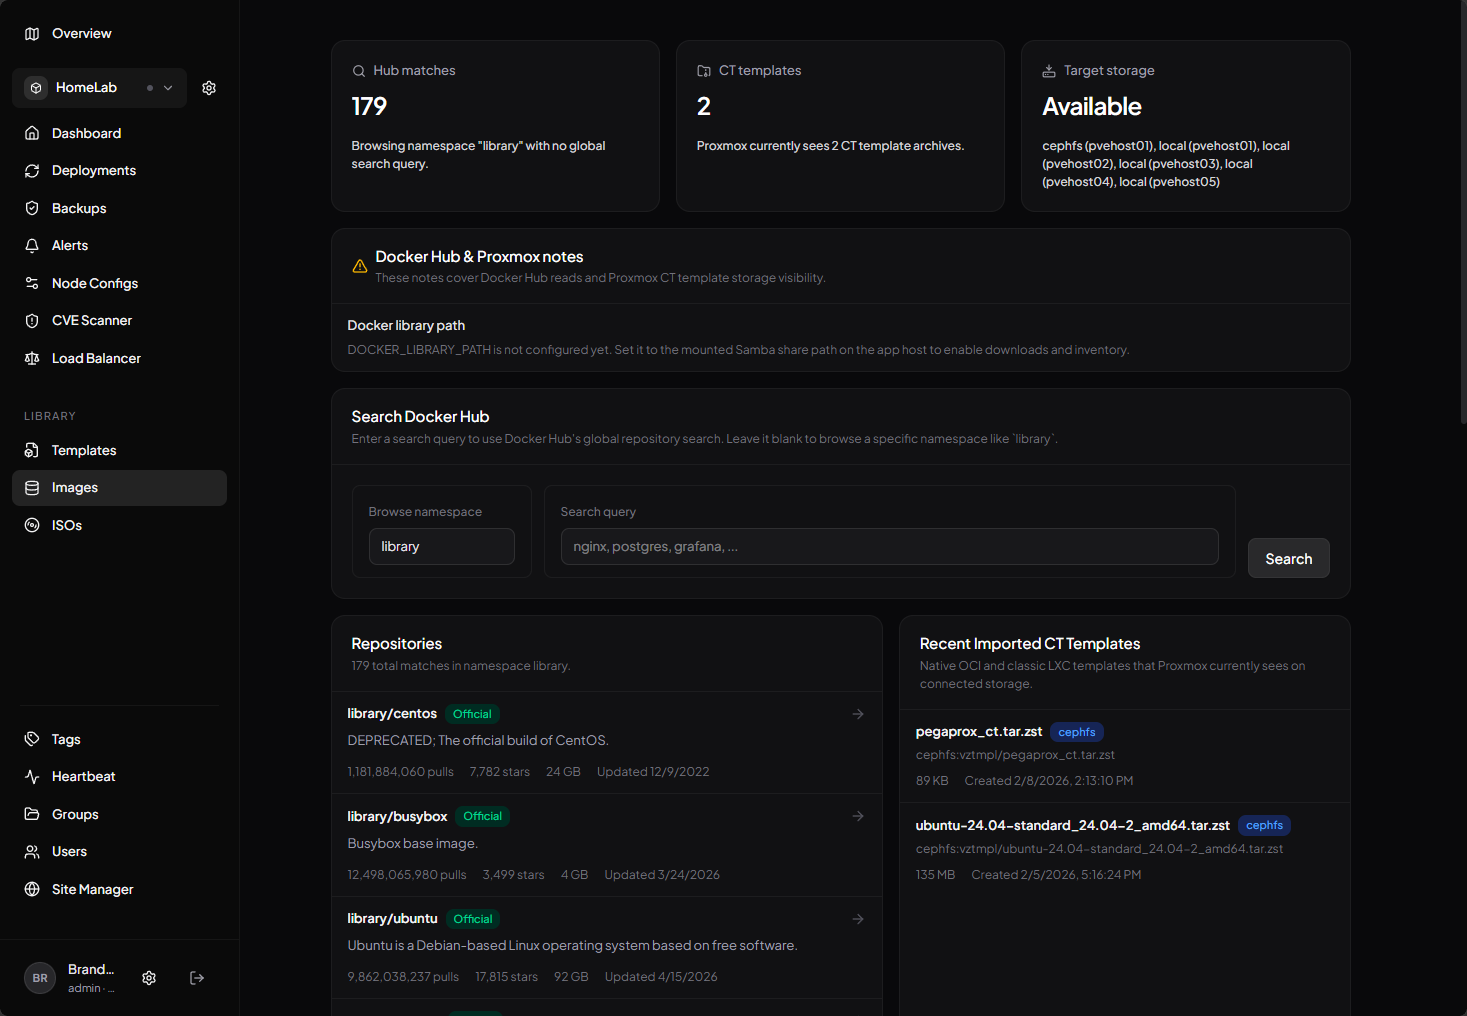
On the images screen you have a full image management solution where you can query and search Docker hub, etc.
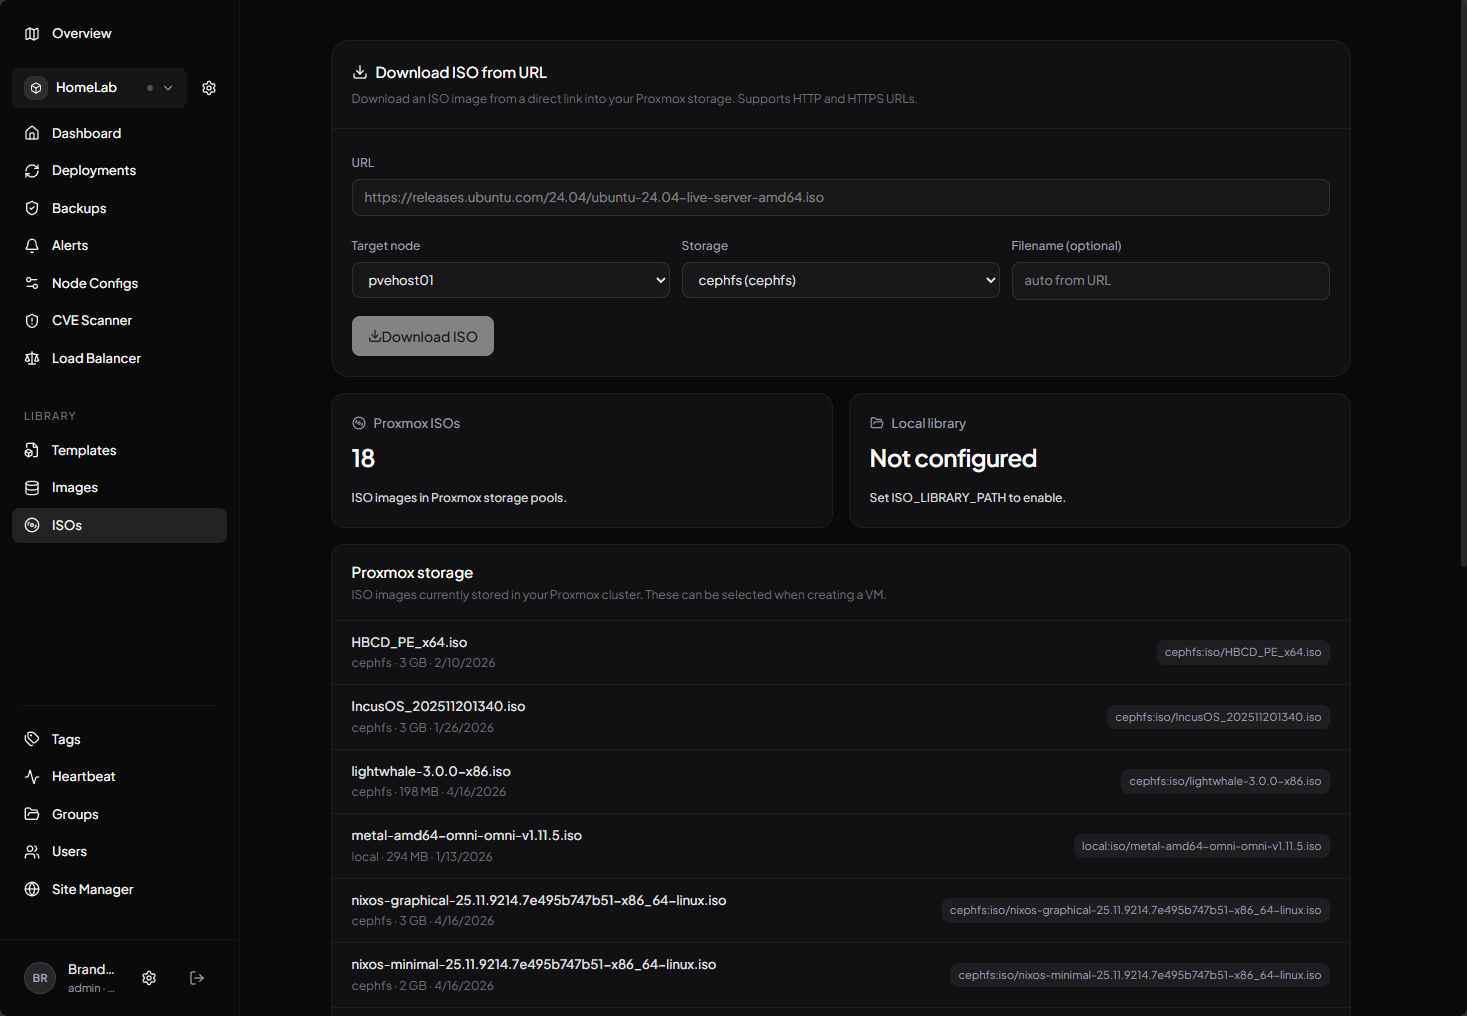
On the ISOs management screen you can manage your ISO images and download images from URLs.
These are just some of the highlights of the tainer Proxmox management solution that makes it a worthwhile deploy in the home lab environment.
Pros and cons
I think there is a lot to like about this project. But, here are some of the pros and cons to make note of as you consider whether this is a project you want to deploy in your home lab environment.
| Pros | Cons |
|---|---|
| Simple but modern UI | Limited advanced features |
| Quick to deploy with Docker | Not as mature as other tools and some of the functionality doesn’t fully work in the interface as of yet |
| Gives you easy visibility on VMs and containers | Smaller community support |
| Minimal configuration required | Not many if any integrations at this point |
| Good for small environments | Maybe not ideal for large scale setups |
| Some functionality not contained in other tools (node snapshots, etc) | Lacks deep monitoring capabilities |
Wrapping up
After spending quite a bit of time with Tainer, I can say that it is one of the more interesting new tools in the Proxmox ecosystem that I have seen. I don’t think it is a full replacement for the Proxmox UI, but it’s not really meant to be that either. But, this is absolutely a great interface that also looks really good on a mobile device if you are looking for a solution that presents your environment with a great mobile management experience. I think the Portainer comparison is not totally a perfect comparison, but it gives me that same “vibe” of abstraction and helps you to have a clean and smooth workflow for many things we want to do in the home lab. How about you? Is this one that you are going to try out in your home lab? Let me know in the comments.
More in this topic


Discuss this in the Community
Google is updating how articles are shown. Don’t miss our leading home lab and tech content, written by humans, by setting Virtualization Howto as a preferred source.
About The Author

How do I add a second node on the sames site?