
One thing that I think makes a really good hypervisor is if it comes out of the box with reasonable and sensible defaults that allow you to hit the ground running. The last thing you want to do is have to tweak for half a day to get a platform usable. This is one of the things I really like about Proxmox as it comes out of the gate with a very usable set of defaults. You can install it, log in, start creating your VMs and LXCs and start getting things spun up in production or in your home lab. You learn though, there are a few Proxmox default settings that you might change. Let’s look at the default I leave alone and ones I change to help shed light on these.
Proxmox default settings I leave on purpose
There might be the temptation to just start tweaking Proxmox default settings just because you can. However, I would caution against doing that. Proxmox is configurable to the nth degree but you could tweak and likely make things less efficient without seeing real benefits or even cause yourself issues. These are the defaults that I have learned to trust out of the box.
The Proxmox Web UI layout and permissions model
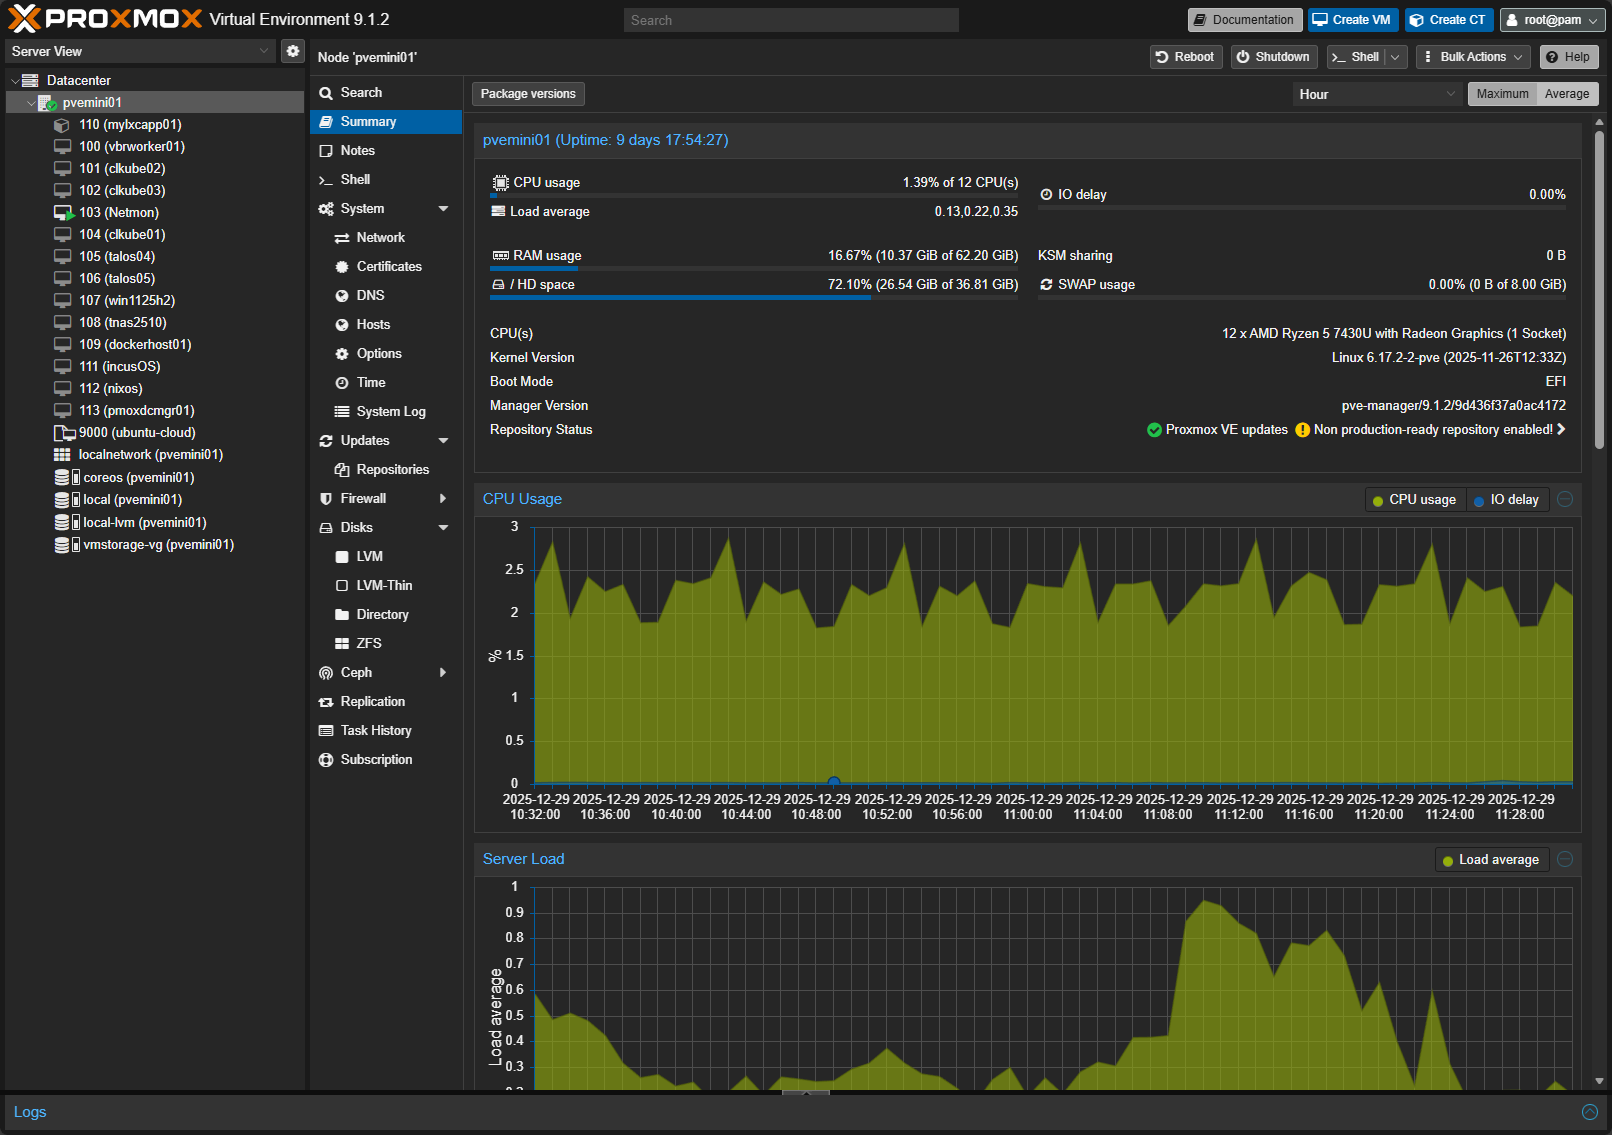
I keep the overall layout of the Proxmox UI as is out of the box. The Datacenter view, node views and VM organization make sense one you spend a little bit of time with it. Now that dark mode is on and is the default out of the box, there isn’t really anything I do differently with the look and feel either for the default settings.
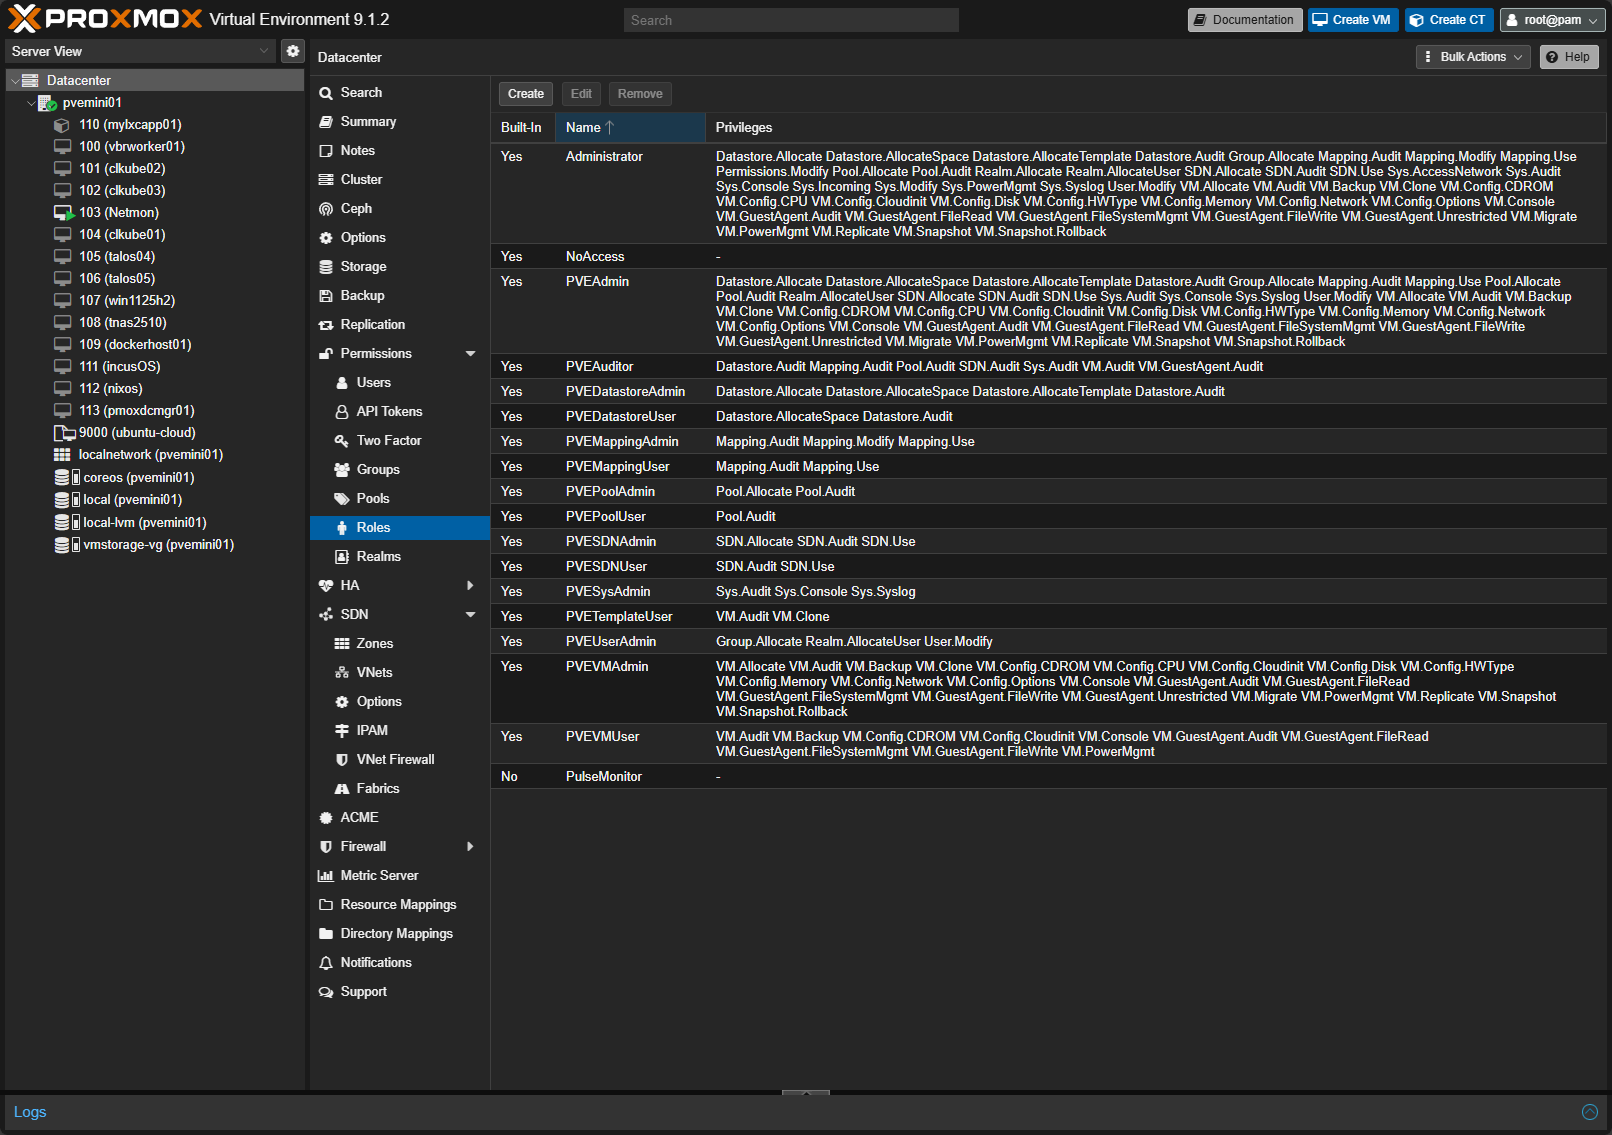
On to permissions. I have seen people try to over customize user roles early on, including myself when I started with Proxmox. It almost always creates confusion later. For a home lab, the default root@pam login with carefully scoped API tokens for automation is more than sufficient. I do not rush to add LDAP or external authentication unless there is a real reason.
In fact, most big players like VMware and others have changed their stance on integrating with Active Directory. From a security perspective, this almost always opens a can of worms that can allow attackers with compromised AD creds have the ability to have compromised access to your virtualized environment by default.
Proxmox defaults here are reasonably secure and well documented.
Default storage abstractions
I think out of the box, the way that Proxmox handles storage and abstracts it is one of the strengths of the platform. You have local LVM, directory storage, NFS, iSCSI, and Ceph. These are all handled well by the system in a consistent way.
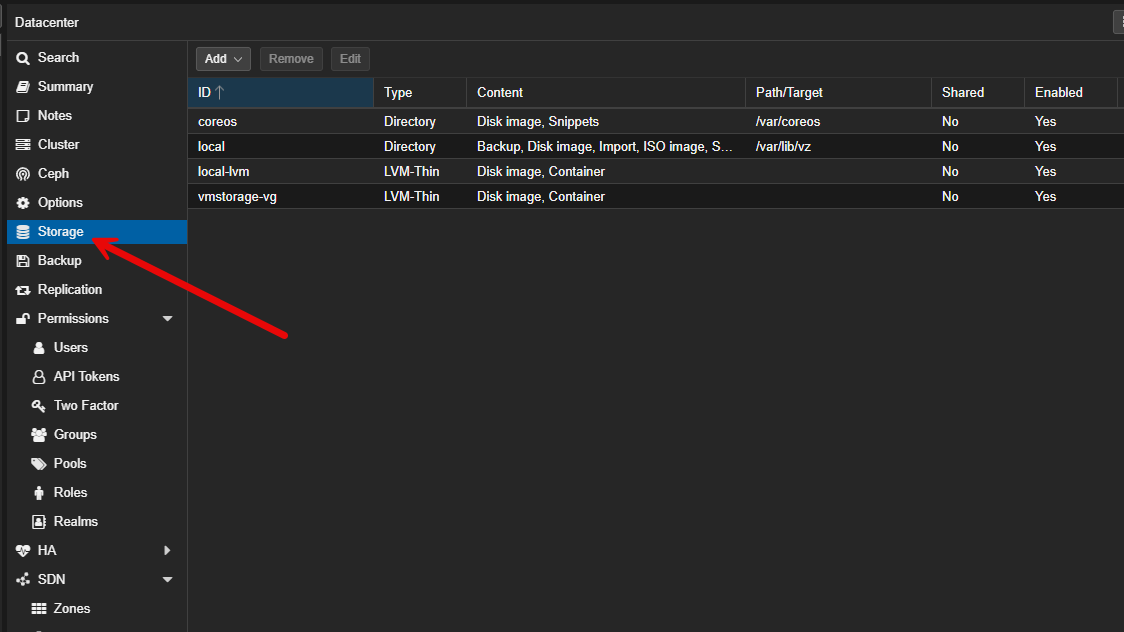
If I am using local storage, I leave the default directory storage configuration alone. If I am using NFS or SMB, I let Proxmox manage it instead of trying to mount things manually inside the operating system. The UI has great workflows that allow you to configure storage in a way that works well and makes backups, migrations, and permissions setup less painful.
Check out my post on adding an NVMe drive to your Proxmox VE Server host: Proxmox add disk storage space – NVMe drive.
Default VM hardware models
Another area is the default VM hardware models. For most virtual machines, I leave the default hardware models as is. I use the default VirtIO for disk and network, i440fx machine type, and default BIOS settings. These keep with having the best compatibility across the board. If you want to tweak here, you can change to q35 machine type which is a more modern PCI layout and aligns better with current guest operating systems.
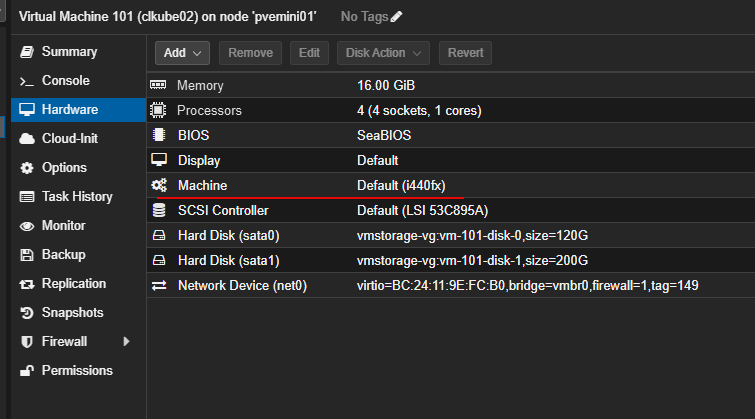
The VirtIO drivers perform really well and the key here is they are widely supported. These also integrate with the default Proxmox tooling. The only t8ime when you might deviate or change these is when you are running something that is super legacy or extremely specialized.
Default backup scheduling
When setting up Proxmox backups, even if I adjust the timing of the backups, I leave the backup framework itself untouched. In my opinion, the integration with Proxmox Backup Server are really good out of the box and don’t need many changes to start protecting your data adequately.
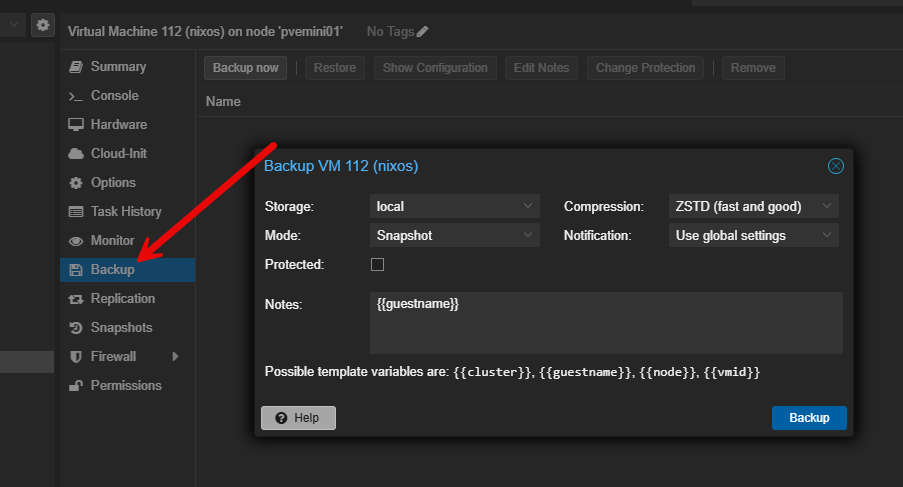
Also, I don’t script backups manually or rely on cron jobs outside of Proxmox. The defaults with backups in Proxmox give you visibility and really good error reporting. I like the consistency and reliability of the built in backup functionality and this is hard to replicate in a manual way (and why would you want to?).
Defaults I always change immediately
Now, let me share the fun part. These are the defaults that I change on most every Proxmox install that I do. Keep in mind these changes are not radical earth-shattering changes, but they make a difference over time in using Proxmox as a virtualization platform.
Subscription repository configuration
This one is a no-brainer, especially for home labs and is one that I have highlighted in many blog posts. For home lab environments, I disable the enterprise repos and enable the no subscription repos for updates. This helps to avoid errors when the Proxmox VE Server by default is pointed to enterprise repos and it expects a subscription. With the default update repository configuration, these will start filling up your logs when update checks fail with 401 errors.
However, Proxmox has a solution for this if you just want to use the non-vetted updates, that aren’t as thoroughly tested for production. You just point to the non-subscription repositories for updates and this allows you to check and pull down updates, totally free and without errors.
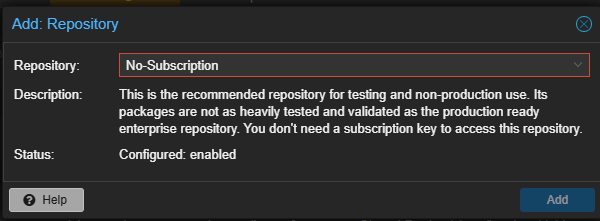
Check out my walkthrough on this topic here: Proxmox Update No Subscription Repository Configuration.
Storage layout when installing Proxmox
When you are installing Promxox, it is easy to accept the defaults, and this works. However, if I am using ZFS, I do step back and think carefully about my disk layout and other things like compression. Also, if the node will participate in replication or backups. If I am using LVM, I like to take a look at the specific hardware being installed on and see if the swap sizing and root volume space allocated make sense for the hardware.
Keep in mind, you no longer have to match swap to RAM size one-to-one as this advice is outdated for modern virtualization hosts. However, below is a good rule of thumb:
- 32 GB RAM host: 8 to 16 GB swap
- 64 GB RAM host: 16 GB swap
- 128 GB RAM host: 16 to 32 GB swap
- 256 GB RAM host: 32 GB swap
See my full tweaks guide for Proxmox swap here: Proxmox Swap Tweaks Guide! Dedicated drive, Swappiness, Page Cluster.
Also, interesting with today’s high RAM prices is cheating system RAM by using Intel Optane. See my video on that here:
Also, remember on the root partition, it doesn’t just hold the OS, it also include:
- Package updates and cached files
- Logs
- Kernel images
- Backup job metadata
- ISO images (if stored locally)
- Crash dumps
- Container images if you run LXC heavily
A good rule of thumb:
- Active home lab node: 96 to 128 GB
- Cluster node with ISOs, backups, and logs: 128 GB
- Minimal Proxmox node: 64 GB
Anything smaller than 64 GB almost always leads to cleanup work later. Taking an extra 5 minutes here can pay dividends not struggling with space or other issues with your system install for the life of the node.
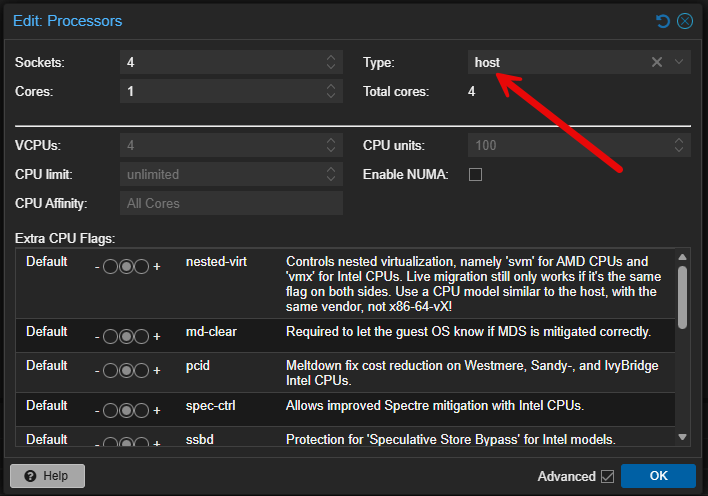
VM CPU Type
By default, when you create a VM or LXC in Proxmox, it uses a generic CPU type. This is for good reasons as a default since it helps to maximize CPU compatibility and migration compatibility. However, if you have the same generation of CPU across nodes or a single node lab, I almost always change this to host.
This allows you to expose more CPU features to the guest and take advantage of things like nested virtualization. For home labbing this is a great win since it allows you to try out other things that require virtualization capabilities exposed to the CPU.
Memory ballooning configuration
Another default that you might consider changing is memory ballooning. This is enabled by default. This one is one that you might think about with today’s memory price hikes and many running low-memory systems. But, if you want the best and most predictable performance, you can disable memory ballooning since it allows guest VMs and LXCs to keep the memory they have been allocated.
Especially if you have memory intensive applications like databases or monitoring stacks or anything else that is performance sensitive, these usually behave better with fixed memory. For low-performance or lightweight utility VMs, leaving ballooning configured for these is perfectly fine.
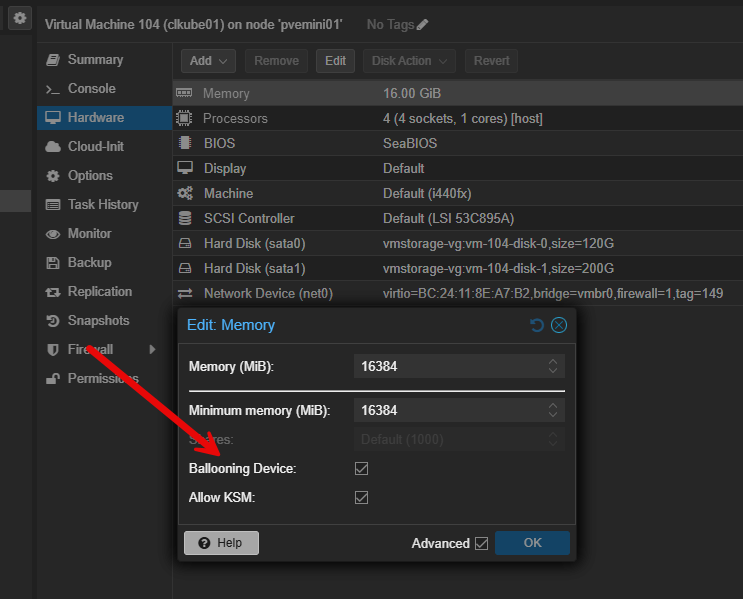
Keep in mind this may be one that you no longer accept the default on, but rather, you consciously think about your workloads when determining how to configure your memory behavior.
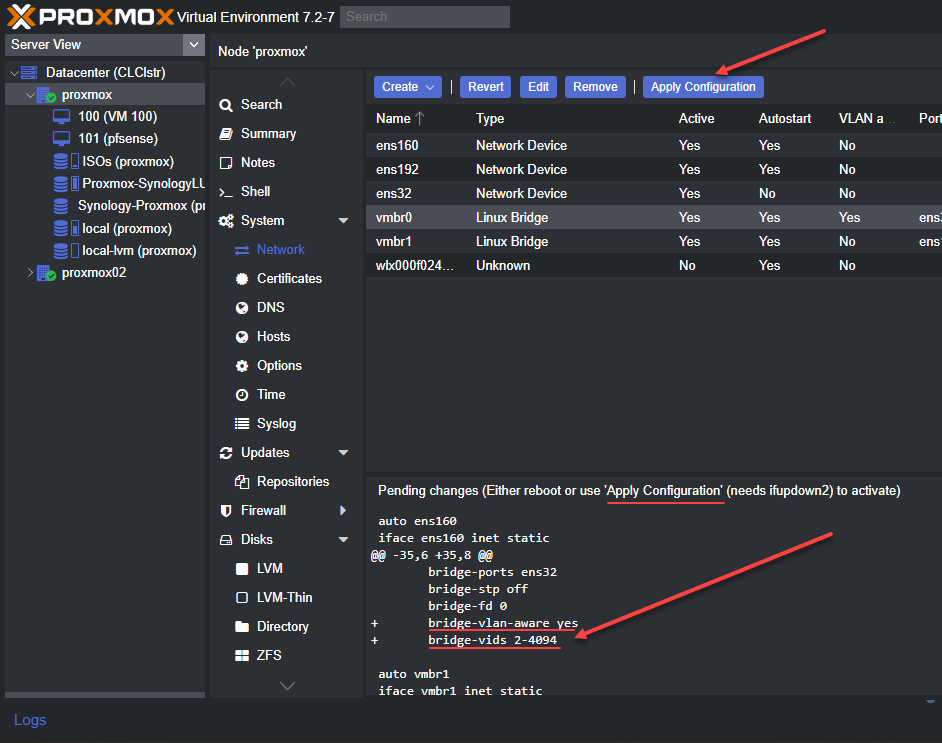
Network bridge naming and segmentation
When you install and stand up Proxmox in your home lab or production, it creates the vmbr0 bridge by default. This is totally fine, kind of like vSwitch0 in VMware. However, I almost always rename or add additional bridges once the lab grows.
When you explicitly name bridges based on their purpose or VLAN, it makes troubleshooting easier. For example, you can create bridges like management, storage, and different lab networks. This is what we did and have done with VMware environments as well over the years. I think this methodology works well with Proxmox also.
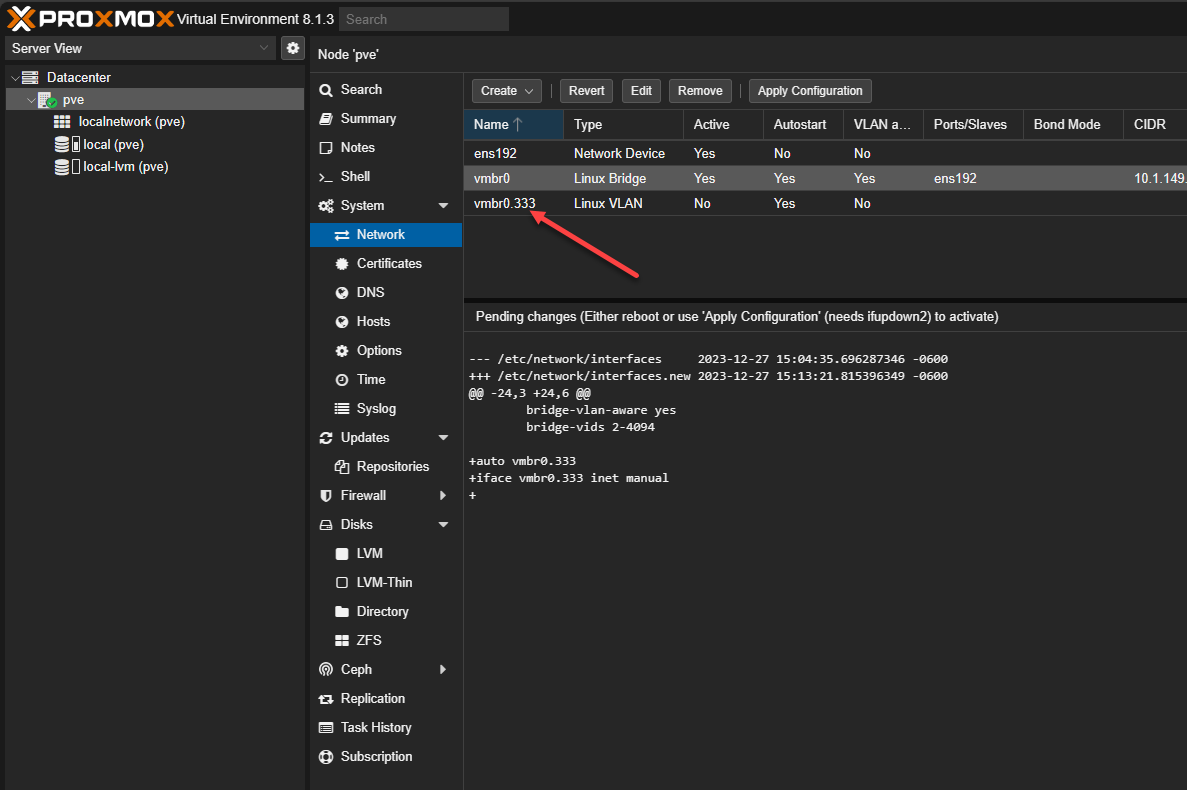
You can leave everything on a single default bridge and just tag machines into different VLANs, but from a management and visibility standpoint, I think it creates a messy management experience later as your lab grows.
Check out my Proxmox VLAN configuration guide here: Proxmox VLAN Configuration: Management IP, Bridge, and Virtual Machines.
Snapshot and backup retention
I mentioned earlier that I don’t change the backup framework. I use the built-in backup workflows already built into Proxmox. However, I do tune the retention policies based on the importance of the workload and available storage.
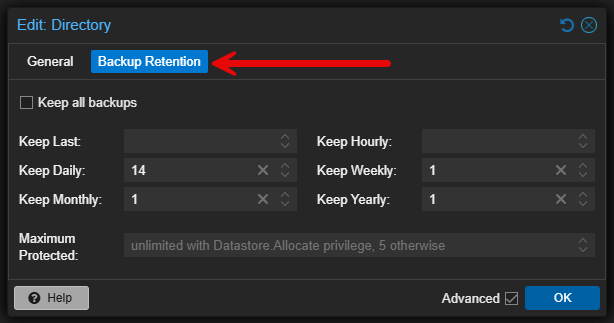
Virtual machines that are critical in my environment get longer retention. Test virtual machines get shorter retention time or even none at all if they are temporary or ephemeral. Making this explicit keeps backups from consuming too much space over time, and it makes sure that what is important is protected adequately.
Firewall defaults
Included in the Proxmox default settings and capabilities is a really powerful firewall solution built into the hypervisor. It is disabled by default at the datacenter level. I almost always enable it, even if I do not use complex rules immediately.
I have had this question before: if I have a firewall like pfSense or OPNsense already protecting the network, why would I need the Proxmox firewall? Well, this is a great question. Using the Proxmox firewall allows you to protect your hypervisor or VMs from resources on the same VLAN/subnet. So, you can effectively microsegment your Proxmox host from the rest of the network and east/west traffic. This is something that your main firewall can’t do with traffic on the same VLAN.
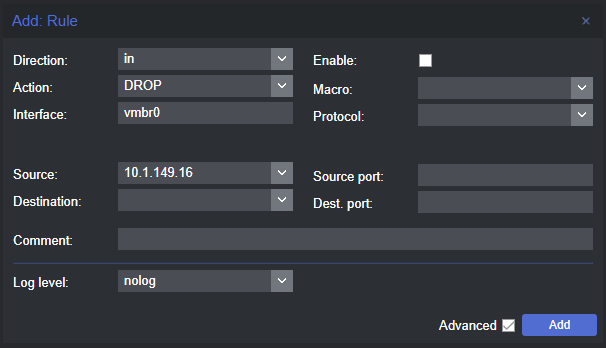
Even simple rules like blocking unnecessary inbound traffic or isolating lab VLANs can add real value to your lab and learning.
Here is my full Proxmox firewall configuration and setup guide: Proxmox firewall setup and configuration.
Logging and monitoring
Proxmox logging defaults are adequate, but I usually integrate external monitoring early. I like to setup a syslog target for my Proxmox logs and start monitoring with Prometheus and Grafana, or adding alerting. You can also add your Proxmox VE Server to something like Pulse early on for great monitoring visibility.
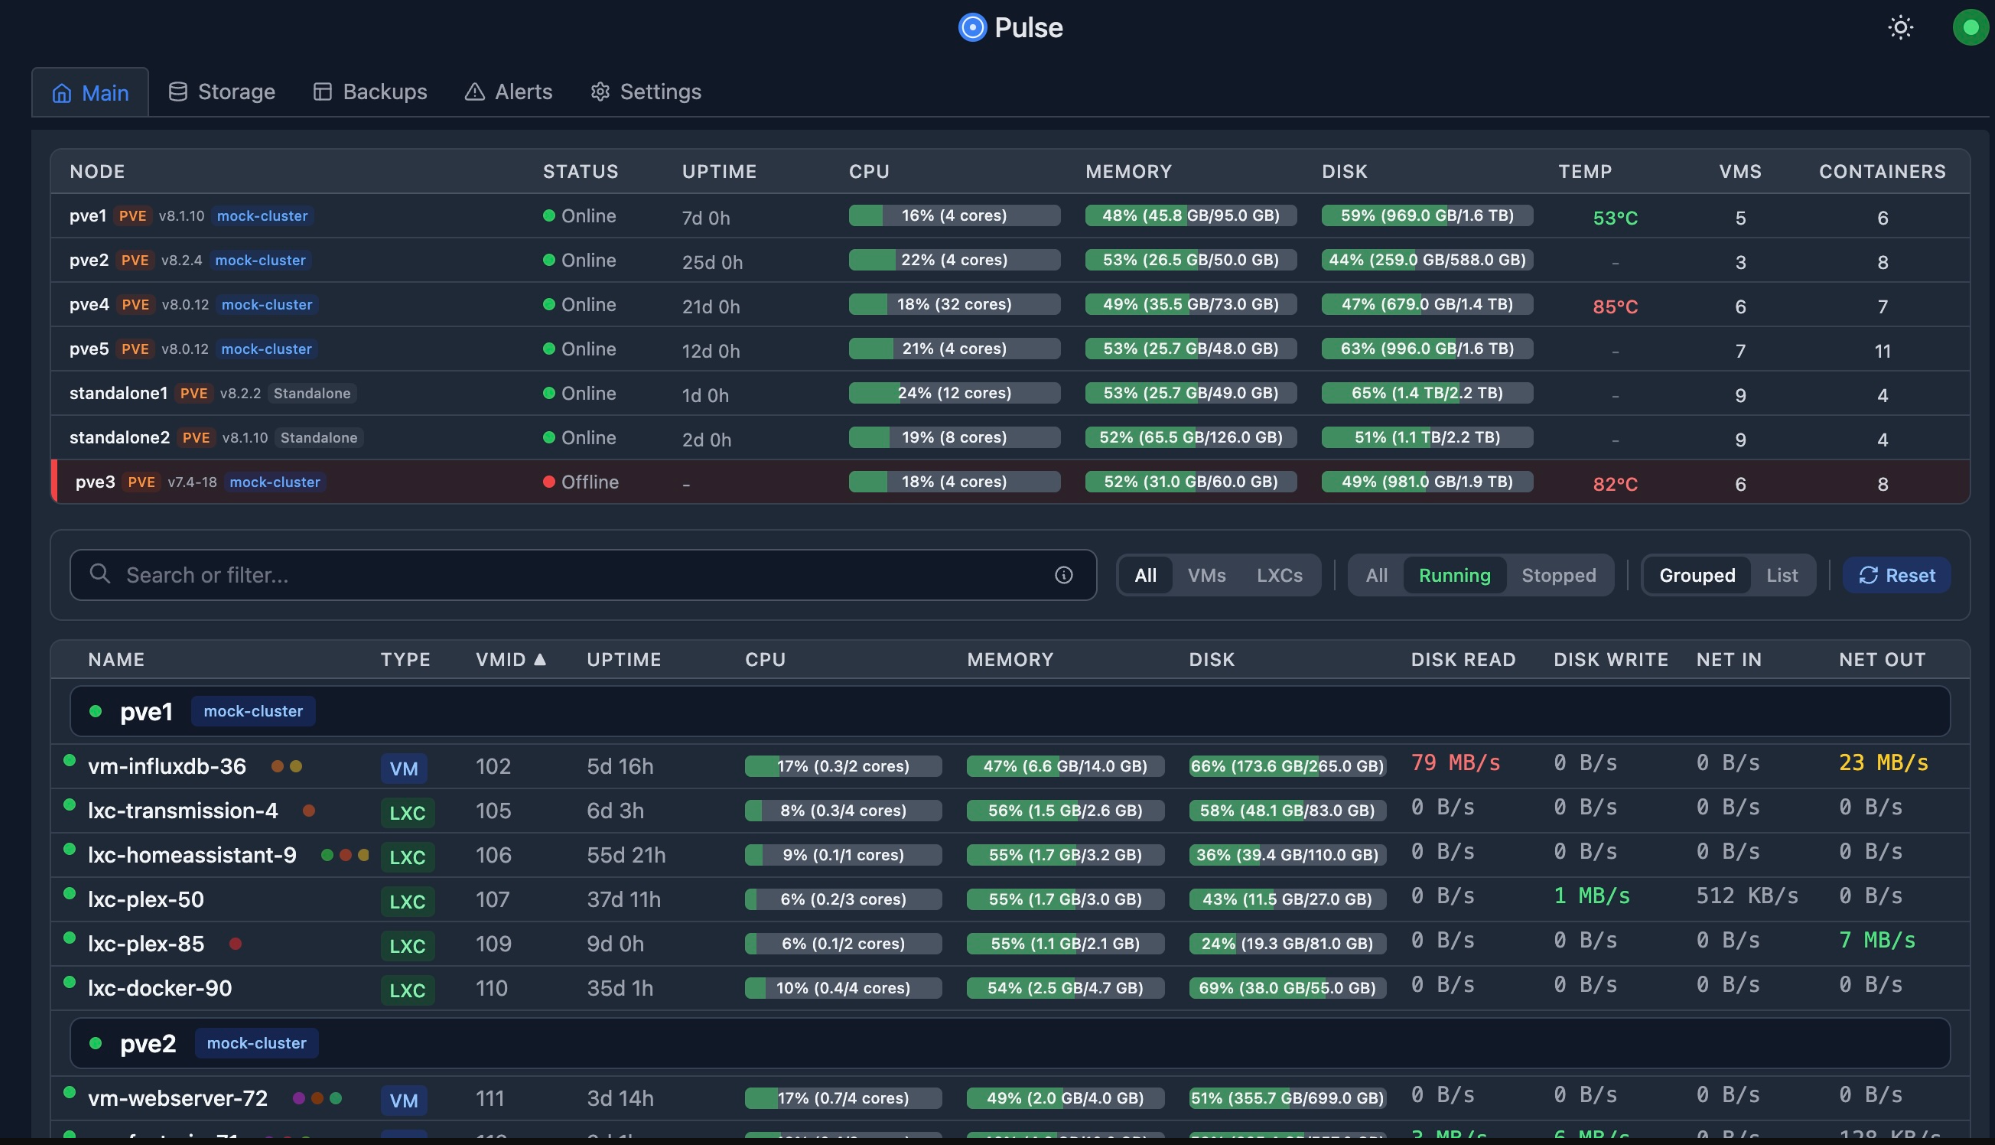
Check out my guide on setting up Pulse for Proxmox monitoring: This Free Tool Gives Proxmox the Monitoring Dashboard It Always Needed.
Proxmox default settings I change sometimes
Not everything is a hard rule. I take the following defaults and evaluate these on a case by case basis depending on the environment and use case.
ZFS tuning
If I am using ZFS, sometimes adjusting the ARC size, compression settings or record size might be needed. However, this again is on a case by case basis and you need to understand the workload. The defaults are actually good for mixed use workloads. If you overtune ZFS or tune it for the wrong type of workload, it can lead to problems.
Here are some recommendations:
| ZFS Setting | Default | My Recommendation | When I Change It | Why It Matters |
|---|---|---|---|---|
| Compression | lz4 | Keep enabled | Rarely change | Near-zero CPU cost and can improve I/O performance |
| ARC size | Dynamic | Review on small hosts | ≤ 32 GB RAM systems | Prevents ARC from starving VMs of memory |
| Record size | 128K | Leave default | Databases only | Wrong values can hurt performance |
| Sync | standard | Leave default | Only with eyes wide open with risk in mind | Disabling sync risks data loss |
| Atime | on | Disable | VM and container datasets | Reduces unnecessary write I/O |
| Ashift | Set at creation | Be deliberate | Pool creation only | Cannot be changed later |
| Autotrim | off (varies) | Enable on SSDs | SSD-backed pools | Helps to support SSD performance |
HA and cluster settings
High availability defaults are sensible, but I do not enable HA on everything just because I have multiple nodes.
Some workloads do not benefit from HA and add unnecessary complexity. I selectively enable HA where it provides real value and leave defaults elsewhere.
PCI passthrough and IOMMU settings
These are special-purpose settings that I only enable when needed. GPU passthrough, NIC passthrough, disk passthrough are use cases for the settings but these require you to think carefully about implementing these.
You don’t want to turn these settings on everywhere on every host as it can cause issues. PCI passthrough is a tool that you enable when needed but leave disabled most of the time when you don’t need it.
Here is my detailed PCI passthrough for GPU passthrough into VM and LXC containers:
- Proxmox GPU PassThrough: Step-by-step Guide
- How to Enable GPU Passthrough to LXC Containers in Proxmox
Wrapping up
Hopefully, this discussion of Proxmox default settings that it comes with out of the box and whether or not to leave these set as is or change them, will help ones who may be thinking about their configuration. Like any good hypervisor should be, Proxmox doesn’t really require you to change things out of the box for most workloads, especially in the home lab. However, knowing which defaults to leave in place and perhaps the ones you might choose to tweak is a great way to take performance and useability even higher. If you are rebuilding your lab, or even just auditing an existing cluster, this is a great exercise to walk through. You may be surprised how many small improvements are sitting there waiting to be made.
Google is updating how articles are shown. Don’t miss our leading home lab and tech content, written by humans, by setting Virtualization Howto as a preferred source.
About The Author


atime + relatime should be left on, which is the default and less impact on SSDs than no relatime. PBS needs relatime for proper functionality.