
If you have been wanting to get into Home Assistant, it is a growing ecosystem that is fun and exciting. And, if you already have a home lab environment, which most of the readers here do, you already likely have the infrastructure you need to run a Home Assistant Docker container. Using Docker Compose, you can easily spin up the HA resources you need. However, here, we will take a look at design decisions you need to think about. These decisions include networking choices, storage, backups, and also a complete, working example of my docker-compose.yml file. So, let’s jump in!
Why Docker and Docker Compose for Home Assistant?
Containerizing Home Assistant may not have been an option you have thought about. After all, you can easily buy something like a Home Assistant Green, Yellow, or Blue, or something like a Raspberry Pi works fine too. However, running it as a containerized solution is a great option, as I mention in the outset if you already have a docker host or virtualized environment with Proxmox, etc, since you already have that hardware.
Also, there are other advantages of running it in Docker defined by Docker Compose. With compose code you can store it in Git and easily recreate it if something happens. Also, it helps you avoid dependency hell with Python dependencies and other things on a physical host that you might be using for something else.
I already use Docker Compose for all my other services. This also allows you to easily add sidecar containers like MQTT brokers or dashboards.
Design Decisions
So, moving forward with running Home Assistant in Docker using Docker Compose, there are several other design decisions you need to think about and make, especially around networking. Let’s talk about that first.
Networking
When I spun up Home Assistant I had to decide how the container would join my network. Docker offers three main modes:
- host network – Running in host mode gives Home Assistant direct access to all host network interfaces. This simplifies discovery of devices and integration with protocols like mDNS or UPnP. So here you are trading off more isolation for better discoverability of your devices in home assistant.
- bridge network – The default bridge isolates the container behind its own virtual interface. With this config, you must publish each port Home Assistant needs, such as 8123 for the UI. Bridge mode provides security isolation but can complicate integrations that rely on broadcast traffic. You can work around this with sidecar containers that forward mDNS, etc.
- macvlan network – You can also use the macvlan network in Docker. Macvlan creates a virtual interface that makes your container appear as a physical device on your network. Home Assistant gets its own IP on the network segment, so like host mode, discovery works out of the box and you get isolation from the host. The downside is some hosts cannot communicate with macvlan devices on the same physical adapter. Also, this configuration definitely adds some complexity.
Storage
Home Assistant stores YAML configuration, a SQLite database by default, and long-term history in your Docker persistent storage. I like to use the following choices:
- Bind mounts – Mapping host directories under /srv/homeassistant/config gives you direct access to edit files on the host. It’s simple, and backups can be as easy as copying a folder which I will detail in just a moment. The downside is permissions can sometimes be complicated and you may have performance issues if you are mounting a volume across the network.
- Named volumes – Docker-managed volumes under /var/lib/docker/volumes/… can give you slightly better performance and automatic cleanup. However, accessing the raw data requires that you interact with it with a container like: docker run –rm -v volume:/data busybox to inspect it.
In practice I use bind mounts mostly. These are super easy to setup and if your storage is relatively fast, you won’t see performance issues.
Backups
Backups are very important for your persistent volume data. The beauty of containers is that you can pull a new container or even blast your entire Home Assistant container as long as you have your persistent data. I use a combination of things in my lab environment. These include the following:
- Veeam Backup and Replication – I use the Linux agent to backup local files on the box and image-based backups of the virtual machine that is running as my Docker Host. Also, they have a Community Edition that is free.
- Duplicati – Duplicati is a self-hosted persistent volume backup solution that lets you backup your container storage to a completely separate storage location.
How to handle your Zigbee devices
With Home Assistant, there are really a couple of different ways you can handle communication with your Zigbee devices. These include letting Home Assistant speak directly to your Zigbee devices using a USB dongle. Or you can use sidecar containers instead. Let me explain why you might choose each.
Home Assistant Container with USB Zigbee Dongle
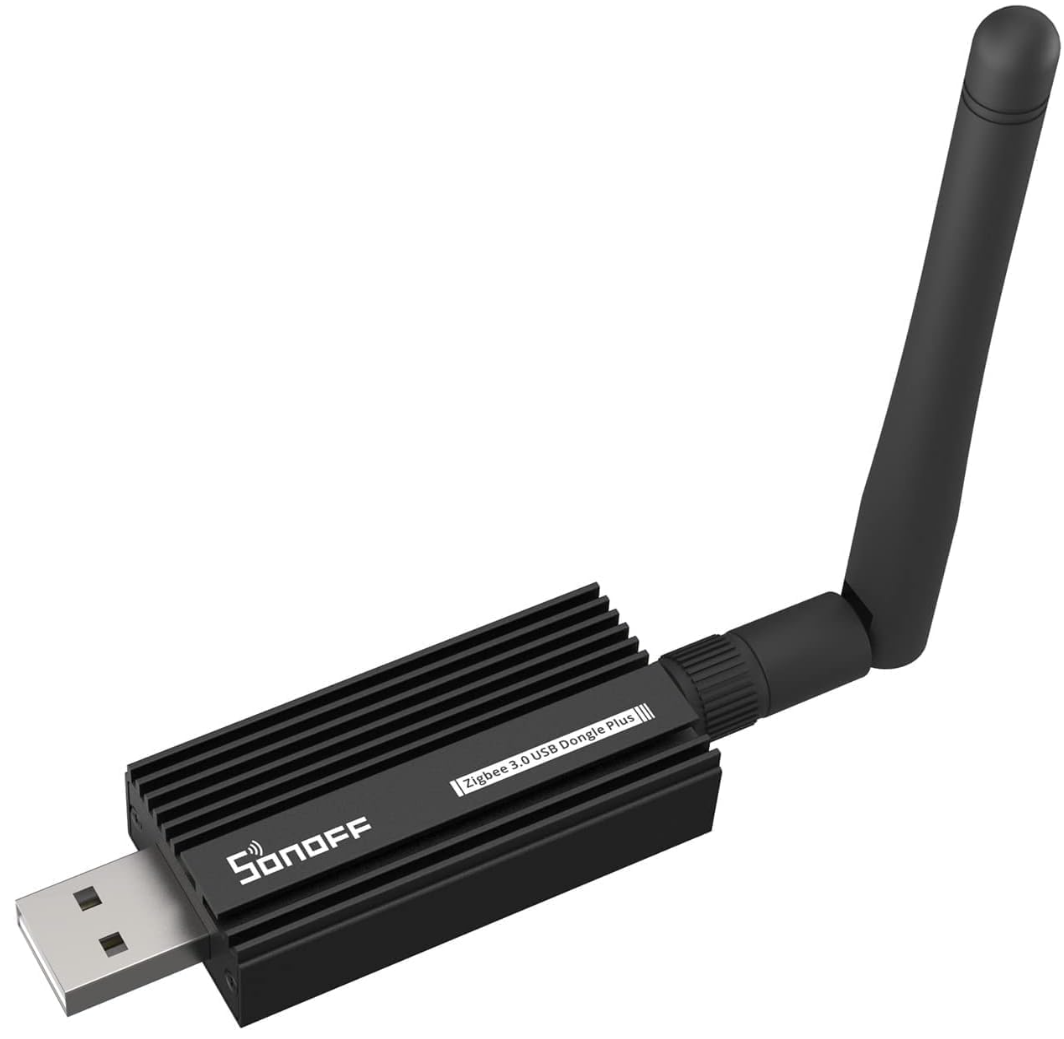
First, you can plug a USB Zigbee stick directly into your Home Assistant container and use the built-in ZHA integration. In this setup, the Home Assistant container talks straight to /dev/ttyACM0 (or whichever device path your stick shows up as).
You can purchase the adapter below here (my amazon affiliate link): https://geni.us/zigbeeusbdongle1
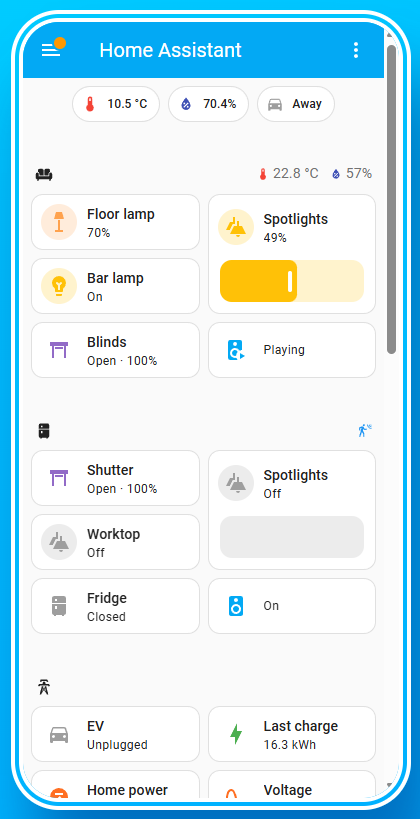
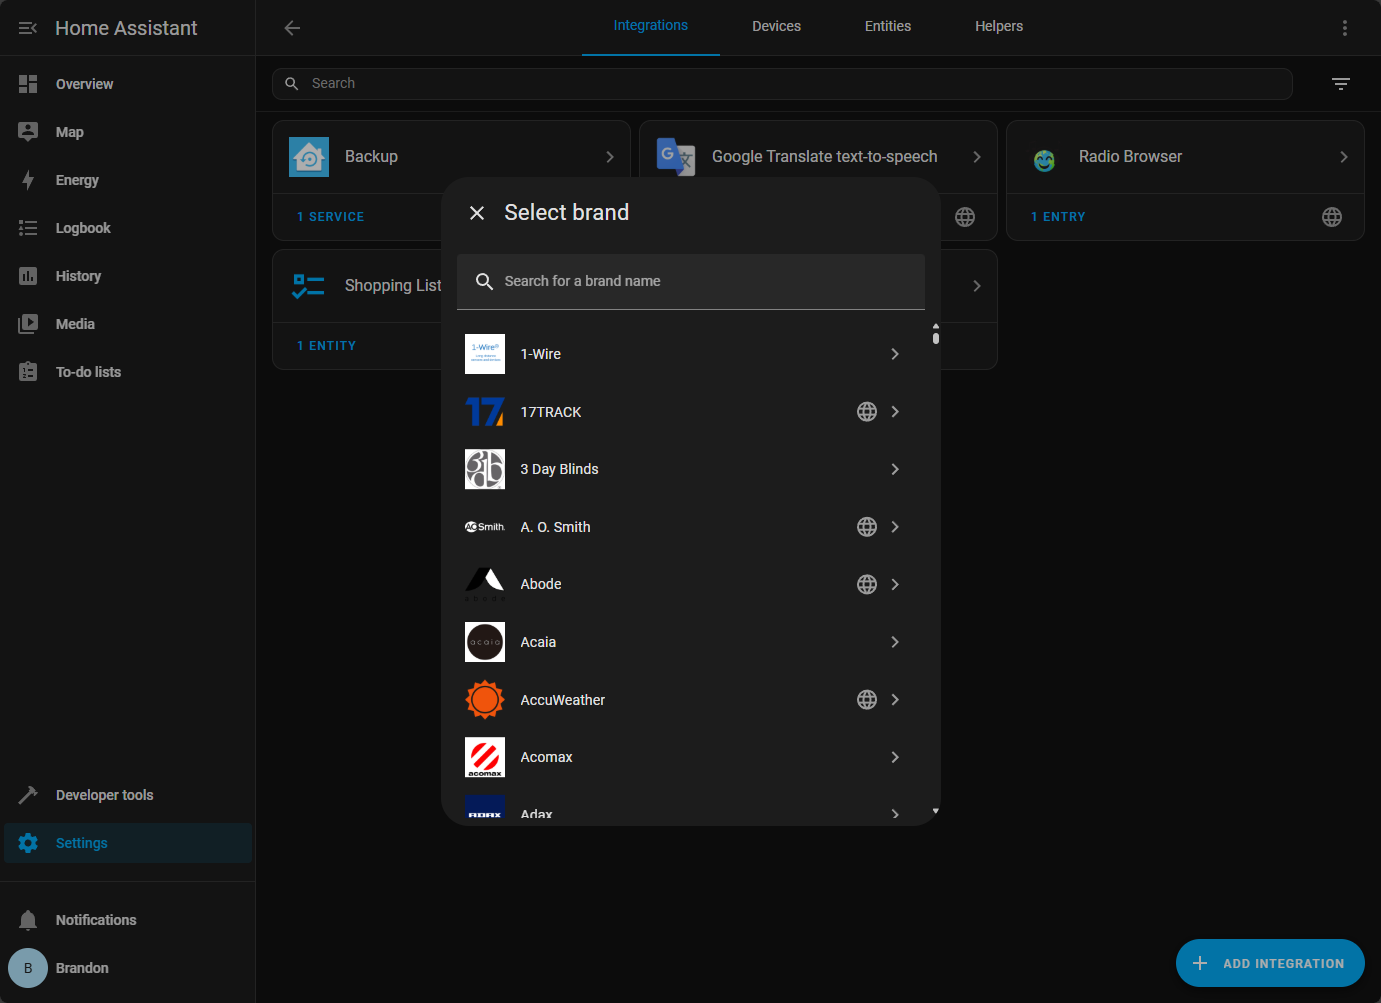
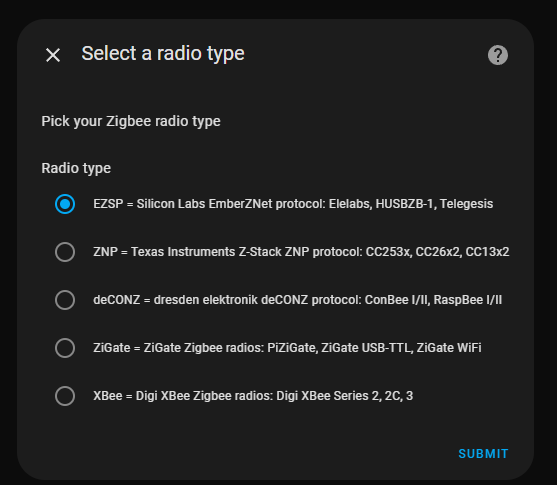
Pairing new lights, sensors, and switches happens through the Integrations page. You simply click “Configure” under ZHA and let it discover devices on the network. Firmware updates for many popular sticks can be applied right from that same UI.
With this configuration, you don’t need any extra containers or brokers, and everything stays self-contained inside the Home Assistant process. This approach is the cleanest when you only intend to manage Zigbee devices from Home Assistant and don’t need MQTT for anything else.
Home Assistant without USB Dongle and Sidecar Containers
If you prefer to keep your Zigbee traffic isolated or want to share it with multiple services, you can skip the direct USB passthrough and instead run one or more sidecar containers alongside Home Assistant. Typically this looks like:
Zigbee2MQTT container
zigbee2mqtt:
  image: koenkk/zigbee2mqtt:latest
  restart: unless-stopped
  network_mode: homenet
  devices:
    - /dev/ttyACM0:/dev/ttyACM0
  volumes:
    - /srv/zigbee2mqtt/data:/app/data
  environment:
    - MQTT_SERVER=mosquitto
MQTT broker container (Mosquitto)
mosquitto:
  image: eclipse-mosquitto:latest
  restart: unless-stopped
  network_mode: homenet
  ports:
    - "1883:1883"
  volumes:
    - /srv/mosquitto/config:/mosquitto/config:ro
    - /srv/mosquitto/data:/mosquitto/data
How do the sidecar containers work? Well, Zigbee2MQTT listens on your USB stick and translates each device message into JSON on MQTT topics, and publishes to the broker. Home Assistant then gets those topics via its MQTT integration.
Why would you go through this additional complexity? Well the benefit is broad device support. New or quirky Zigbee gear often lands in Zigbee2MQTT first. And you can also hook up Node-RED, custom scripts, or dashboards directly to the same MQTT topics. You trade a bit of extra complexity and another container for better compatibility and the ability to do a few more interesting things.
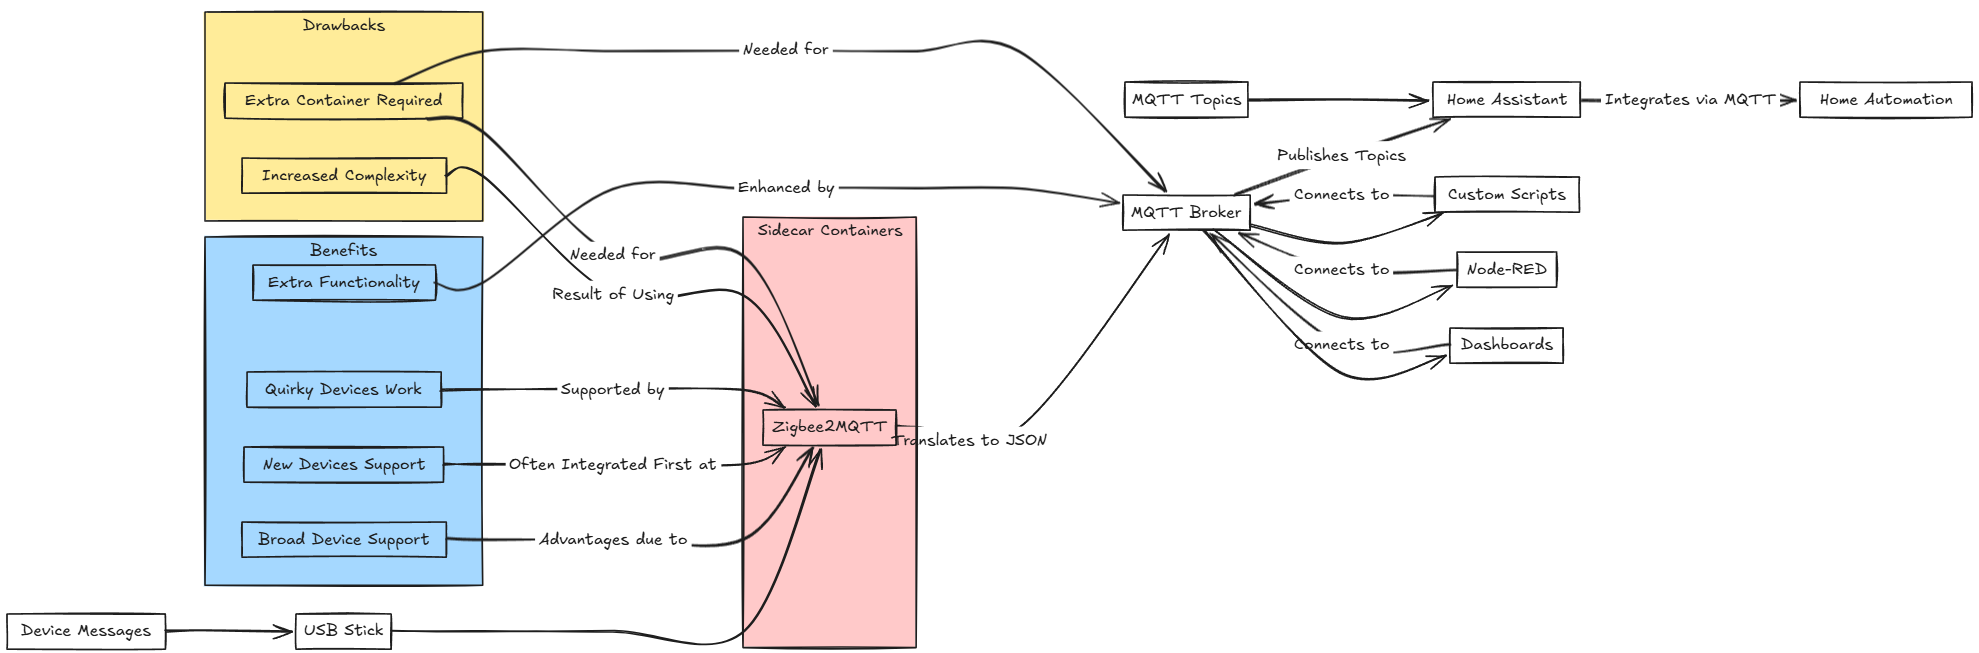
Choose direct USB passthrough when you want simplicity. Choose the sidecar containers when you need maximum flexibility and multi-service access to your Zigbee network.
Building the Docker Compose File
Below is an annotated example of my docker-compose.yml. Feel free to adapt image tags, volume paths, and network names to match your environment. Below, we are showing:
- MQTT broker (eclipse-mosquitto)
- Zigbee2MQTT or deCONZ for Zigbee radios
- InfluxDB and Grafana for long-term metrics and dashboards
If you don’t need the sidecar containers and are using a USB dongle, just take these out of the docker compose.
services:  homeassistant:
    image: ghcr.io/home-assistant/home-assistant:stable
    container_name: homeassistant
    user: "1001:1001"
    restart: unless-stopped
    network_mode: "service:proxy" # attach to Traefik sidecar for SSL
    depends_on:
      - mosquitto
    volumes:
      - /srv/homeassistant/config:/config:rw
      - homeassistant_db:/config/home-assistant_v2.db
    environment:
      - TZ=America/Chicago
    secrets:
      - api_key
    healthcheck:
      test: ["CMD-SHELL", "curl -f http://localhost:8123/api/health || exit 1"]
      interval: 1m
      timeout: 10s
      retries: 3
    cap_drop:
      - ALL
    cap_add:
      - CHOWN
      - SETUID
      - SETGID

  mosquitto:
    image: eclipse-mosquitto:latest
    container_name: mosquitto
    restart: unless-stopped
    networks:
      homenet:
    volumes:
      - /srv/mosquitto/config:/mosquitto/config:ro
      - /srv/mosquitto/data:/mosquitto/data
      - /srv/mosquitto/log:/mosquitto/log
    ports:
      - "1883:1883"

  influxdb:
    image: influxdb:2.6
    container_name: influxdb
    restart: unless-stopped
    networks:
      homenet:
    volumes:
      - influxdb_data:/var/lib/influxdb2
    environment:
      - INFLUXDB_ADMIN_USER=admin
      - INFLUXDB_ADMIN_PASSWORD_FILE=/run/secrets/influxdb_admin_password
    secrets:
      - influxdb_admin_password
    ports:
      - "8086:8086"

  grafana:
    image: grafana/grafana:9.5
    container_name: grafana
    restart: unless-stopped
    networks:
      homenet:
    volumes:
      - grafana_data:/var/lib/grafana
    environment:
      - GF_SECURITY_ADMIN_PASSWORD_FILE=/run/secrets/grafana_admin_password
    secrets:
      - grafana_admin_password
    ports:
      - "3000:3000"

networks:
  homenet:
    driver: macvlan
    driver_opts:
      parent: eth0
    ipam:
      config:
        - subnet: 192.168.1.0/24
          gateway: 192.168.1.1

volumes:
  homeassistant_db:
  influxdb_data:
  grafana_data:
Adding SSL certificates
You can easily add SSL certificates to your Home Assistant Docker container configuration. There are two solutions I recommend:
- Nginx Proxy Manager – by far the easiest way to add LetsEncrypt certificates to your containers with a GUI. Check out my walkthrough of NPM here: Setting Up Nginx Proxy Manager on Docker with Easy LetsEncrypt SSL.
- Traefik – Much steeper learning curve, but you get your SSL certs configured in code: Traefik with ACME in Kubernetes with LetsEncrypt Certificates.
Zero Downtime Upgrades
To upgrade Home Assistant I pull the latest image and restart the container using docker compose commands:
docker compose pull homeassistant
docker compose up -d homeassistant
Wrapping up
Hopefully, this Home Assistant Docker Compose design post is helpful for anyone looking to get into running home assistant in their network. It is a super powerful solution that helps to bring smart home devices together in a way that is customizable and secure. Using Docker is my preferred way of running Home Assistant, since I already run a home lab I have the Docker infrastructure to use. By understanding a few of the concepts, storage, networking, and backups, you can run a resilient Home Assistant solution. Let me know in the comments how you have your Home Assistant configured. Are you using containers?
Google is updating how articles are shown. Don’t miss our leading home lab and tech content, written by humans, by setting Virtualization Howto as a preferred source.
About The Author


Very interesting but you lost me in a few places.
Background: I currently run HA/Mosquitto/Z2M from a single
compose.yamlfile,network_mode: host& a Sonoff-P dongle.Some questions:
1] What does sidecar mean? Does it only exist when using
networks: xxxx:?2] Why are you defining
userin HA?3] What do
secrets,cap_dropandcap_adddo (HA compose)?Thankyou!
H Brandon,
Can you help me?
James,
What types of help are you looking for? Hop over to the forums and create a topic there and I can better assist you there: https://www.virtualizationhowto.com/community/.
Brandon
Docker is literally one of the worst ways to run home assistant. You’re only doing it to force your infrastructure as code mentality, instead of doing it the right way, which is to run the HAOS VM. Don’t get so caught up in infrastructure as code that it limits functionality of the service you are running and complicates them.
Johng,
Curious what issues you have encountered with running HA in Docker? So far, my installation has been rock solid.
Brandon