I’ve spent countless weekends automating every corner of my home lab, and nothing feels better than kicking back on Monday morning knowing that routine tasks and projects in the home lab ran themselves over the weekend. In this post, I’m sharing 15 of my favorite Ansible playbooks that are weekend-ready for very cool home lab fun!
Why Ansible playbooks?
Well, in a word, they are awesome. They help to make very tedious configuration changes and configuration management in general much easier. Also, the thing that has always drawn me to Ansible is the fact that it is agentless. So, you don’t have to manage a fleet of agents across the environment. There are also great tools like Ansible Semaphore UI that I have recently written about that gives you a super nice GUI to work with your Ansible playbooks.
1. Install Docker Engine
This is a playbook that I run often when I want to make a Linux host a Docker Engine host. This installs Docker and adds the user you want to add to the Docker group. Just replace linuxadmin with the user you want to add to the Docker group.
---
- name: Install Docker and add user to docker group
  hosts: all
  become: true
  tasks:
    - name: Update apt package index and install dependencies
      ansible.builtin.apt:
        name:
          - ca-certificates
          - curl
          - gnupg
        update_cache: yes
        state: present

    - name: Create directory for Docker's GPG key
      ansible.builtin.file:
        path: /etc/apt/keyrings
        state: directory
        mode: '0755'

    - name: Download and de-armor Docker's official GPG key
      ansible.builtin.shell:
        cmd: curl -fsSL https://download.docker.com/linux/ubuntu/gpg | gpg --dearmor -o /etc/apt/keyrings/docker.gpg
        creates: /etc/apt/keyrings/docker.gpg

    - name: Ensure Docker GPG key has correct permissions
      ansible.builtin.file:
        path: /etc/apt/keyrings/docker.gpg
        mode: '0644'

    - name: Set up Docker's official repository
      ansible.builtin.shell:
        cmd: 'echo "deb [arch=$(dpkg --print-architecture) signed-by=/etc/apt/keyrings/docker.gpg] https://download.docker.com/linux/ubuntu $(. /etc/os-release && echo "$VERSION_CODENAME") stable" | tee /etc/apt/sources.list.d/docker.list > /dev/null'
        creates: /etc/apt/sources.list.d/docker.list

    - name: Update apt package index after adding repo
      ansible.builtin.apt:
        update_cache: yes

    - name: Install Docker Engine and plugins
      ansible.builtin.apt:
        name:
          - docker-ce
          - docker-ce-cli
          - containerd.io
          - docker-buildx-plugin
          - docker-compose-plugin
        state: present

    - name: Create docker group
      ansible.builtin.group:
        name: docker
        state: present

    - name: Add user 'linuxadmin' to docker group
      ansible.builtin.user:
        name: linuxadmin
        groups: docker
        append: yes
2. Setup NTP with Chrony
Keeping accurate time on your Linux host is extremely important. Especially for things like logs, certs, clusters, etc. The below Ansible playbook installs chrony and points it to publicly available NTP servers. Just replace the NTP servers with ones you want to use instead if you want to change them. Also, it will make sure the service is running and makes firewall changes if needed.
---
- name: Configure NTP with Chrony
  hosts: all
  become: yes
  vars:
    chrony_servers:
      - 0.pool.ntp.org
      - 1.pool.ntp.org
  tasks:
    - name: Install chrony
      apt:
        name: chrony
        state: present
        update_cache: yes

    - name: Configure NTP servers
      lineinfile:
        path: /etc/chrony/chrony.conf
        regexp: '^server'
        line: "server {{ item }} iburst"
      loop: "{{ chrony_servers }}"

    - name: Restart chrony
      service:
        name: chrony
        state: restarted
        enabled: yes
3. Edit Sudoers via visudo
Instead of having to hand edit /etc/sudoers, this playbook uses the visudo command. This approach allows you to grant passwordless sudo to your admin group or a specific user.
---
- name: Configure visudo for secure sudoers
  hosts: all
  become: yes
  tasks:
    - name: Allow admin group passwordless sudo
      copy:
        dest: /etc/sudoers.d/admin
        content: "%{{ ansible_user }} ALL=(ALL) NOPASSWD:ALL"
        owner: root
        group: root
        mode: '0440'
##For a specific user

---
- name: Add linuxadmin to sudoers
  hosts: all
  become: yes
  tasks:
    - name: Ensure linuxadmin can sudo without a password
      lineinfile:
        path: /etc/sudoers
        state: present
        regexp: '^linuxadmin'
        line: 'linuxadmin ALL=(ALL) NOPASSWD: ALL'
        validate: 'visudo -cf %s'
4. Set the timezone
Going along with the earlier comment about accurate time, setting the correct timezone helps avoid confusion in logs and other things. This playbook makes sure your hosts are set to the correct timezone. Just replace with the timezone you want to use.
---
- name: Configure system timezone
  hosts: all
  become: yes
  vars:
    tz: America/Chicago
  tasks:
    - name: Set timezone
      timezone:
        name: "{{ tz }}"
5. Update your Linux server
This playbook runs updates for APT, YUM, or Zypper based on ansible_facts['pkg_mgr'], then reboots if a kernel update occurred. I like to run this playbook periodically using Ansible Semaphore against my Linux fleet to make sure everything stays up-to-date.
---
- name: Apply all Linux updates
  hosts: all
  become: yes
  tasks:
    - name: Update all packages
      package:
        name: "*"
        state: latest
      register: update_result

    - name: Reboot if kernel updated
      reboot:
      when: update_result.changed
6. Create Linux users and deploy SSH keys
With this, you can automate your user provisioning and SSH keys so you never hand out plain-text passwords. Replace the users list with your own.
---
- name: Create users and deploy SSH keys
  hosts: all
  become: yes
  vars:
    users:
      - name: alice
        key: "{{ lookup('file', '~/.ssh/alice.pub') }}"
      - name: bob
        key: "{{ lookup('file', '~/.ssh/bob.pub') }}"      - name: mydogkujo        key: "{{ lookup('file', '~/.ssh/mydogkujo.pub') }}"
  tasks:
    - name: Create user accounts
      user:
        name: "{{ item.name }}"
        state: present
        shell: /bin/bash
      loop: "{{ users }}"

    - name: Add SSH authorized keys
      authorized_key:
        user: "{{ item.name }}"
        key: "{{ item.key }}"
        state: present
      loop: "{{ users }}"
7. UFW firewall config
This allows you to lock down network traffic to your Linux hosts. It installs UFW, sets your rules, and enables it. The below example makes sure SSH and HTTP/S are allowed.
---
- name: Configure UFW firewall
  hosts: all
  become: yes
  tasks:
    - name: Install UFW
      apt:
        name: ufw
        state: present
        update_cache: yes

    - name: Allow SSH
      ufw:
        rule: allow
        name: OpenSSH

    - name: Allow HTTP & HTTPS
      ufw:
        rule: allow
        port: "{{ item }}"
      loop:
        - 80
        - 443

    - name: Enable UFW
      ufw:
        state: enabled
        logging: on
8. Prune unused Docker images
This is also one I like to schedule and run periodically. Over time, a Docker host will get bloated with unused images, dangling containers, and other disk space wasters. The top Ansible YML code just prunes images. The bottom one prunes everything. Be careful with the bottom one as it will prune stopped containers, etc that you may not want to get rid of.
##Prune just images

---
- name: Prune unused Docker images
  hosts: all
  become: yes
  tasks:
    - name: Prune dangling images
      docker_image:
        prune: yes
        dangling: yes

    - name: Prune all unused images
      command: docker image prune -a -f
      args:
        warn: false
##Prune images and everything else - be careful with this one

---
- name: Prune unused Docker images & everything else
  hosts: all
  become: yes
  tasks:
    - name: Prune dangling images
      community.docker.docker_prune:
        images: yes
        dangling: yes

    - name: Prune all unused Docker objects (system prune)
      ansible.builtin.shell: docker system prune -a -f
      args:
        warn: false
9. Install and configure Fail2Ban
Fail2Ban is a well-known tool to help with SSH brute force and hacking attempts. This playbook automates its setup and configuration.
---
- name: Install and configure Fail2Ban
  hosts: all
  become: yes
  tasks:
    - name: Install fail2ban
      apt:
        name: fail2ban
        state: present
        update_cache: yes

    - name: Deploy jail.local
      copy:
        src: files/jail.local
        dest: /etc/fail2ban/jail.local
        owner: root
        group: root
        mode: '0644'

    - name: Restart fail2ban
      service:
        name: fail2ban
        state: restarted
        enabled: yes
10. Create Swap File
This is one for a few edge cases. On low-RAM systems, this is an automated swap file setup to prevent out-of-memory issues during heavy builds.
---
- name: Create swap file if not present
  hosts: all
  become: yes
  vars:
    swap_file: /swapfile
    swap_size_mb: 2048
  tasks:
    - name: Allocate swap file
      command: fallocate -l {{ swap_size_mb }}M {{ swap_file }}
      args:
        creates: "{{ swap_file }}"

    - name: Secure swap file
      file:
        path: "{{ swap_file }}"
        owner: root
        mode: '0600'

    - name: Make swap
      command: mkswap {{ swap_file }}

    - name: Enable swap
      command: swapon {{ swap_file }}

    - name: Ensure swap on reboot
      mount:
        name: none
        src: "{{ swap_file }}"
        fstype: swap
        opts: sw
        state: present
11. Configure SNMP for monitoring
SNMP can be a beast to configure manually. This playbook helps you to easily integrate your Linux host with Prometheus, Zabbix, or other SNMP-based tools and automates the config of SNMPd.
---
- name: Configure SNMP service
  hosts: all
  become: yes
  vars:
    community: labpublic
  tasks:
    - name: Install snmpd
      apt:
        name: snmpd
        state: present
        update_cache: yes

    - name: Configure community string
      lineinfile:
        path: /etc/snmp/snmpd.conf
        regexp: '^rocommunity'
        line: "rocommunity {{ community }}"

    - name: Restart snmpd
      service:
        name: snmpd
        state: restarted
        enabled: yes
12. Deploy a basic Nginx web server
This playbook helps to quickly get Nginx installed and loaded with a basic configuration on your Linux server to serve out a static page on port 80.
---
- name: Install and configure Nginx
  hosts: all
  become: yes
  tasks:
    - name: Install nginx
      apt:
        name: nginx
        state: present
        update_cache: yes

    - name: Deploy index.html
      copy:
        src: files/index.html
        dest: /var/www/html/index.html
        owner: www-data
        group: www-data
        mode: '0644'

    - name: Ensure nginx is running
      service:
        name: nginx
        state: started
        enabled: yes
13. Backup /etc to a Remote Host
On a traditional VM or server, if you need to get a backup of host level configuration in the /etc directory, this playbook helps to automate daily backups of /etc via rsync to a central server. It keeps a 7-day rotation.
---
- name: Backup /etc directory
  hosts: all
  become: yes
  vars:
    backup_host: backup.lab.local
    backup_path: /backups/{{ inventory_hostname }}
  tasks:
    - name: Create remote backup directory
      file:
        path: "{{ backup_path }}"
        state: directory
        mode: '0755'
      delegate_to: "{{ backup_host }}"

    - name: Rsync /etc
      synchronize:
        src: /etc/
        dest: "{{ backup_path }}/etc-{{ ansible_date_time.date }}"
        archive: yes
        delete: no
14. Install and configure PostgreSQL
PostgreSQL is one of the most popular DB solutions, especially on Linux environments and backs many different solutions for backend data. This playbook helps to stand up a secure database, adding a user and database you configure.
---
- name: Install and configure PostgreSQL
hosts: all
become: yes
vars:
db_user: labuser
db_name: labdb
db_password: secure_pass_here
tasks:
- name: Install PostgreSQL
apt:
name: postgresql
state: present
update_cache: yes
- name: Ensure postgres is running
service:
name: postgresql
state: started
enabled: yes
- name: Create database user
postgresql_user:
name: "{{ db_user }}"
password: "{{ db_password }}"
state: present
- name: Create database
postgresql_db:
name: "{{ db_name }}"
owner: "{{ db_user }}"
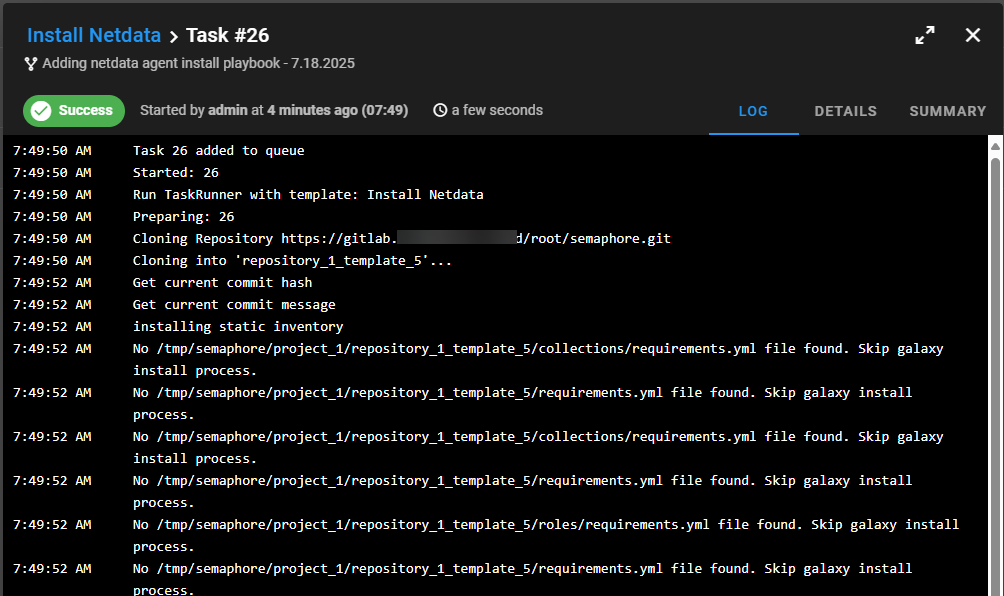
encoding: UTF815. Install your Netdata agent
If you use Netdata to monitor your homelab (great option if you don’t know about it and they have a $90 a year subscription for home labs for unlimited nodes), this playbook automates onboarding your Linux server into the Netdata cloud environment. Just enter your claim token and claim room id.
---
- name: Install & Claim Netdata Cloud Agent
  hosts: all
  become: true

  vars:
    netdata_kickstart:   "/tmp/netdata-kickstart.sh"
    netdata_stable:      true
    netdata_claim_token: "your claim token"
    netdata_claim_rooms: "your claim room id"
    netdata_claim_url:   "https://app.netdata.cloud"

  tasks:
    - name: Fetch the official Netdata kickstart script
      ansible.builtin.get_url:
        url: "https://get.netdata.cloud/kickstart.sh"
        dest: "{{ netdata_kickstart }}"
        mode: '0755'
      register: fetched

    - name: Run Netdata kickstart installer with Cloud claim
      ansible.builtin.command: >
        "{{ netdata_kickstart }}"
        {% if netdata_stable %}--stable-channel{% endif %}
        --claim-token {{ netdata_claim_token }}
        --claim-rooms {{ netdata_claim_rooms }}
        --claim-url {{ netdata_claim_url }}
      args:
        creates: /usr/sbin/netdata
      when: fetched.changed

    - name: Ensure Netdata service is enabled and running
      ansible.builtin.service:
        name: netdata
        enabled: true
        state: started
Wrapping up
Hopefully these 15 Ansible playbooks will give you a good start on a few things to automate in your home lab environment and can be a great weekend project. With Ansible, the sky is the limit and you can develop and use Ansible scripts that are specific to your needs in the home lab and things you want to accomplish with automation.
Google is updating how articles are shown. Don’t miss our leading home lab and tech content, written by humans, by setting Virtualization Howto as a preferred source.
About The Author


