Run VMware Workstation Pro on a Mini PC: Top Tips and Tweaks
With the recent development of VMware by Broadcom announcing VMware Workstation is now free for personal use, I think this will be a great resource for the home lab for those looking at how they can easily and cheaply set up a virtualized environment to use their existing workstation or mini PC. Many are switching over to mini PCs due to their small footprint, low noise, and efficient power use. Let’s look at how to Run VMware Workstation Pro on a mini PC and the top tips and tweaks you should know about.
Table of contents
- VMware Workstation Pro free for personal use
- Why run VMware Workstation Pro on a mini PC?
- Top tips and tweaks for running VMware Workstation Pro on a mini PC
- 1. Use the VMware Desktop Optimization Tool
- 2. Make sure you have virtualization turned on in the BIOS
- 3. Watch for conflicts with Windows virtualization technologies
- 4. Create dedicated networks for your virtual machines that are VLAN-enabled
- 5. Use a separate drive for virtual machines
- 6. Max out memory
- 7. Create exceptions in your end-point security
- 8. Use an IP KVM or PiKVM device for out-of-band management
- Next Steps
- Wrapping up
VMware Workstation Pro free for personal use
In case you missed the news, VMware by Broadcom announced that VMware Workstation Pro is now free for personal use. This comes on the heels of the announcement earlier this year that free ESXi was going away and would no longer be available.
Read my written blog post here: VMware Workstation Pro Free for Personal Use Download – Virtualization Howto
Check out my YouTube video:
This news, along with major price increases, sparked many to think about transitioning to a different platform. I am not sure if this announcement by Broadcom is a way to help soften the blow of some of the changes and offer this as an olive branch. Time may tell. Whatever the case, I think many will benefit from the announcement.
Why run VMware Workstation Pro on a mini PC?
You may wonder why you may want to run VMware Workstation Pro on a mini PC for a home lab. This is a good question. But I think it makes a lot of sense since many are transitioning to mini PCs for a power workstation, and many may not want to run dedicated hardware for a home lab.
Running dedicated equipment requires several things:
- Investment in the dedicated hardware itself
- Power investment due to having the equipment running
- Extra networking gear
- Licensing for dedicated hypervisors or server OS licenses
- Extra noise
- Extra heat
- Etc, etc, etc
Don’t get me wrong, I run a dedicated home lab and view the investment as part of the cost of continuously learning. However, this may not be true for some who may not have the budget for it. Running a type 2 hypervisor on top of a mini PC using VMware Workstation is a great way to have the best of both worlds without a significant investment, especially now that VMware Workstation Pro is free.
In other words, you can use the mini PC as your daily driver running Windows or Linux OS and then have VMware Workstation loaded so you can run virtual machines as needed to set up labs, testing, development, and other environments.
Looking for a good mini PC for home lab? Check out my recent video here:
Top tips and tweaks for running VMware Workstation Pro on a mini PC
Let’s consider the following as top tips and tweaks for running VMware Workstation Pro on a mini PC:
- Use the VMware Desktop optimization tool
- Make sure you have virtualization turned on in the BIOS
- Watch for conflicts with Windows virtualization technologies
- Create dedicated networks for your virtual machines that are VLAN-enabled
- Use a separate drive for virtual machines
- Max out memory
- Create exceptions in your end-point security
- Use an IP KVM or PiKVM device for out-of-band management
1. Use the VMware Desktop Optimization Tool
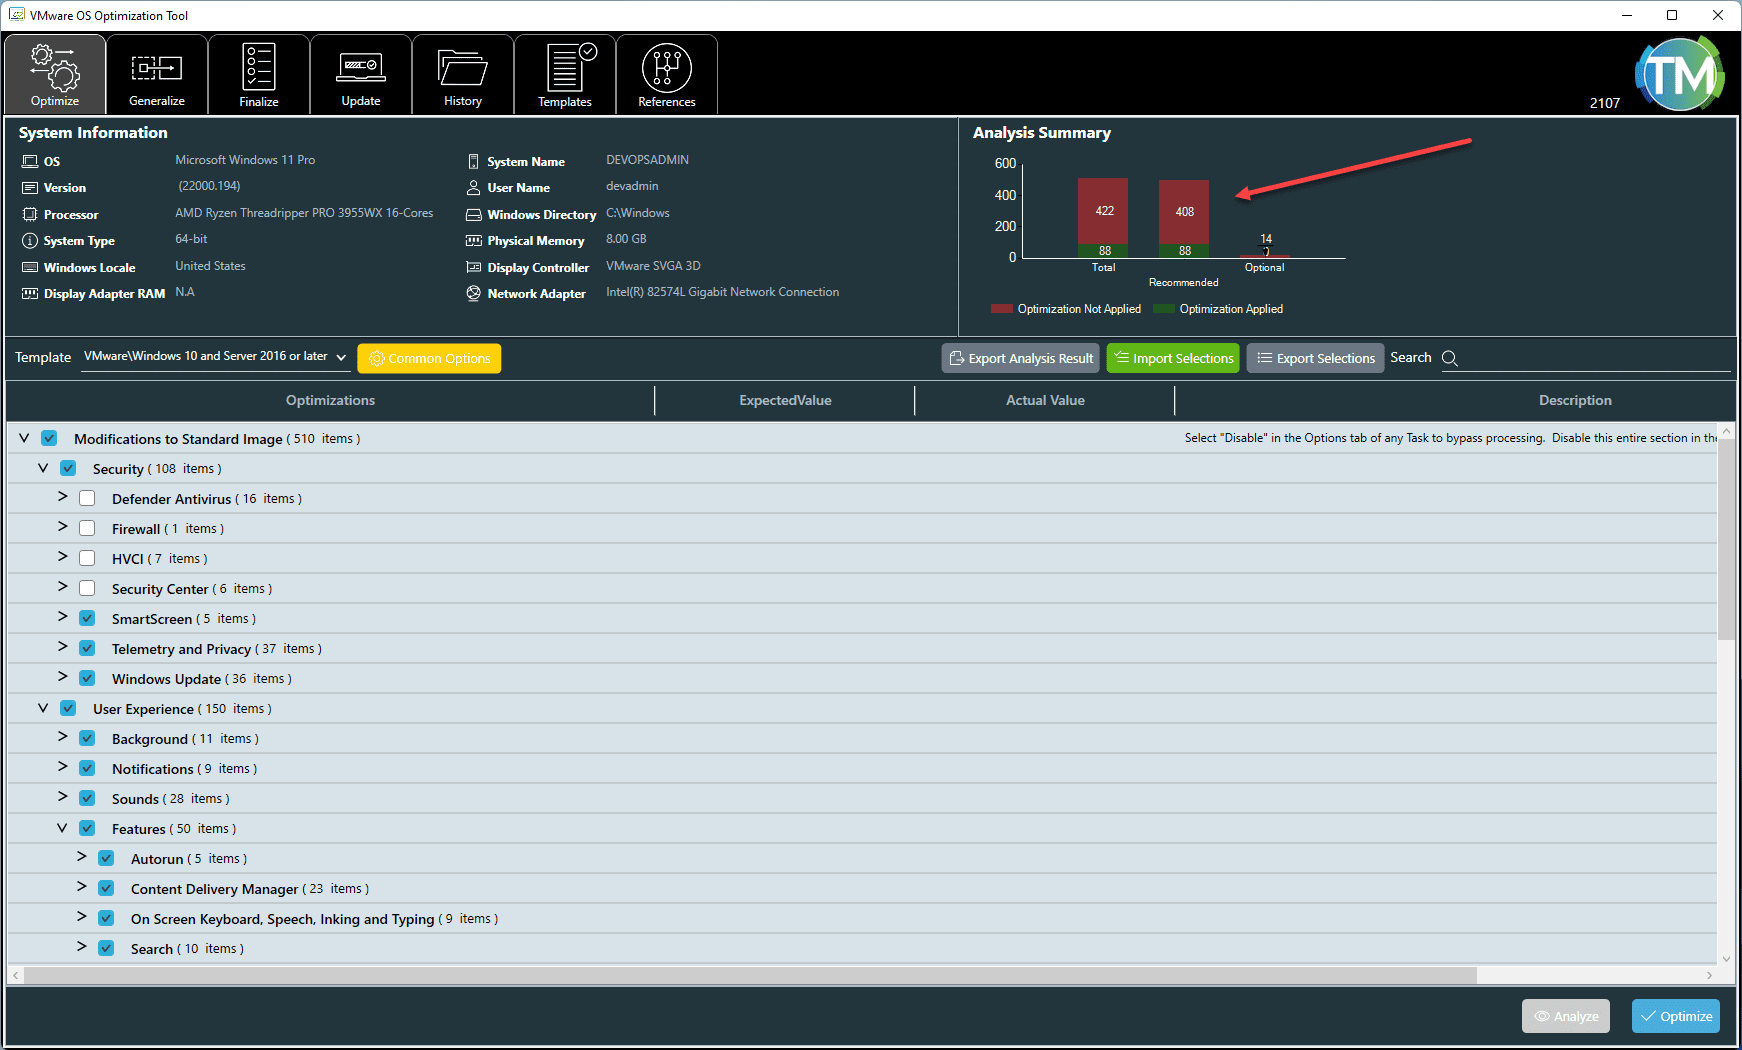
You may not know about this tool, but it is called the VMware OS Optimization tool. It is a bit more difficult to find these days since the Broadcom acquisition. However, check out the official link here: Install Windows OS Optimization Tool for VMware Horizon.
It essentially turns off all unnecessary services and visual enhancements in Windows to make sure the underlying base Windows installation runs as efficiently as possible. While the expressed purpose of this tool is to optimize base images for Horizon, I have found it works great as a general tool to speed up Windows 10 and 11.
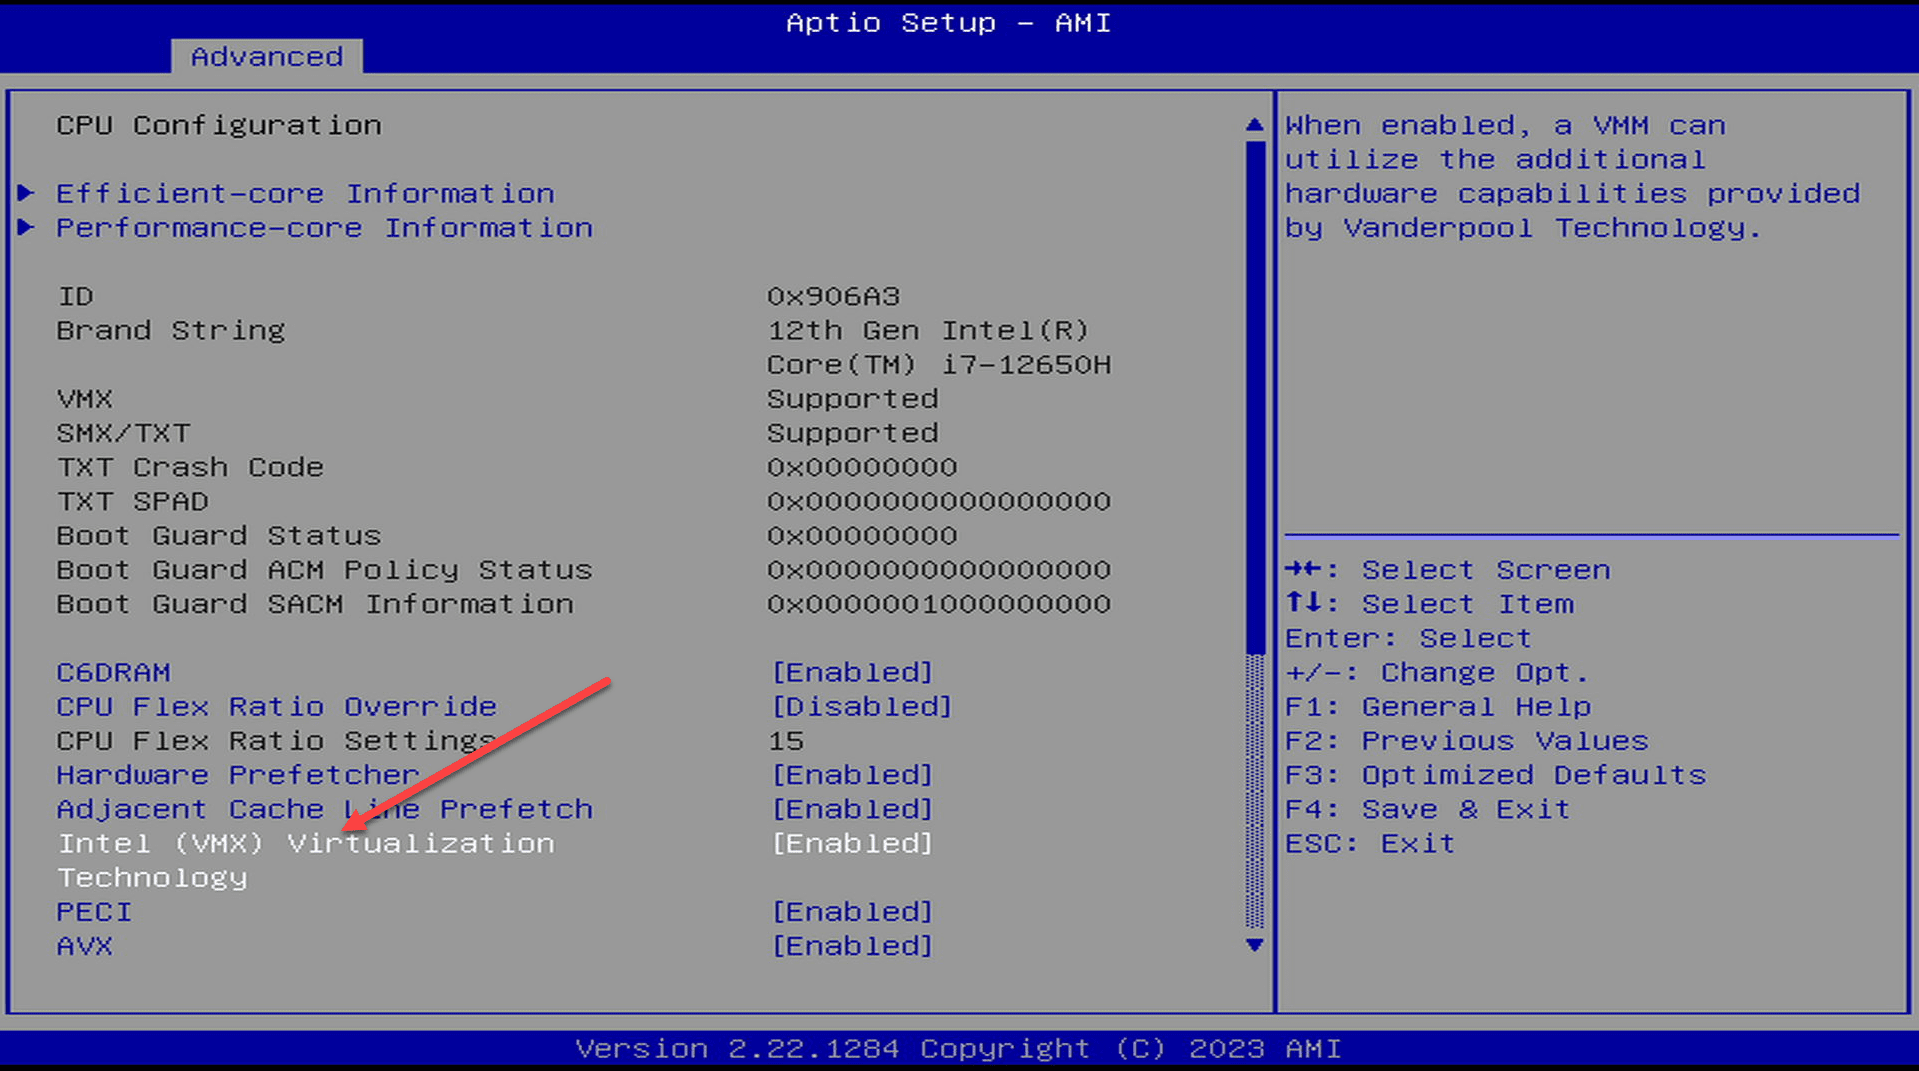
2. Make sure you have virtualization turned on in the BIOS
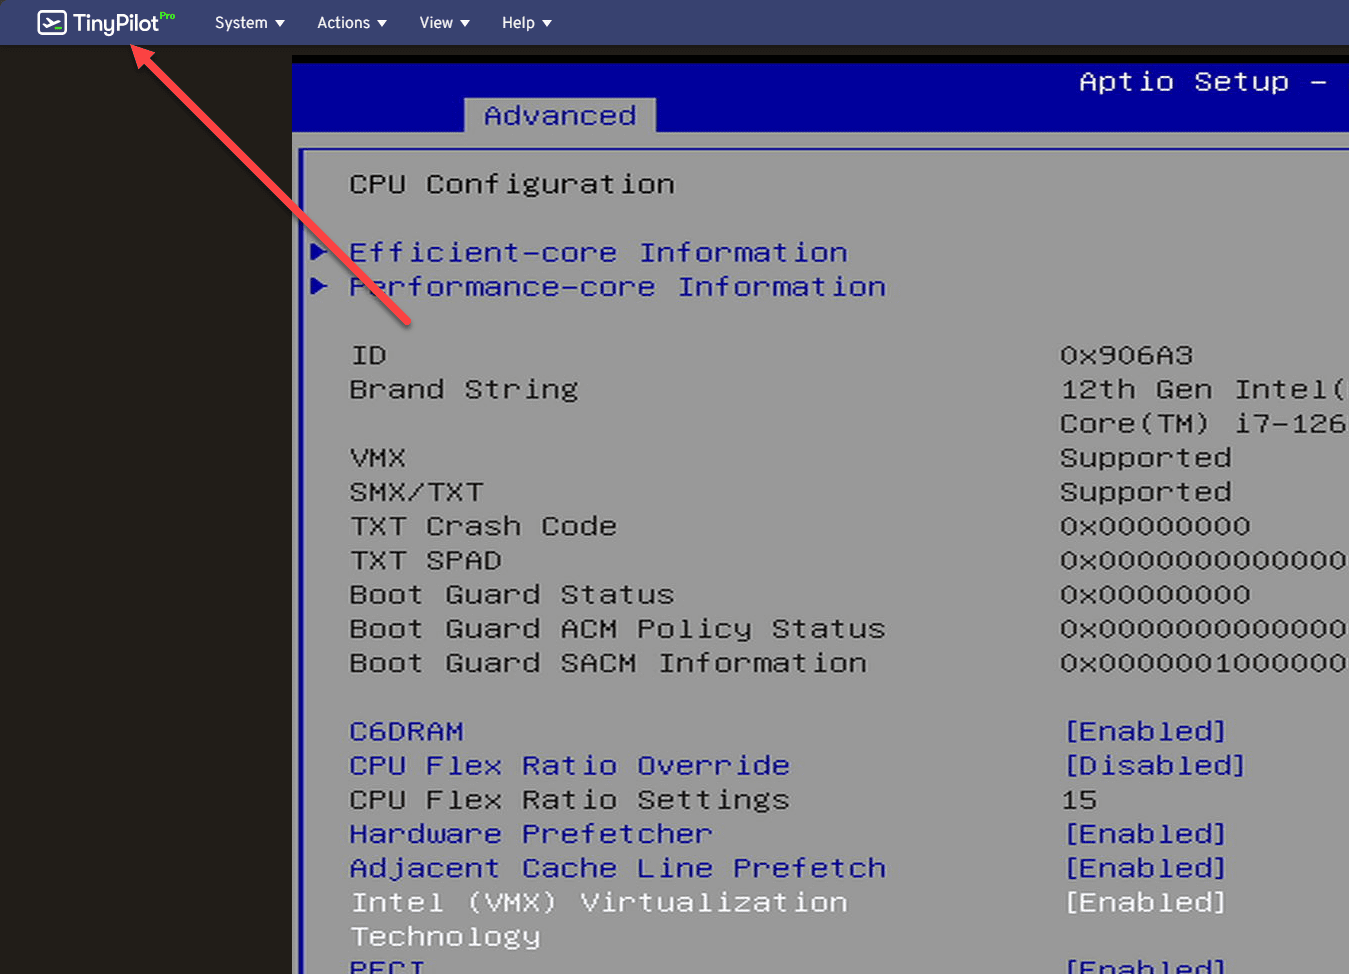
You will want to make sure you have virtualization options turned on in the BIOS. This will allow your mini PC to be able to use nested virtualization features that are passed directly to the hardware CPU and the performance is much better.
3. Watch for conflicts with Windows virtualization technologies
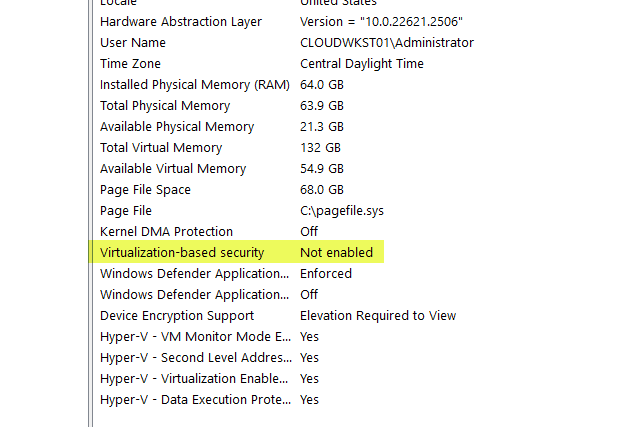
I have seen cases of conflicts with virtualization-enabled technologies between Windows installed on your workstation (mini PC) and VMs that you want to enable with virtualization instructions for nested virtualization, running Docker Desktop, etc.
It seems like there is a known issue, especially with AMD CPUs where you can’t have the OS enabled with virtualization features such as Hyper-V or virtualization-based security and run VMware Workstation on top of this. The issue creeps up when you want to enable nested features in your VMs. If you don’t want or need to run nested virtualization in your VMware Workstation virtual machines, this won’t be an issue.
You can easily check this by typing system information in the Windows search in the start menu.
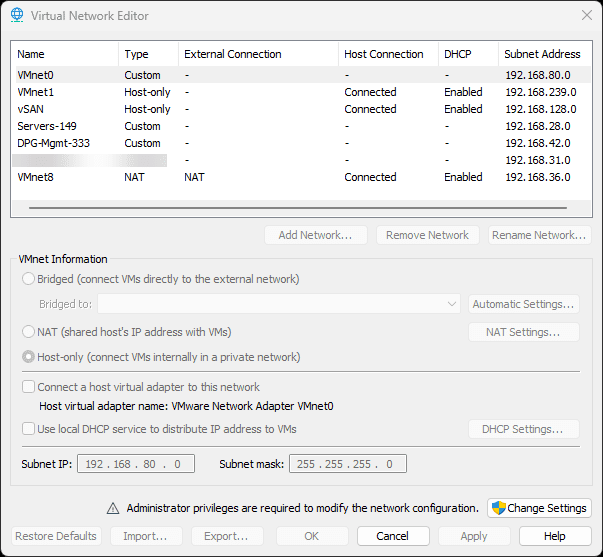
4. Create dedicated networks for your virtual machines that are VLAN-enabled
VMware Workstation has powerful network configuration features built into the platform. With the virtual network editor, you can create customized networks that are tailored to your specific home lab, development, or other environment.
5. Use a separate drive for virtual machines
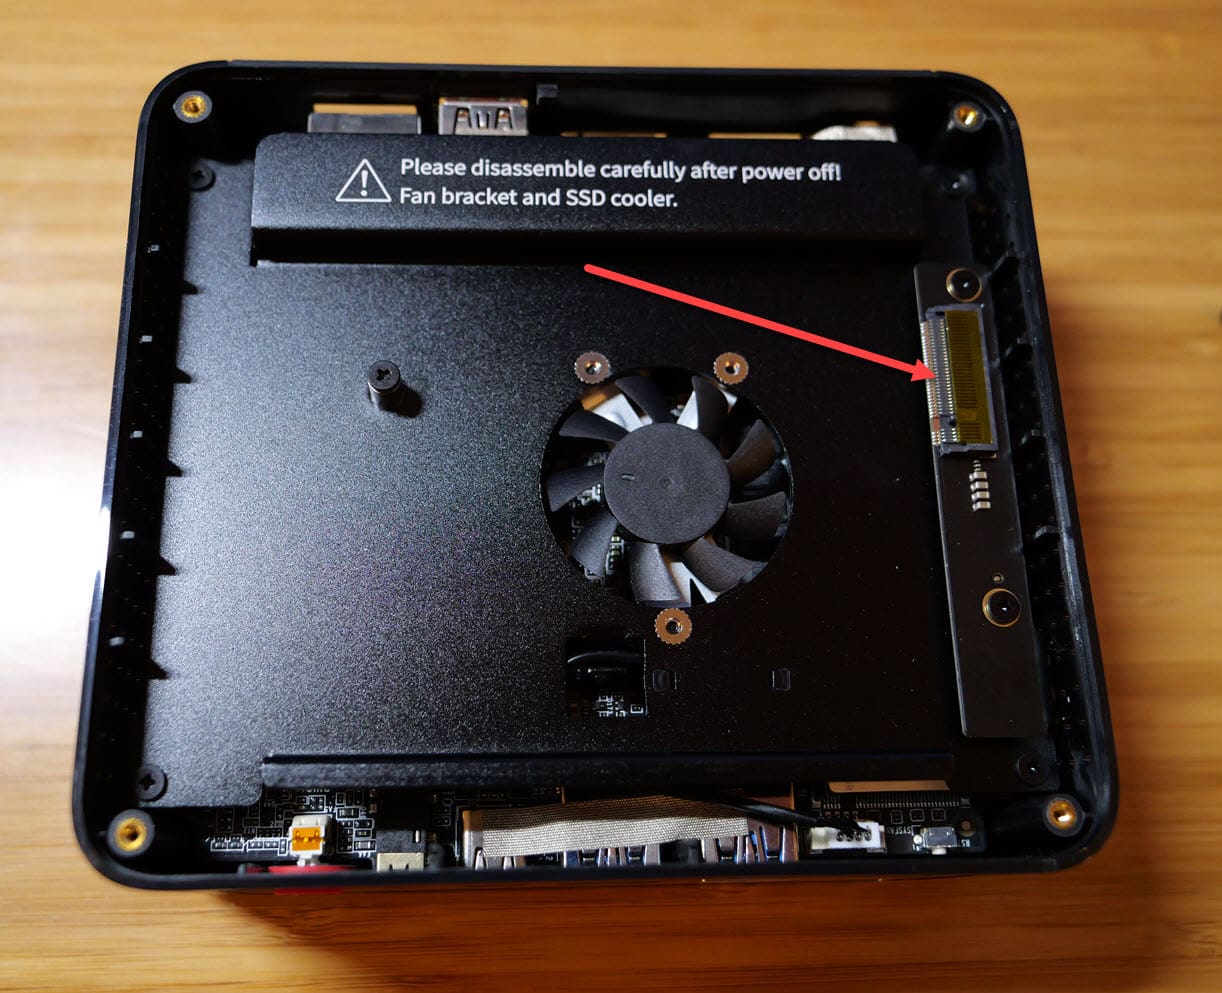
If possible and your mini PC supports it, it is a great idea to use a separate physical drive for your virtual machines. Many of the mini PCs on the market today have a 2nd M.2 slot where you can run another NVMe drive in your configuration. Also, many of these are PCI-e 4.0, so they perform great with the latest PCI-e NVMe drives available on the market.
Having your virtual machines on a dedicated drive, separates out I/O from your host operating system and makes it easier to exclude things in your end-point security. Finally, it creates a space dedicated totally to VM storage so you don’t have to worry about competing software and disk space.
6. Max out memory
There is no question that one of the most important resources you can have with a mini PC or any other PC running virtual machines is memory. Most mini PCs that run DDR4 can max out at 64 GB of memory. Also, while DDR5-equipped mini PCs will state they max out at 64 GB of RAM, these generally can go up to 96 GB of memory.
This reason is why I generally look for mini PCs with DDR5 memory these days. It just provides a lot more headroom going from 64 to 96 GB of memory, allowing you to run more dense environments in a lab scenario.
7. Create exceptions in your end-point security
One thing to be sure and do. Whatever end-point security you are running, create exceptions for your VMs directory and also your VMware Workstation directory. This will help ensure there are no conflicts or blocks due to false positives on virtual machine files.
8. Use an IP KVM or PiKVM device for out-of-band management
Using an IP KVM or something like a PiKVM is a great way to have out-of-band management for your mini PC running VMware workstation. Since you will likely be treating the mini PC as a desktop/server, it is good to have a way to get to the mini PC if something happens or it crashes for some reason.
If you don’t already have an IP KVM (which most don’t unless running a full-blown home lab environment), you can easily put together a Raspberry Pi-based KVM or buy something off-the-shelf, like the TinyPilot.
Also, leverage features in the BIOS like Wake-on-LAN that allow remotely turning on your PC using the “magic packet”. All of these features help to make sure you have control over the hardware in a situation where things crash or get turned off.
Next Steps
What are you waiting for? Plug up your mini PC and get started installing VMware Workstation Pro. Check out my post and video linked above on how to download VMware Workstation Pro for Personal Use. Also, I have a lot of content covering mini PCs on my blog and YouTube channel:
Wrapping up
I think many will benefit from the recent announcement and release of VMware Workstation Pro for free. Using today’s powerful mini PCs, you can have a quick and easy home lab that doubles as your daily driver. Hopefully, the tips described above will help tailor your mini PC for use with VMware Workstation and eliminate any performance issues or other things you may see. Let me know in the comments if you are planning this type of setup any time soon.


