Portainer Docker Compose container automation
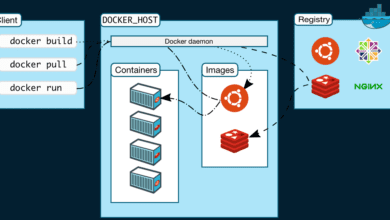
Docker makes creating and running applications easier and faster than you can run them with VMs. However, managing Docker containers across multiple hosts can be challenging. This is where a solution called Portainer comes into play.
What is Portainer?
Portainer is a great GUI tool for managing Docker environments so you don’t have to do everything from the command line. It includes managing a single Docker host or multiple Docker hosts if you want (can do this with the agent we will see below).
You can even manage Docker Swarm cluster, or Kubernetes clusters too. Portainer has a built-in way to spin up Microk8s clusters on your own VMs and manage it from there.
You can manage most of the configuration of your containers. This include images, networks, and volumes through its the Portainer GUI.
Portainer agents
Portainer uses what it calls agents to manage other Docker container hosts. You install the Portainer agent on the other nodes and then your Portainer server can manage these from your main Portainer dashboard.
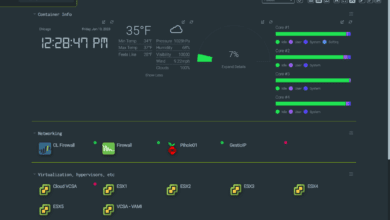
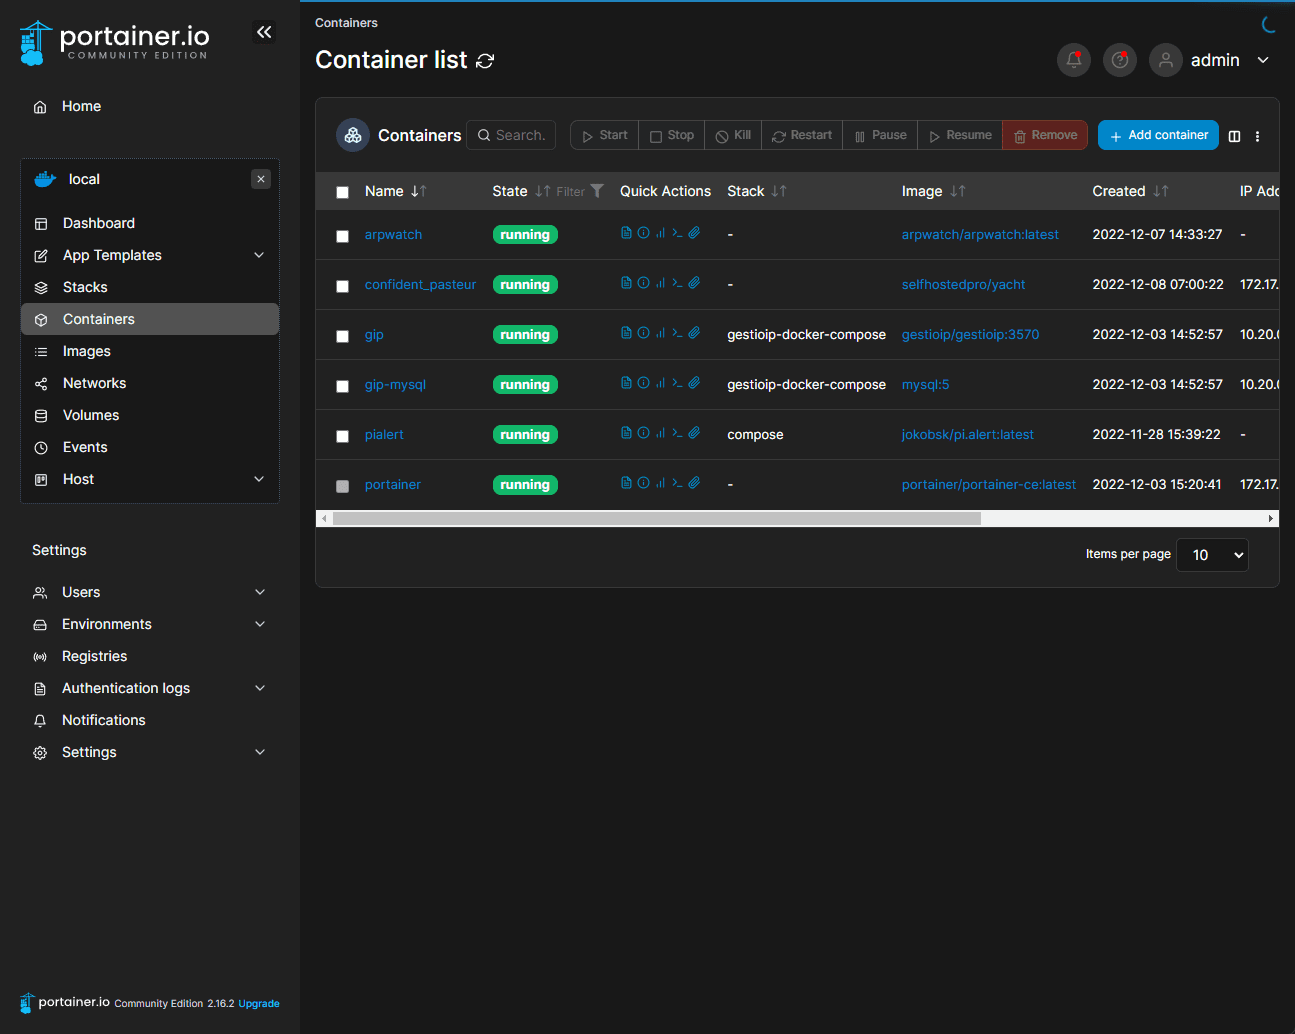
Below is a look at the container list found in Portainer.
Installing Portainer
There are two versions of Portainer available. You can install the Portainer CE (Community Edition) which is free to use and great for things like home labs, and development environments. There is also the Portainer Business Edition. It has other features that CE doesn’t have like web hooks for updates, etc.
As a note, you can install Portainer Business Edition free for up to 3 nodes as a note, which is a pretty awesome deal.
To install Portainer, we’ll run it as a container. Here are the steps:
Create a directory where the Portainer data will be stored:
sudo mkdir -p /opt/portainer/dataRun the Portainer container:
sudo docker run -d -p 9000:9000 --name portainer --restart always -v /var/run/docker.sock:/var/run/docker.sock -v /opt/portainer/data:/data portainer/portainer-ceThis pulls the latest version of Portainer CE. It will then run it as a container with the name “portainer“. The “-p” option maps the container port (9000) to the host port (9000), allowing us to access the Portainer UI on port 9000. The “-v” options mount the Docker socket and the Portainer data directory to the container, enabling Portainer to manage the Docker environment. With Portainer running:
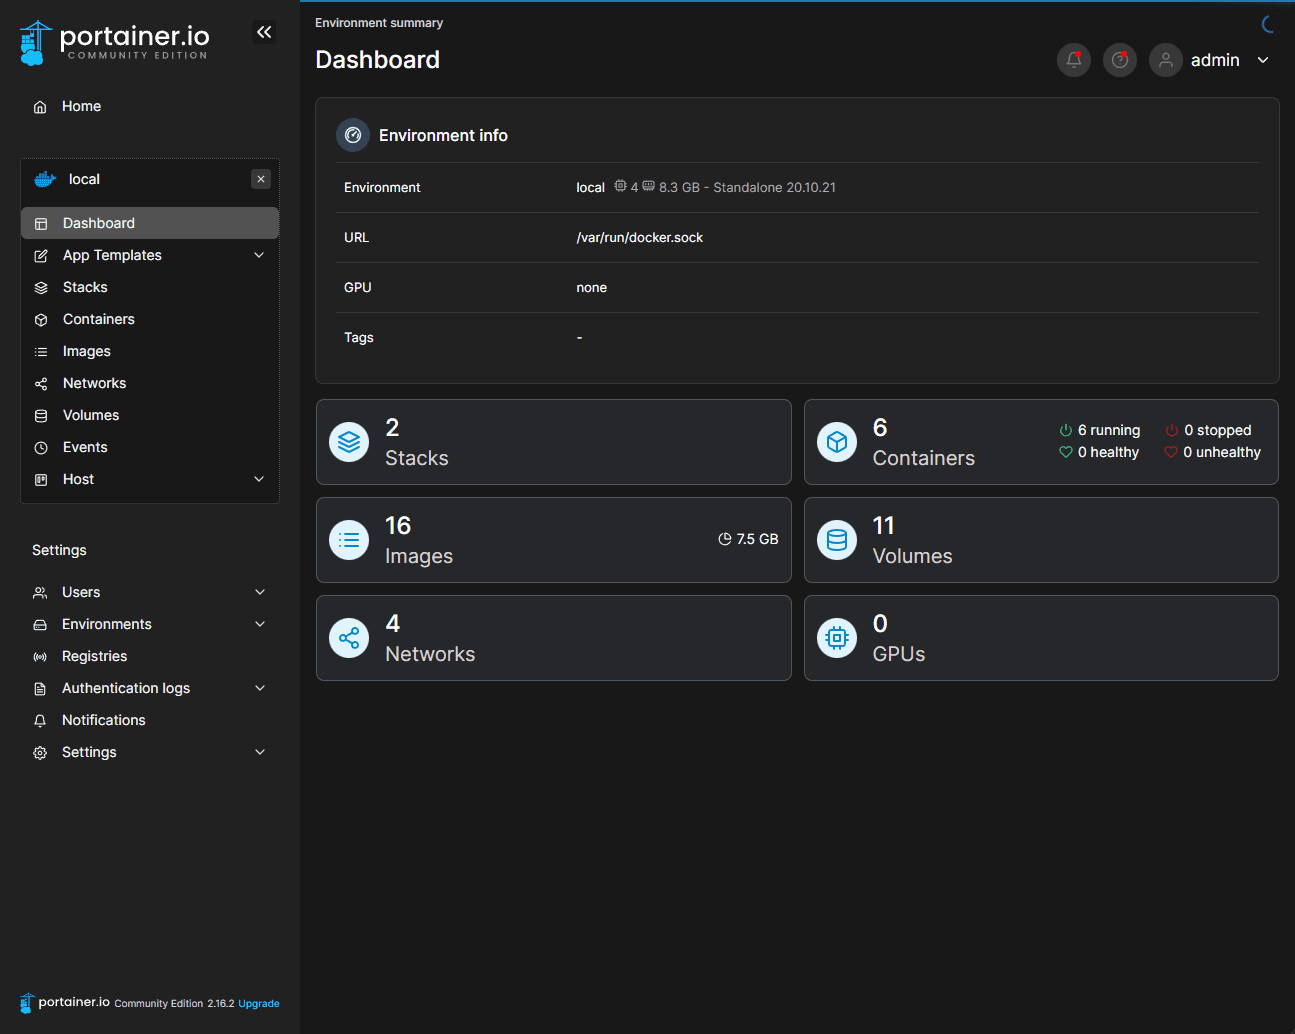
Connect to Portainer UI:
To connect to the Portainer UI, go to to http://<your-server-ip>:9000 in your web browser. You’ll be prompted to create the admin and set a password. After setting up your credentials, you’ll be taken to the dashboard.
Portainer with Compose
Docker Compose is a tool for defining and running multi-container Docker applications. It uses a YAML file (docker-compose.yml) to define the services, networks, and volumes that make up an application. With Portainer, we can easily create, manage, and deploy Docker Compose stacks.
Creating a Stack
With our Compose file in place, we can create a new stack in Portainer that details each Docker container. A stack is a collection of services that make up an application. Here are the steps to create new Portainer stacks:
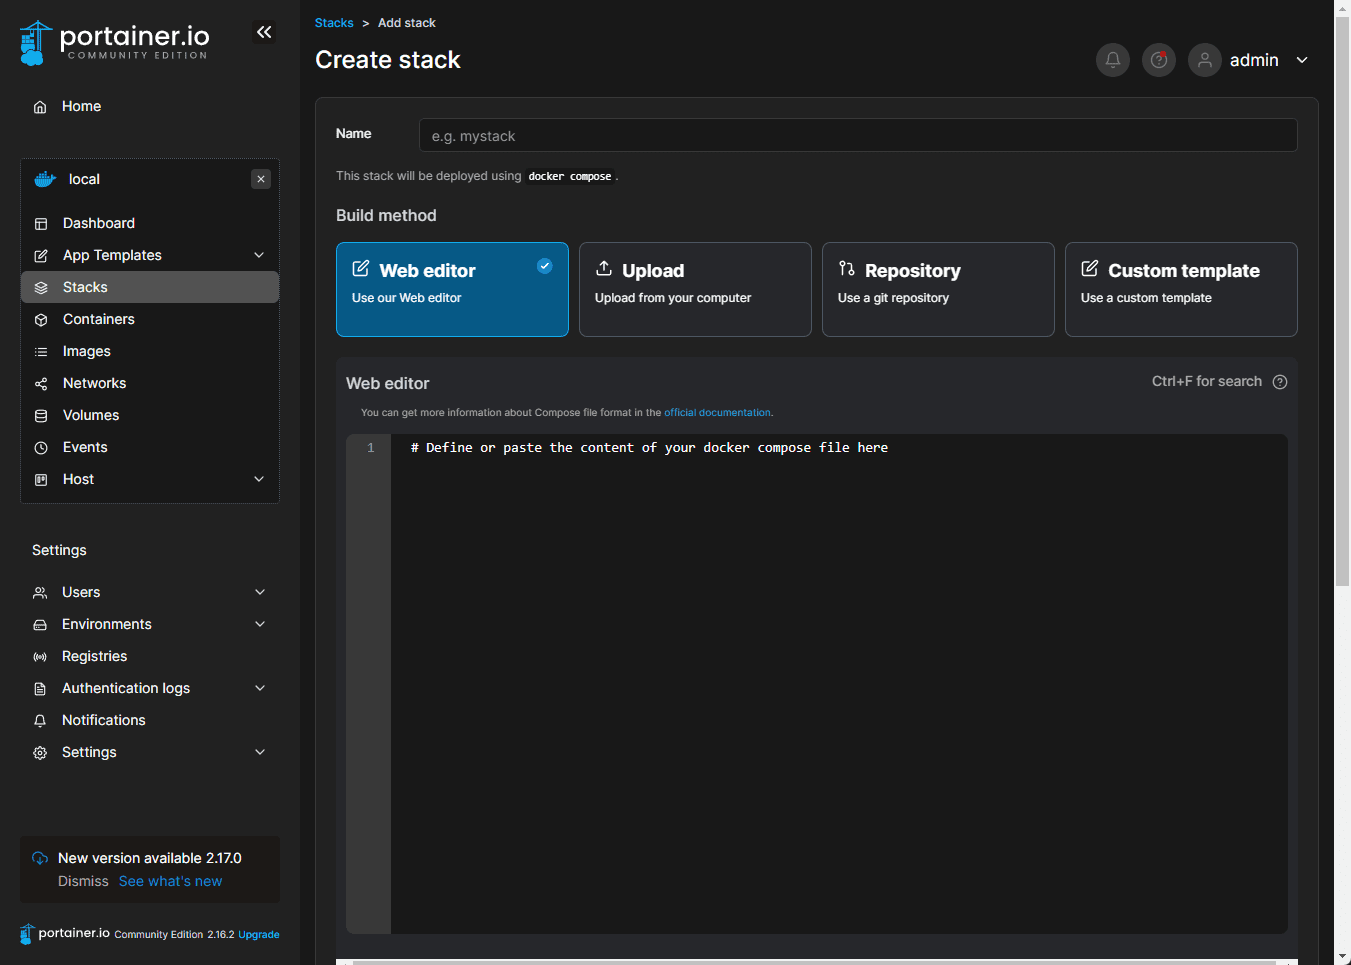
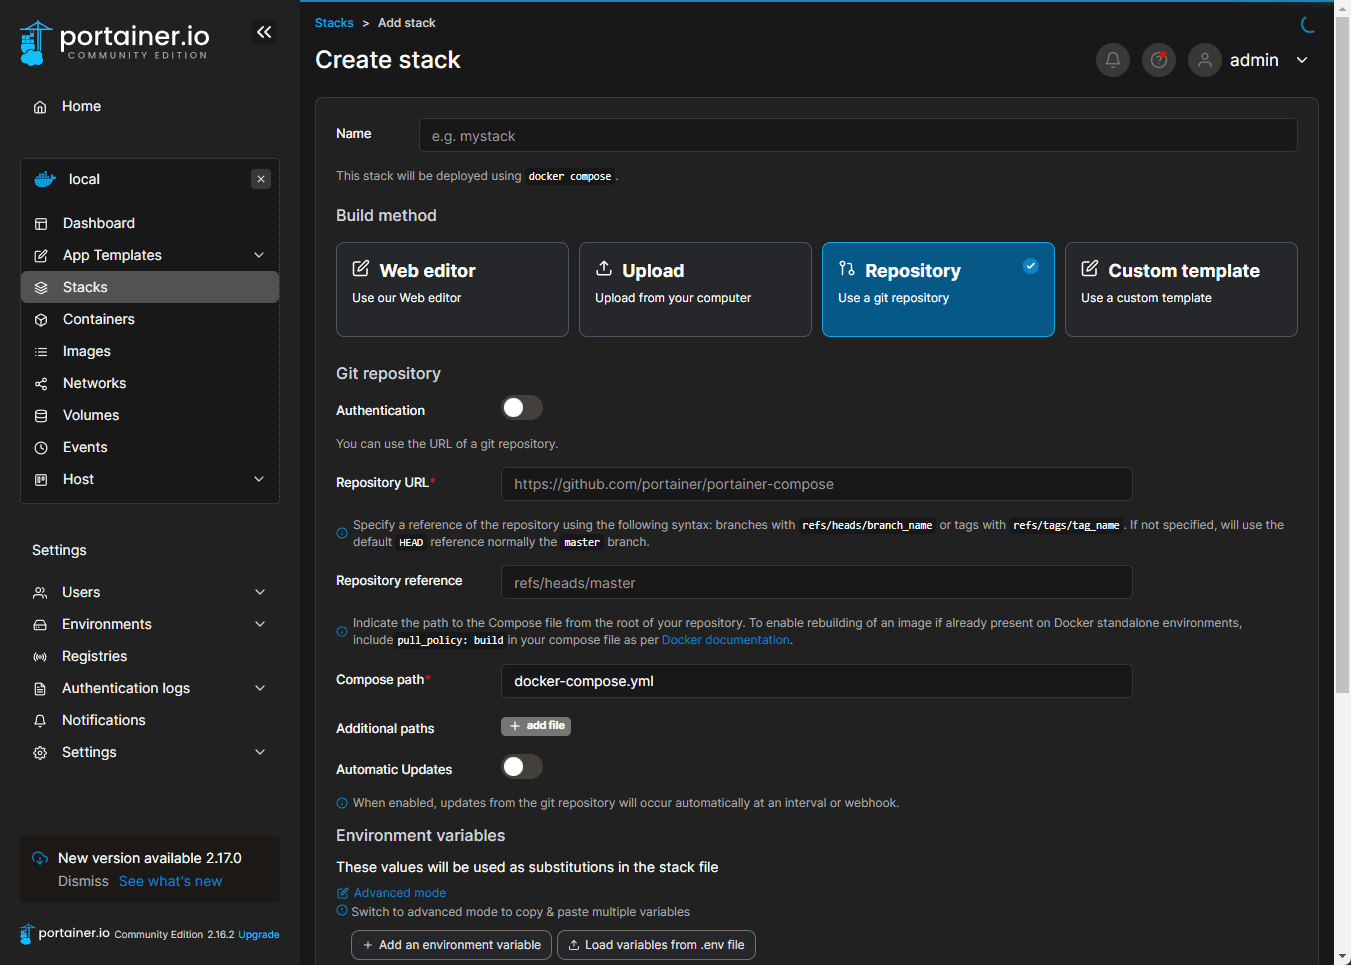
Navigate to the “Stacks” screen in Portainer.
Click on the “Add stack” button.
Give your stack a name and select the “Web editor” option.
In the editor, copy and paste the contents of the Compose file.
Click on the “Deploy the stack” button.
Portainer will now create a new stack using the Compose file created. You’ll be able to see the state of the stack, the containers that make up the stack, and the logs for each container.
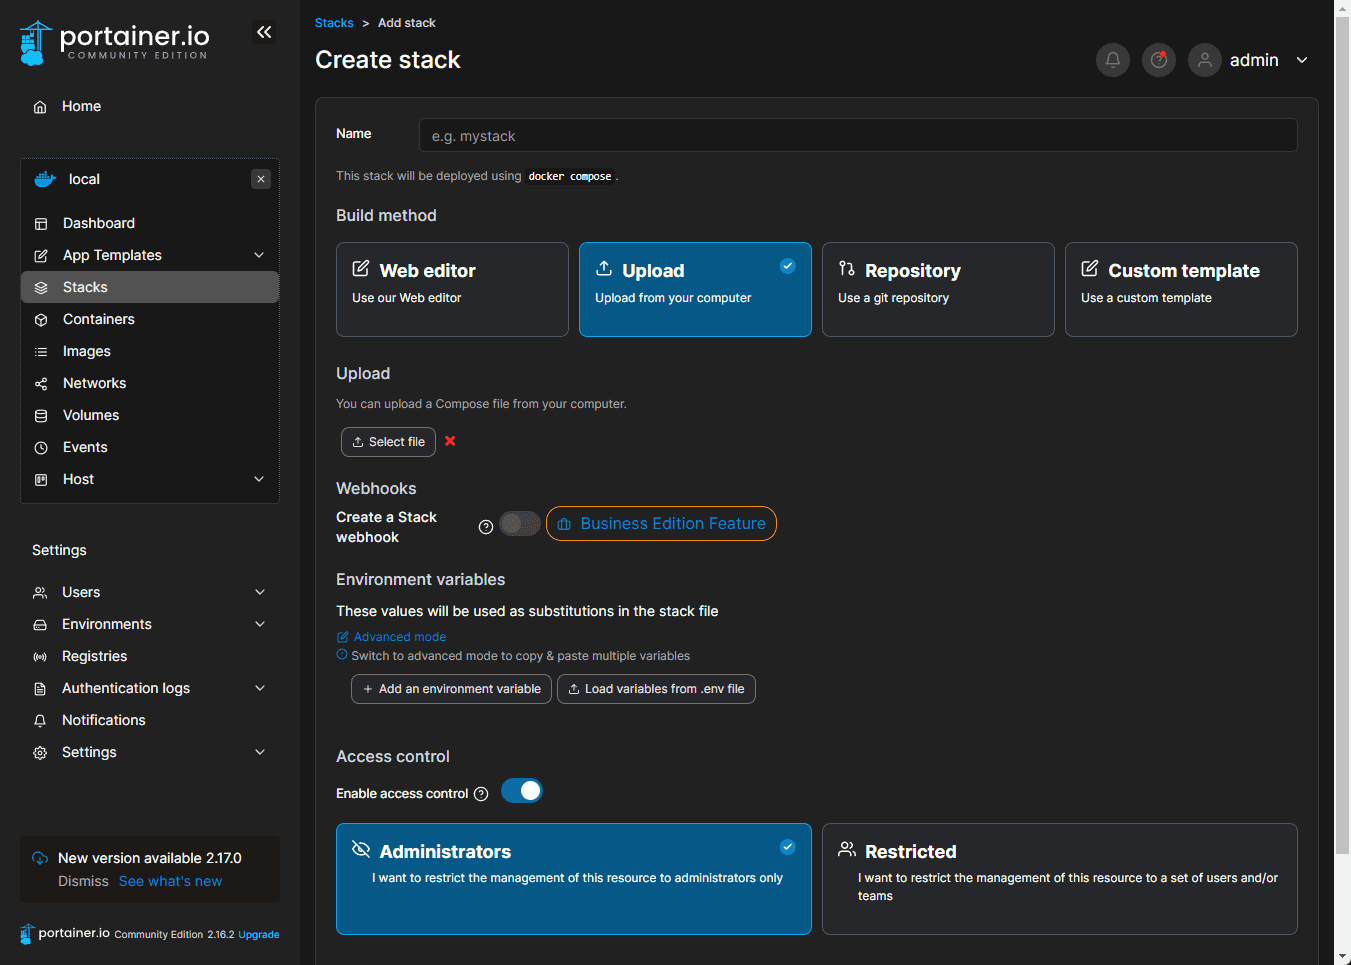
Using the upload feature to upload a Docker Compose file.
You can pull a stack configuration from a git repository.
Updating a Stack
If you make changes to your Compose file, you can update the stack inside Portainer stacks. Here are the steps:
Go to the “Stacks” screen in Portainer.
Click your stack
Click on the “Update the stack” button.
Make changes you want to make
Click on the “Update the stack” button.
Portainer will now update the stack based on the updated Compose file.
Creating Custom Templates
Portainer also allows you to create custom Compose file templates. This can be useful if you have a standard set of services across different applications. Here are the steps to create a custom template:
Got to the “App Templates” screen in Portainer.
Click on the “Create a new template” button.
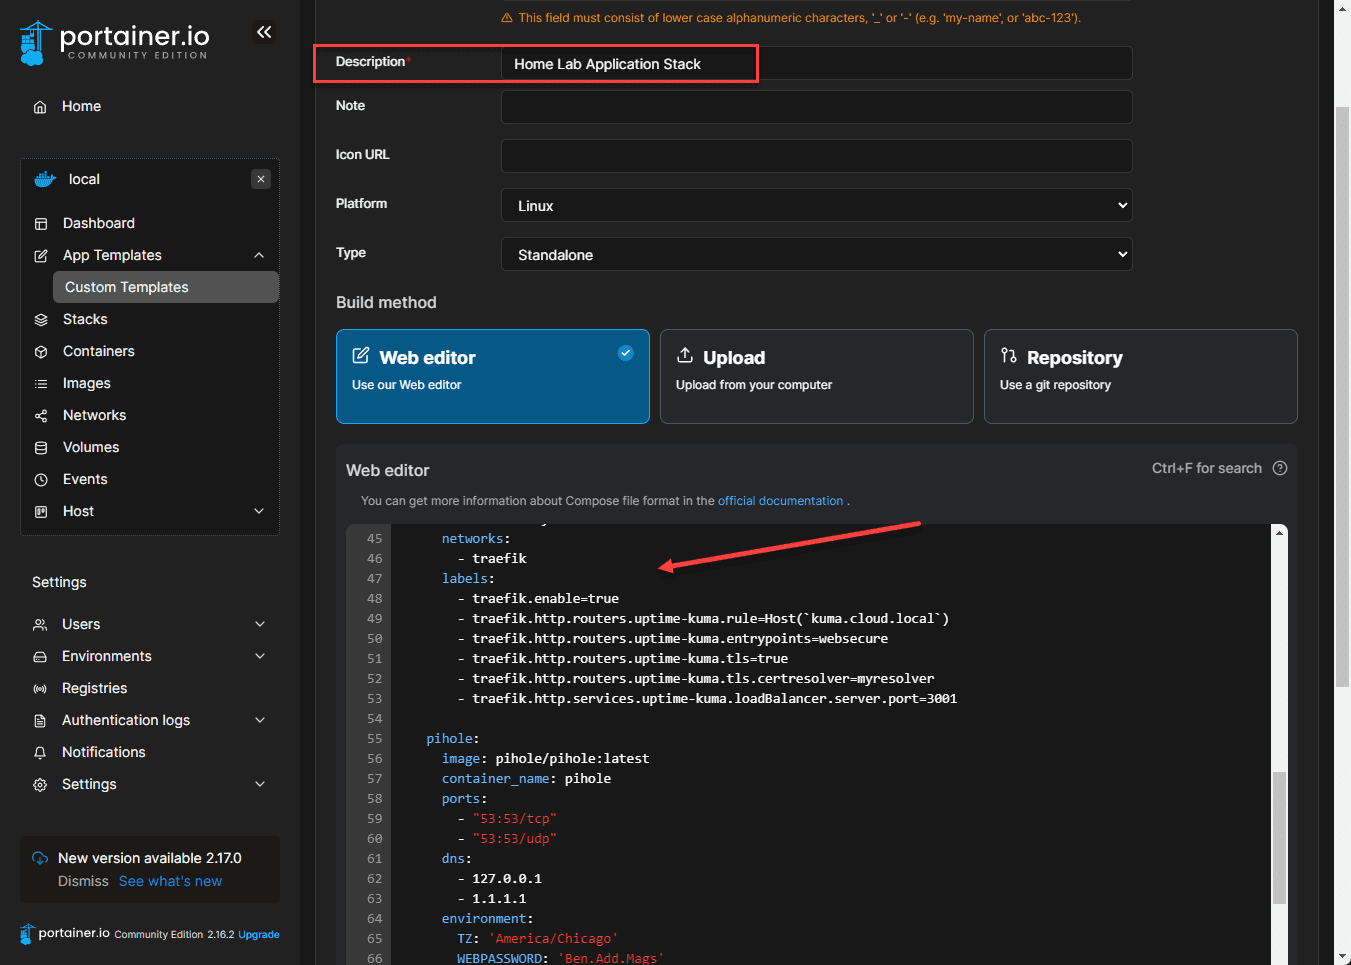
Give your template a name and description.
Copy and paste the contents of your Compose file into the editor.
Define any variables that you want to make configurable.
Save the template.
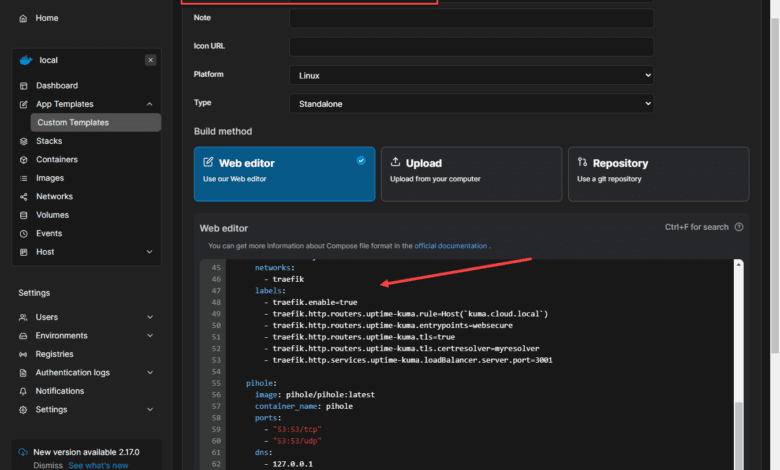
You can now use your custom template to create new stacks in Portainer. Below, I pasted in Docker Compose YML code into the Web editor of the Custom Templates screen.
Now, we can save this as a template so we can easily deploy across the Docker container hosts in the lab or production environments, hosts, etc.
Manually creating a Docker Compose file
Here is an example of a Docker Compose file that includes Traefik, Nginx, and Up-time Kuma . Traefik is used as a reverse proxy for the services and SSL cert configs. This example file also creates a Docker network called “traefik” and creates all the required volumes:
version: "3.8"

services:

  traefik:

    image: "traefik:v2.6"

    command:

      - "--providers.docker=true"

      - "--providers.docker.exposedbydefault=false"

      - "--entrypoints.web.address=:80"

      - "--entrypoints.websecure.address=:443"

      - "--certificatesresolvers.myresolver.acme.tlschallenge=true"

      - "--certificatesresolvers.myresolver.acme.email=myemail@mydomain.com"

      - "--certificatesresolvers.myresolver.acme.storage=/letsencrypt/acme.json"

    ports:

      - "80:80"

      - "443:443"

    volumes:

      - "/var/run/docker.sock:/var/run/docker.sock:ro"

      - "./letsencrypt:/letsencrypt"

    networks:

      - traefik

    labels:

      - "traefik.enable=true"

      - "traefik.http.routers.traefik.rule=Host(`traefik.mydomain.com`)"

      - "traefik.http.routers.traefik.entrypoints=websecure"

      - "traefik.http.routers.traefik.tls.certresolver=myresolver"

      - "traefik.http.middlewares.redirect-to-https.redirectscheme.scheme=https"

      - "traefik.http.routers.traefik.middlewares=redirect-to-https"

      - "traefik.http.services.traefik.loadbalancer.server.port=8080"

  nginx:

    image: "nginx:latest"

    volumes:

      - "./nginx/conf.d:/etc/nginx/conf.d"

    networks:

      - traefik

    labels:

      - "traefik.enable=true"

      - "traefik.http.routers.nginx.rule=Host(`nginx.mydomain.com`)"

      - "traefik.http.routers.nginx.entrypoints=websecure"

      - "traefik.http.routers.nginx.tls.certresolver=myresolver"

      - "traefik.http.services.nginx.loadbalancer.server.port=80"

  uptime:

    image: "uptime-kuma:latest"

    environment:

      - "PORT=3000"

    volumes:

      - "./uptime:/data"

    networks:

      - traefik

    labels:

      - "traefik.enable=true"

      - "traefik.http.routers.uptime.rule=Host(`uptime.mydomain.com`)"

      - "traefik.http.routers.uptime.entrypoints=websecure"

      - "traefik.http.routers.uptime.tls.certresolver=myresolver"

      - "traefik.http.services.uptime.loadbalancer.server.port=3000"

networks:

  traefik:

    external: true

volumes:

  letsencrypt:

  uptime: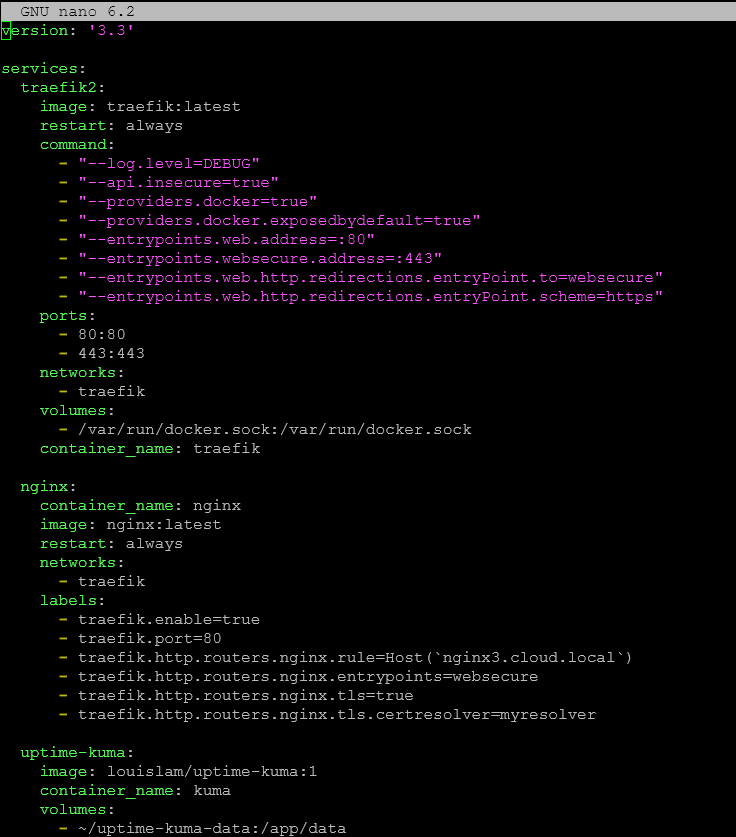
Wrapping Up
Portainer is one of the best tools you can use for managing Docker environments. When you use it with Docker Compose, it can automate full application stacks. Do you use Portainer in your environment? If so, in what way? If not, what tool are you using to deploy and manage your app stacks?