The last few days have been spent with a lot of Windows 11 time. Many have had issues with the TPM check since the release of Windows 11 GA. The Preview Builds did not check for a proper TPM. However, Microsoft has now flagged this check on with the GA release of Windows 11. I have posted a couple of posts that have resonated with many, including the following:
Both of these posts detail workarounds to get past the TPM errors with the Windows 11 GA ISO. However, what if we could modify the ISO itself to get around the TPM check and set the “flag” to “off” for the TPM check with the GA release? This would mimic the behavior we have seen with the Preview builds? Is this possible? Yes. Let’s take a look at how to create a Windows 11 ISO with no TPM check and see how to do this.
Create Windows 11 ISO with No TPM Check
First of all, why do I want to do this? This is obviously not supported by Microsoft. However, I wanted to use the GA release of Windows 11 in my home lab and with automation tooling. Several of my lab hosts do not have TPM chips. So, I wanted to create a customized ISO that bypasses this check so I don’t have to do this manually each time I install Windows 11 from an ISO as well as with Packer builds.
There are only a few things we need to do to bypass the TPM check in the Windows 11 ISO. However, there are some prerequisites we need to have installed:
- Windows ADK for Windows 11
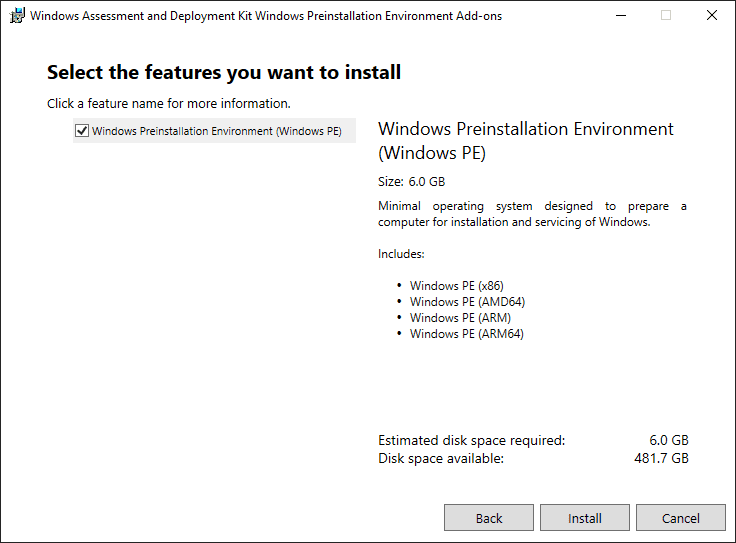
- WinPE add-on for the Windows ADK
- Windows 11 GA ISO downloaded from Microsoft
Once we have those installed, the process looks like the following:
- Mount the Windows 11 ISO and copy the files to a folder
- Mount the boot.wim file from the folder
- Load the SYSTEM registry from the folder and add the BypassTPMCheck DWORD value
- Commit the changes to the boot.wim file
- Create a new ISO using the OSCDIMG.exe tool
Install the Windows 11 ADK and WinPE add-on
After downloading the Windows 11 ADK, install the Deployment tools option. This is the only component needed.
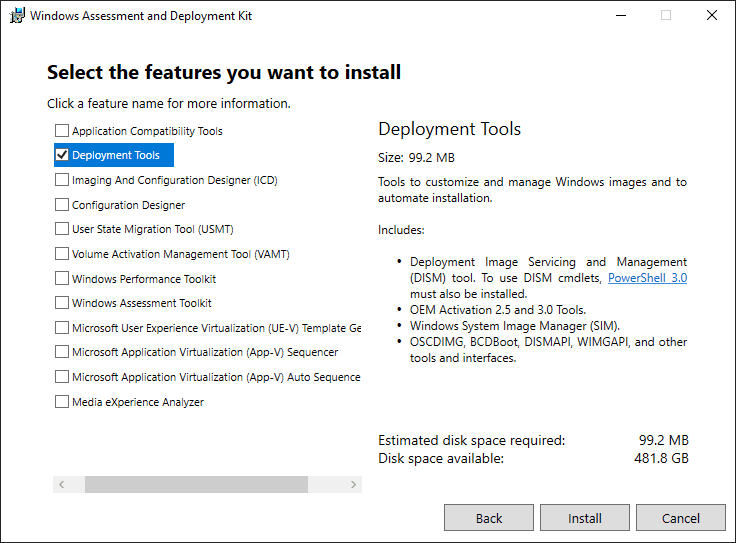
You may not 100% need this component as it mainly relates to creating the PE builds, however, I installed it for good measure.
Now, on to the process.
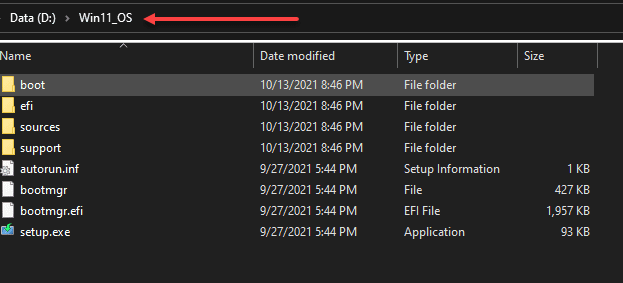
1. Mount the Windows 11 ISO and copy the files to a folder
Below, I have created a Win11_OS folder on the root of my D drive. I just literally selected all from the Windows 11 GA ISO I had mounted in Windows and pasted into this folder.
2. Mount the boot.wim file from the folder
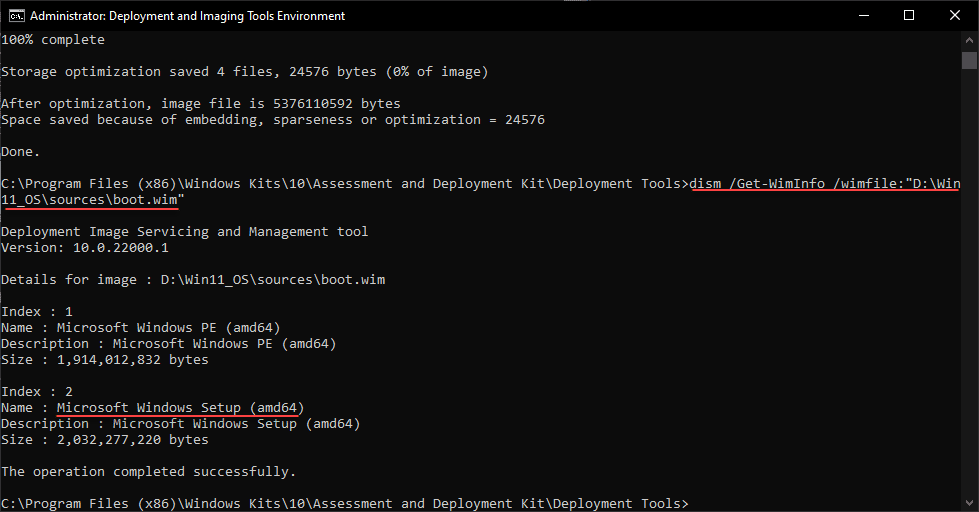
Next, we need to mount the boot.wim file to alter the registry for this image. However, we need to know what index value to mount. To get the information about the boot.wim file, use the following command:
Dism /Get-WimInfo /WimFile:D:\Win11_OS\Sources\boot.wimAs you can see below, Index 2 is the Microsoft Windows Setup image. This is the one we want.
Below, we are mounting the boot.wim image to a mount folder, located at d:\mount\mount (Create this folder). There is no significance to the mount\mount directory. It requires the folder to be blank and I had some files in the parent folder. So, I simply created a new child folder underneath.
dism /mount-wim /wimfile:"D:\Win11_OS\sources\boot.wim" /index:2 /mountdir:d:\mount\mount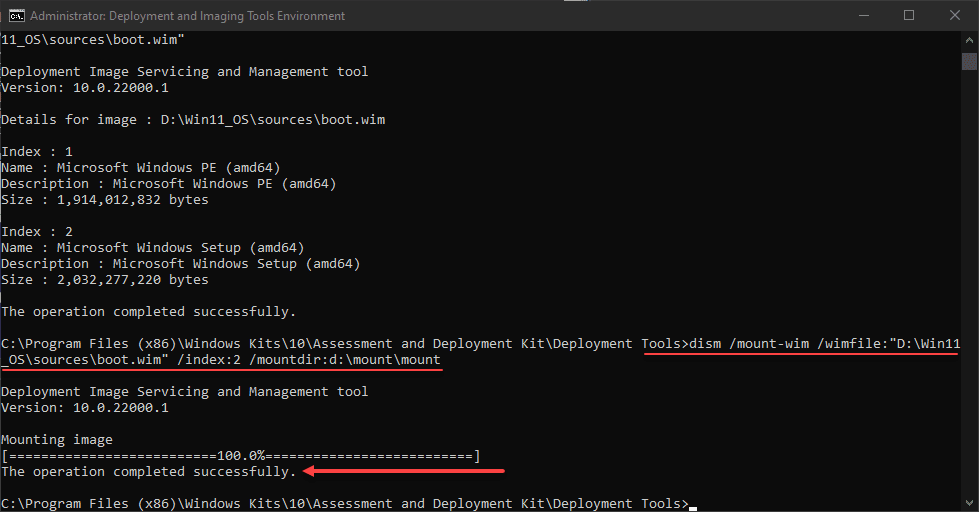
3. Load the SYSTEM registry from the folder and add the BypassTPMCheck DWORD value
Once you have the boot.wim file mounted to a mount folder, you can then load the SYSTEM registry from the mounted boot.wim image and edit the registry.
reg load HKLM\test d:\mount\mount
***Note*** If you receive an error message about the file is being used by another process, there is a workaround:
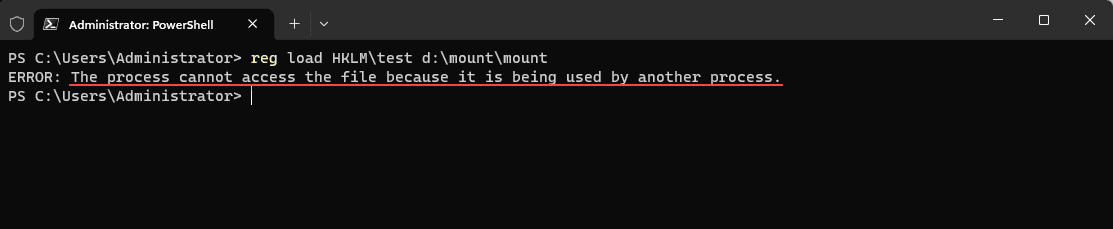
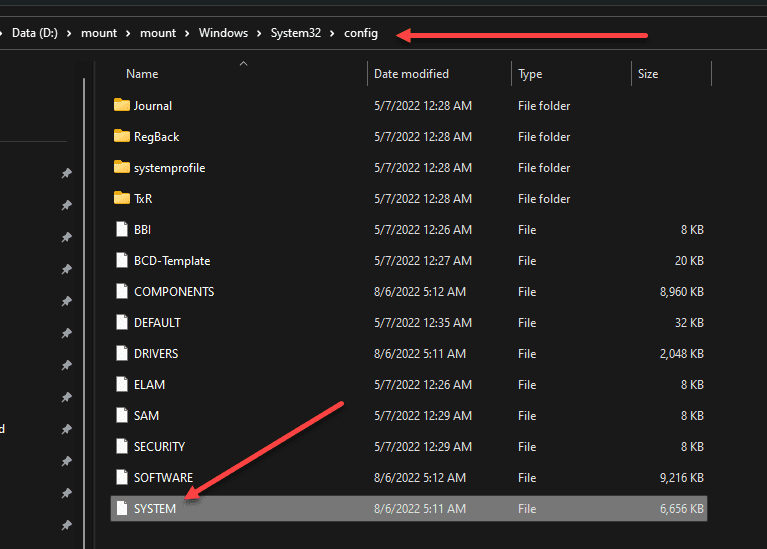
reg load HKLM\test D:\mount\mount\Windows\System32\config\SYSTEM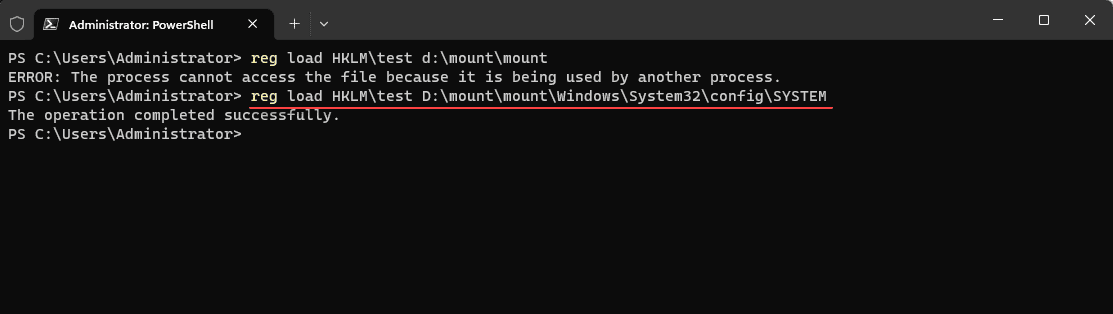
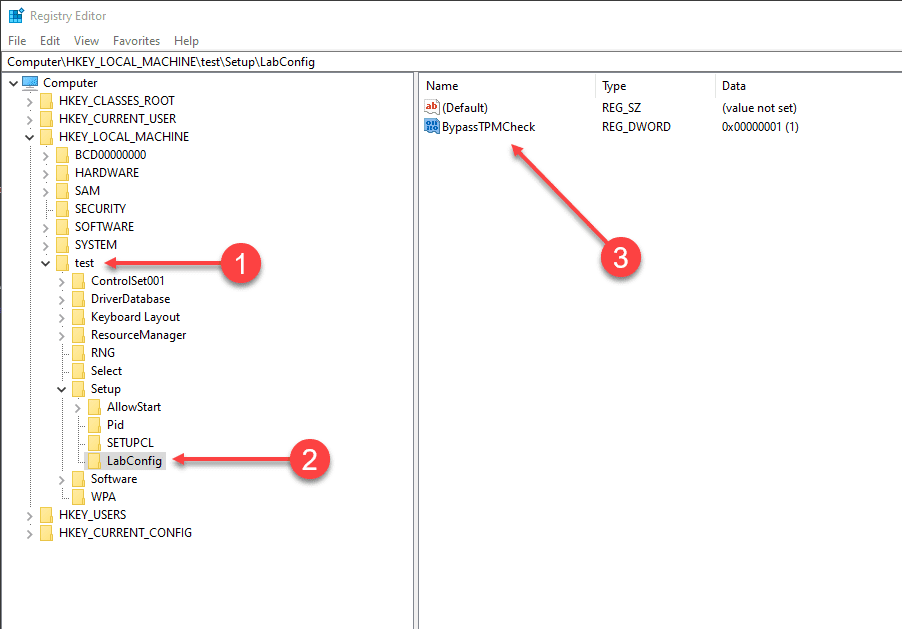
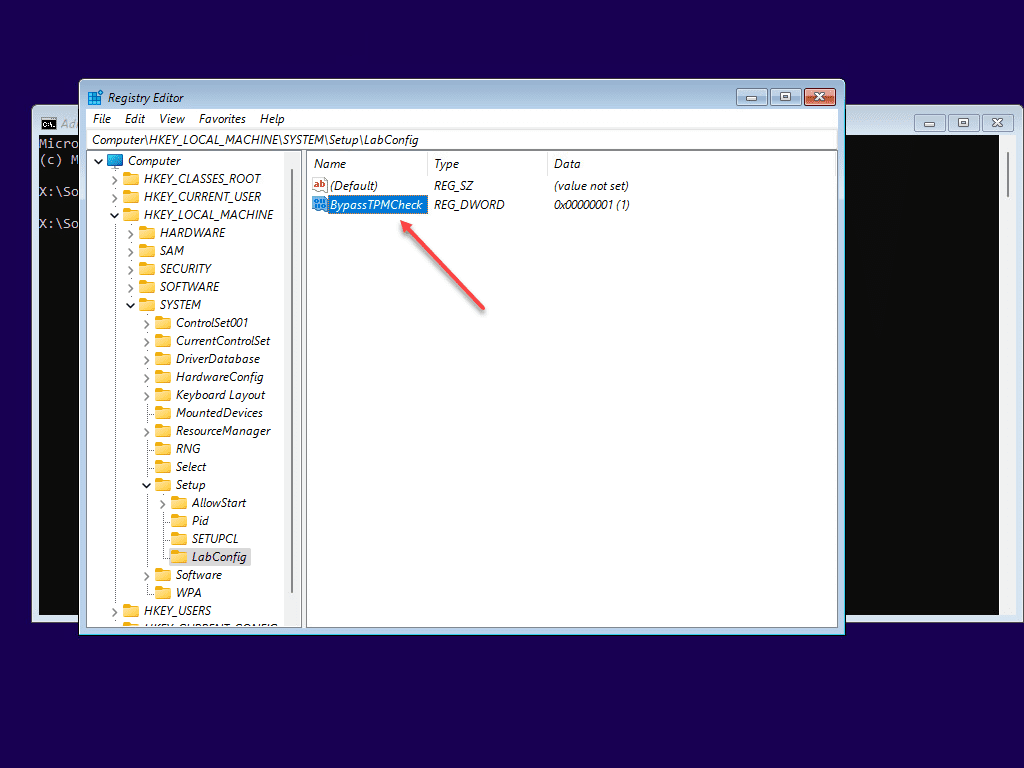
Note, when you load the registry HIVE, you access this from your host workstation’s registry editor. Create the new LabConfig key under the Setup key. Then create the BypassTPMCheck DWORD value with a data entry of 1.
Now, we need to unload the registry hive before we commit the changes to the boot.wim file.

4. Commit the changes to the boot.wim file
At this point, we can commit the changes to the boot.wim file. What we are actually doing is committing the registry changes that we made, including the BypassTPMCheck DWORD into the registry and saving that to the boot.wim file. Since we mounted the file directly from the Win11_OS folder, it will be saved back to where it needs to go.
dism /unmount-wim /mountdir:d:\mount\mount /commit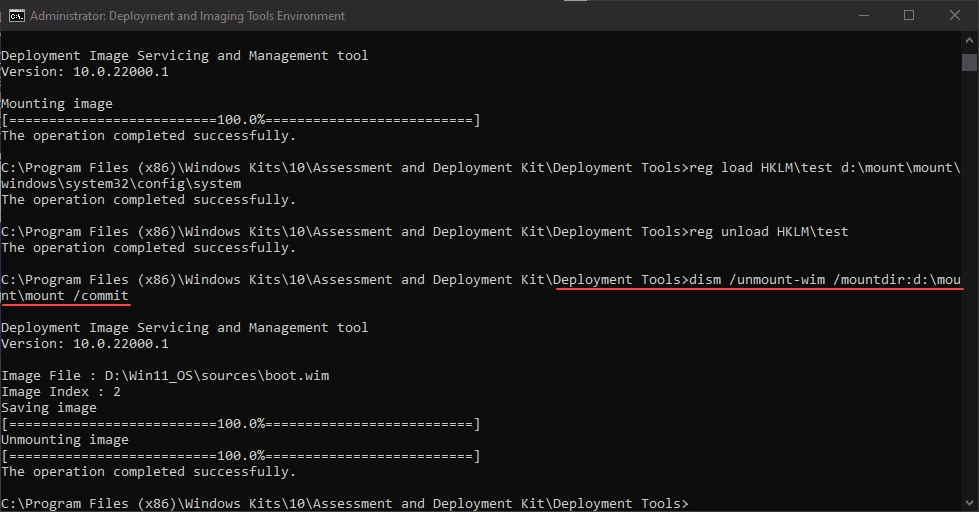
5. Create a new ISO using the OSCDIMG.exe tool
Now, all that is left is to create a new ISO file from the working directory, Win11_OS, that contains our registry hack. To do that, we need to use a utility that is part of the WADK, oscdimg.exe. The syntax to create a new ISO file that is EFI enabled is the following. Be sure to replace your respective directories with what they are in your case. As you can see, I am creating the new ISO called Windows11GA_noTPM.iso.
oscdimg -m -o -u2 -bootdata:2#p0,e,bD:\Win11_OS\boot\etfsboot.com#pEF,e,bD:\Win11_OS\efi\microsoft\boot\efisys.bin D:\Win11_OS D:\Windows11GA_noTPM.iso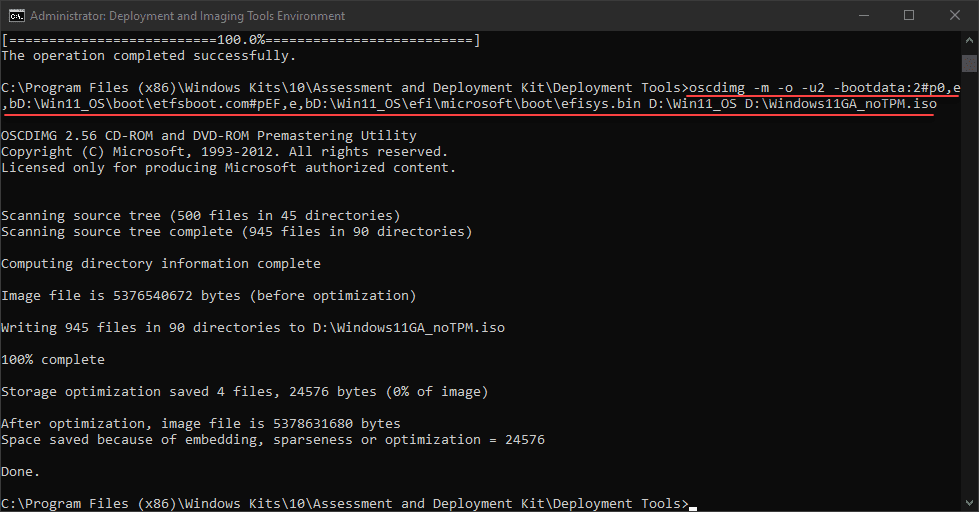
After mounting the new Windows11GA_noTPM.iso to a virtual machine, voila! No “Your PC can’t run Windows 11” error, and I didn’t have to manually update the registry.
Video showing the process to create a Custom Windows 11 ISO
Concluding
Hopefully, this hack on how to Create Windows 11 ISO with No TPM Check will help anyone that needs to have a TPM-less installation of Windows 11 for automation and other purposes. It is going to be interesting to see how Microsoft handles updates of Windows 11 that have been bypassed with no TPM installed. It has been mentioned they won’t support these with updates.
Google is updating how articles are shown. Don’t miss our leading home lab and tech content, written by humans, by setting Virtualization Howto as a preferred source.
About The Author

Dude, your tutorial is full of errors!
You missed so many information that is needed in order this to be done.
1. you forgot to mention that you need to create “Win11_OS” AND “mount” folder in the root of your dir.
2. Insider of the mount there should be another subfolder “mount” otherwise your command won’t work and will give you an error
3. your registry mount is not complete: “reg load HKLMtest d:mountmount” and it should be “reg load HKLMtest d:mountmountwindowssystem32configsystem”
4. unmounting wim you have a typo “dism /unmount-wim /moutdir:d:mountmount /commit” and it should be “dism /unmount-wim /mountdir:d:mountmount /commit”
Please correct your tutorial so that others don’t waste time on checking what went wrong like I did, and had to correct each step.
This Tutorial is not working with Windows 11 22H2 !
Still getting the same message when running setup
Can you update the tutorial for Win 11 22H2 ?
I do believe the WinPE addon is required to get oscdimg.exe