Have you been in a situation where you are installing a brand new VMware ESXi host, and when you get to the point of the installer scanning for the available disks, and none are found? Just the other day, I was installing a brand new Supermicro server with an extremely new model of LSI/Avago/Broadcom RAID controller. In this particular environment, VMware vSphere 6.7 was the installed version, so this was the target of my install. Unfortunately, after beginning the install, the installer did not find any disks on which to install ESXi. What is often the culprit in this situation? Let’s look at ESXi install disk not detecting HDD and see how you can overcome this issue in your environment.
Troubleshooting the ESXi install disk not detecting your hard drive
This situation is mostly seen when you have a RAID controller installed on a server. To successfully install ESXi, the installer has to recognize the RAID controller and storage provisioned by the controller. This process, of course, involves a driver.
VMware does a great job of keeping the ESXi installers up-to-date with patches and other enhancements that add compatibility for new hardware as it is released. However, you can get in a situation where you have a bleeding-edge RAID controller just released to the market without the correct driver in your ESXi install disk to recognize the hardware. What can you do in this situation?
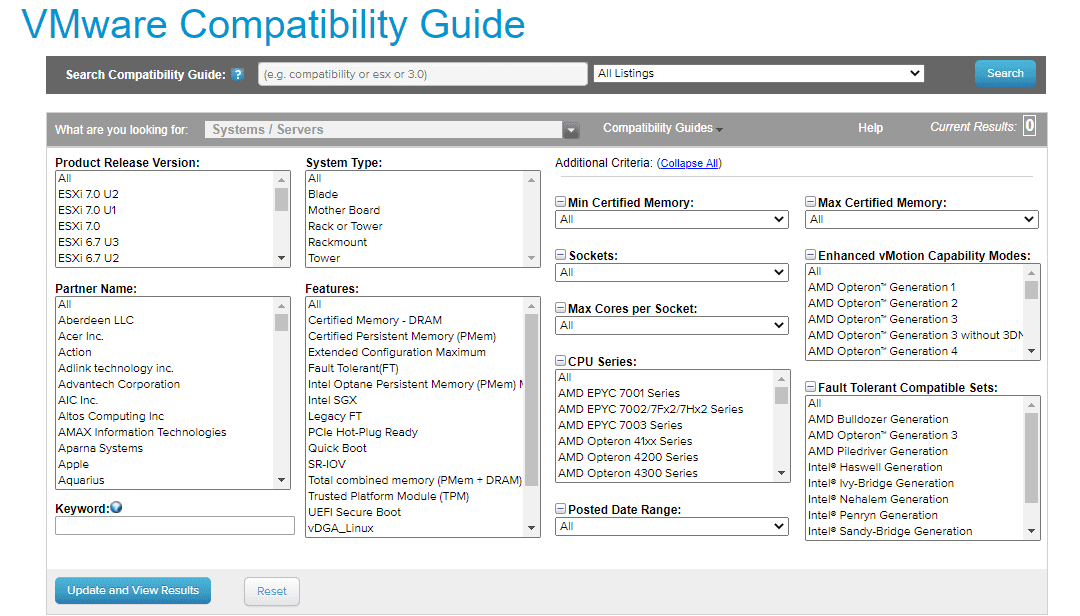
As you probably are thinking, you need to get the correct driver into the ESXi installer ISO file to recognize the RAID controller and provisioned storage in your ESXi host. However, before troubleshooting a driver issue, it is always a good sanity check to ensure you have hardware compatibility with VMware ESXi.
Check compatibility
One of the first things that you should do, especially when dealing with whitebox type systems is take a step back and ensure your storage hardware is on the compatibility matrix for the particular VMware ESXi version you are installing. It is important to check for the specific version as there can be changes between versions.
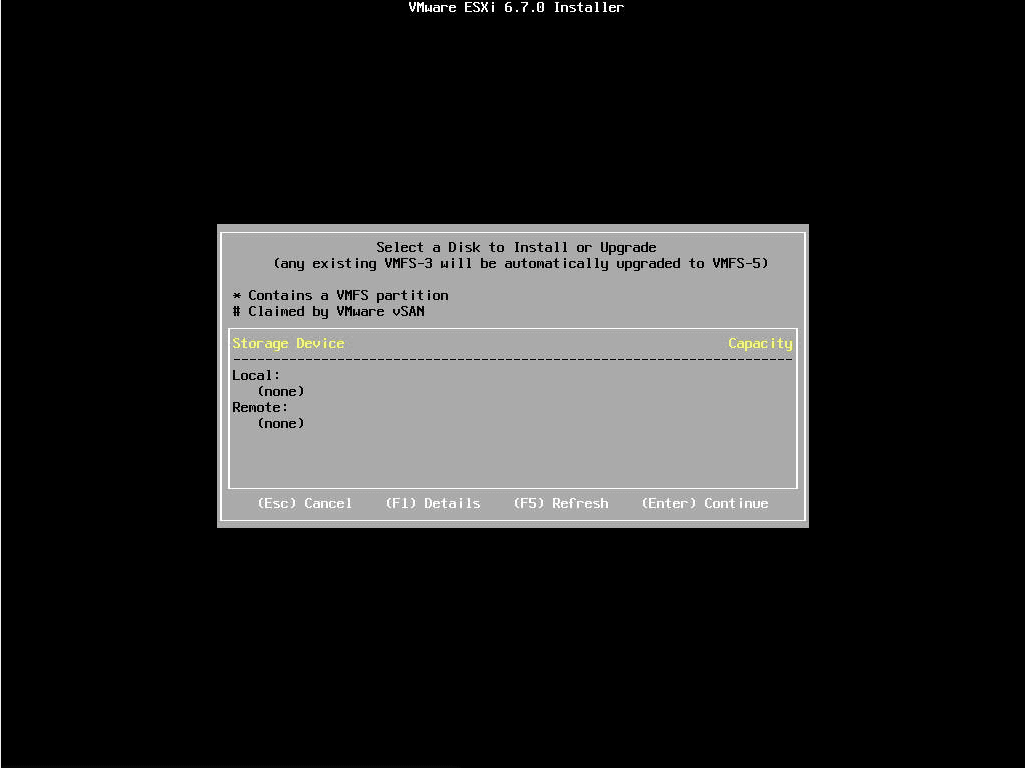
ESXi Install Disk not detecting HDD
If you have verified compatibility with your RAID controller and the VMware ESXi version you are installing, let’s see how to get the driver installed in your ESXi ISO media easily. The first thing you want to do is go to your hardware manufacturer for your storage adapter and download the driver for your RAID controller that is compatible with ESXi.
Below is a view from downloading a RAID controller driver from LSI/Avago/Broadcom.
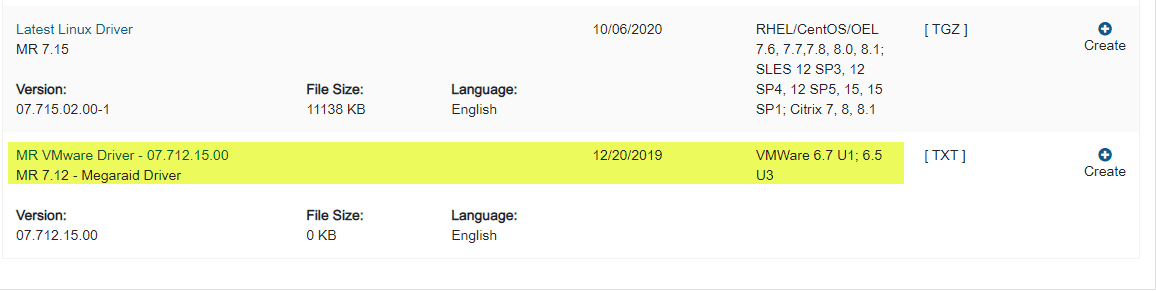
What you will find is at least from Broadcom, the “download” is simply a text file that points you to the official download from VMware’s site. In this case, the driver shown above points to:
https://my.vmware.com/en/web/vmware/details?downloadGroup=DT-ESXI67-BROADCOM-LSI-MR3-77120500-1OEM&productId=742 Now that you have the driver downloaded, let’s see how we can get this into the ESXi install ISO. Back in the day, there used to be a GUI tool, called the ESXi-Customizer utility. That tool has since been deprecated. However, Andreas Peetz over at v-front.de has created a PowerShell version of the tool that works great. I have used this many times to create customized ISOs for ESXi. It allows creating an ESXi ISO with the custom drivers and patches easily. You can find detailed information about how to download and use the tool here:
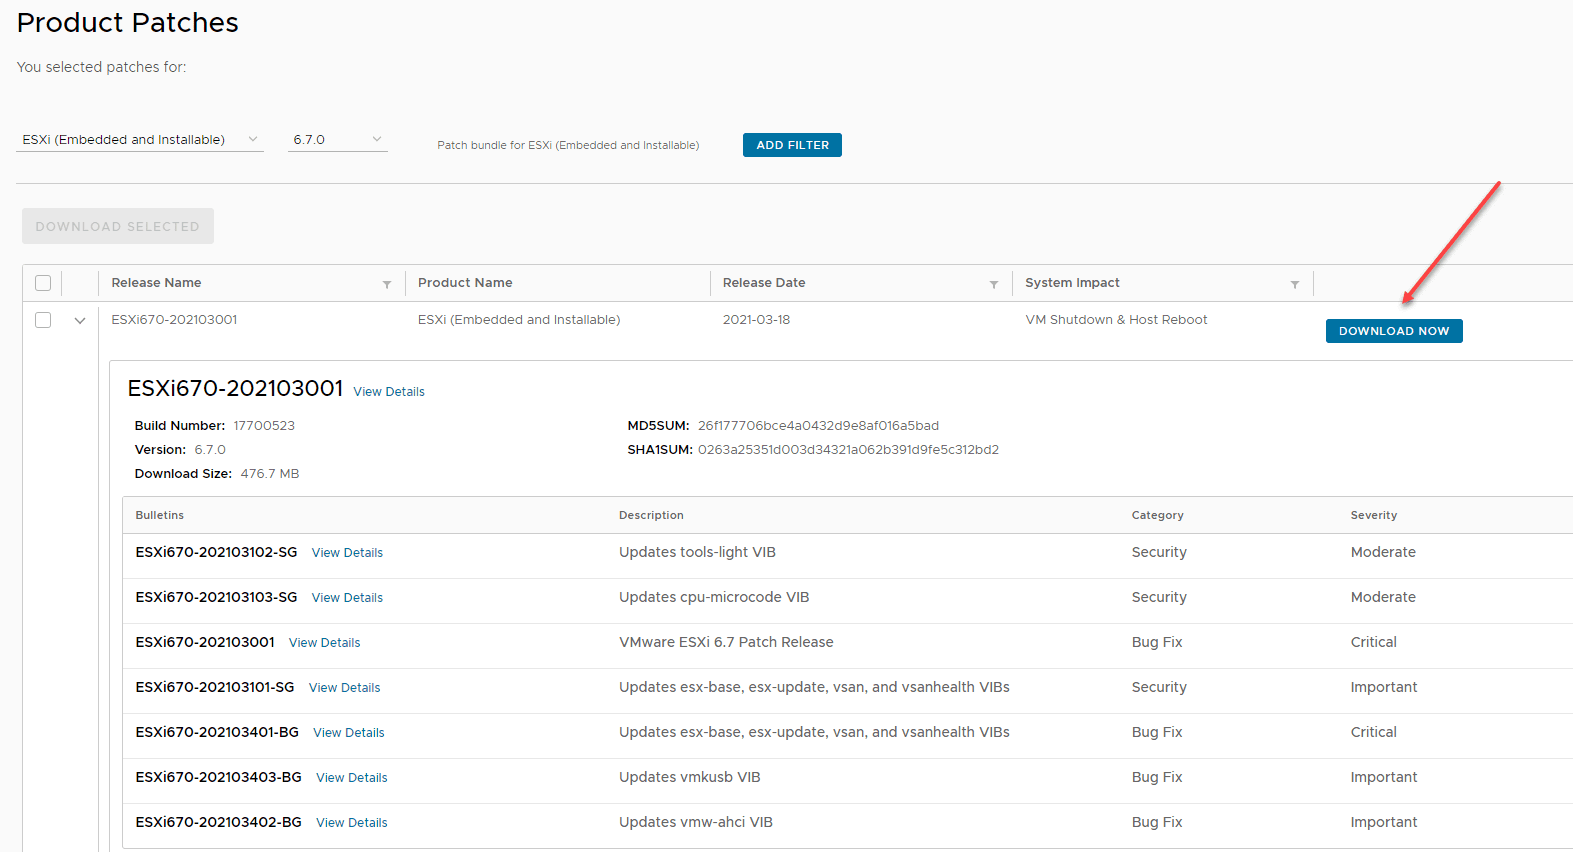
Using the tool, what you can do is use the latest patch bundle for your specific ESXi version and also specify a directory that contains drivers and other patches. The ESXi-Customizer PowerShell script will create an ISO from these files for you. To get the latest patch bundle, navigate to:
As an example, below I have navigated to the 6.7 ESXi version and will download the latest patch here:
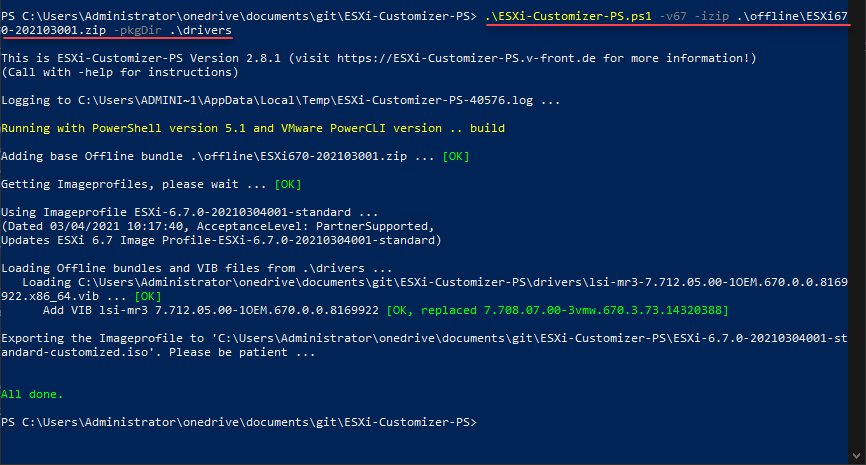
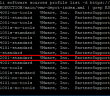
Now that we have downloaded both the latest patch and have the Broadcom/Avago/LSI official driver downloaded, we can use the PowerShell ESXi-Customizer tool to create the ISO we need to use to install ESXi. Below, I am specifying the version of ESXi with the -v67 switch and then using the -izip parameter to point it to the offline patch .ZIP file. The .\drivers folder contains the .vib file for the RAID controller. As you can see below, it replaced the lsi-mr3 driver found with the one we downloaded.
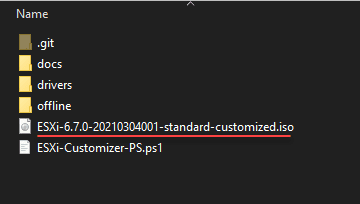
As you can see below, the tool created a customized ISO file for the ESXi 6.7 installation.
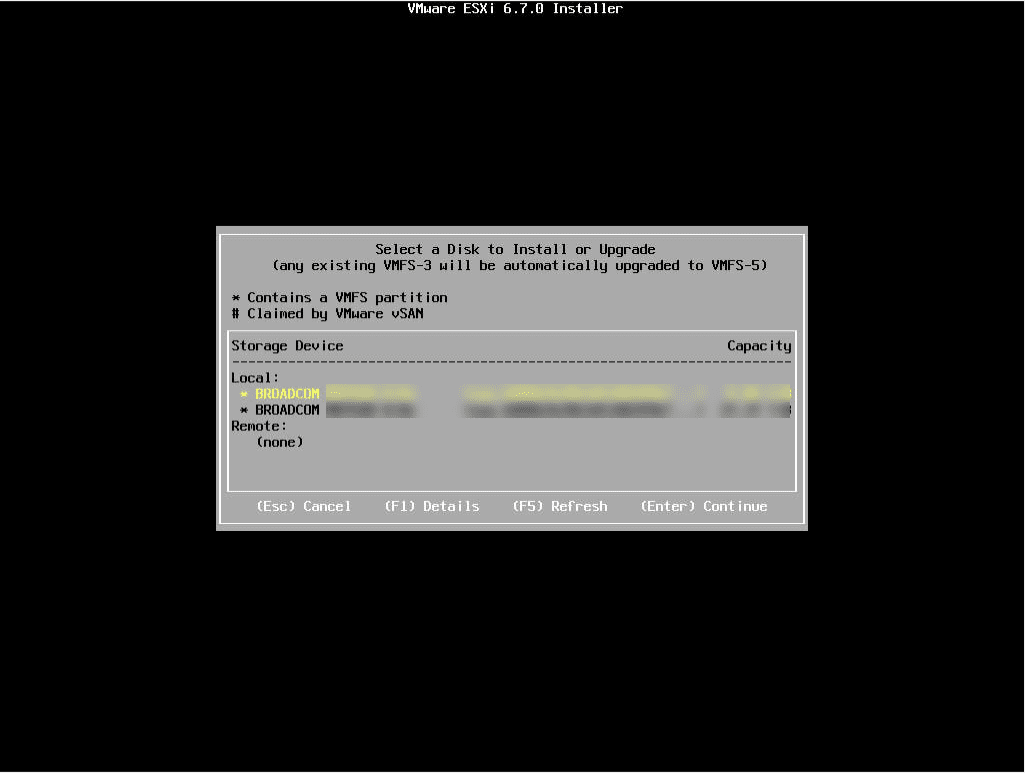
Now, let’s see if it works. Bingo!
Concluding
You may run into cases from time to time of the ESXi Install Disk not detecting HDD for installation. In these cases, pulling the latest storage driver and integrating into the ESXi install ISO may be the only way to get your storage adapter recognized. Using the ESXi-Customizer utility as shown, you can easily use the latest patch version and slipstream the driver into the ESXi ISO.
Google is updating how articles are shown. Don’t miss our leading home lab and tech content, written by humans, by setting Virtualization Howto as a preferred source.
About The Author

That did not work for me it seems like there are some steps missing.
PS C:UsersjakeDesktopTest4> .ESXI-Customizer-PS.ps1 VMware-ESXi-7.0U3g-20328353-depot -izip .offlineVMware-ESXi-7.0U3g-20328353-depot.zip -pkgDir .drivers
I get this error:
An unexpected error occurred:
Could not initialize the VMware.ImageBuilder PowerCLI module. Make sure that Python 3.7 is installed and that you have set the path to the Python executable by using Set-PowerCLIConfiguration -PythonPath. See the PowerCLI Compatibility Matrixes for information on the Python requirements.
FYI: python 3.7 is installed
This is the command to add it to path:
Set-PowerCLIConfiguration -PythonPath “C:~AppDataLocalProgramsPythonPython37python.exe” -Scope User
You need Python version 3.7.9 or it will encounter a bug, and you need to pip install the following packages:
six
psutil
lxml
pyopenssl
To get PowerCLI just use Install-Module -Name VMware.PowerCLI in Powershell