Kubernetes Dashboard Helm installation and configuration
Many are starting their journey working with Kubernetes aside from myself. I have been playing around a lot with Kubernetes in the home lab and elsewhere and getting up to speed on various technologies and solutions associated with Kubernetes. In my Kubernetes Home Lab Setup Step-by-Step post, I took a look at the step-by-step approach to getting a Kubernetes cluster up and running in the home lab. One of the first things you will want to do after installing and provisioning your Kubernetes cluster and cluster nodes is getting the Kubernetes Dashboard running. In this post, we will kill two birds with one stone and look at Kubernetes dashboard helm installation and configuration to see how you can install the Kubernetes Dashboard using helm.
What is Kubernetes Helm?
If you begin working with Kubernetes, you will no doubt see something referenced called helm. What is helm? The easiest way to think of helm is it is a package manager for Kubernetes clusters. Much like you use Linux repos to install software on your favorite Linux distro, you use the helm tool to go out and pull down applications to install in your Kubernetes cluster.
Helm allows you to install and manage Kubernetes applications. It does this by what it calls charts. What are charts? The chart is a bundle of information necessary to create an instance of a Kubernetes application.
In addition to the chart, there are a couple of other important concepts:
- config – contains configuration information that can be merged into a packaged chart to create a releasable object.
- release – a running instance of a chart, combined with a specific config
Using helm charts, you can carry out the following tasks:
- Create new charts from scratch
- Package charts into chart archive (tgz) files
- Interact with chart repositories where charts are stored
- Install and uninstall charts into an existing Kubernetes cluster
- Manage the release cycle of charts that have been installed with Helm
Installing Helm
The process to install helm is very easy. Just run the following three commands in your favorite Linux distro and you will be able to pull down the helm tool in no time.
curl -fsSL -o get_helm.sh https://raw.githubusercontent.com/helm/helm/master/scripts/get-helm-3

chmod 700 get_helm.sh

./get_helm.sh
Kubernetes Dashboard Helm installation and configuration
Now that we have the helm utility downloaded and installed, we can use it to easily install the Kubernetes dashboard. Just a little learning that I have done recently, Helm v3 has departed from the previous stable repos that were used. While you can still access the stable repos, the best way to find the up-to-date applications you are looking for is in the hub. You can search both to see if the app you are looking for is in one or the other. As you can see below, the artifacthub site has the recent version of the Kubernetes dashboard.
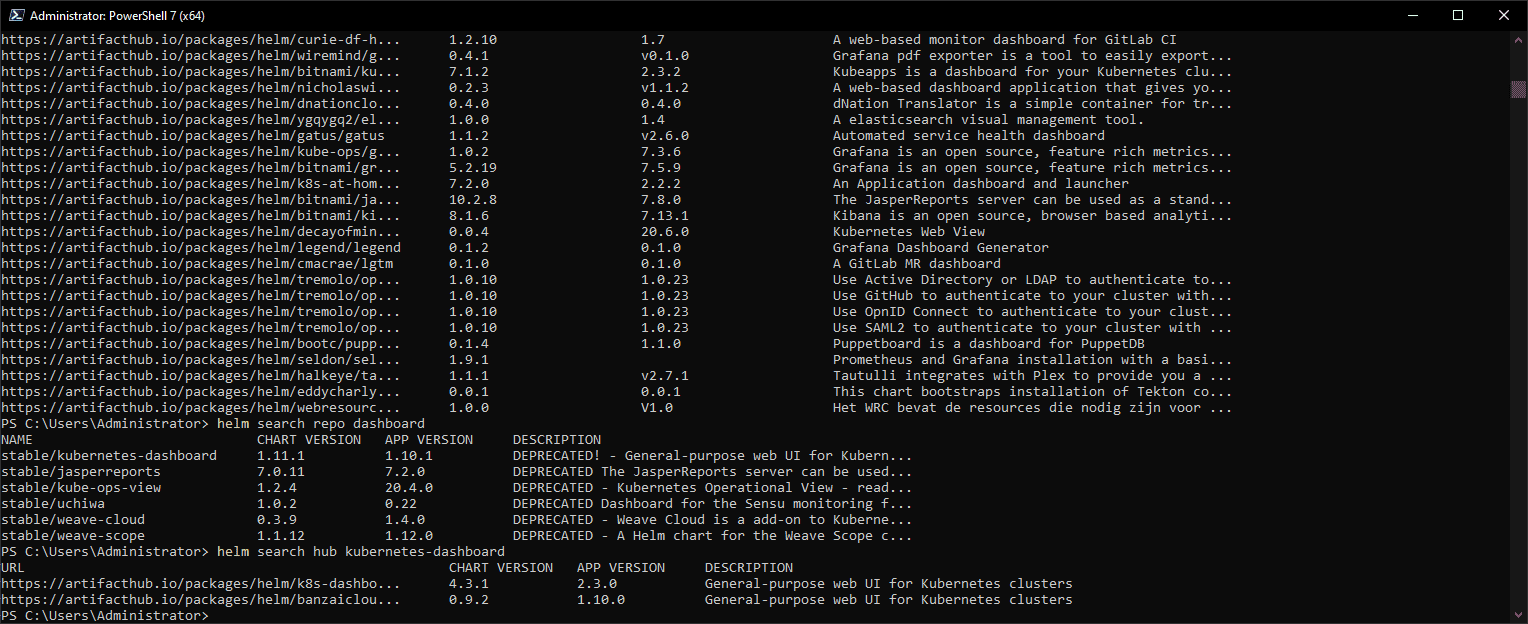
One downside I found is that you can’t pull from the URL listed in the search return unless I am missing something here with the artifact hub. Instead, what I did was browse out to the artifact hub and load the repo presented from here and then installed from the official repo that was added after walking through the artifact hub site.
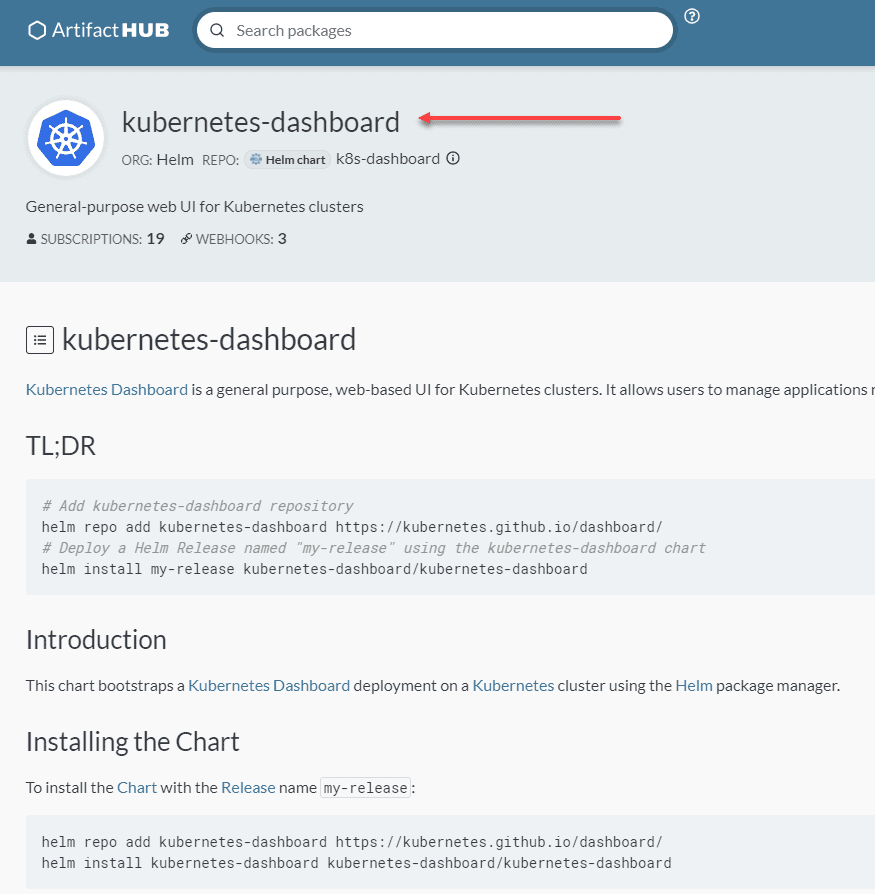
As you can see above in the official chart found in the hub, you need to run the following two commands:
helm repo add kubernetes-dashboard https://kubernetes.github.io/dashboard/
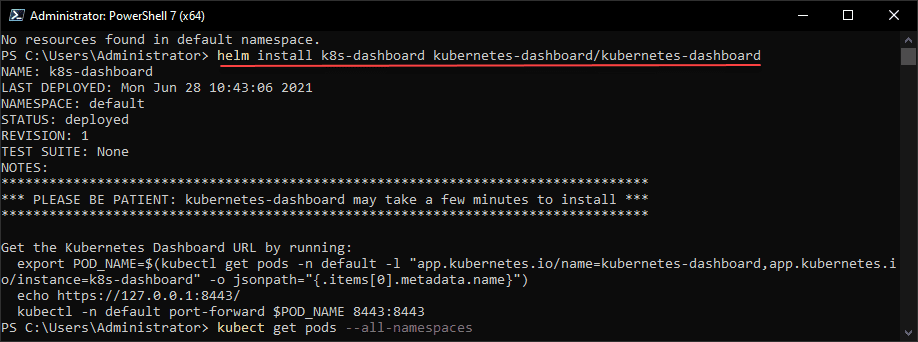
helm install <your dashboard name> kubernetes-dashboard/kubernetes-dashboardAfter the installation is successful, it will direct you below the installation of the application to enable port forwarding to access. However, I will be changing this to NodePort and accessing the application that way for lab purposes.
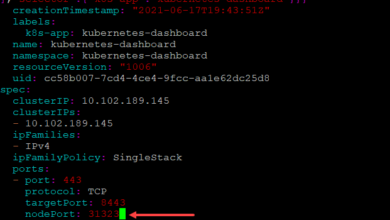
Below, I am changing the service to NodePort instead of the ClusterIP. To do that, you can run the following command, replacing the service with your service name:
kubectl edit svc k8s-dashboard-kubernetes-dashboard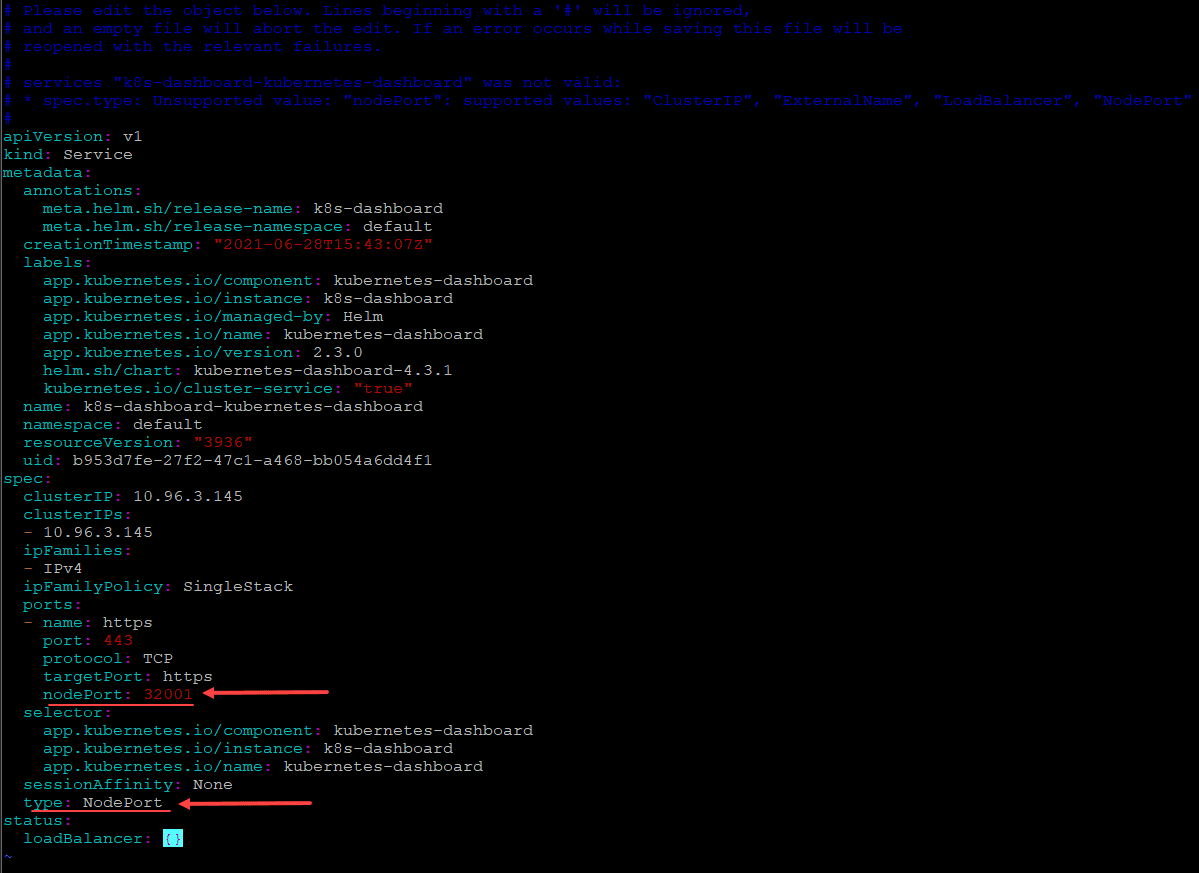
Logging into the Kubernetes Dashboard
The next hurdle is actually logging into the Kubernetes Dashboard. How do you do this? You have a couple of ways, using a token or kubectl config. Let’s look at using a token.
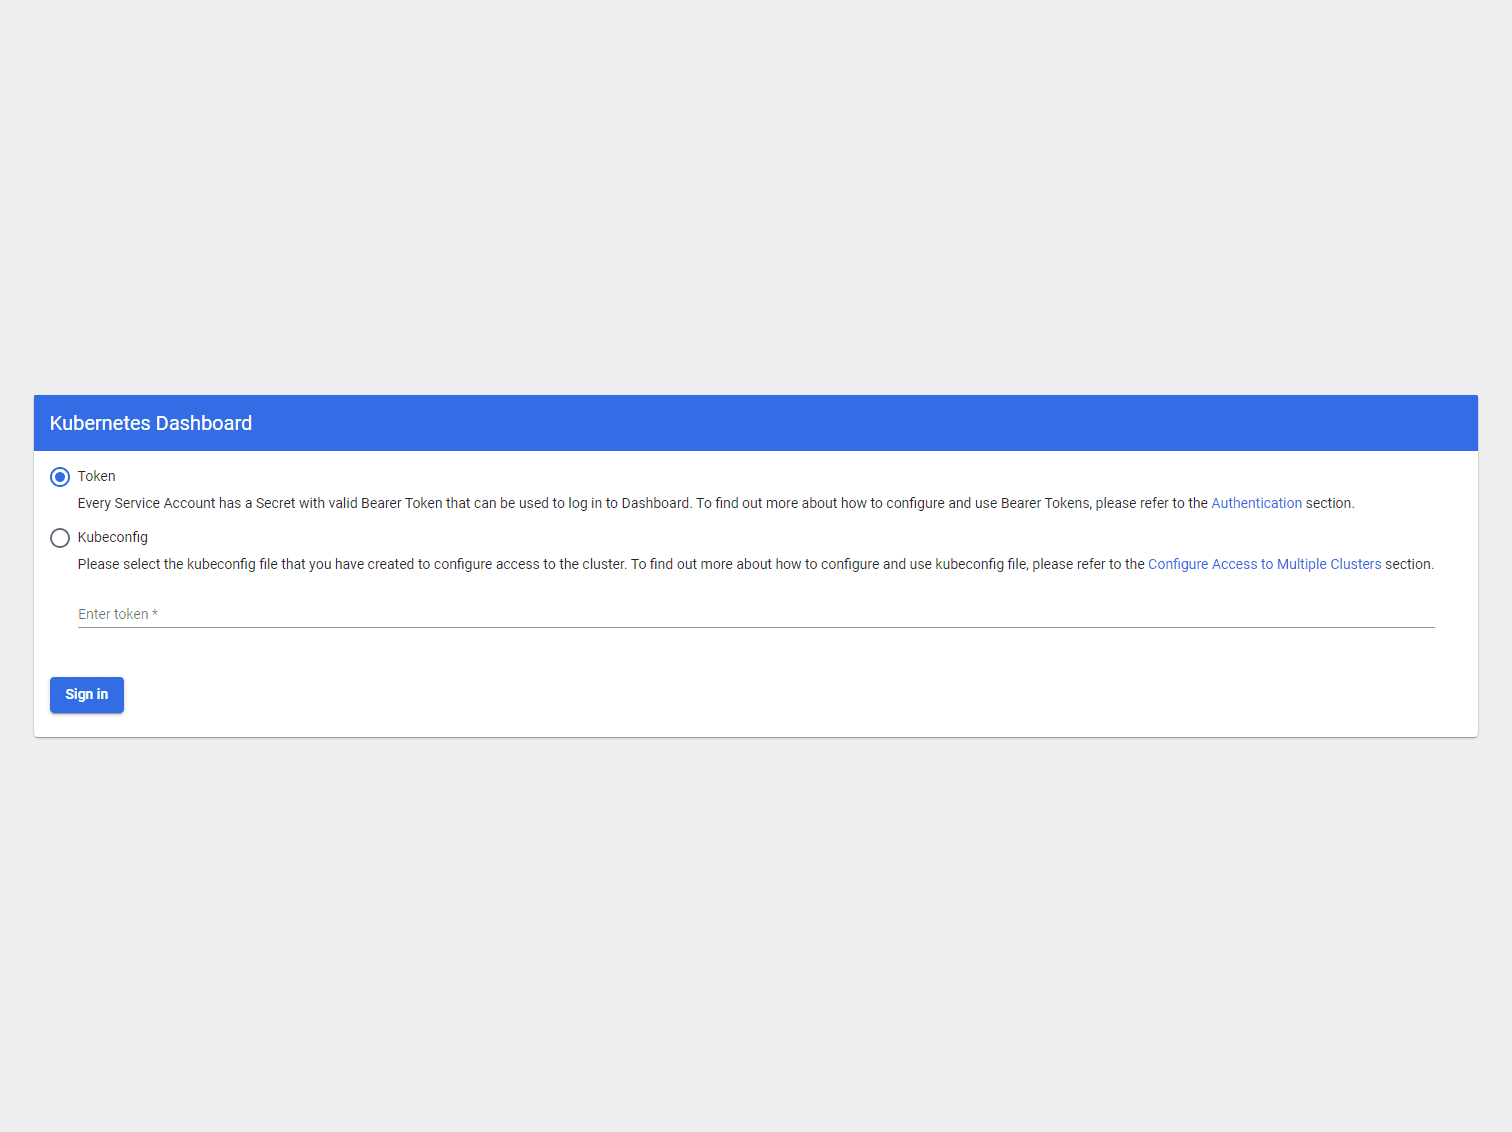
How do you find the token for logging in? Use the commands below to get the token that is installed by default with the installation of the dashboard using helm.
kubectl get sa
kubectl describe sa k8s-dashboard-kubernetes-dashboard
Copy the Token value listed
kubectl describe secret <token value copied>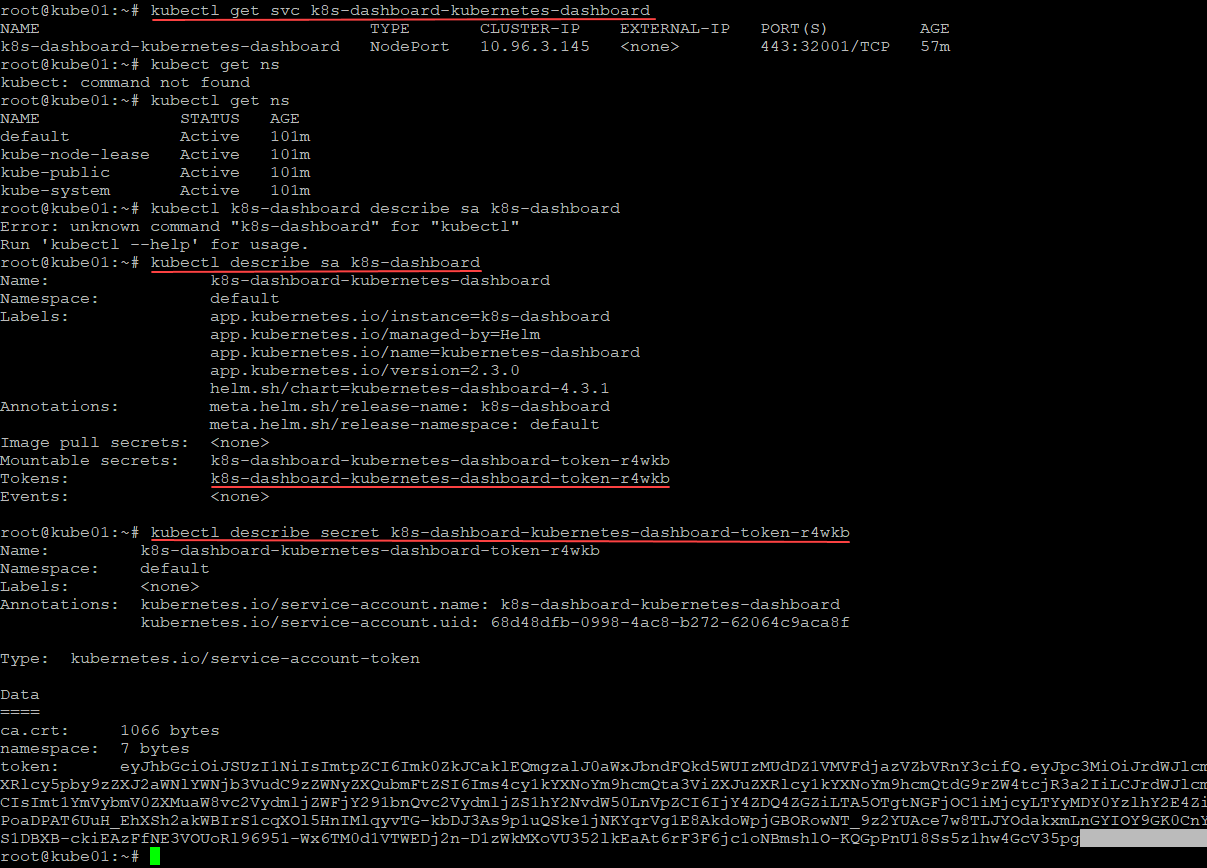
However, you will probably get the following error
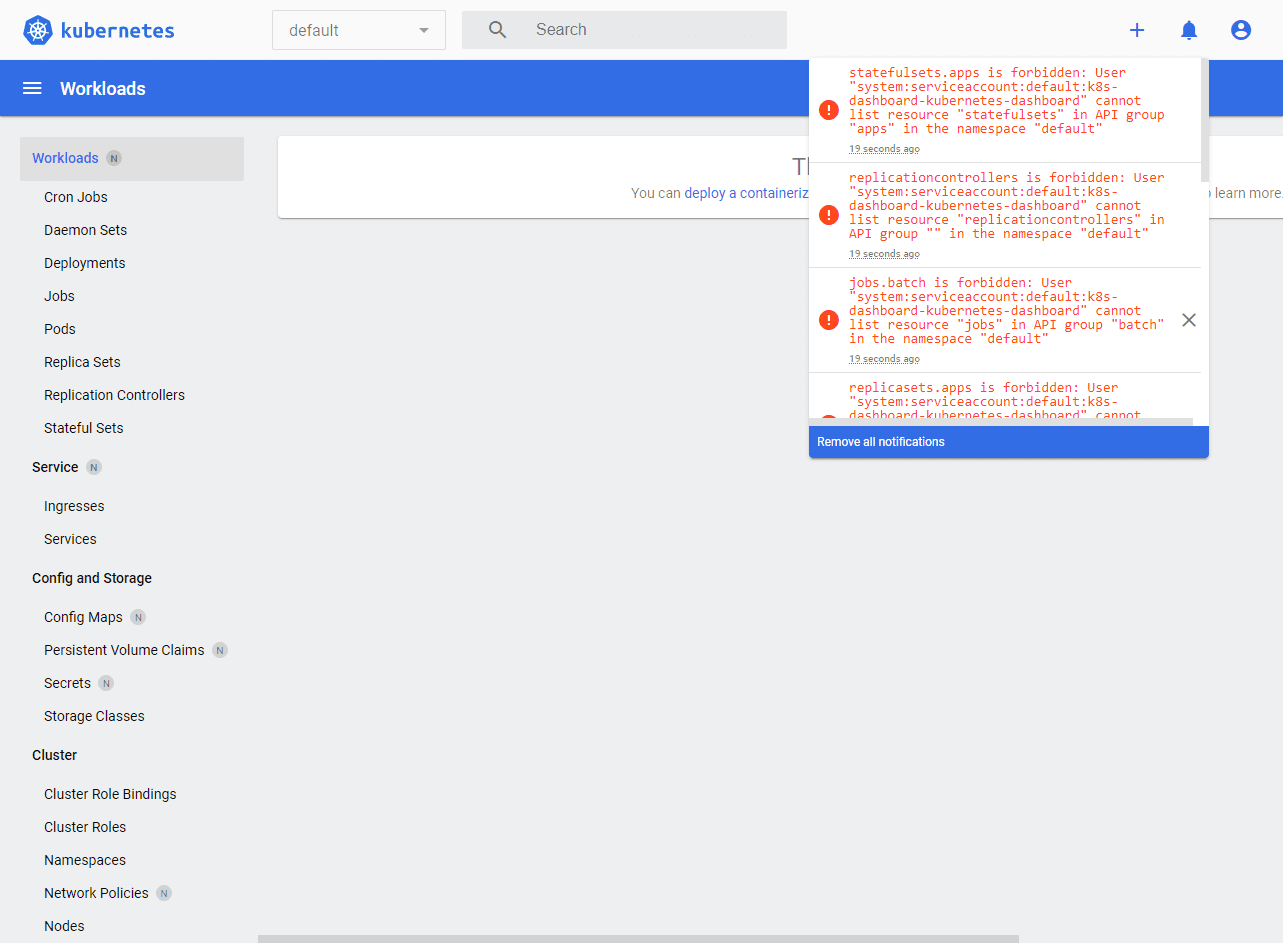
Create a service account with the cluster admin role. I highly recommend visiting the Github site of “justmeandopensource.” Download the sa_cluster_admin.yaml. This creates a service account with the cluster admin role using the following code:
apiVersion: v1
kind: ServiceAccount
metadata:
  name: dashboard-admin
  namespace: kube-system
---
apiVersion: rbac.authorization.k8s.io/v1beta1
kind: ClusterRoleBinding
metadata:
  name: cluster-admin-rolebinding
roleRef:
  apiGroup: rbac.authorization.k8s.io
  kind: ClusterRole
  name: cluster-admin
subjects:
- kind: ServiceAccount
  name: dashboard-admin
  namespace: kube-system
To install the new service in your Kubernetes cluster, run the following command to install the yaml file:
kubectl create -f sa_cluster_admin.yamlAfter creating the new service account, you can check the service accounts by running:
kubectl -n kube-system get saYou will see the service account dashboard-admin. Now, we go through the same process to get the token and secret values for the new service account.
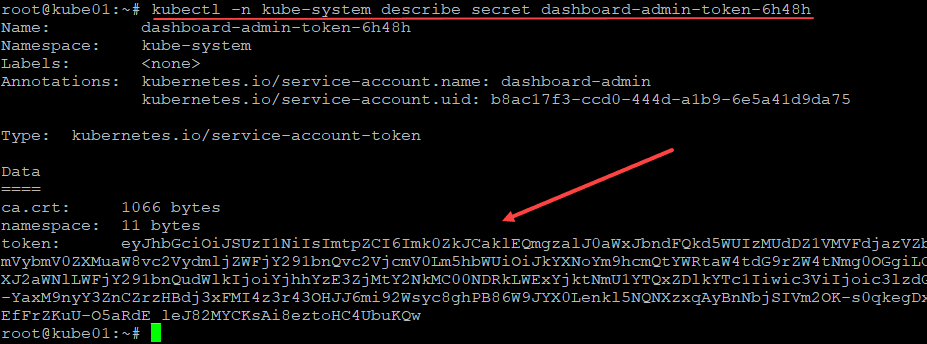
kubectl -n kube-system describe sa dashboard-admin
Copy the Token value
kubectl -n kube-system describe secret <token value>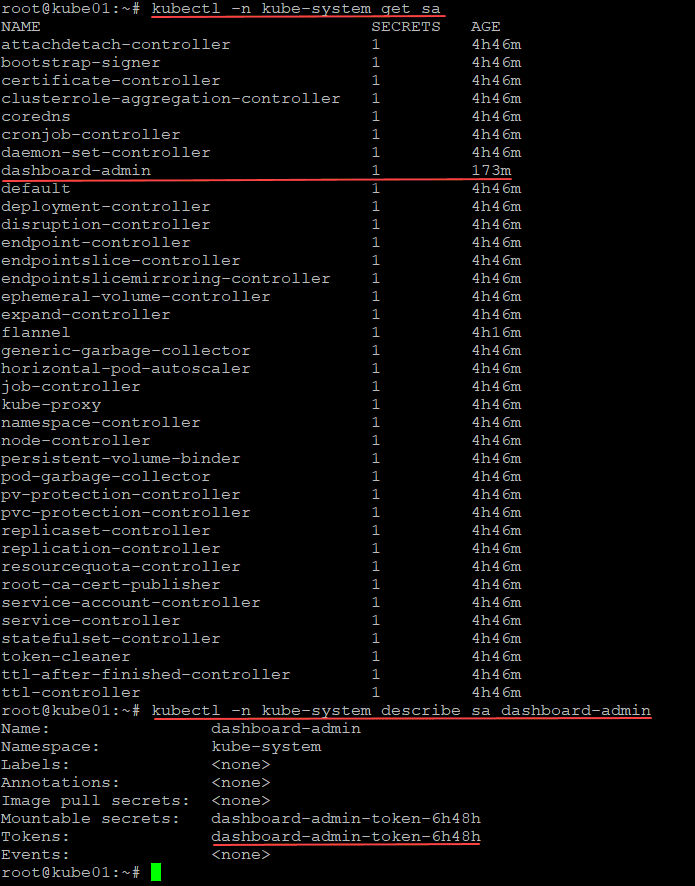
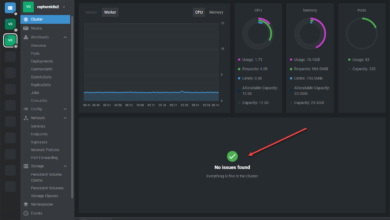
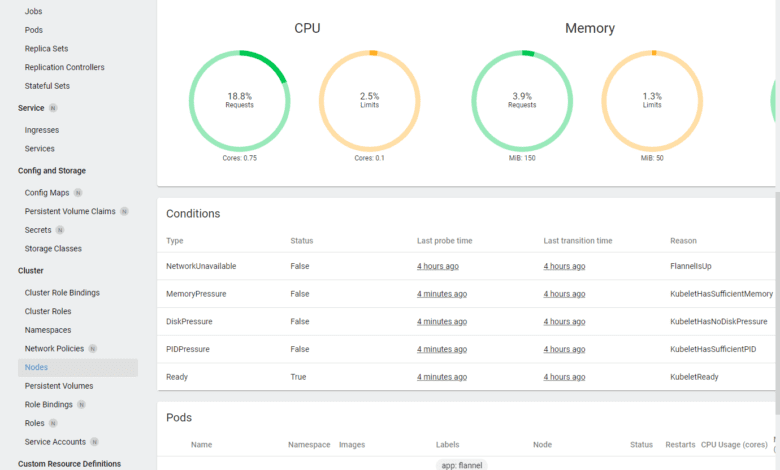
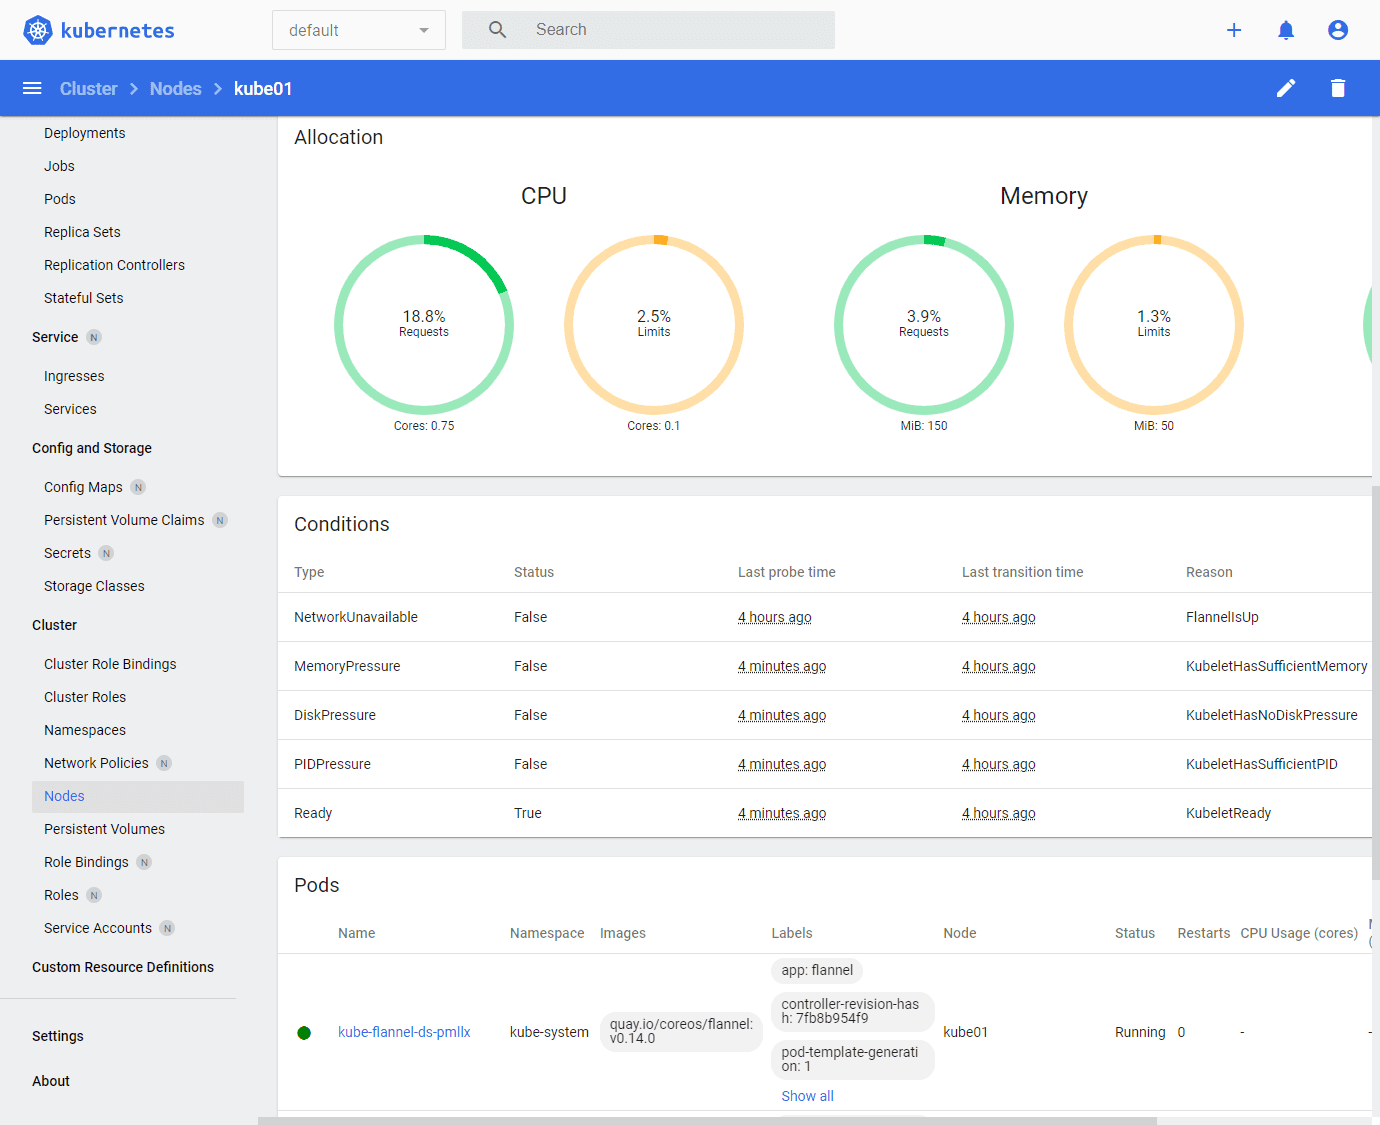
Now, after logging into the Kubernetes Dashboard with the new cluster admin service account, there are no permissions issues and all dashboard elements are displaying correctly.
Wrapping Up
Hopefully this Kubernetes Dashboard Helm installation and configuration guide will help any who may be struggling to install the Kubernetes dashboard application in their Kubernetes cluster. Using helm is a great way to easily install applications into your cluster using the charts methodology.