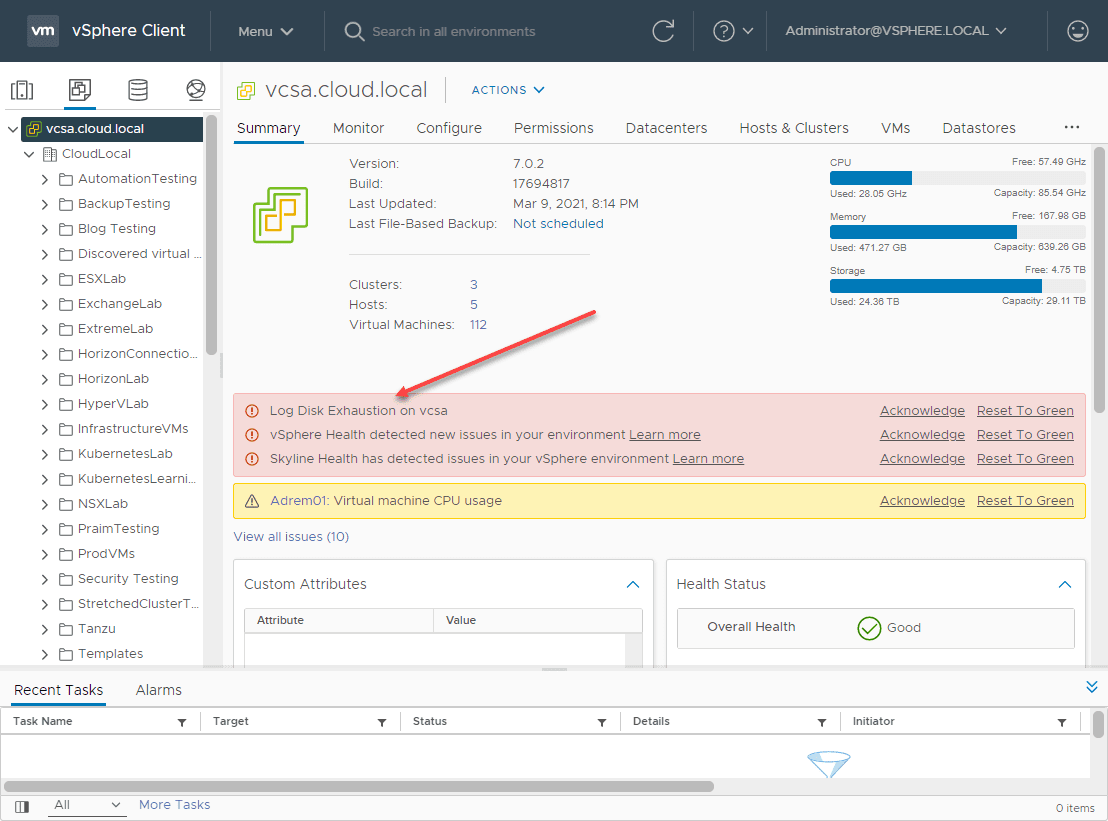
After you have upgraded to vCenter 7.0 Update 2, the next step to getting your environment updated to native vSphere 7.0 Update 2 is upgrading your ESXi hosts. There is a lot of new capabilities found in the vSphere 7.0 Update 2 release, making it a worthy target for upgrading your production environments. In this walkthrough, I will be demonstrating how to upgrade to vSphere 7.0 Update 2 using the vSphere Update Manager. Look for a follow-up post showing the steps using vSphere Lifecycle Manager (vLCM).
What’s new with ESXi 7.0 Update 2?
The list will seem short with ESXi 7.0 Update 2 new features as most of the functionality coming in this release is at the vCenter Server level with new enhancements and features with vSphere Lifecycle Manager and vSAN. However, as noted from VMware, new features include:
ESXi 7.0 Update 2 supports vSphere Quick Boot on the following servers:
- Dell Inc.
- PowerEdge M830
- PowerEdge R830
- HPE
- ProLiant XL675d Gen10 Plus
- Lenovo
- ThinkSystem SR 635
- ThinkSystem SR 655
Read my post VMware vCenter Server 7.0 Update 2 New Features for a detailed look at what you will find new from the vCenter Server side (note it is a lot!).
Importing an ISO into vSphere Lifecycle Manager
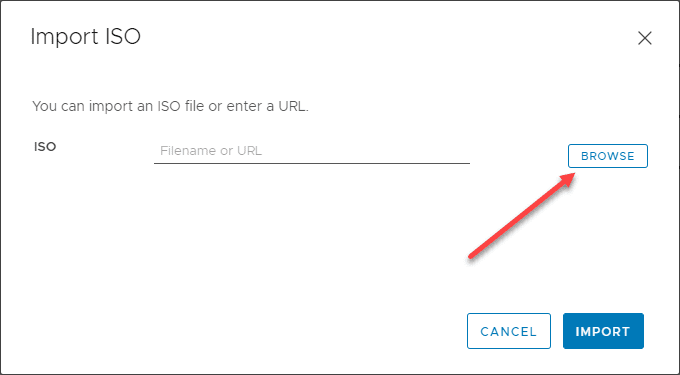
If you want to use vSphere Update Manager, you will need to import the vSphere 7.0 Update 2 ESXi ISO. This will allow creating a baseline and then assigning the baseline to your vSphere hosts/clusters for upgrade. To import the ISO image, navigate to the Lifecycle Manager. Click Imported ISOs > Import ISO.
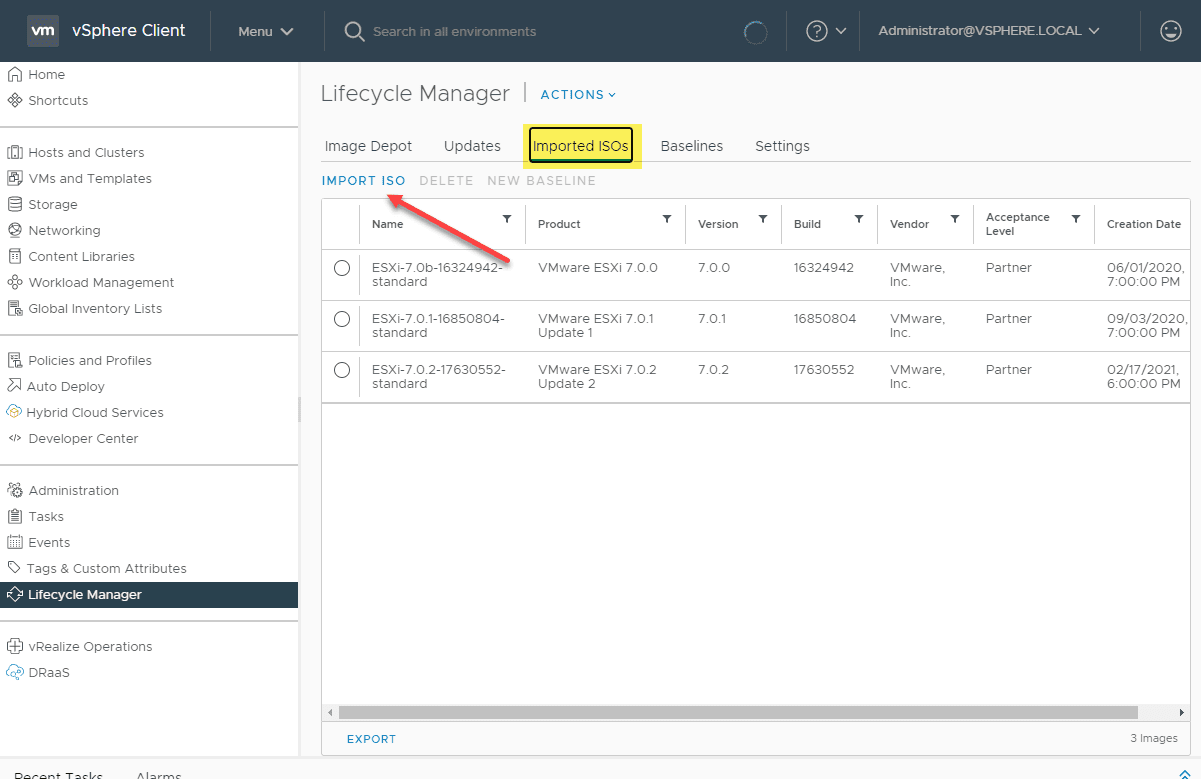
This will launch the Import ISO dialog box. Click the Browse button and find the ISO file you downloaded for ESXi 7.0 Update 2. After selecting the ISO, click Import.
The upload process for the ISO will begin.
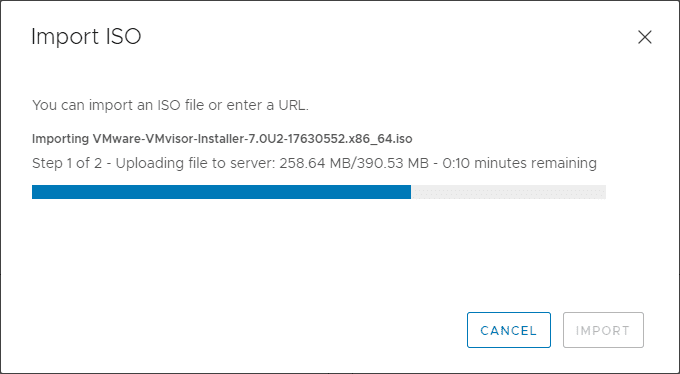
After the upload process for the ISO is complete, you can create the upgrade baseline for vSphere 7.0 Update 2.
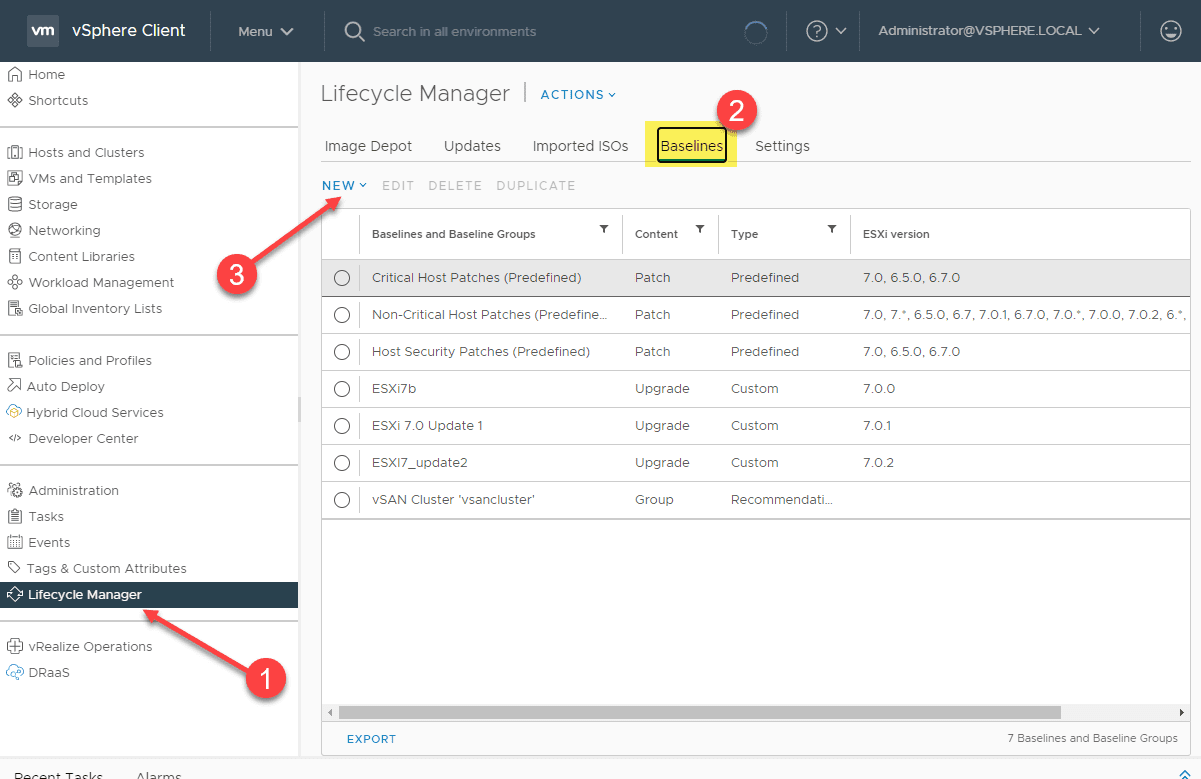
Creating a new Upgrade Baseline for vSphere 7.0 Update 2 ESXi
The vSphere Update Manager (VUM) works off what are known as baselines. There is a special baseline called an upgrade baseline that is used for upgrading an ESXi host from one major version of ESXi to the next major release. With VUM, we will create a new upgrade baseline and use the imported ISO file for the baseine.
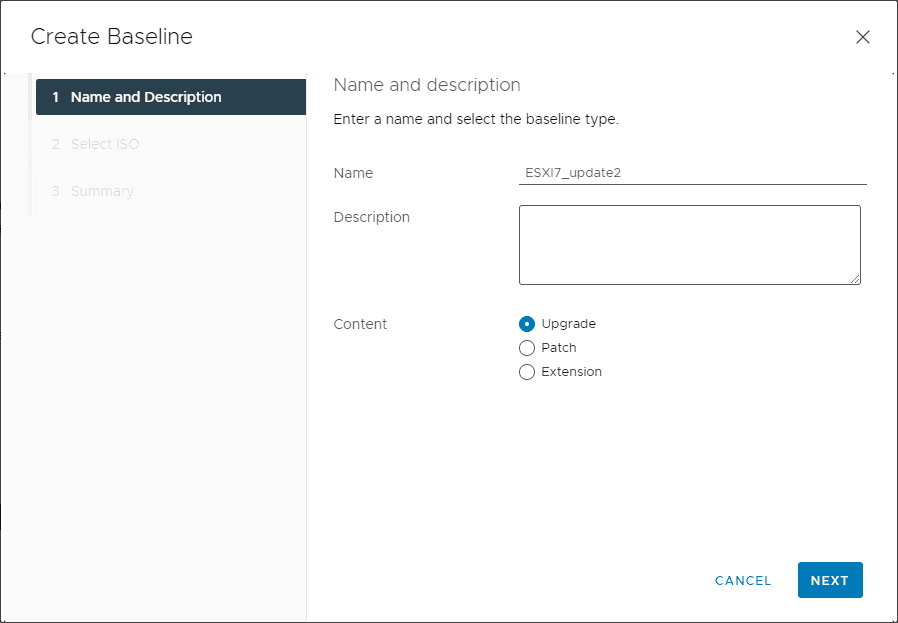
The Create Baseline wizard launches. First, enter the name and description for the new upgrade baseline. Be sure to select Upgrade. ***Note*** Some users have experienced issues with their update to ESXi 7.0 Update 2 because of using the Patch baseline instead. Be sure to read William Lam’s post here regarding the issue.
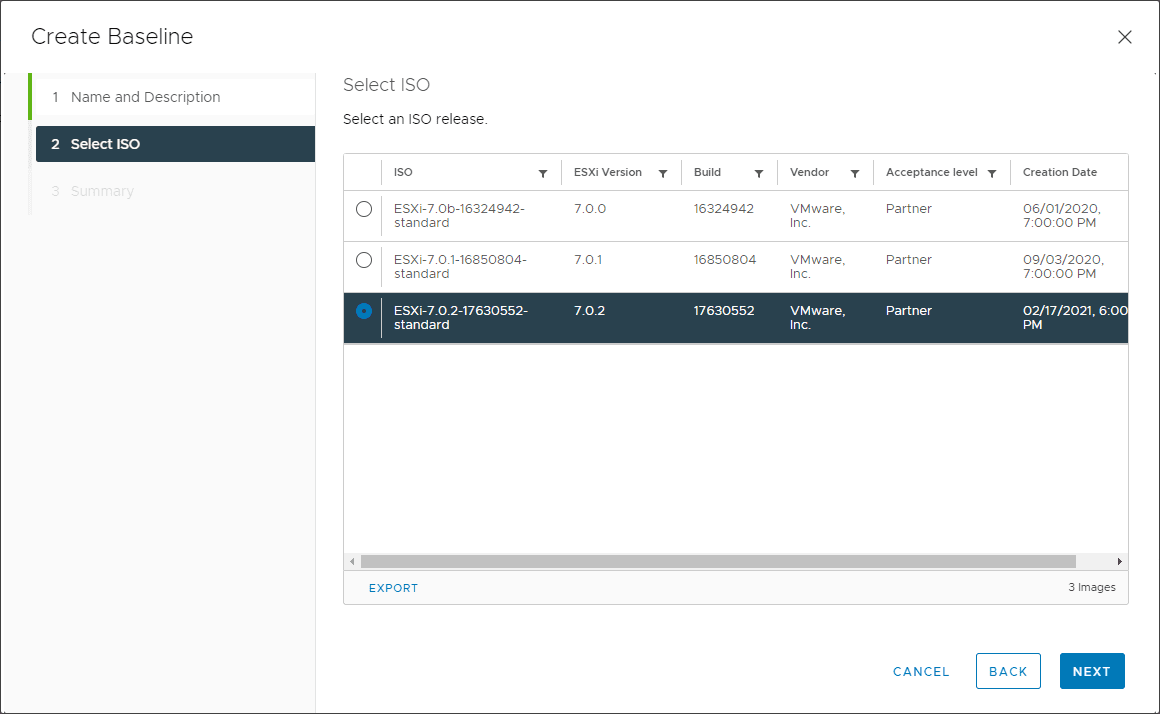
Select the ESXi 7.0 Update 2 ISO that was imported earlier for the upgrade baseline.
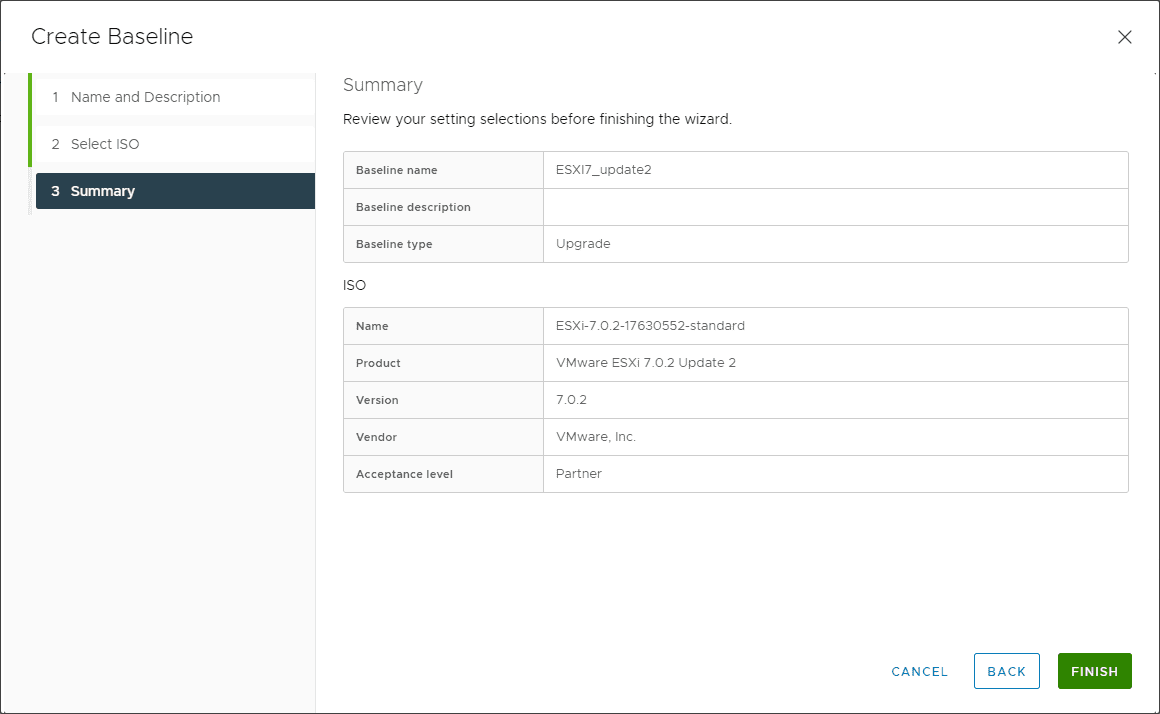
On the summary screen, click Finish.
Attach the baseline to the ESXi host for upgrading to vSphere 7.0 Update 2
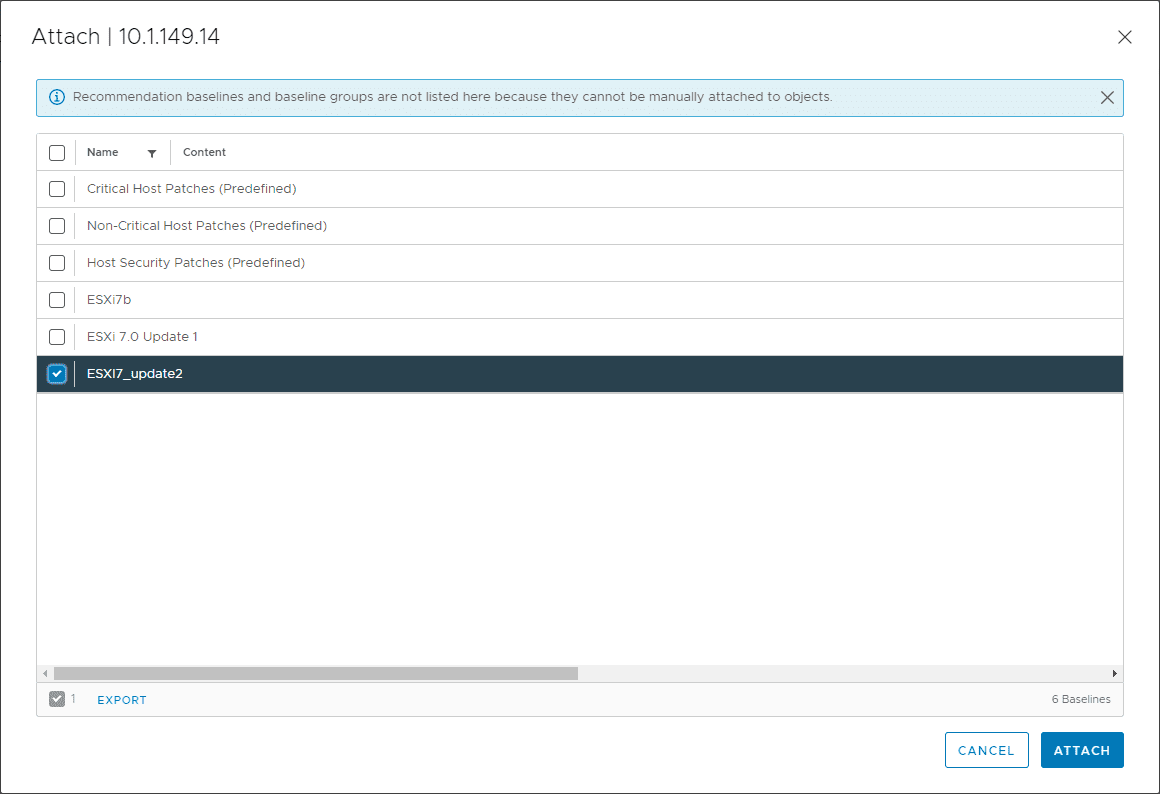
After the upgrade baseline is created with the attached ISO file for upgrade purposes, the last step is to assign the baseline to the various ESXi hosts. You can do this at the cluster or ESXi host level. Here I am targeting an ESXi host. Navigate to the Updates tab for the host Attached Baselines and Baseline Groups > Attach.

This will bring up the Attach dialog box where you can select the newly created Upgrade baseline.
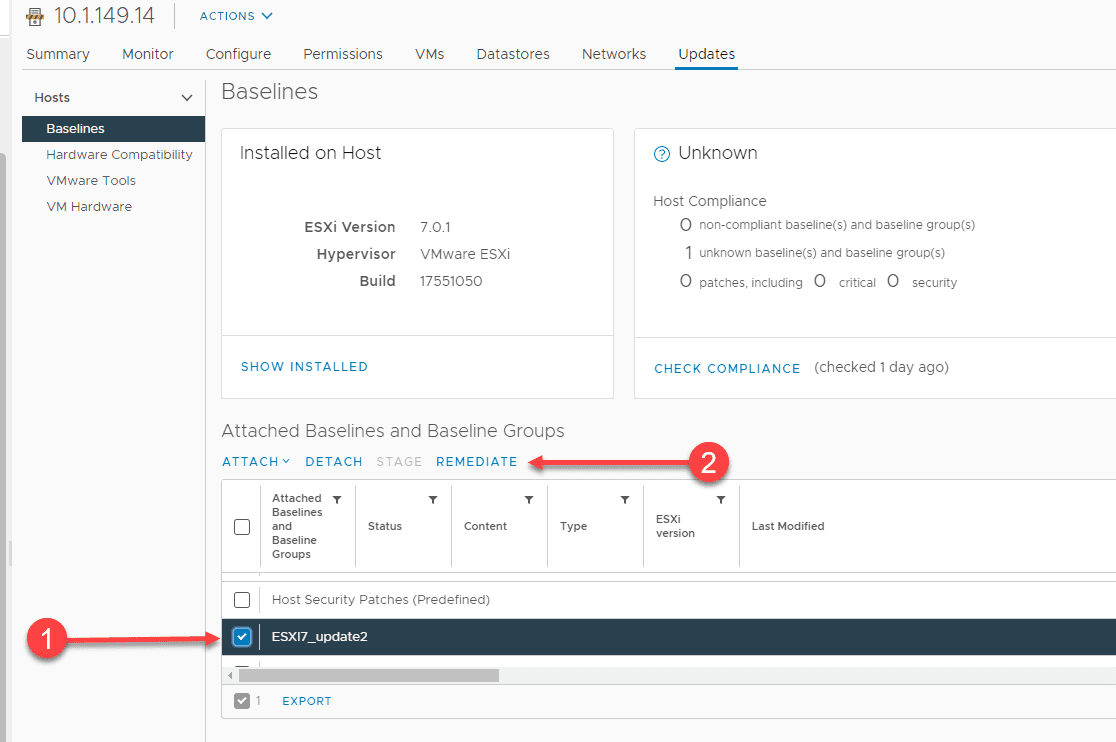
After assigning the Upgrade baseline to the ESXi host. You can select the Upgrade baseline and then click Remediate.
This will launch the Remediate wizard for the host. You can expand the installation options, scheduling, and settings. Click the Remediate button.
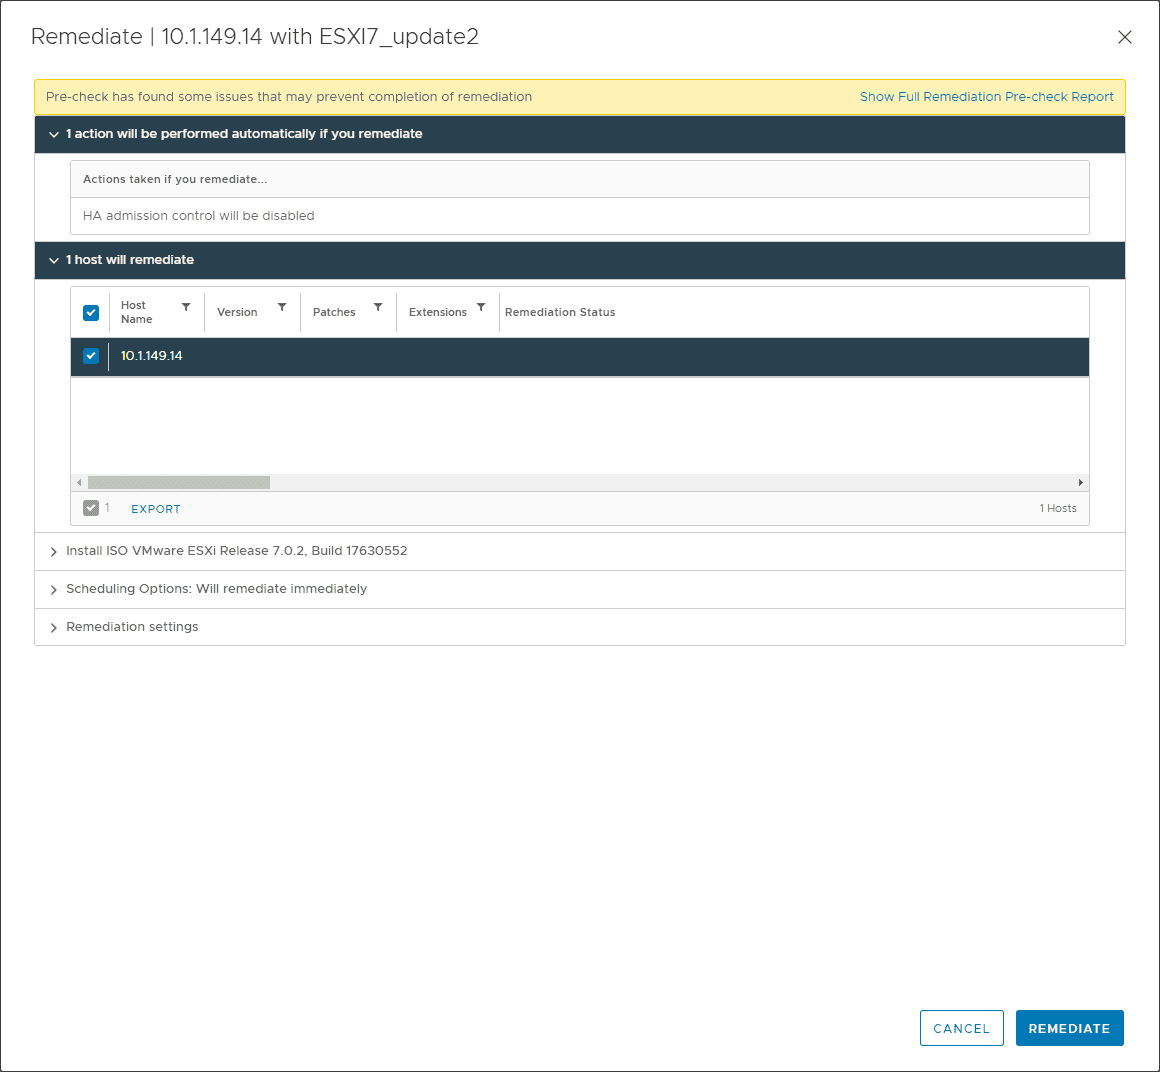
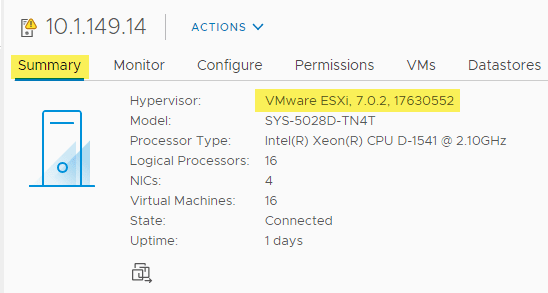
After clicking the Remediate button, you will see the host remediation vCenter task begin
Wrapping Up
The VMware vSphere 7.0 Update 2 ESXi Upgrade process using the vSphere Update Manager (VUM) is straightforward and easy and is the same process we have all been used to with VUM for years now. In the next post, we will look at the process to upgrade to ESXi 7.0 Update 2 using vSphere Lifecycle Manager.
Google is updating how articles are shown. Don’t miss our leading home lab and tech content, written by humans, by setting Virtualization Howto as a preferred source.
About The Author