One of the new features contained in the Veeam Backup & Replication v11 release is what is defined as Continuous Data Protection (CDP). With CDP, you can protect a workload with ultra-low RPOs that start at seconds rather than minutes. For tier one workloads, this can drastically reduce the amount of data loss that happens and many possibilities for protecting business-critical data. I have started playing around with Veeam Backup & Replication v11 in the lab environment and Continous Data Protection (CDP) is a very exciting feature I wanted to get my hands on. This post will cover Veeam Backup and Replication v11 CDP configuration step-by-step and see how you can easily get this up and running for the desired workloads.
Benefits of Veeam v11 Continuous Data Protection (CDP)
There are many benefits to using the new Continuous Data Protection (CDP) in Veeam v11. These include the following:
- No VM Snapshots – I/O filter certified by VMware
- No workload or hardware dependency – replicate any to any
- No distance limits and reduced bandwidth requirements
- No babysitting with policy-based protection
- No need for a worker appliance on each host in the cluster
- No deployment guesswork with the built-in assistant
Veeam Backup & Replication v11 CDP prerequisites
I will detail the requirements as I found in labbing out creating the Veeam Backup & Replication v11 Continuous Data Protection (CDP) configuration. These include the following:
- Adding both source and target VMware vCenter Servers to your Veeam Backup & Replication v11 environment
- Installing the I/O filters on both the source and destination VMware vSphere ESXi clusters
- Deploy a Veeam CDP Proxy
- Creating a CDP Policy to define parameters of the CDP job
- Allow replication initial synchronization to complete
Veeam Backup and Replication v11 CDP Configuration Step-by-Step
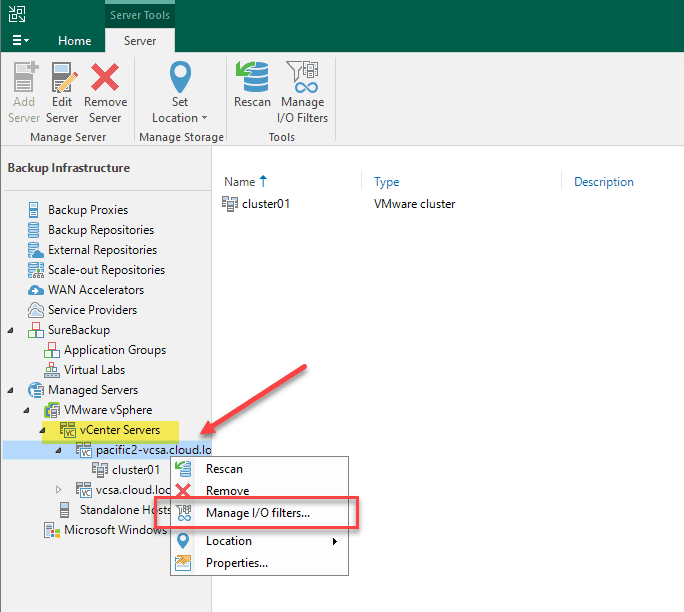
So, to begin with, in line with the requirements listed above, the first thing I am doing here is running the Manage I/O filters action by right-clicking on the vCenter Server in the Backup Infrastructure section of the console.
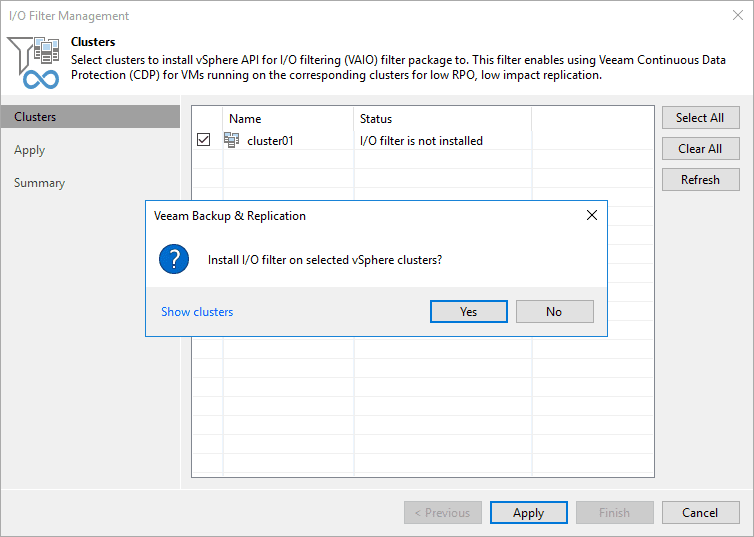
Select the vSphere cluster where the I/O components are to be installed.

Confirm the installation of the I/O filters.
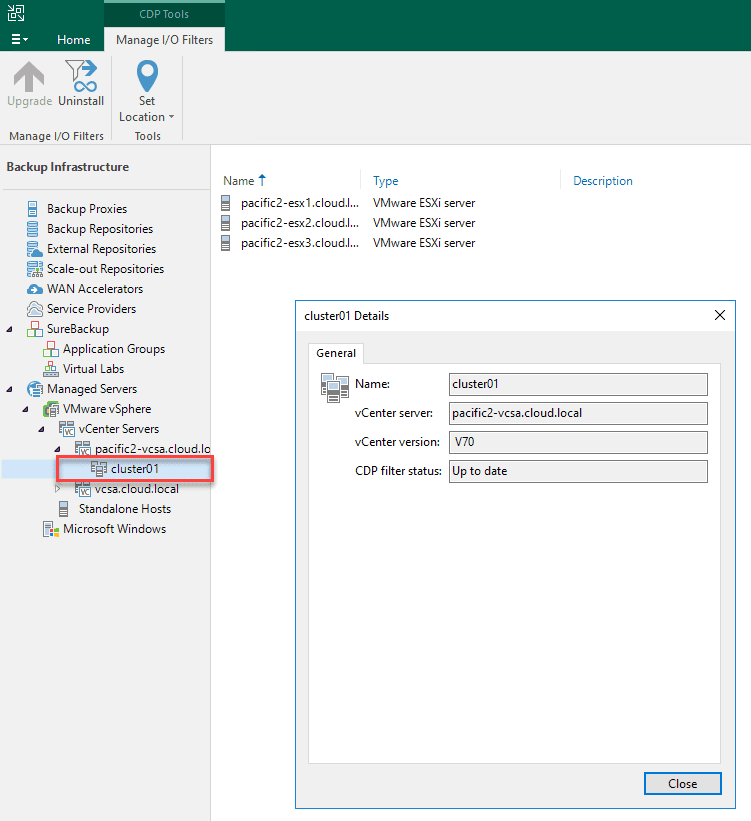
The I/O filter components are installed successfully. Keep in mind you will need to add both the source and destination vCenter environments and clusters to Veeam v11 so the I/O filter can be installed in both environments.
Deploying the CDP Proxy
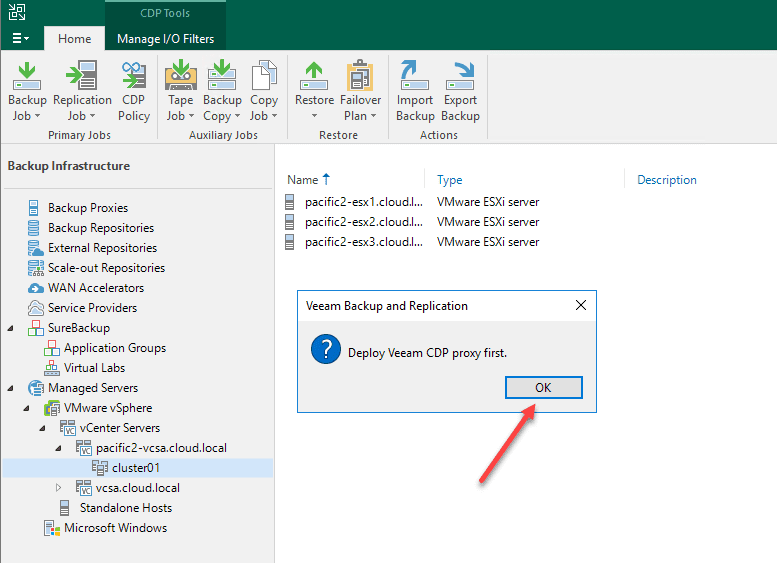
If you start to deploy the CDP Policy from the Veeam Backup & Replication console, you will be prompted for the next step needed, install the CDP Proxy.
If you are like me after installing the I/O components, I immediately went to setup the CDP policy to create the CDP policy for protecting the test virtual machine.

If you haven’t already deployed the CDP proxy, you will see the message below stating you need to deploy the CDP proxy first.
This kicks off the new VMware CDP Proxy wizard.

Select storage for the cache configuration for the CDP proxy.

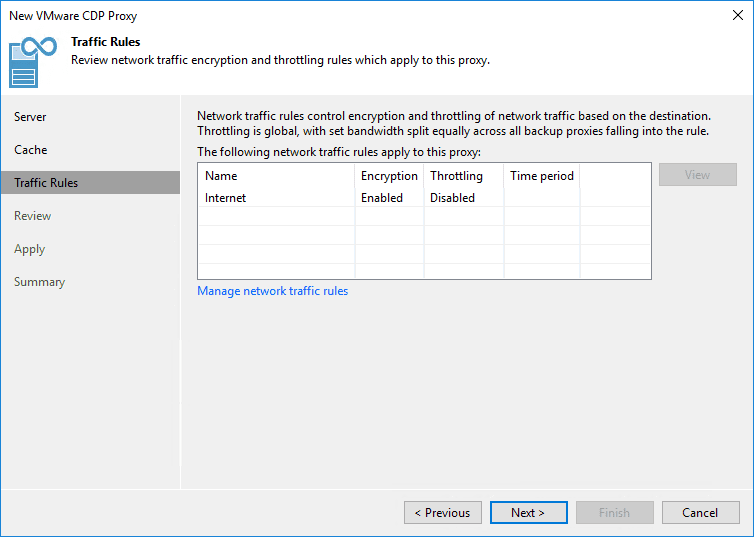
Configure any traffic rules needed.
Review the configuration for the new VMware CDP proxy.
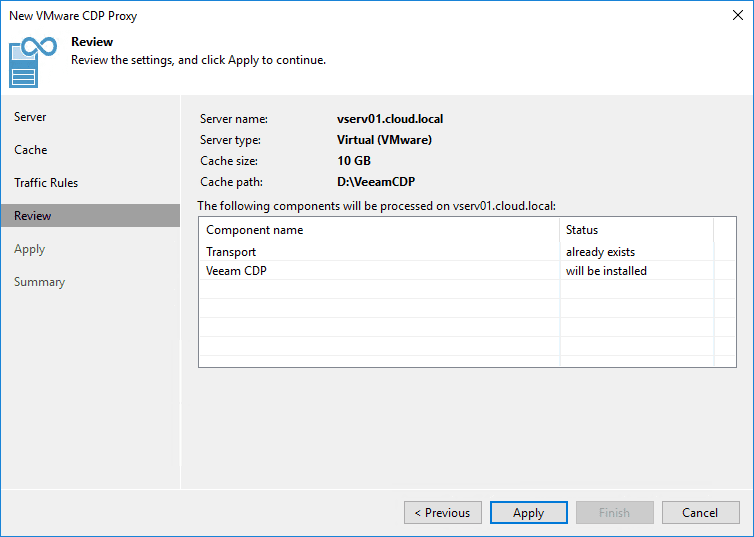
Apply and install the CDP Proxy.

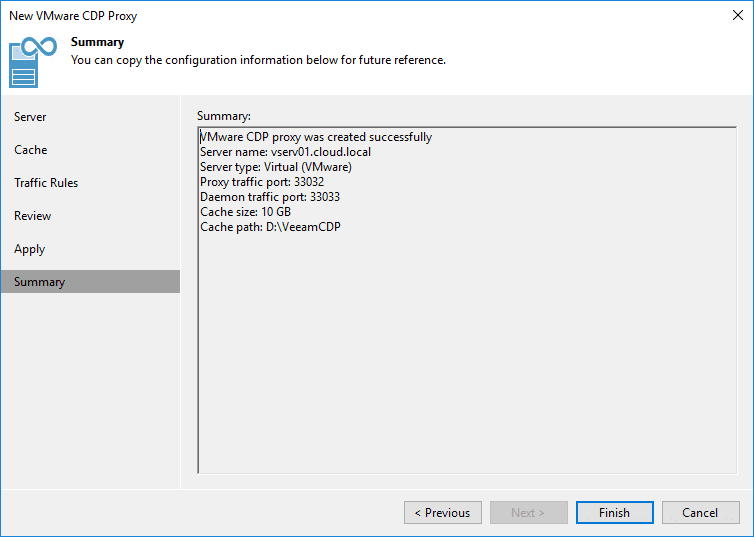
The Summary screen shows the details fo the installation.
Creating a new CDP Policy
Now that you have the CDP Proxy in place, the next step is creating a new CDP Policy. The policy is the piece that defines the virtual machines protected by CDP and other configuration.

Select your virtual machine(s) for adding to the CDP Policy.

Next, select the destination environment. Again, as a note, you will need to ensure the destination environment has the CDP components (IO filter components) installed on the cluster.

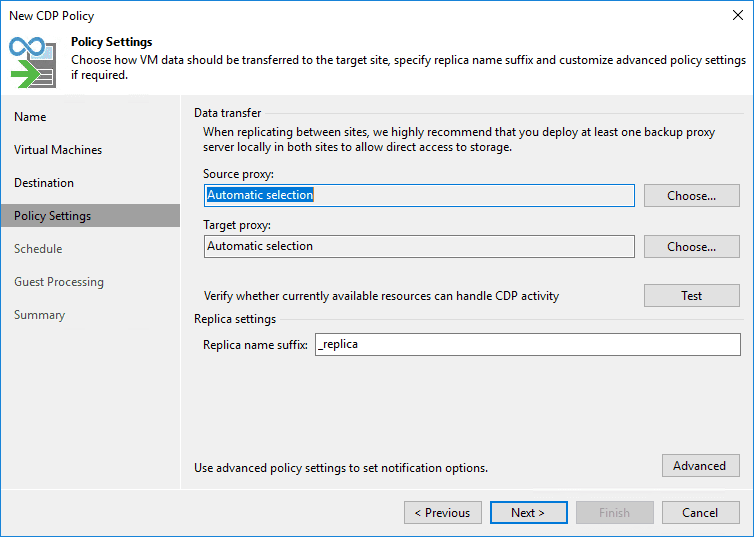
Next, the policy settings. Choose how VM data should be transferred to the target environment as well as the naming convention of the VM replica.
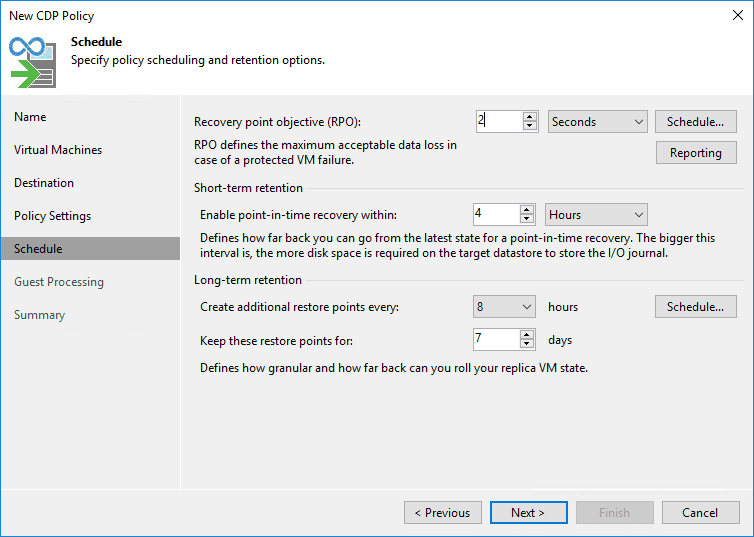
On the schedule screen, this is where you see the exciting settings of CDP. By default the Recovery point objective (RPO) is configured at 15 seconds. You also see the short-term retention and long-term retention configuration.

Just for kicks, I wanted to see how far down the RPO would go and it will go down to a minimum of 2 seconds for CDP.
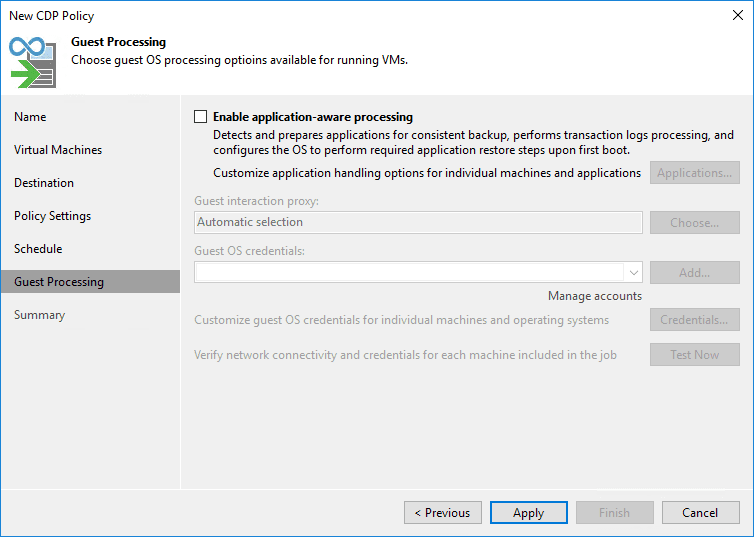
Select your guest processing settings.
Finalize the new CDP policy configuration.

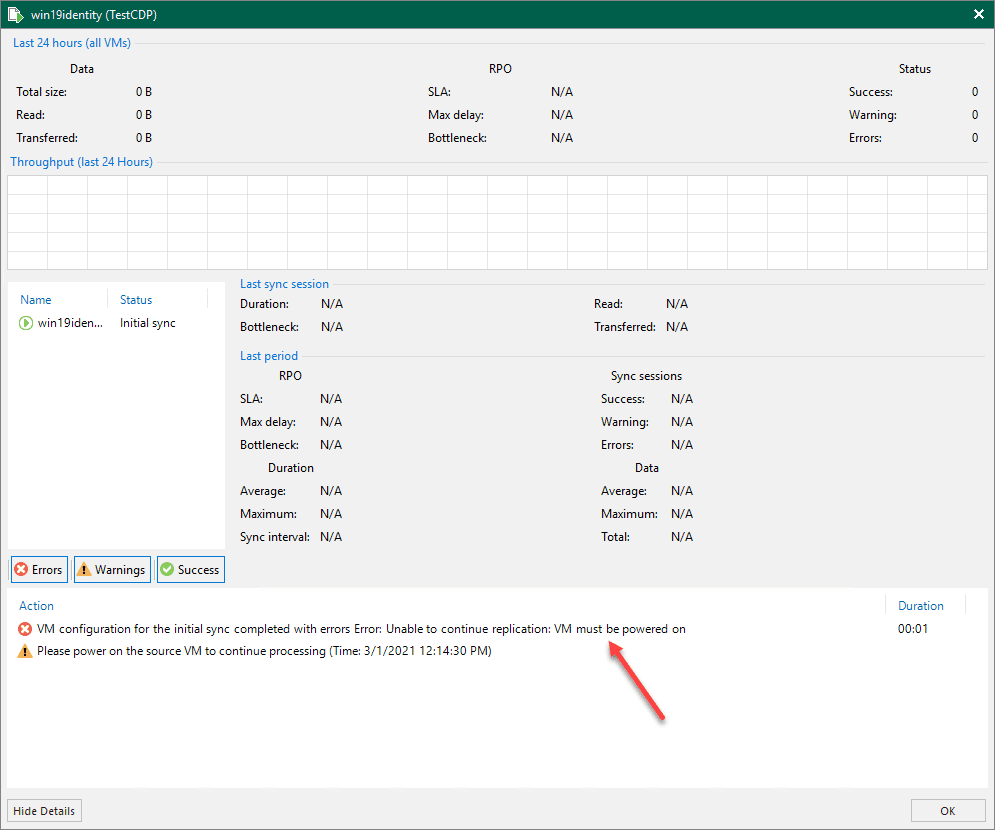
After you finalize the CDP Policy, you will see the initial replication job for CDP synchronization begin.

As a note, your virtual machine must be powered on to be protected with CDP. Below, I had the test VM powered off from another operation and the initial synchronization failed with the error about the power state.
In the target environment, you will see the replica VM created.

As a test, as I saw the similar demo performed in the Go Live event, I began copying an Ubuntu ISO to the protected machine.
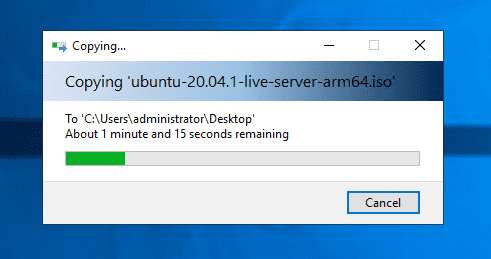
Even though the ISO had not finished copying to the machine, you will see the bump in replication traffic after a few seconds once the RPO value is hit.

Restoring a point in time from a Veeam v11 CDP replica
With the CDP replica in place, we now have a much more granular set of RPOs where we can essentially slide the “play” button to where you want the restore to take place.

Wrapping Up
This is a feature that many have been waiting on in Veeam Backup & Replication for quite some time. It was believed to be in version 10, but did not make that release. However, Veeam v11 has delivered. As shown in the walkthrough Veeam Backup and Replication v11 CDP Configuration Step-by-Step is easily accomplished in the normal easy Veeam style from the VBR console.
More in this topic
Discuss this in the Community
Google is updating how articles are shown. Don’t miss our leading home lab and tech content, written by humans, by setting Virtualization Howto as a preferred source.
About The Author
