How to Create a vSphere with Tanzu Namespace

No doubt, there are many like me that are having fun playing around with vSphere with Tanzu. I have been utilizing William Lam’s vSphere with Tanzu automation script to quickly deploy nested environments in the lab with just a few tweaks here and there. Check out William’s script here. You can also read my post about how to Configure VMware vSphere with Tanzu Workload Management in your vSphere environment. This post picks up after the workload management has been successfully enabled on your vSphere with Tanzu cluster. Let’s take a look at how to create a vSphere with Tanzu namespace.
vSphere with Tanzu Considerations
Let’s talk about a few things with vSphere with Tanzu and considerations you want to keep in mind. When you configure a namespace on the Supervisor Cluster, you essentially configure several different things. You set resource limits, permissions, storage policy, and provide the URL of the Kubernetes control plane for DevOps engineers. This allows them to run Kubernetes workloads on the namespaces for which they have permissions.
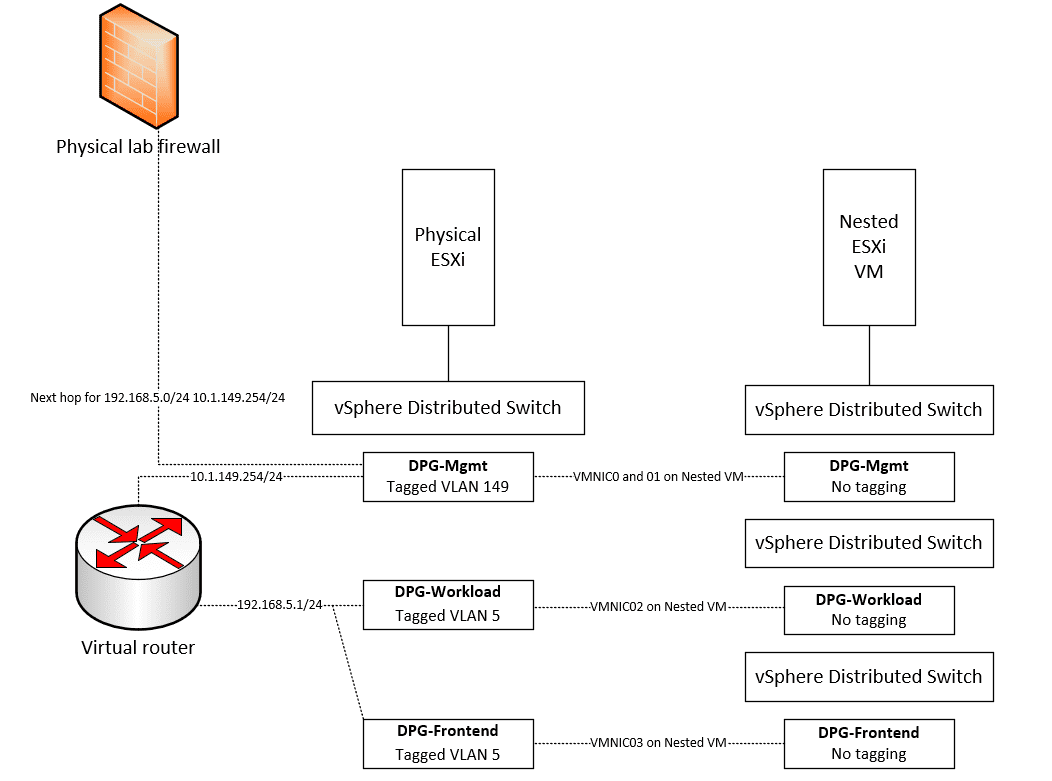
When you compare namespaces and capabilities with the vSphere networking stack compared to namespaces configured with the NSX-T networking stack, there are differences in capabilities. Namespaces running on NSX-T have more capabilities than namespaces on the vSphere networking stack.
Namespaces that are created on the vSphere networking stack can only run Tanzu Kubernetes clusters. You can’t run vSphere Pods or use the Registry Service with them. Workload networking is supported by the vSphere Distributed Switch (vDS).
Namespaces created on the NSX-T networking stack offer the full set of capabilities of the Workload Management platform. NSX-T-enabled namespaces support both vSphere Pods and Tanzu Kubernetes clusters.
How to Create a vSphere with Tanzu Namespace
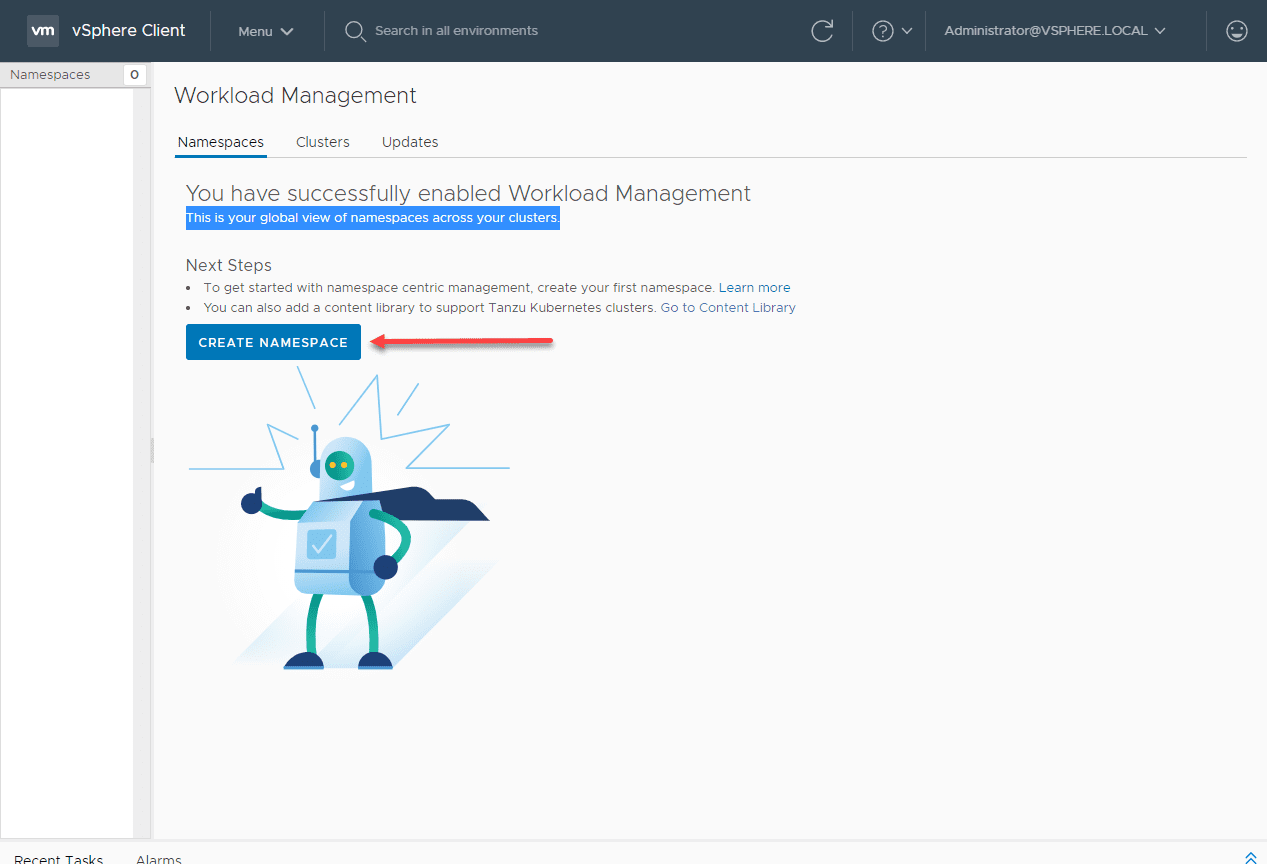
After you Configure VMware vSphere with Tanzu Workload Management in your vSphere environment, you are ready to start configuring your Namespaces with the vSphere networking stack. Click the Namespaces tab.
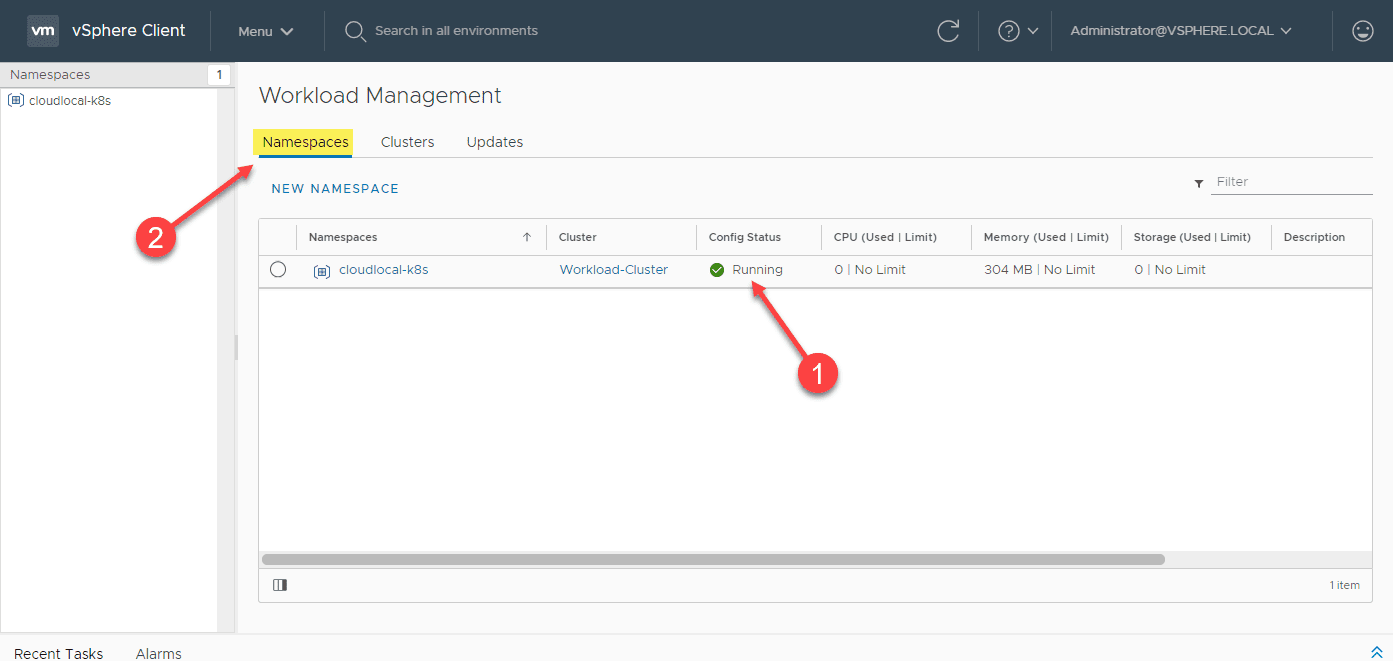
You will see the dashboard to Create Namespace. Click the button.
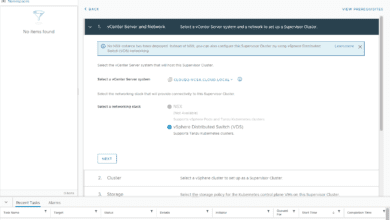
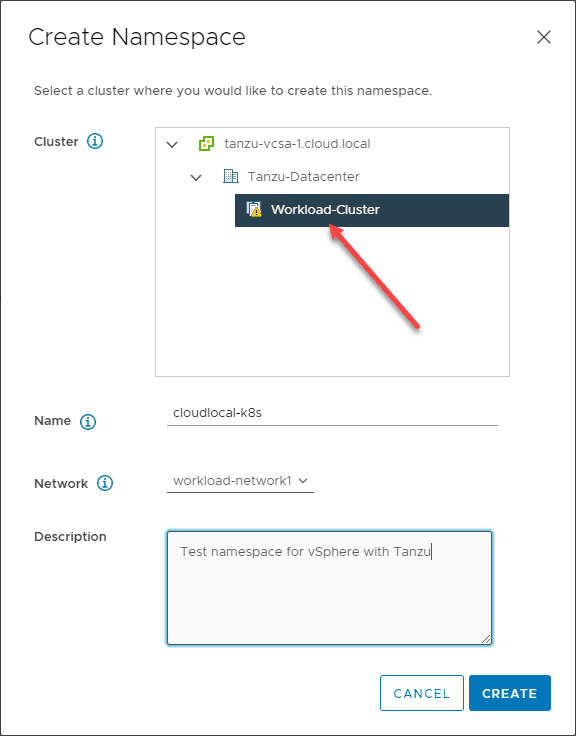
Choose your Workload Cluster, network, choose a name, and enter a description if you would like.
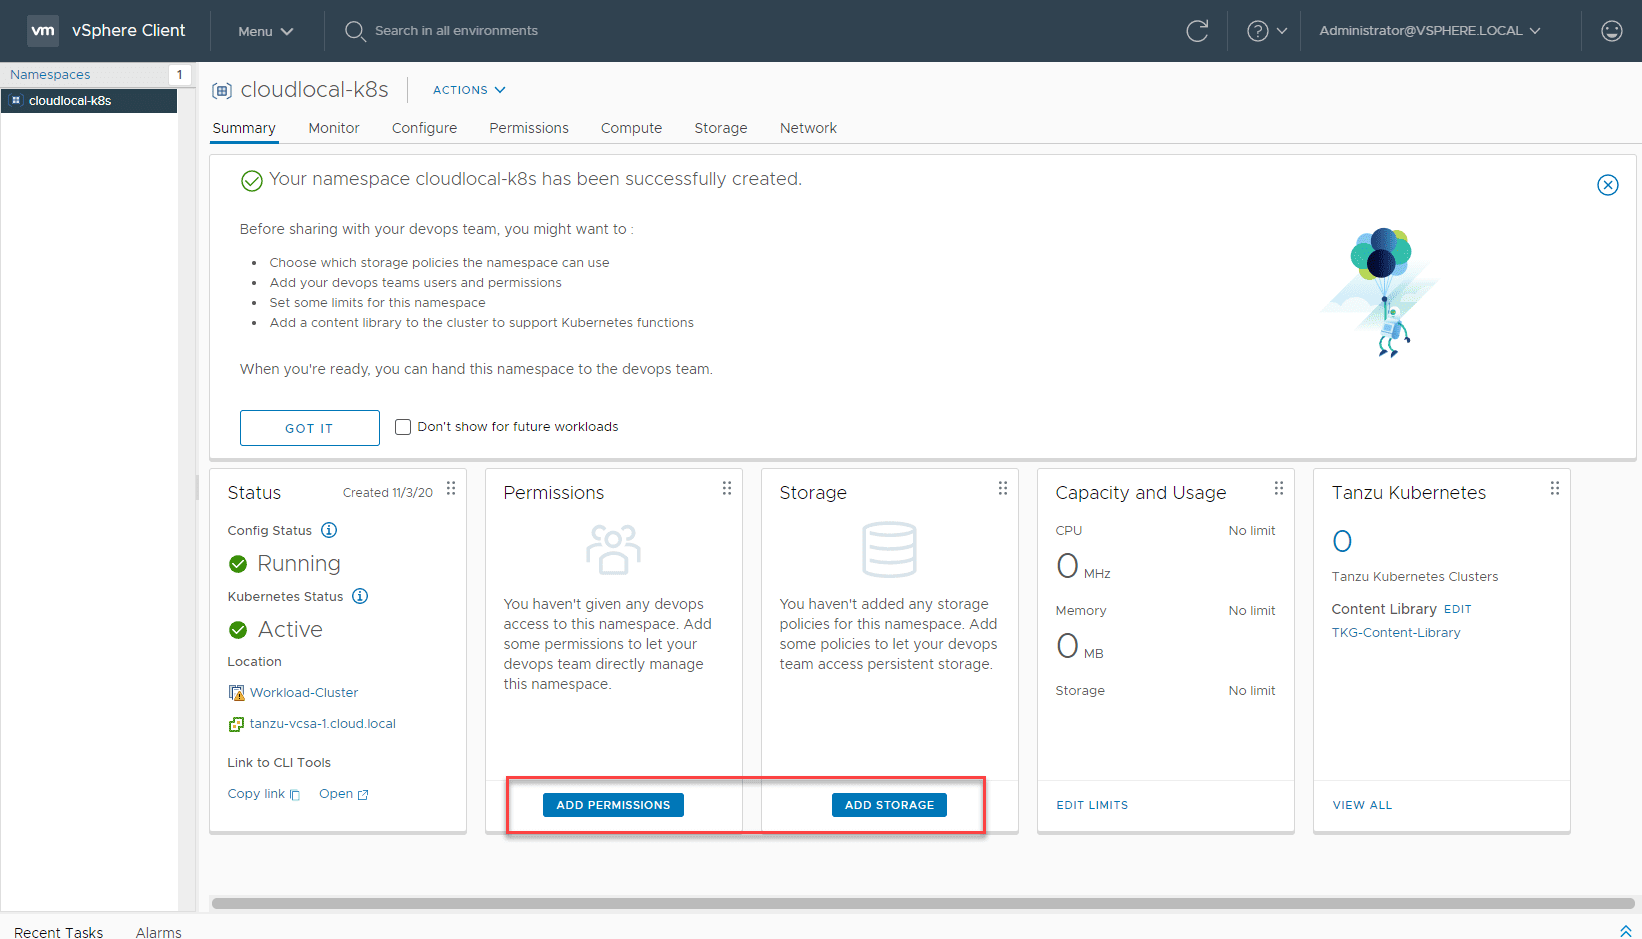
With the namespace created, you now need to setup permissions and a storage policy for the namespace.
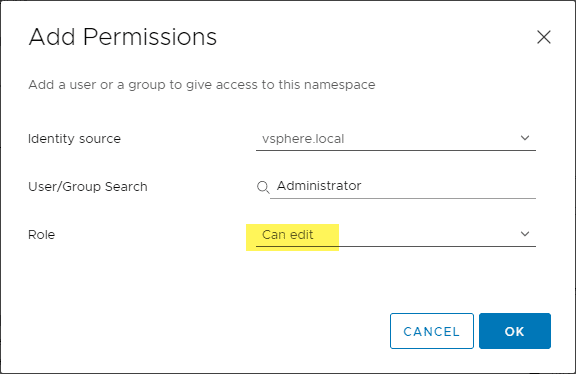
Below, I am assigning permissions to the administrator account to edit. You can also choose to view.
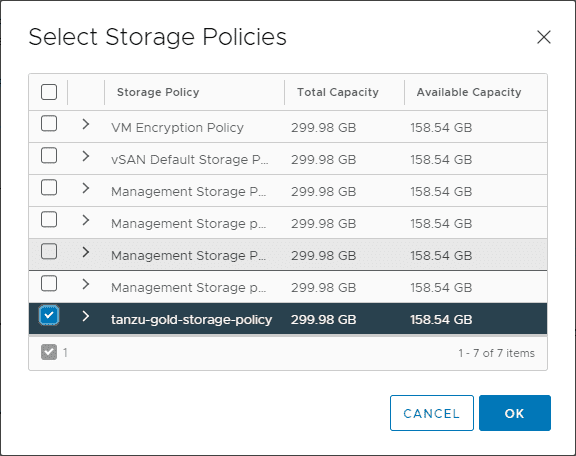
Next, select the Storage Policies for the namespace. Here you can also select multiple policies.
Now that we have the permissions and the storage policy configured, open the link to grab a copy of the Kubernetes CLI tools.
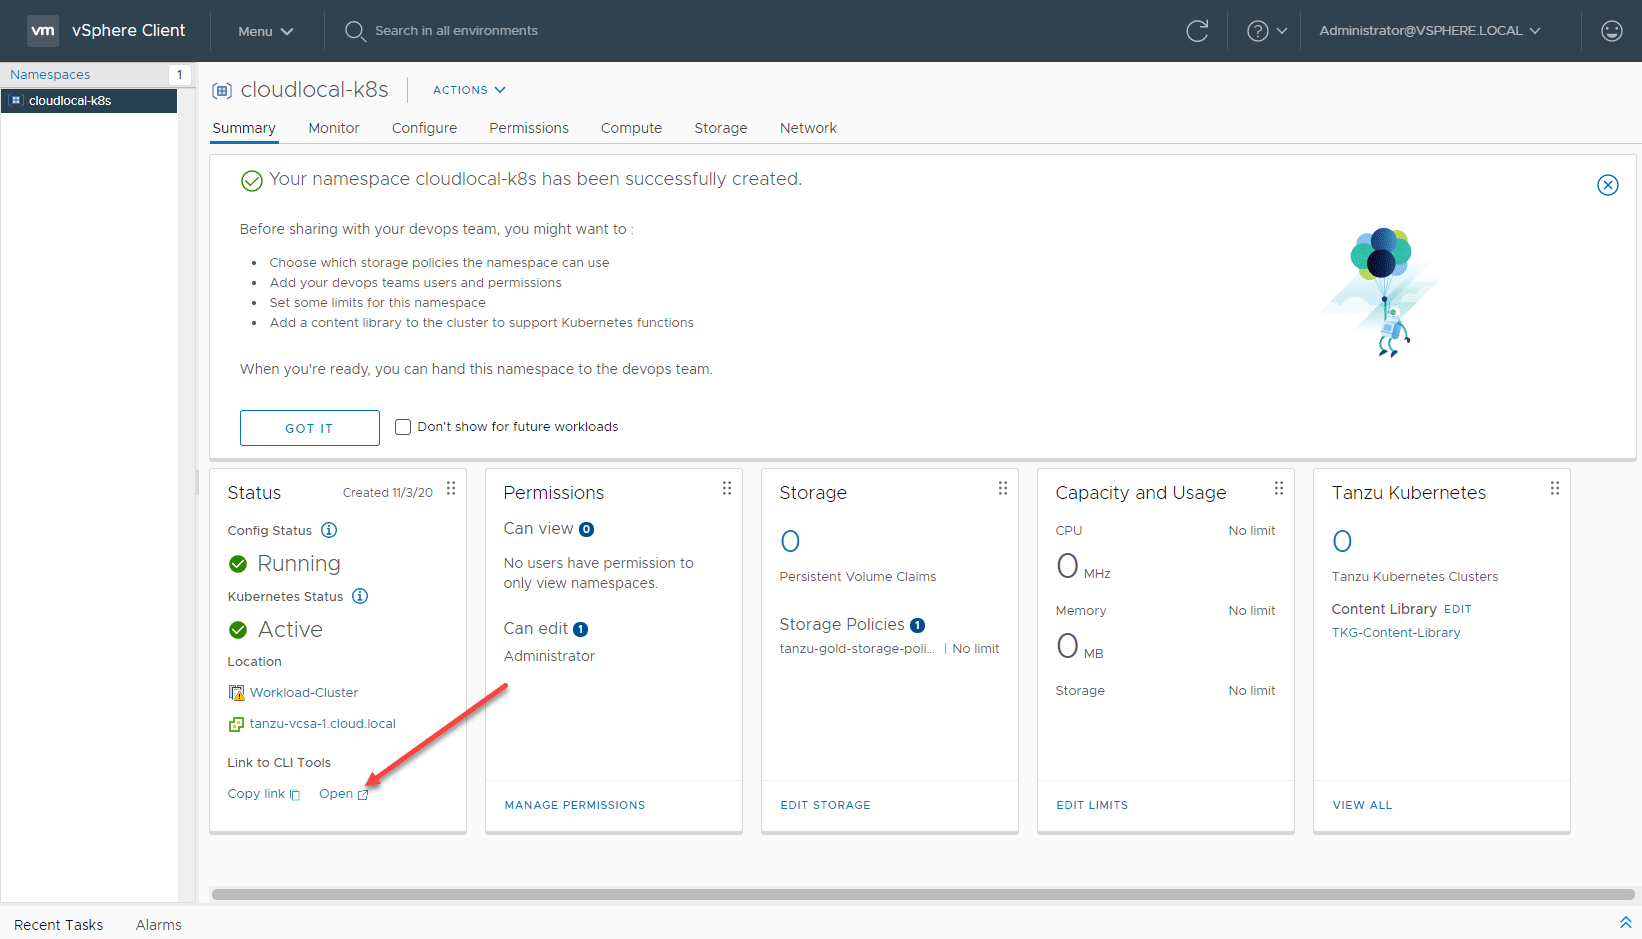
You are actually hitting your configured supervisor control plane node here to pull down the tools.

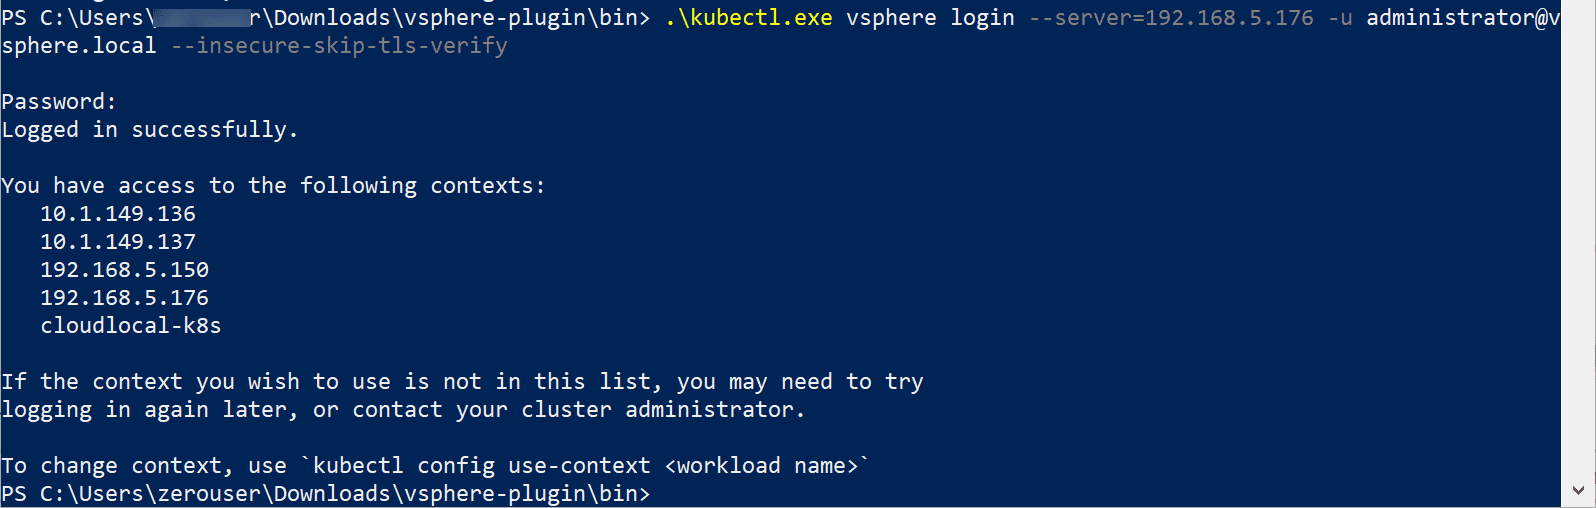
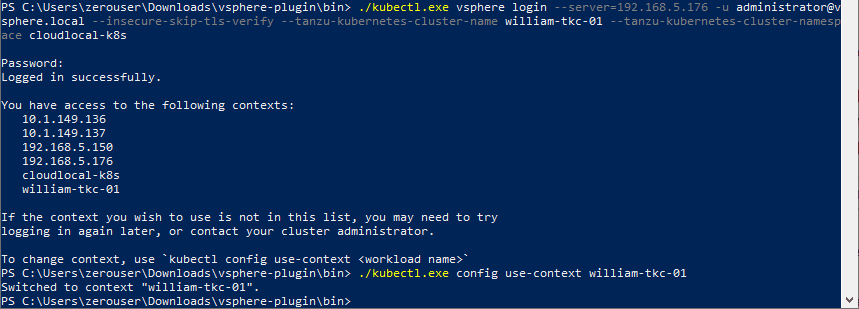
Now that you have the tools, simply extract the .zip file to a directory you want to work from. These are simply self-contained executables so no installation is required. Use the kubectl.exe tool to login to the Supervisor Control plane node. You then change context to your namespace.
 .kubectl.exe vsphere login --server=192.168.5.176 -u [email protected] --insecure-skip-tls-verify

.kubectl.exe config use-context cloudlocal-k8s
Next, you will need to create a configuration YAML file to apply for deploying the worker nodes. I simply copied William’s YAML file here. The only change I made was the namespace name in the file. Make the edits you need to make to the configuration file.
apiVersion: run.tanzu.vmware.com/v1alpha1
kind: TanzuKubernetesCluster
metadata:
  name: william-tkc-01
  namespace: cloudlocal-k8s
spec:
  distribution:
    version: v1.17.8+vmware.1-tkg.1.5417466
  settings:
    network:
      cni:
        name: antrea
      pods:
        cidrBlocks:
        - 193.0.2.0/16
      serviceDomain: managedcluster.local
      services:
        cidrBlocks:
        - 195.51.100.0/12
  topology:
    controlPlane:
      class: best-effort-xsmall
      count: 1
      storageClass: tanzu-gold-storage-policy
    workers:
      class: best-effort-xsmall
      count: 3
      storageClass: tanzu-gold-storage-policy

You can check the status of the Kubernetes worker nodes by issuing the command:
./kubectl.exe get machine
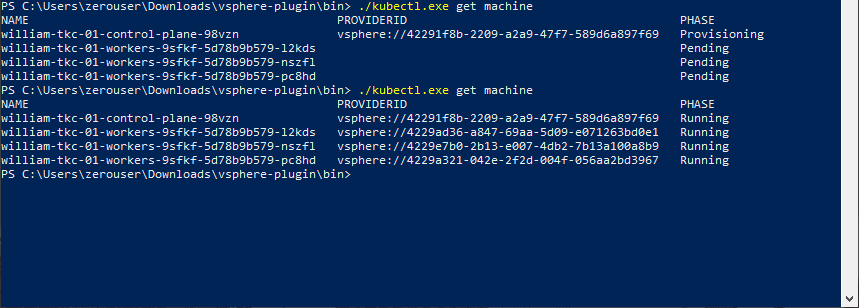
Once you see the control plane and worker nodes running, you are ready to login to the TKG cluster and start deploying applications into the TKG cluster.
./kubectl.exe vsphere login --server=192.168.5.176 -u [email protected] --insecure-skip-tls-verify --tanzu-kubernetes-cluster-name william-tkc-01 --tanzu-kubernetes-cluster-namespace cloudlocal-k8s
Wrapping Up
It is exciting to have access to native Kubernetes inside of vSphere with Tanzu using the native vSphere networking stack. As shown, creating a namespace is made easy with the wizard found in the vSphere Client. After creating the namespace, setting up permissions, and a storage policy, you are ready to begin interacting with the TKG cluster using the kubectl.exe utility.