Backup and Restore OneDrive for Business with NAKIVO
NAKIVO’s newest beta release, NAKIVO Backup & Replication v10.1 beta is a great new release that helps to bolster your cloud data protection strategy if you are using Microsoft 365. With the latest beta version, you can now backup your business-critical OneDrive files that exist in your Microsoft 365 account. In this post, we will take a look at how to backup and restore OneDrive for Business with NAKIVO and see the requirements from your NAKIVO environment, Microsoft 365 environment, as well as the process to both backup and restore files.
Why backup your cloud data?
Many may wonder – why backup your cloud data? Cloud data is indestructible right? No! Cloud data is vulnerable to many of the same risks that threaten your on-premises data. This includes the likes of accidental deletion of files by end users, ransomware attacks, and even (while extremely rare) loss of data due to a catastrophic failure of a cloud environment.
Also, cloud service providers operate on what they refer to as a “shared responsibility model”. This means in most cases that while they take responsibility for the availability of your data from an infrastructure perspective, you are responsible for protecting the actual data itself.
This means that it is absolutely critical to have a backup mechanism for your cloud data.
NAKIVO Backup & Replication v10.1 Beta and OneDrive Backups
One of the major new features of the new release of NAKIVO’s latest beta release, NAKIVO Backup & Replication v10.1 beta is the ability to backup Microsoft 365 OneDrive storage.
This adds to the existing capability of the solution to backup Office 365 email in the way of Exchange Online mailboxes. The great thing about this functionality is this helps to round out the basic functions of backing up Microsoft 365.
Most businesses when they begin migrating to a cloud Software-as-a-Service provider, they generally migrate email and file services first. These may be the only services they take advantage of. However, these are the core and most important for a data protection provider to cover.
I am guessing that NAKIVO most likely has their sights set on furthering their cloud backup functionality to include additional services as well as even other clouds (G Suite). We will see with future beta releases.
Requirements to Backup OneDrive with NAKIVO
Ok, so we understand the importance of backing up your cloud data. NAKIVO now provides the functionality for both email and files in this beta release. How do you get started?
Well, there are just a few things you need to do before you can begin backing up your OneDrive. First, there are some things you need to do on the Azure side of things.
You have to setup an “API Application” that has the permissions that NAKIVO needs to be able to talk to your Microsoft 365 environment. Read my post here where I covered how to setup Azure Active Directory to backup the Exchange Online environment with NAKIVO. Then I will detail the permissions additions that are needed to also cover OneDrive.
Ok, now for the additional permissions that you will need to add to your application API with admin consent in addition to what I detailed in the above article.
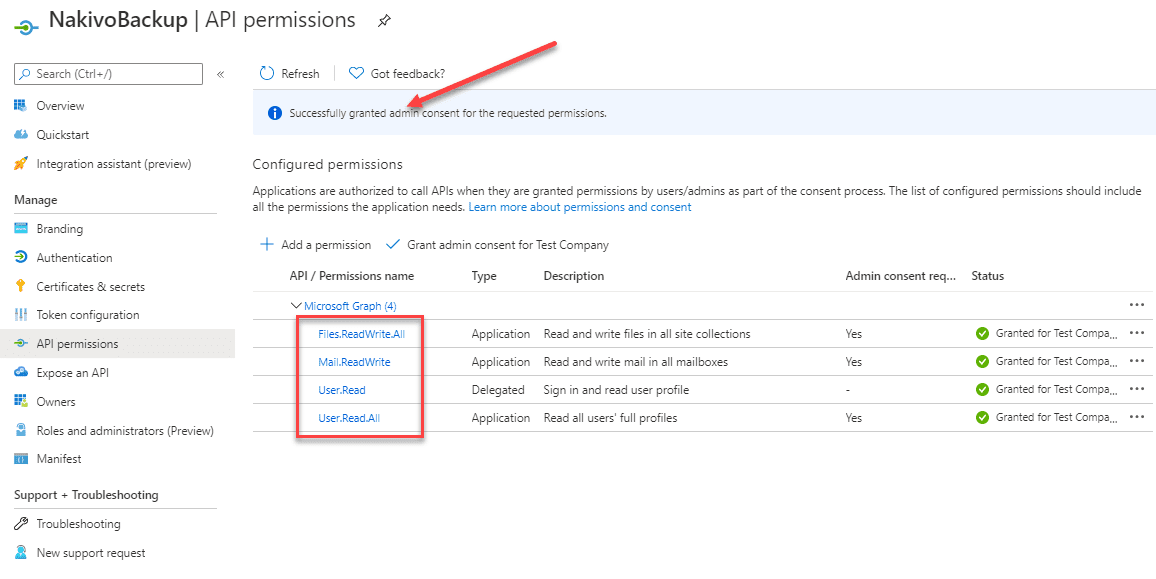
As you can see above, the additional permissions needing to both backup and restore OneDrive files is the Files.ReadWrite.All permission. Be sure to grant admin consent.
Adding the Microsoft 365 account to NAKIVO
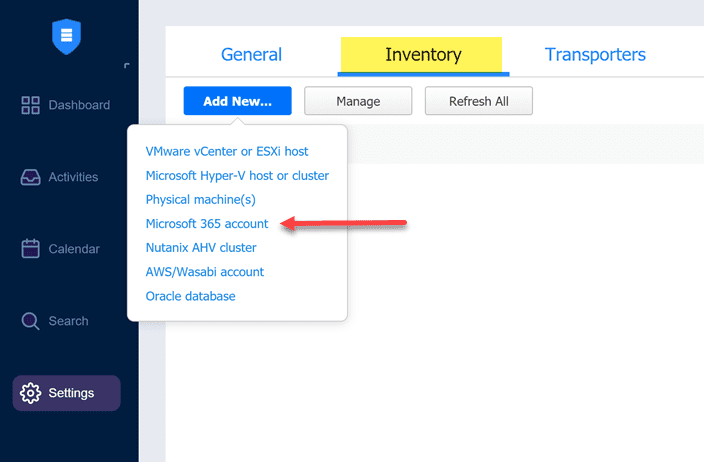
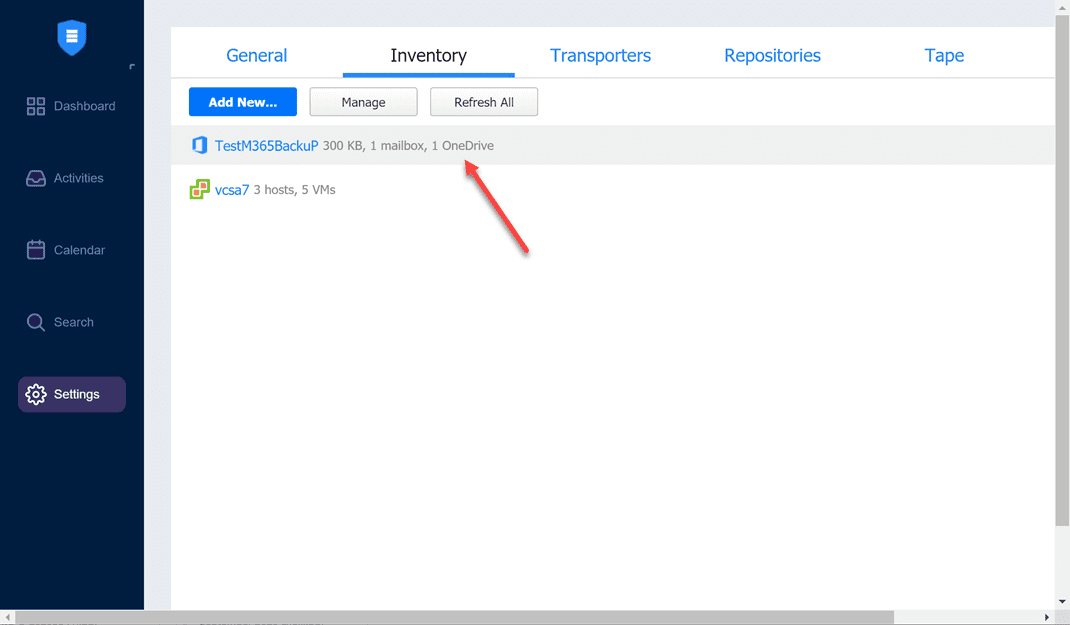
Let’s briefly take a look and see how to add the Microsoft 365 account to NAKIVO so we can get started backing up Microsoft 365 including OneDrive. The actual Microsoft 365 account is added under the Settings > Inventory section.
Choose to Add New… and then select Microsoft 365 account.
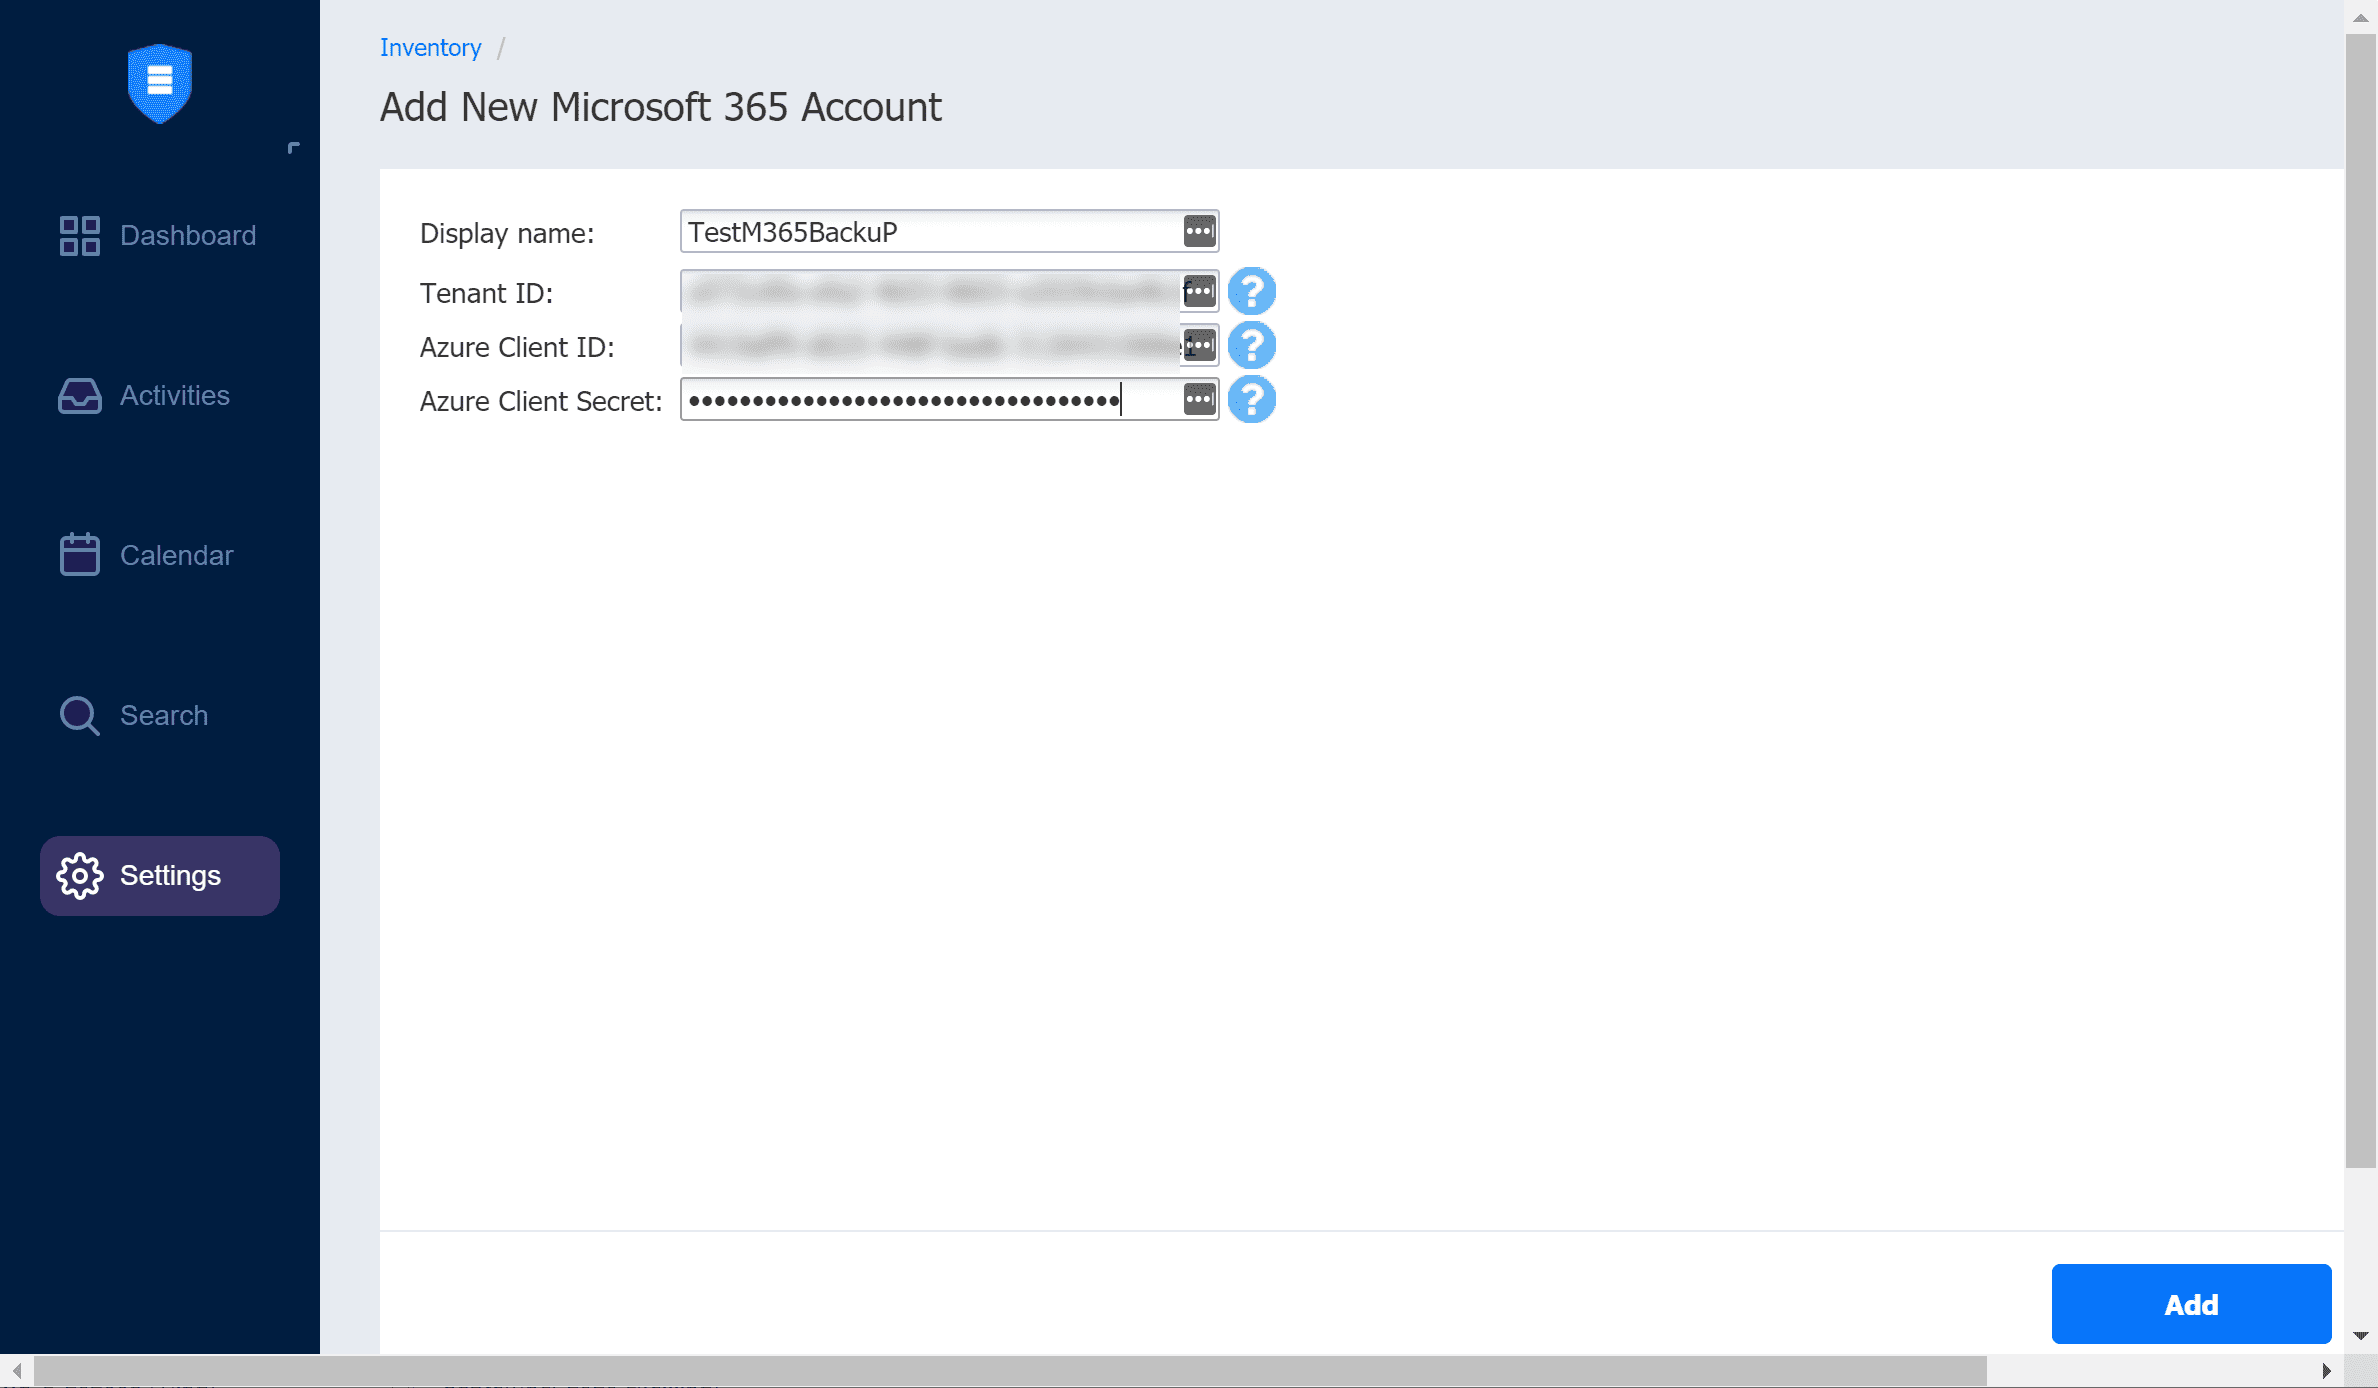
At this point it will ask you for three pieces of information – tenant ID, Azure Client ID, and Azure Client Secret. The breakdown of where you get this information is as follows:
- Azure Tenant ID is created when registering your Microsoft 365 account in the Azure portal. To register your account, sign in to Microsoft Azure with your Microsoft 365 account credentials. In the left navigation pane, click Azure Active Directory>App registrations>New registration. After registering your app, Azure Tenant ID will be provided.
- Azure Client ID is created when registering your Microsoft 365 account in the Azure portal. To register your account, sign in to Microsoft Azure with your Microsoft 365 account credentials. In the left navigation pane, click Azure Active Directory>App registrations>New registration. After registering your app, Azure Client ID will be provided.
- Azure Client Secret is created when registering your Microsoft 365 account in the Azure portal. To access the Client Secret, click on the registered App in the Azure portal and click Settings>Keys.
The Microsoft 365 environment is successfully added to your NAKIVO Backup & Replication v10.1 beta environment.
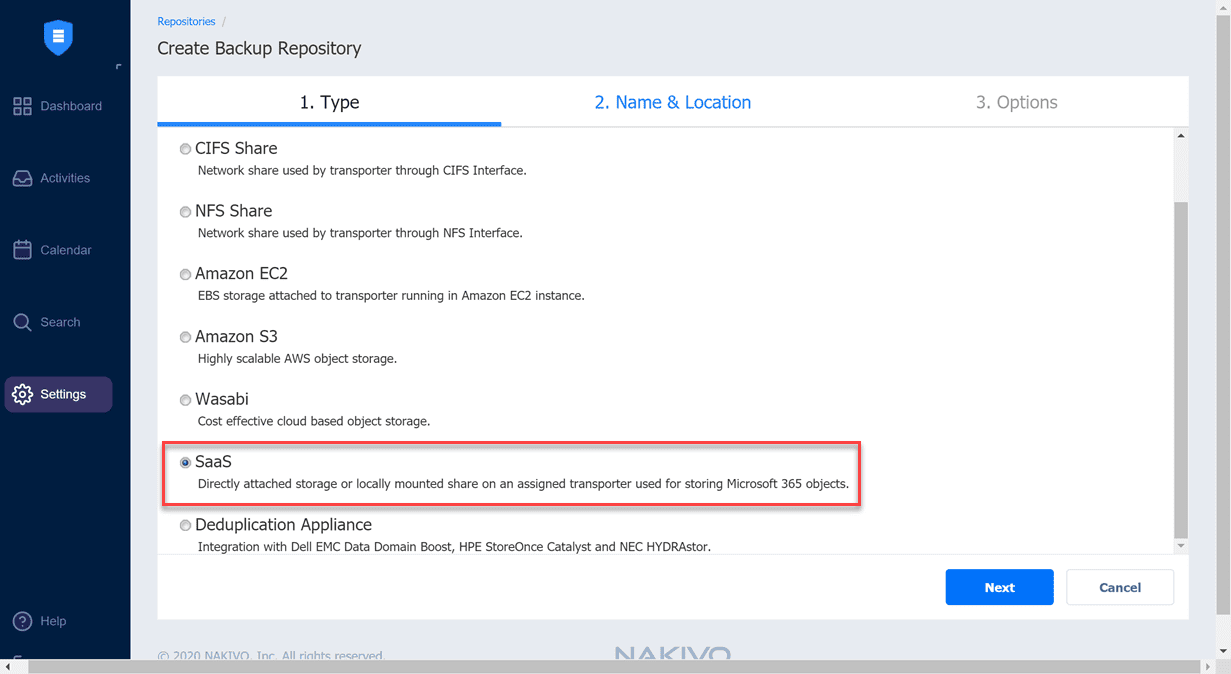
Now, you need to have the right type of backup repository added in NAKIVO. Even if you add the environment, if you don’t have a backup repository that is of the type SaaS, it will not allow you to backup your Microsoft 365 environment.
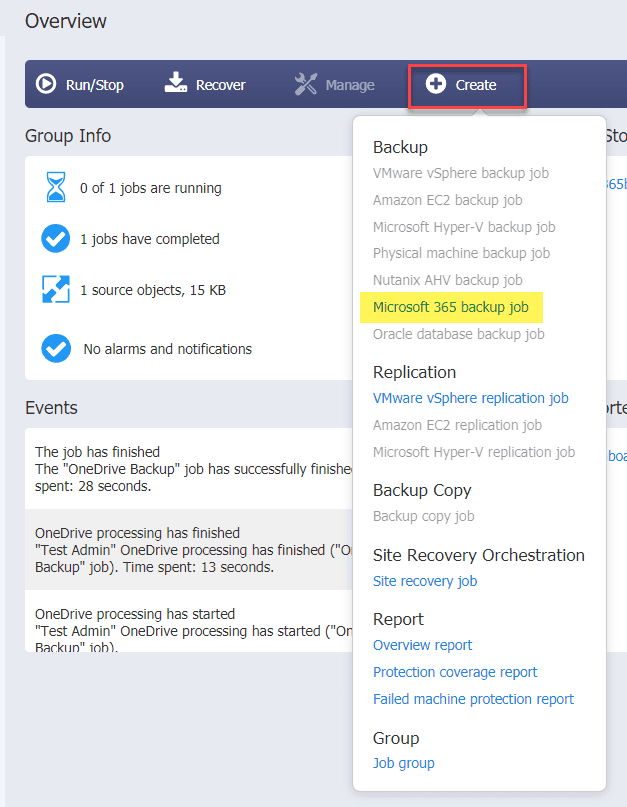
Creating a OneDrive for Business Backup Job
Now, let’s actually create the backup job that will backup our OneDrive for Business files. Select Create > Microsoft 365 backup job.
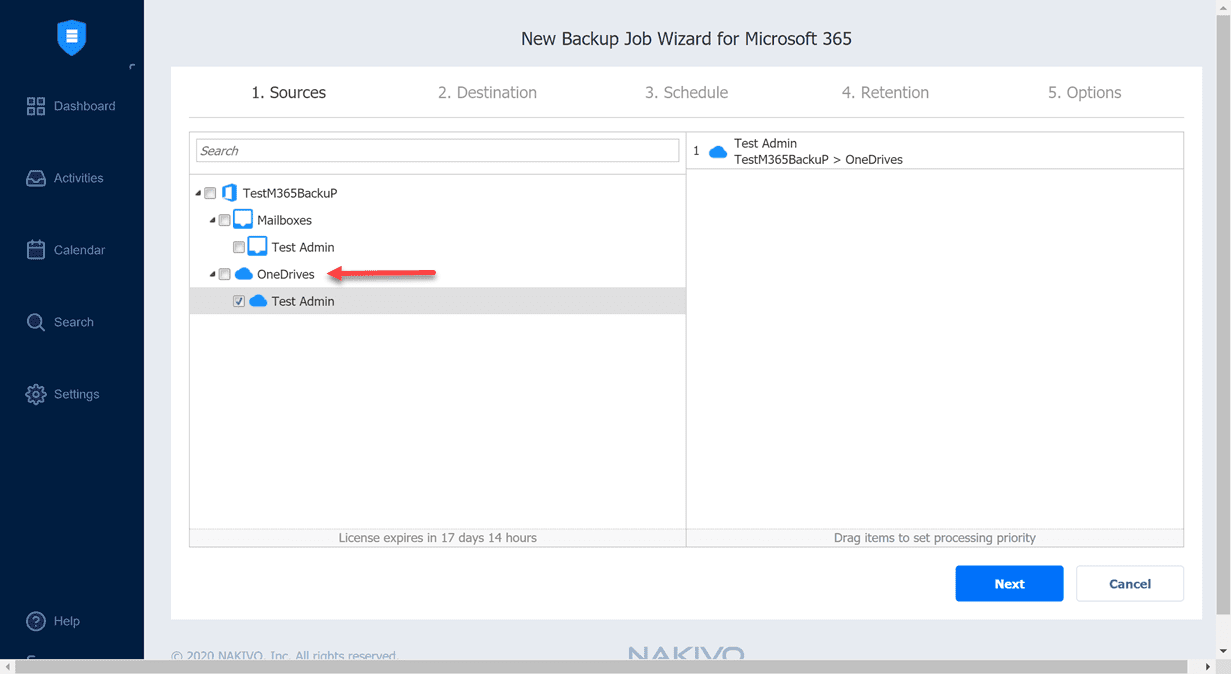
This launches the New Backup Job Wizard for Microsoft 365. To begin with, you need to select the Sources of the backup. This is your Microsoft 365 environment. Here, to highlight the OneDrive functionality, I am simply selecting the OneDrive.
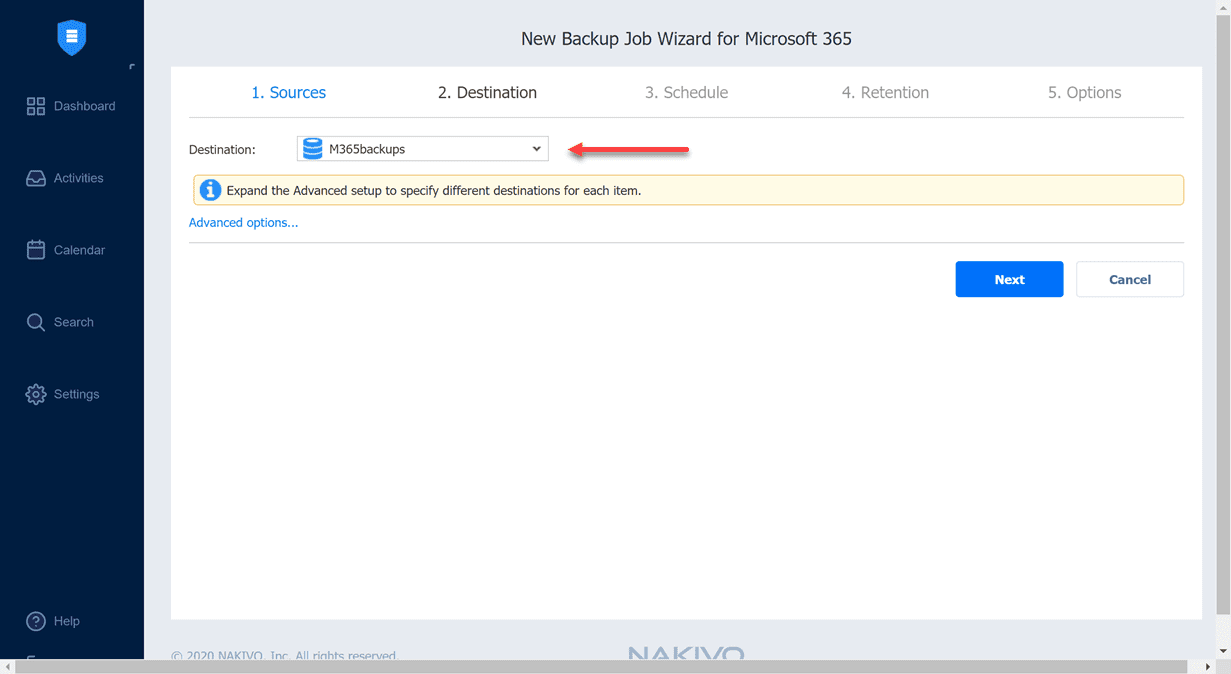
Select the destination which is your SaaS backup repository in NAKIVO.
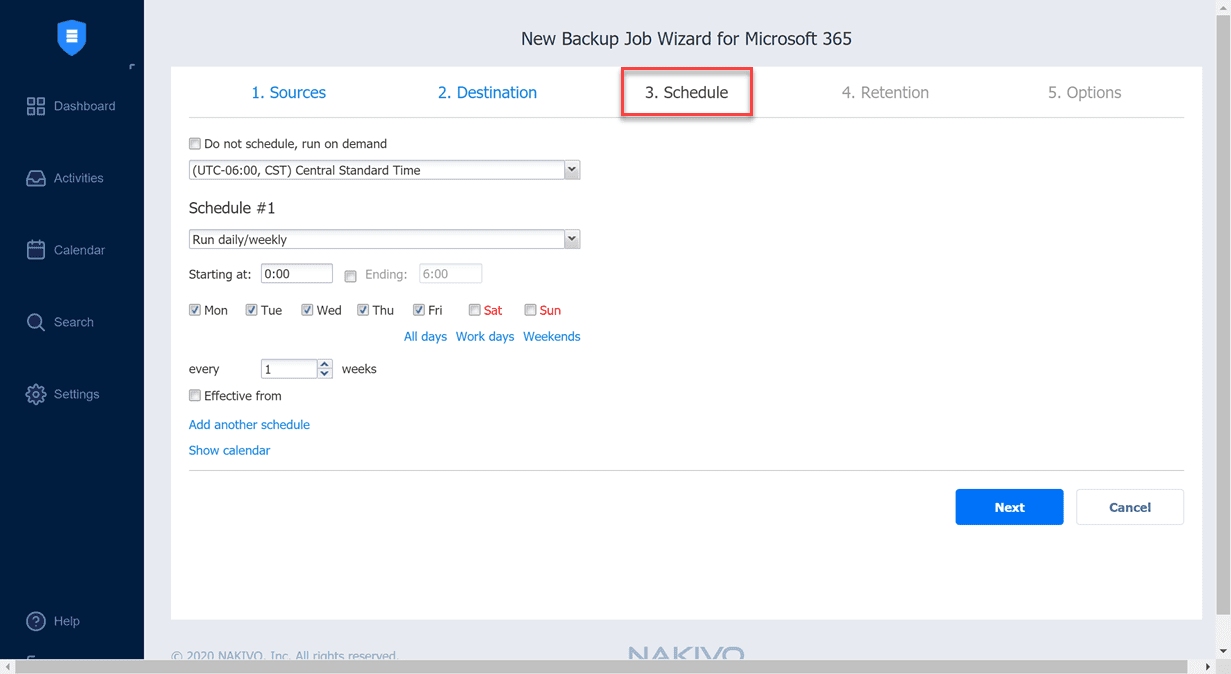
The Schedule is the schedule of when your backups will run for your Microsoft 365 environment.
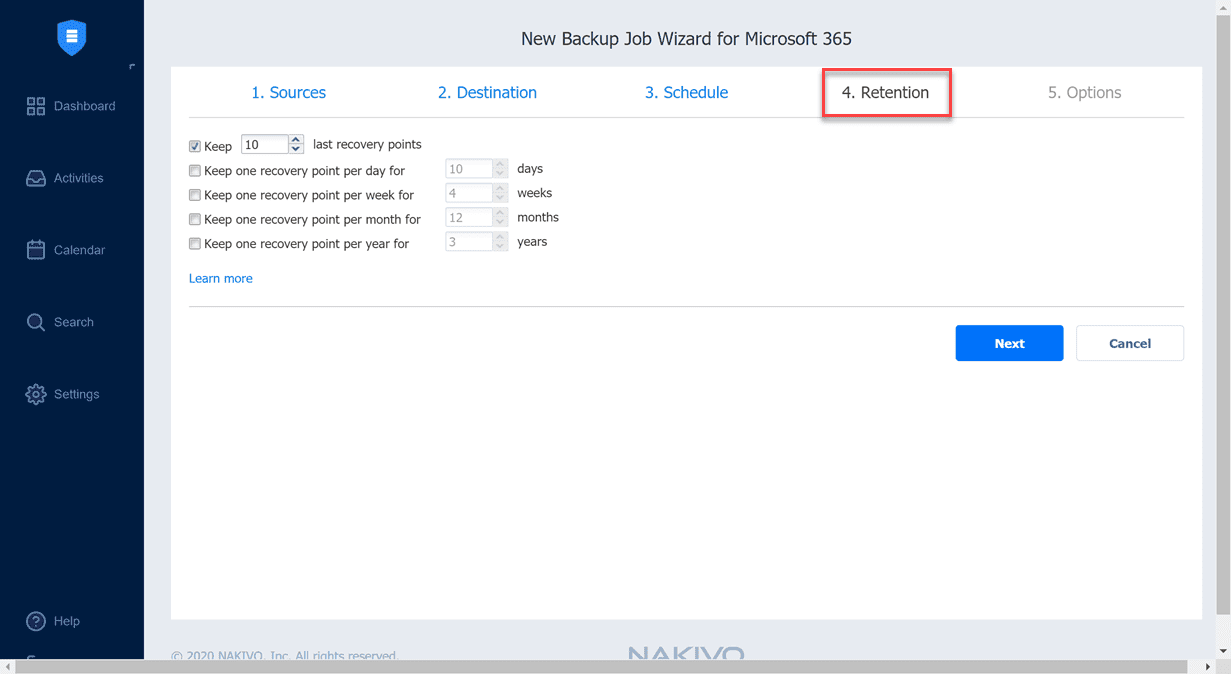
You can set the retention of your cloud SaaS backups here. Decide how many versions of your data you want to keep.
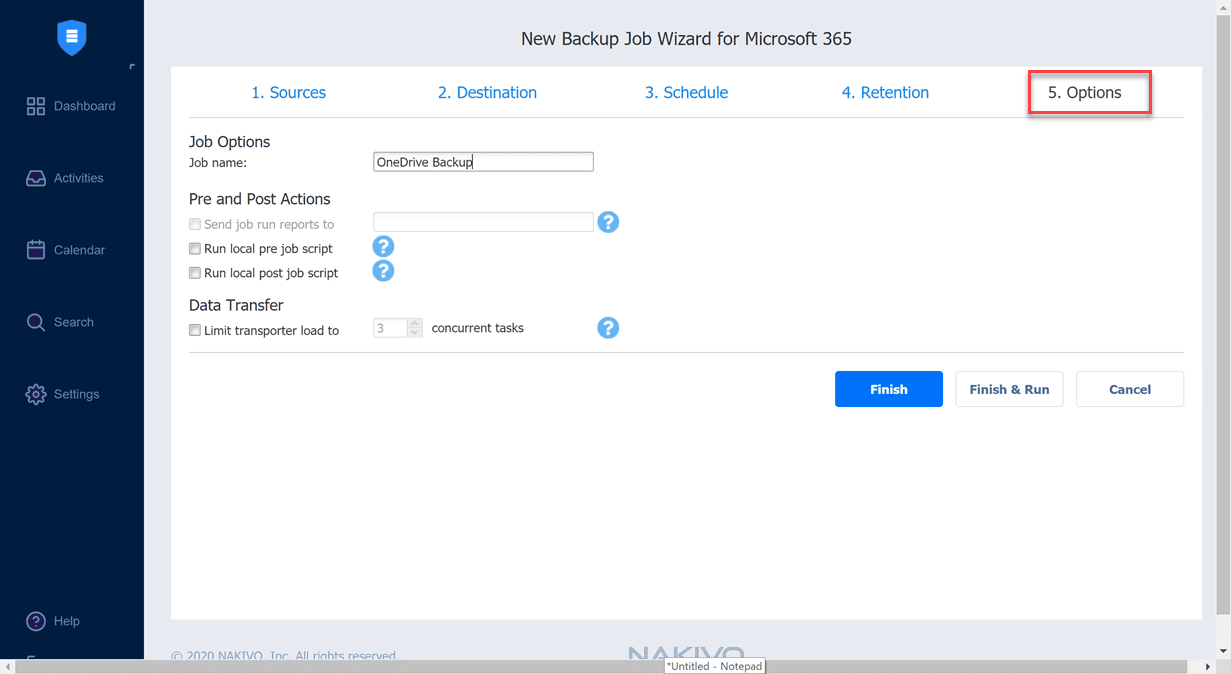
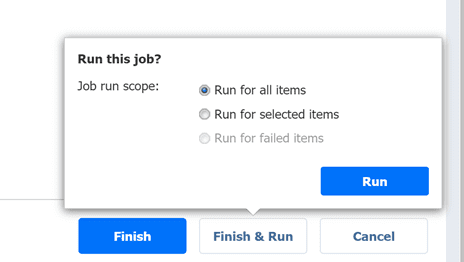
On the options screen, simply name the job and for the most part, you should be ready to run the backup job. Click either Finish or Finish & Run.
I am selecting to Run for all items.
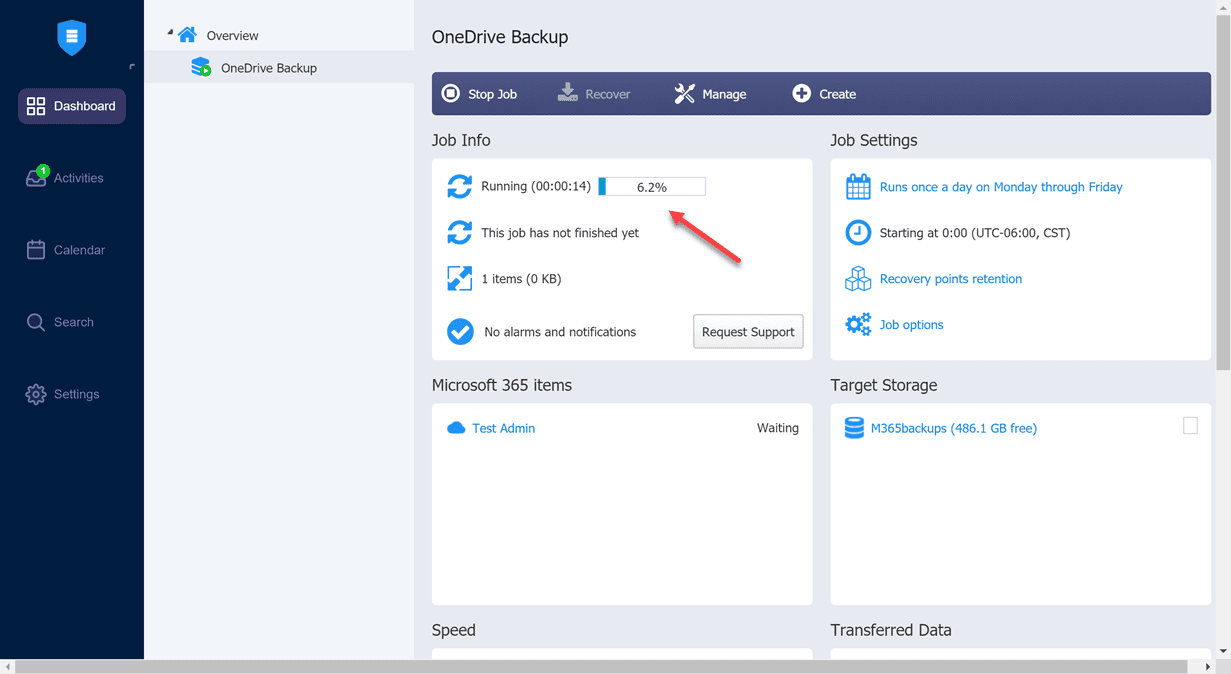
The Microsoft 365 backup job kicks off.
Restoring OneDrive Data
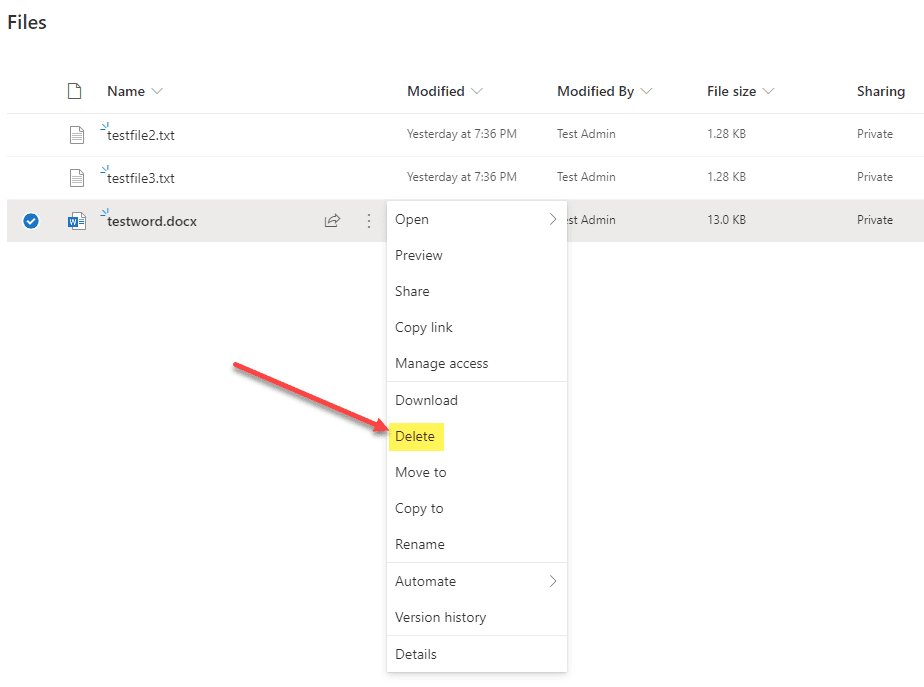
An extremely common scenario is to have data accidentally deleted by an employee. Data loss can easily happen when employees delete data they think they can delete or they are confused about which data they are working with.
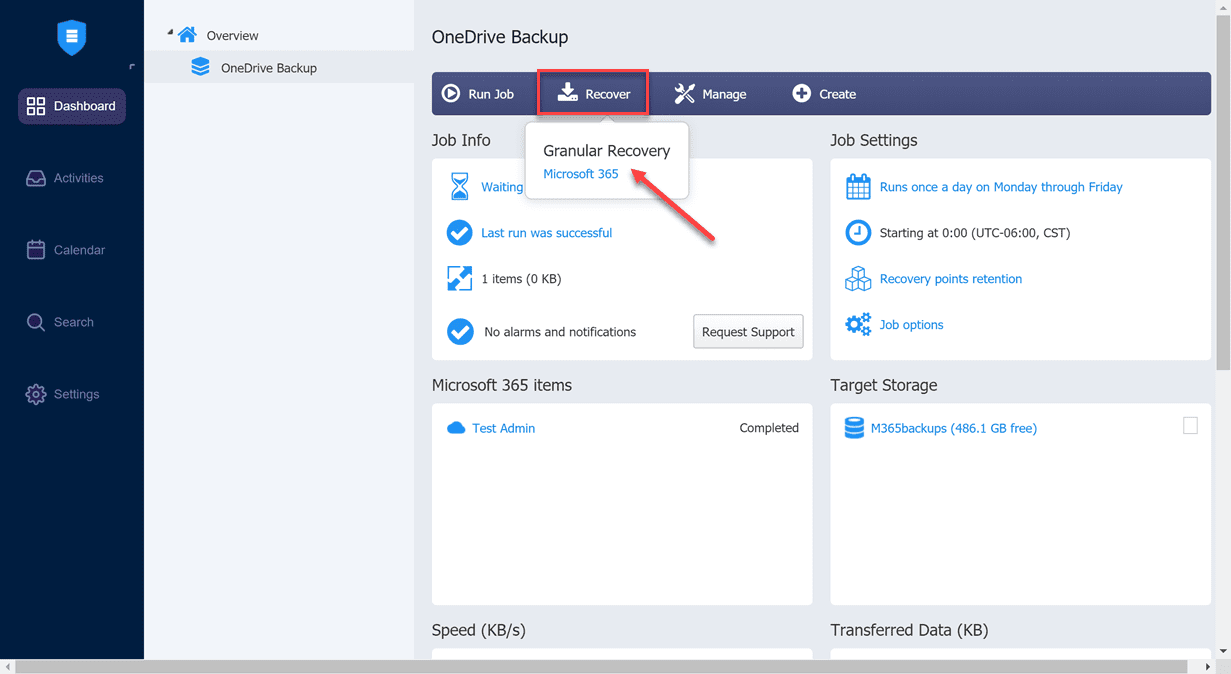
To recover your Microsoft 365 data, just click your Microsoft 365 backup and select Recover > Granular Recovery > Microsoft 365.
This launches the Object Recovery Wizard for Microsoft 365. First, select the OneDrive backup you want to recover files from.
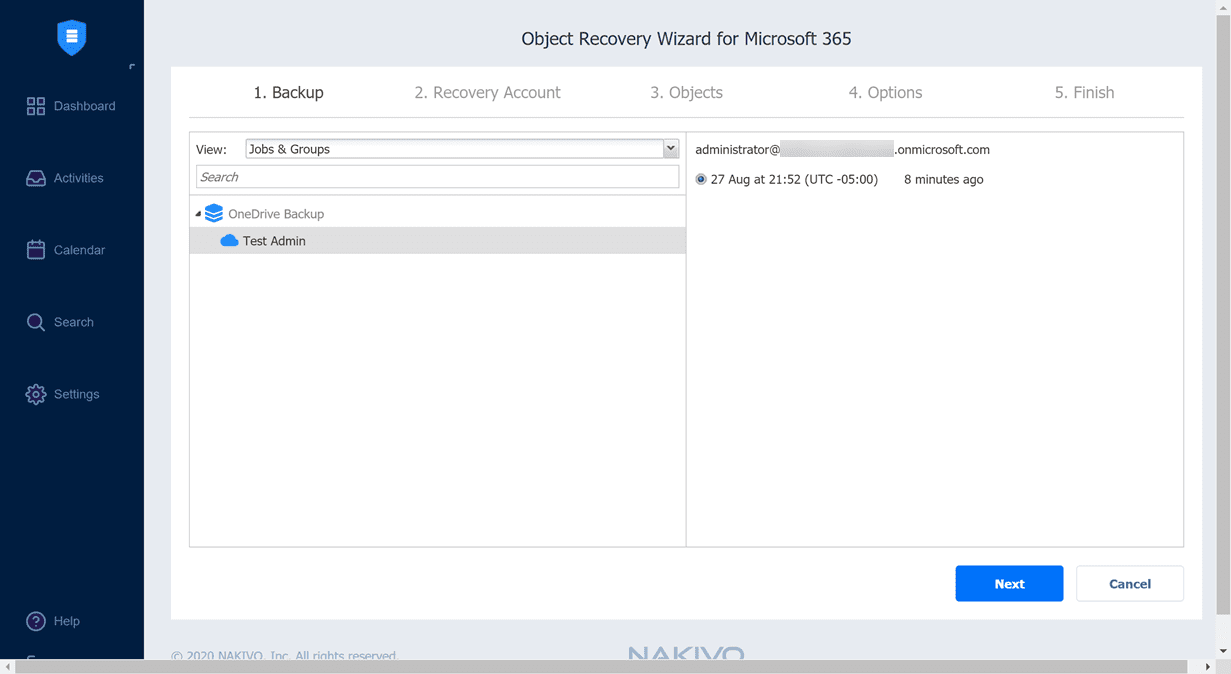
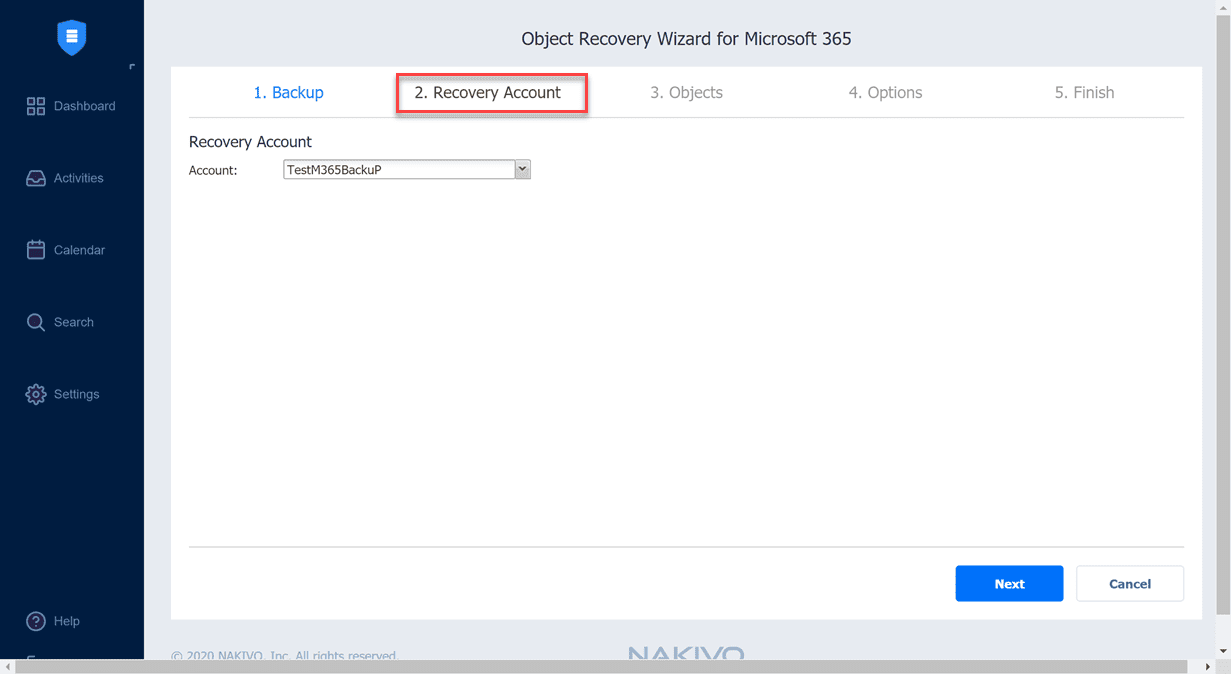
Next, select the Recovery Account, which is the Microsoft 365 backup account you setup in the inventory.
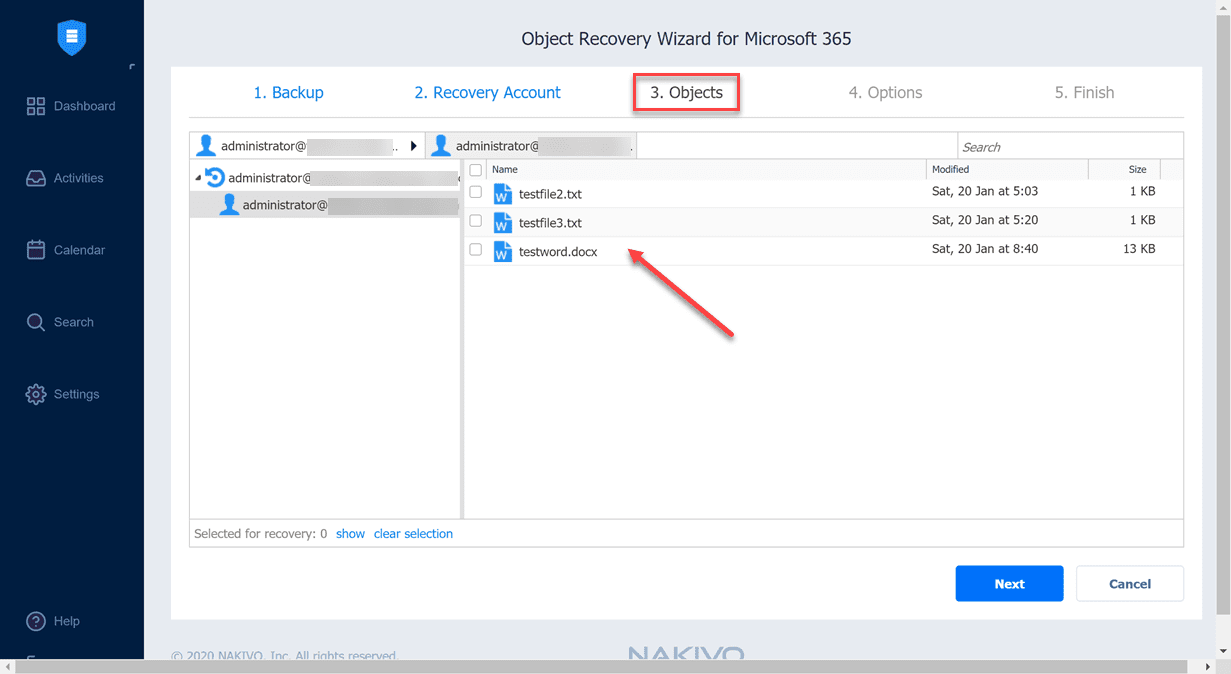
Next, select the backup account and the objects you want to recover.
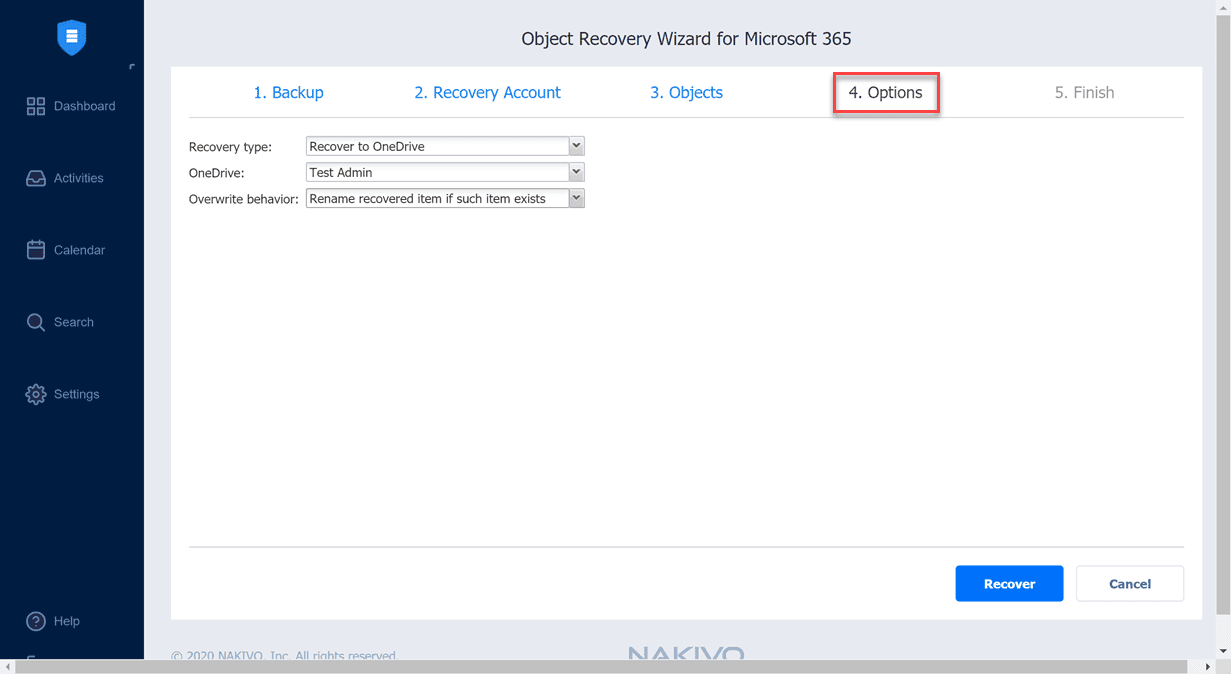
Select the recovery options for the recovery job. This includes the recovery type. You can also select which OneDrive to recover to (so you could migrate data with this tool as well) and then you can select the overwrite behavior. What if the file exists? Those kinds of details of the operation.
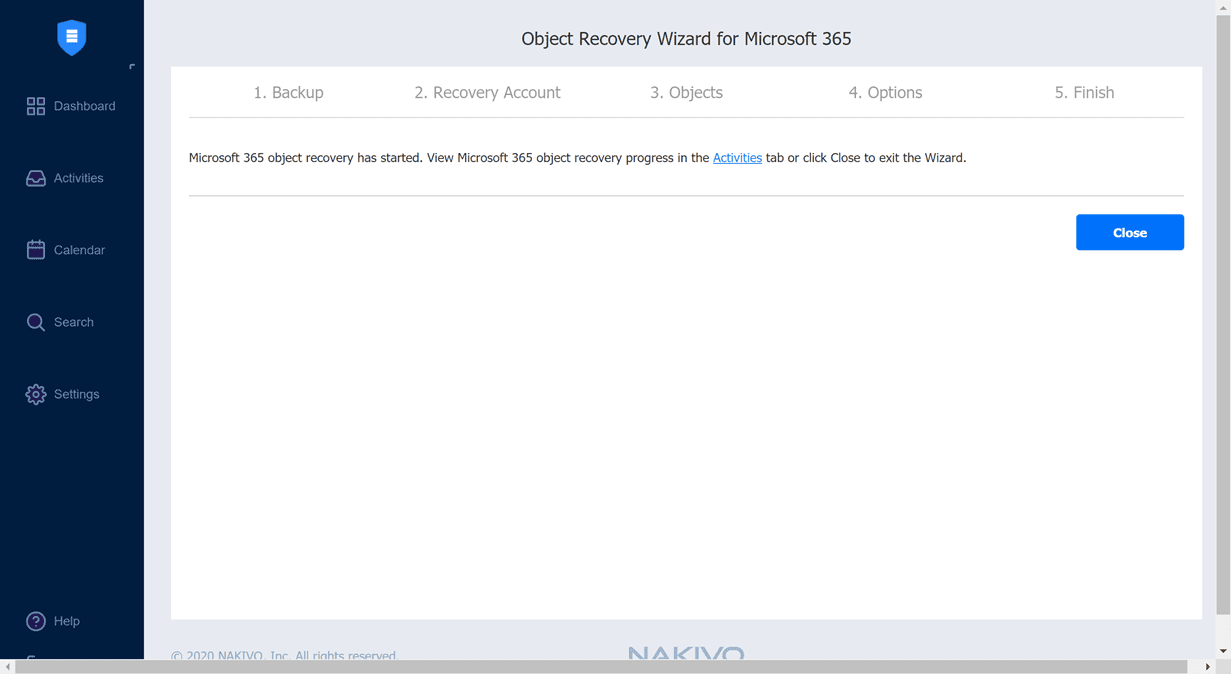
When you are ready, select the Recover button. This actually starts the recovery job.
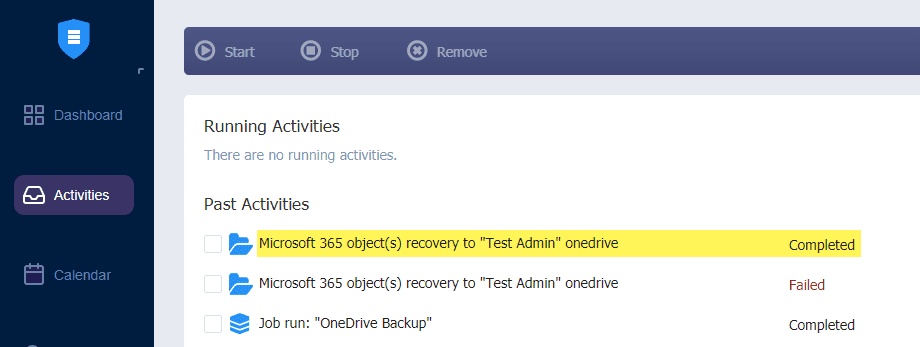
The next screen simply tells you the recovery job has begun. You can monitor the operation from the Activities tab.
Below, you see the recovery job completed successfully. The failure before was from not having the Files.ReadWrite.All permission configured.
The file is successfully recovered in just a few moments. From my testing, the functionality works great and I did not experience any issues.
Wrapping Up
The new functionality to Backup and Restore OneDrive for Business with NAKIVO Backup & Replication v10.1 beta is a great way to ensure that your data in Microsoft 365 is protected.
NAKIVO is gaining a lot of ground here with the newly added features bolstering their cloud backup offering. I am certain they no doubt have plans to add additional cloud backup features as well as other cloud environments to their portfolio of features for protecting your cloud environments.
You can download a fully-featured trial version of NAKIVO Backup & Replication v10.1 beta here.