VMware NSX Identity Based Firewall (IDFW) Configuration in NSX-T 3.0
One of the powerful features of VMware NSX is the ability to have identity based firewalling features. This is an extremely cool feature that allows resources to be scoped not just based on traditional constructs such as VLANs and IP scopes. Identity is a much better way to control access than the traditional means of doing so. With identity based firewall features, resources can be scoped down to the granular level a single user needs without affecting anyone else on the network. This level of micro-segmentation is very difficult if not impossible to do with traditional firewall solutions. In this post, we will look closer at the VMware NSX identity based firewall configuration in NSX-T 3.0 and see how this is easily setup.
What is VMware Identity Based Firewall?
With identity firewall (IDFW) in VMware NSX and NSX-T, you can create Active Directory user-based Distributed Firewall (DFW) rules. There are many different use cases for IDFW.
It an be used for VDI or Remote desktop sessions (RDSH) support. What is great about the VMware NSX solution is that resources that are shared such as RDSH, can have the individual network streams of users coming in, scoped as needed.
In other words, one user could be allowed to access specific resources and another user can be allowed to access other specific resources.
What are the supported operating systems?
The following operating systems are supported in the following scenarios.
| Guest Operating Systems | Enforcement Type |
|---|---|
| Windows 8 | Desktop – supports desktop users use case |
| Windows 10 | Desktop – supports desktop users use case |
| Windows 2012 | Server – supports server users use case |
| Windows 2012R2 | Server – supports server users use case |
| Windows 2016 | Server – supports server users use case |
| Windows 2012R2 | RDSH – supports Remote Desktop Session Host |
| Windows 2016 | RDSH – supports Remote Desktop Session Host |
How does Identity Firewall (IDFW) work?
There are a few configuration steps that need to be taken to properly allow NSX and NSX-T to properly consume Active Directory information for users and groups.
One of the requirements for IDFW to work is that NSX-T must know which desktop an end user is logged into to apply the IDFW rules. A thin agent installed with VMware tools on the VM is the piece that gathers the network information and forwards that to the NSX context engine.
Once the information is found and forwarded over, the NSX-T context engine then applies the enforcement of the IDFW rules appropriately.
IDFW workflow overview:
- A user logs in to a VM and starts a network connection, by opening Skype or Outlook.
- A user login event is detected by the Thin Agent, which gathers connection information and identity information and sends it to the context engine.
- The context engine forwards the connection and the identity information to Distributed Firewall Wall for any applicable rule enforcement.
Configuring Identity Based Firewall in NSX-T 3.0
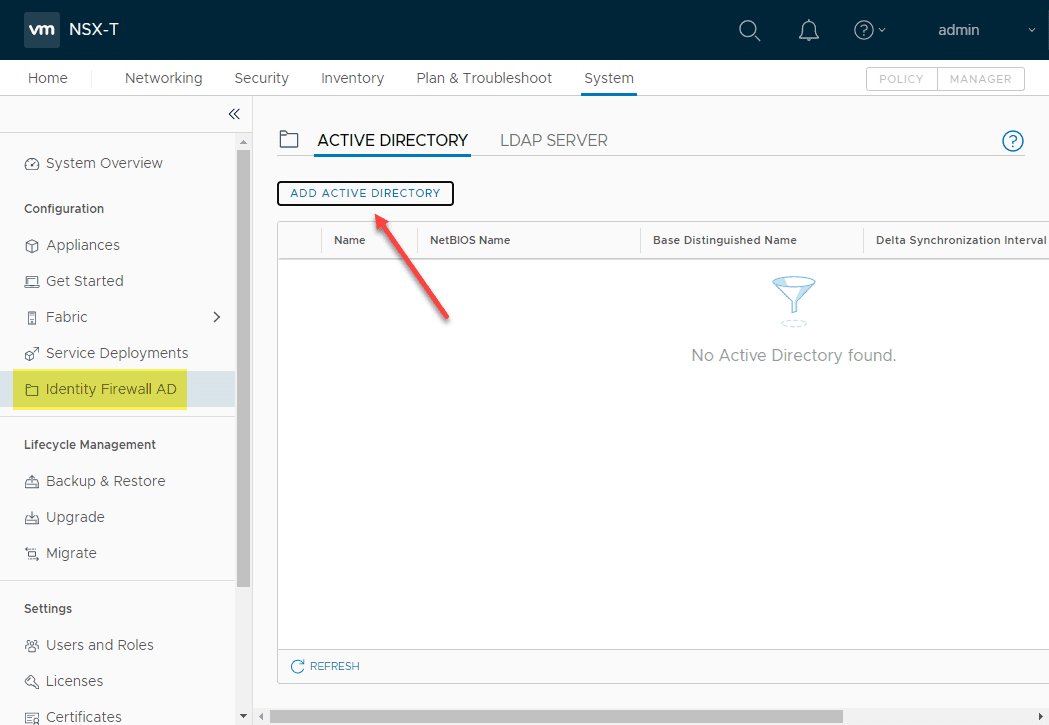
The first thing that you want to do is add your identity source. Let’s look at this workflow. This is found under System > Configuration > identity Firewall AD > Active Directory > Add Active Directory.
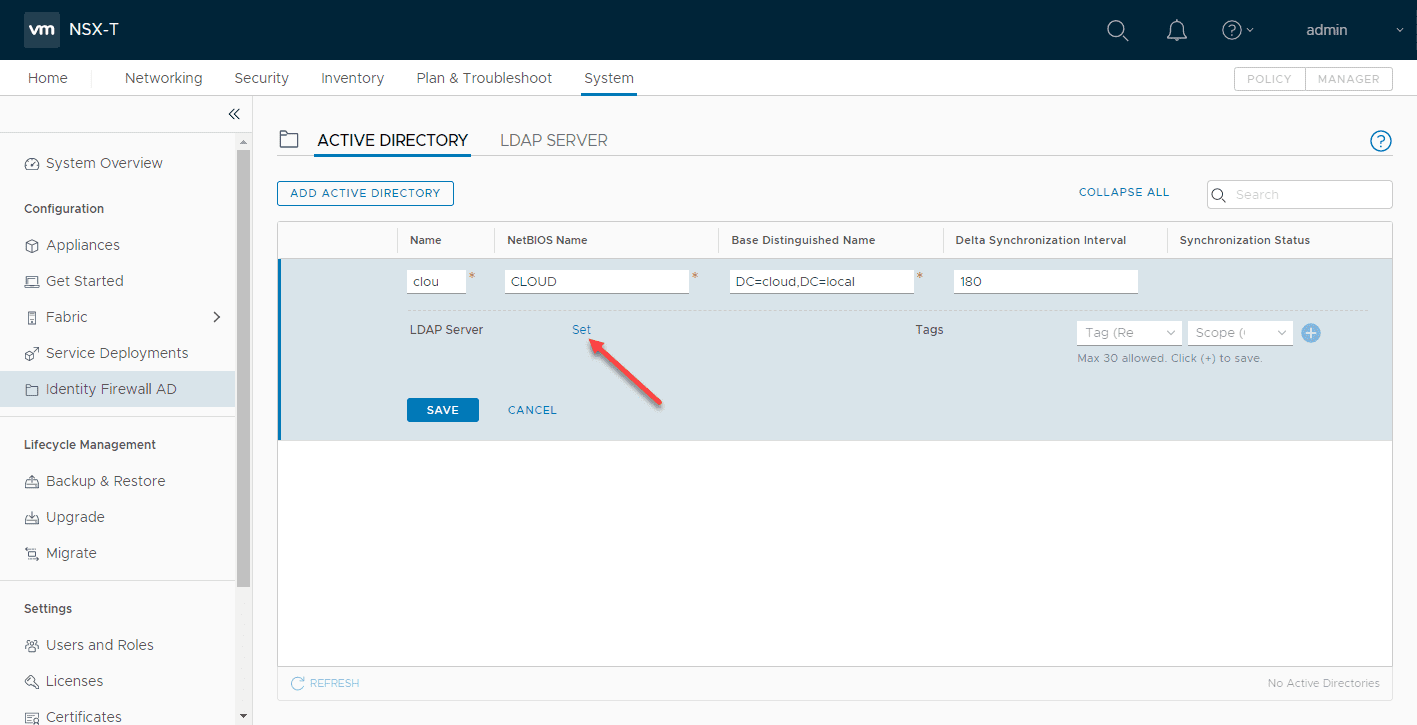
Enter your Active Directory information including:
- Name
- NetBIOS name
- Base Distinguished Name
- Delta Synchronization Interval
- Synchronization Status
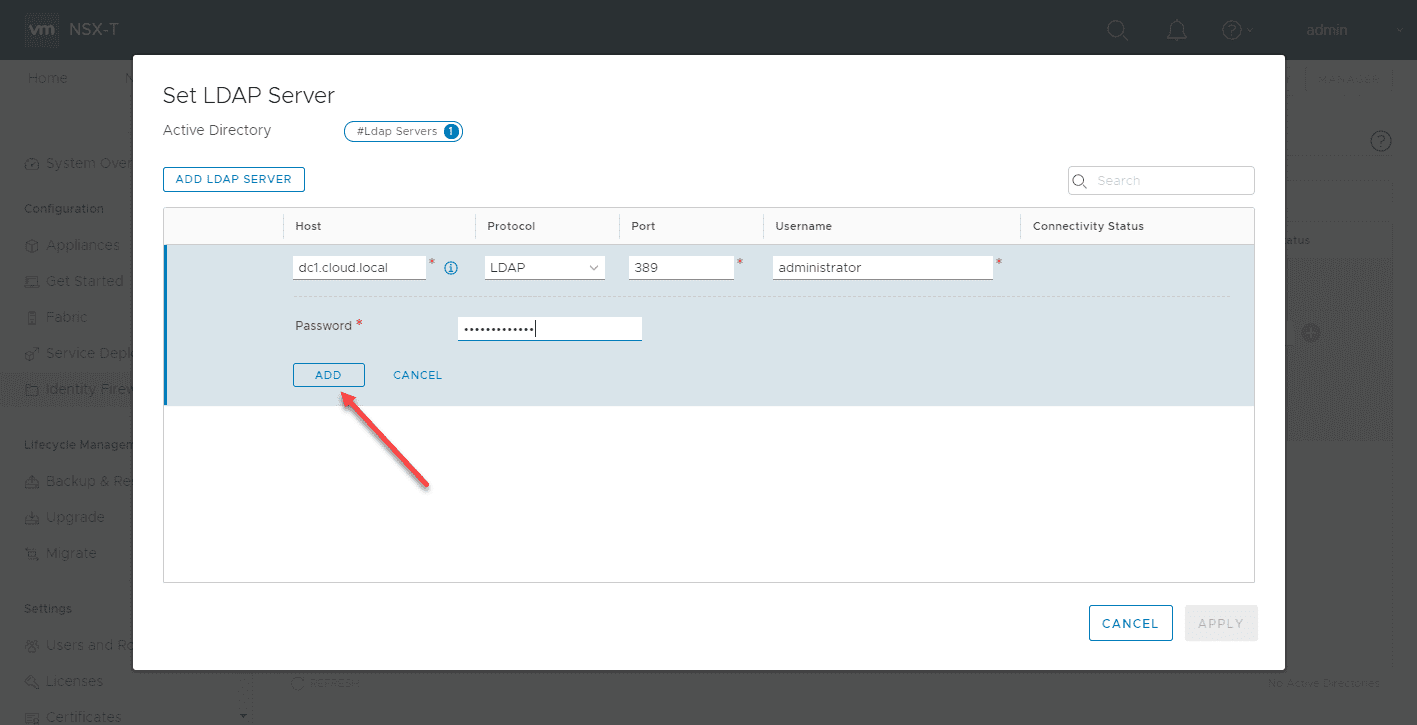
Click the Set hyperlink on the LDAP Server.
Click the Add LDAP Server.
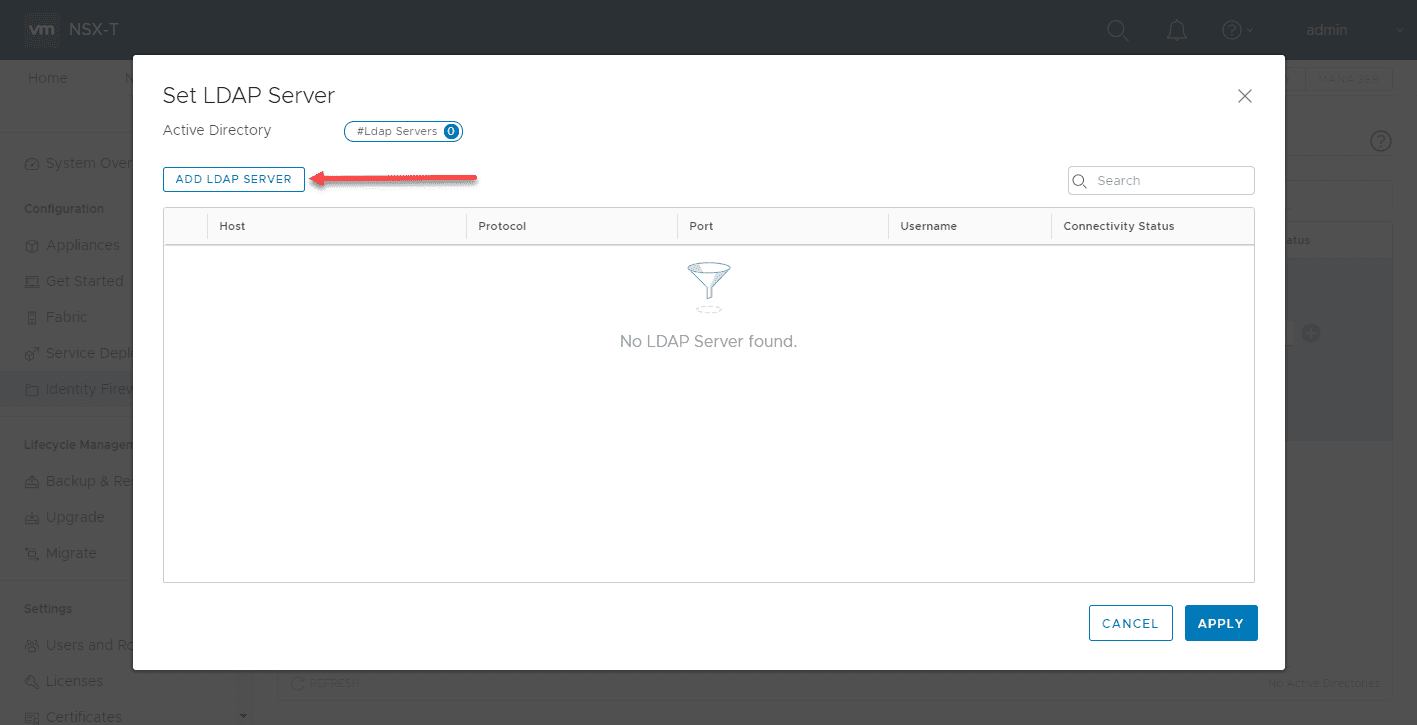
Enter the information:
- Host
- Protocol
- Protocal
- Username
- Password
Click Add.
Click Apply on the “Set LDAP Server”.

Using Identity in the Distributed Firewall
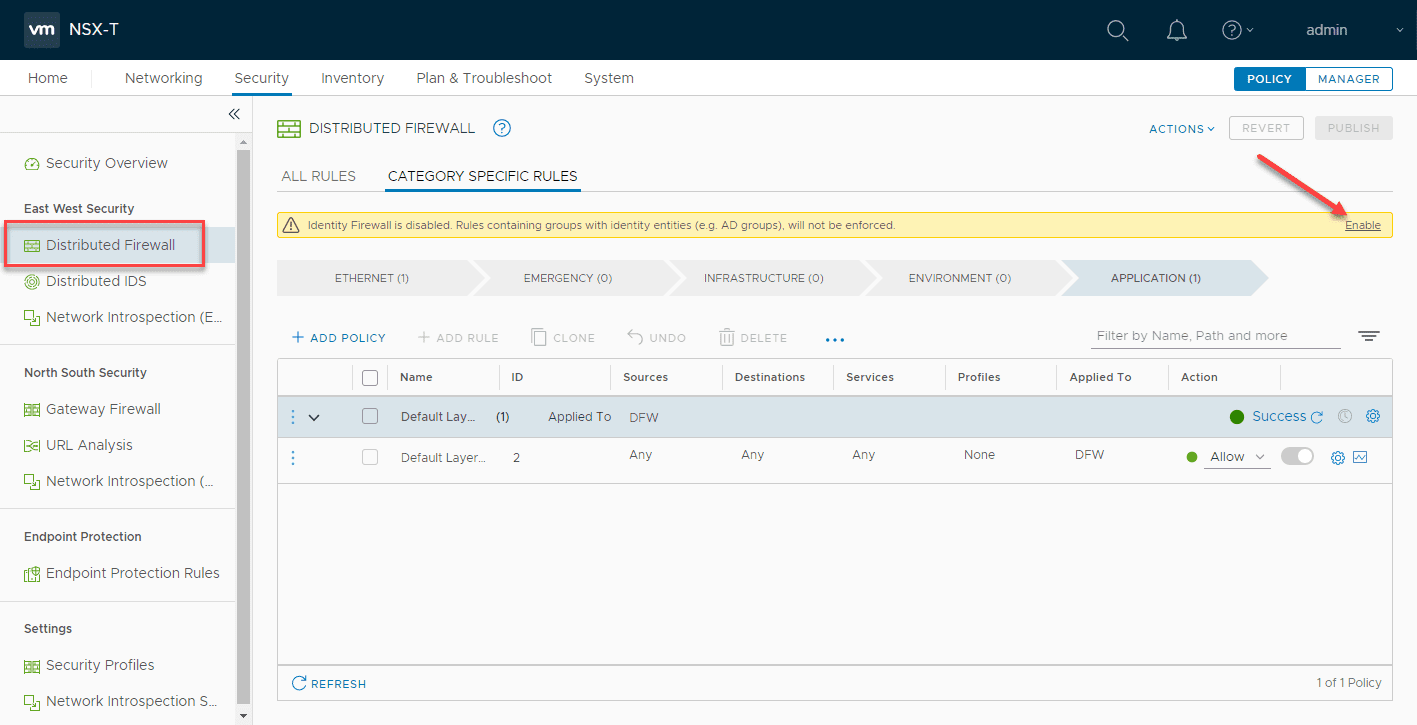
When you navigate to the Distributed Firewall, you will see the banner that specifies Identity Firewall is disabled. Rules containing groups with identity entities (e.g. AD groups), will not be enforced. Click “Enable” on the banner.
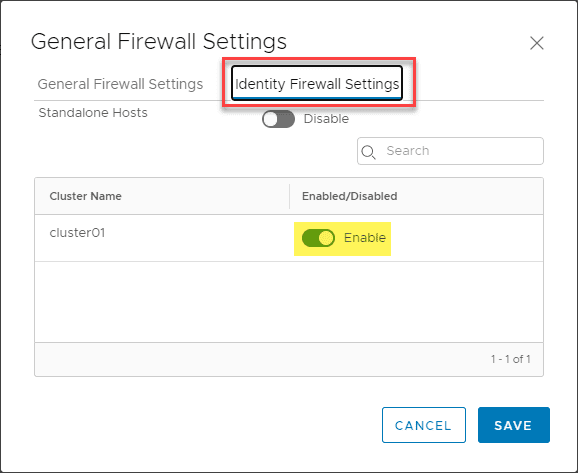
This will launch a dialog box called General Firewall Settings. You will note the Identity Firewall Status will show as disabled. Move the toggle button to Enabled. Below, I have already enabled the feature.

The same under the Identity Firewall Settings. Enable the toggle button for your cluster or standalone hosts/both.
Now, when you create a new firewall rule, you can edit the source, destination, etc.
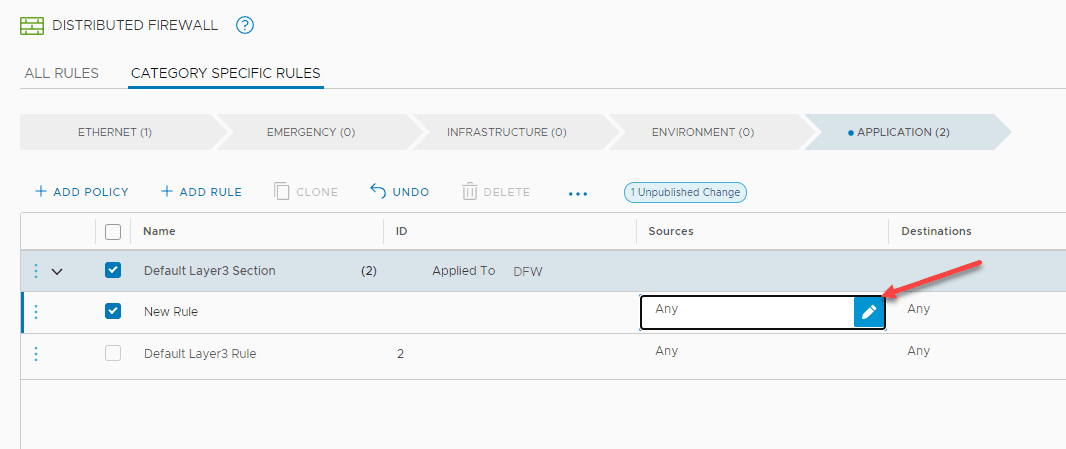
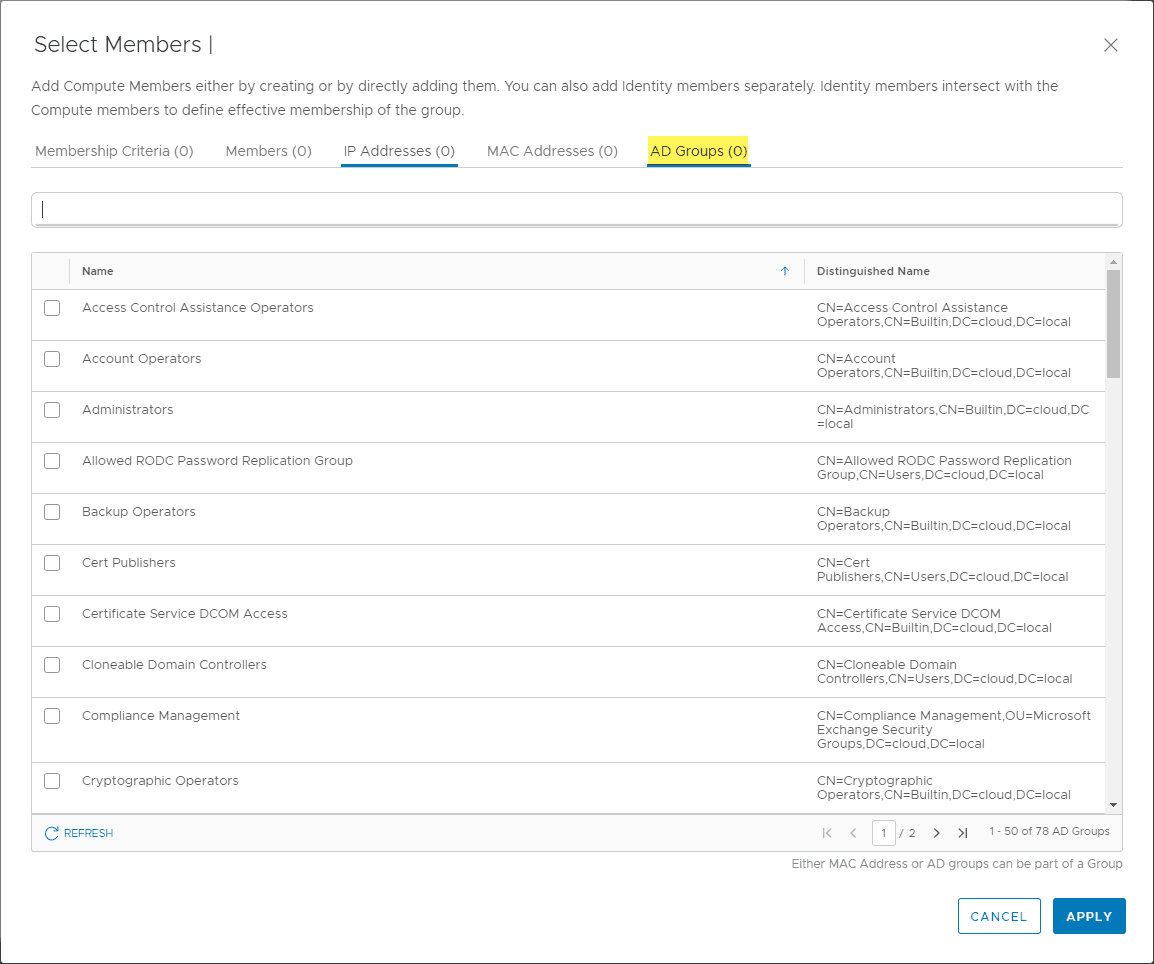
Notice you have a link to Set Members.
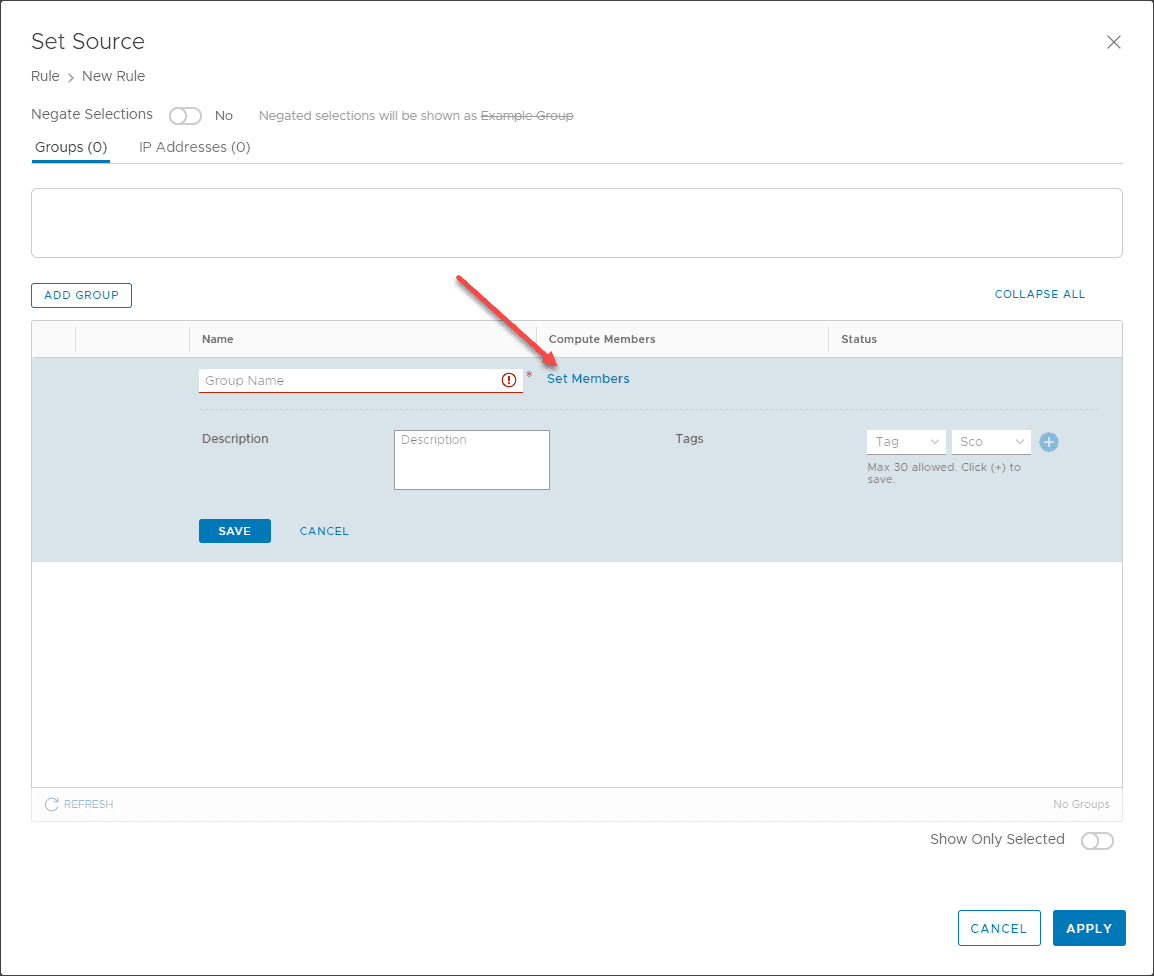
When you click the Set Members link, one of the tabs is AD Groups. You should now see your Active Directory groups available to scope your firewall rules to.
As you can imagine, this is extremely powerful in function. As an example, you can allow or disallow customer support staff to access an HR database with a single firewall policy! Pretty cool stuff.
Concluding Thoughts
VMware NSX Identity Based Firewall is a powerful tool in your micro-segmentation initiatives. It allows using identity as a construct off of which you can build firewall rules. This is a much more granular and easier way to scope resources to users that need access.
VMware NSX identity based firewall configuration in NSX-T 3.0 is straightforward and only takes a few minutes to connect your NSX environment to Active Directory. This allows using users and groups as part of your firewall rules.
Take a look at this post on setting up a VMware NSX Home lab: