PowerCLI Mass Clone and Rename VMware VMs from One vCenter Folder to Another
Automation is king of IT operations today. It is extremely cool and rather fun to be able to hack out a few lines of PowerShell or PowerCLI code in the vSphere realm and perform massive operations that would possibly take hours by hand. In the realm of vSphere, PowerCLI is massively powerful. Recently, I had a task that came up quickly to be able to clone multiple VMs that existed in a particular folder over to a new folder with the resulting VMs having different names (a different prefix in this case). I have created mass snapshots of multiple VMs but hadn’t had the need before to clone virtual machines from one folder over to another folder, rename them, and reprovision for a different lab environment, including network. However, it made me laugh a bit at how easy this is with just a few lines of PowerCLI code. Let’s look at PowerCLI mass clone and rename VMware VMs from One vCenter Folder to Another
PowerCLI Resources for VM Cloning
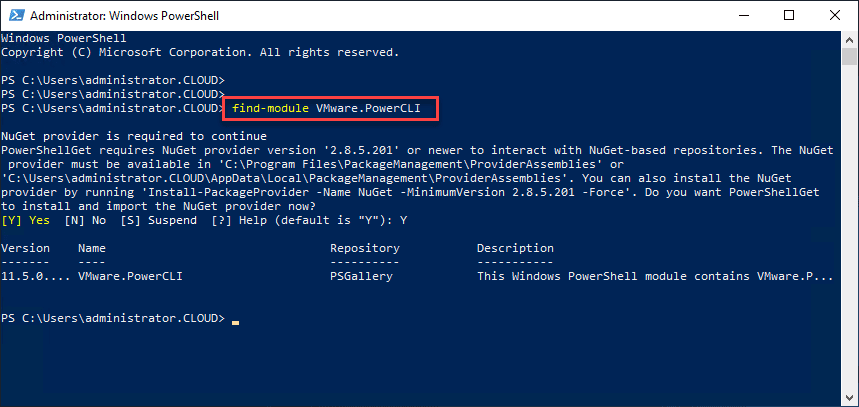
First things first, let’s look at a few resources for looking at doing things with PowerCLI in regards to creating, cloning, and other VM creation type tasks. A great place to start and where I referred to when looking to create a quick script for cloning VMs is the official New-VM cmdlet reference from VMware found here:
The above link includes quite a few examples and ways to use the cmdlet. The global PowerCLI reference is found here:
PowerCLI Mass Clone and Rename VMware VMs from One vCenter Folder to Another
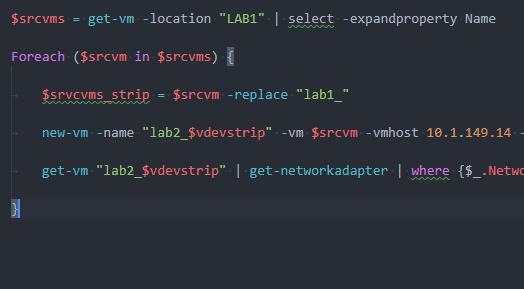
Below, the screenshots are taken from my Visual Studio Code session where we will go through it line by line to see what each line of the code does for the PowerCLI Mass Clone and Rename VMware VMs from One vCenter Folder to Another. However, without further adieu let’s see the code in whole before we start picking it apart.
$srcvms = get-vm -location "LAB1" | select -expandproperty Name

Foreach ($srcvm in $srcvms) {

	$srvcvms_strip = $srcvm -replace "lab1_"

	new-vm -name "lab2_$vdevstrip" -vm $srcvm -vmhost 10.1.149.14 -datastore "datastore1" -DiskStorageFormat Thin -Location "LAB2" -RunAsync

	get-vm "lab2_$vdevstrip" | get-networkadapter | where {$_.NetworkName -eq "lab1_private-VLAN10"} | Set-NetworkAdapter -NetworkName "lab2_private-VLAN20" -confirm:$false

}
In the first line, we get the source location of the VMs we want to clone over to the target folder. The select -expandproperty Name line will ensure we only select the names of the VMs into the array.

Next, the source VMs have a prefix in the source folder. The resulting cloned VMs need to have a different name/prefix. Here we strip the existing prefix off the virtual machines in the source folder so we only have the base name.

The line that follows is the actual clone cmdlet with various options. Here the great thing is we can define the target location as well as the type of disk provisioning. As you can see here, we are taking the stripped off prefix from the source VMs and then using the variable for the rest of the name we want to use for the target VM that gets created.

Another cool thing you can do is change the resulting cloned virtual machine’s network port group so that the virtual machine that is cloned into the new folder is provisioned for the correct virtual network.

Using the above scripting method, the clone job will only clone one virtual machine at a time. If you want to kick off all virtual machines to be cloned, you can use the -RunAsync command which will simply schedule the clone job and loop through the rest of the VMs to be cloned. There are a few things to note if you want to do this. This will create quite a bit more performance hit on the disk subsystem since multiple clone jobs will be kicked off at once. Also, you won’t be able to set the network port group successfully using the code in the previous screenshots as it will fail to find the virtual machine to set the port group.

Wrapping Up
The PowerCLI Mass Clone and Rename VMware VMs from One vCenter Folder to Another task is easily accomplished using the scripting capabilities found in PowerCLI. It is amazing how little code is needed for performing very powerful functions and tasks within the vSphere environment. Hopefully this little post will help someone else who may be tasked to quickly clone a group of virtual machines in a folder over to another folder along with a rename of the virtual machine in inventory. Stay tuned for more PowerCLI coolness.