For those who are running the vSphere Integrated Containers appliance in your vSphere environment getting your feet wet with VIC, we saw the release of VIC 1.2 in conjunction with VMWorld 2017 and now just a couple of days ago we saw 1.2.1 released with bug fixes etc. Since I had been running the 1.1.1 VIC appliance in my lab environment, I began stepping through the process to get the VIC appliance updated as part of the overall update process for VIC. Let’s take a look at how to upgrade vSphere Integrated Containers Appliance.
Upgrade VMware vSphere Integrated Containers VIC Appliance
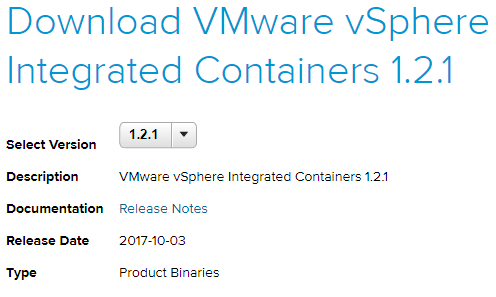
The new 1.2.1 release adds fixes for issues found in 1.2.0, and a new vic-machine create option, –container-name-convention. To read a full list of issues fixed in this release, check out the official GitHub page here: https://github.com/vmware/vic/releases/tag/v1.2.1
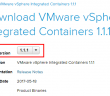
The first thing we need to do is download the new VIC OVA from VMware. This is a free download, however, you will need an account to login. The OVA is quite hefty even compared to the 1.1.1 OVA. The download is pushing 5 gigs.
vSphere Integrated Containers Tasks to Perform Before Upgrading
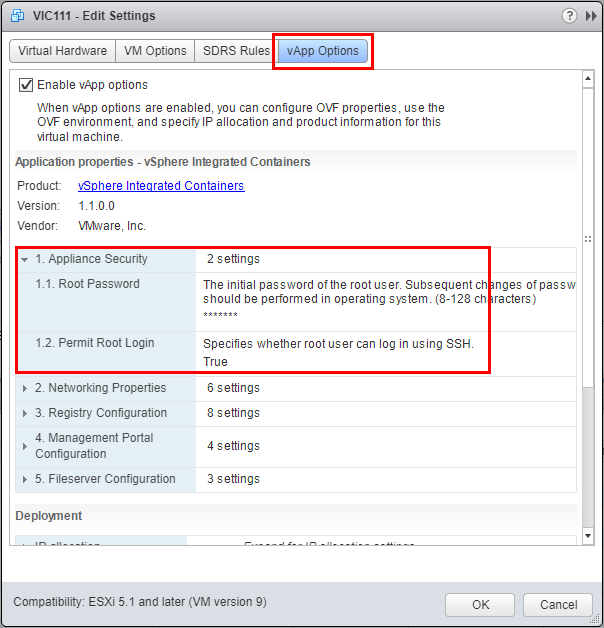
There are some pre-upgrade tasks that are documented to be performed before upgrading. One of those tasks is making sure your previous version of the appliance has root enabled. This is easily done in the vApp Options of the previous VIC appliance running in your environment.
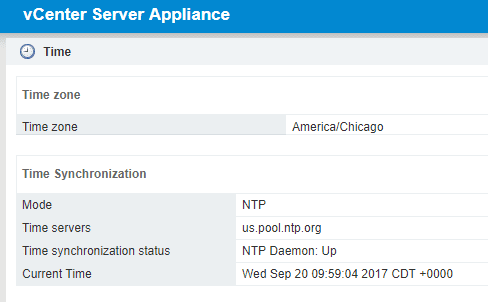
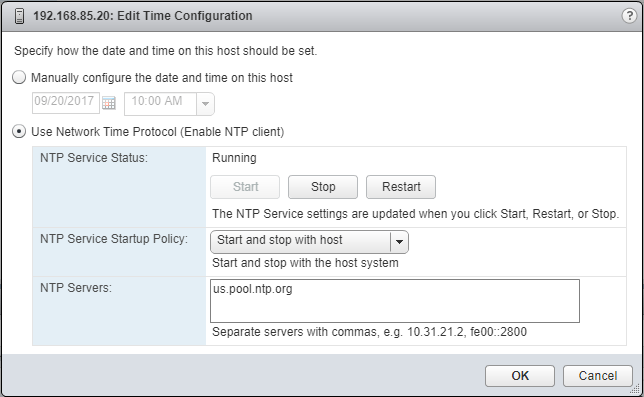
Another item that is mentioned in the pre-upgrade tasks is making sure you have NTP setup on both your vCenter Server as well as the ESXi hosts in your environment. This is best practice outside of setting up vSphere Integrated Containers so hopefully all will already have this step completed.
Deploy the new vSphere Integrated Containers OVA Appliance
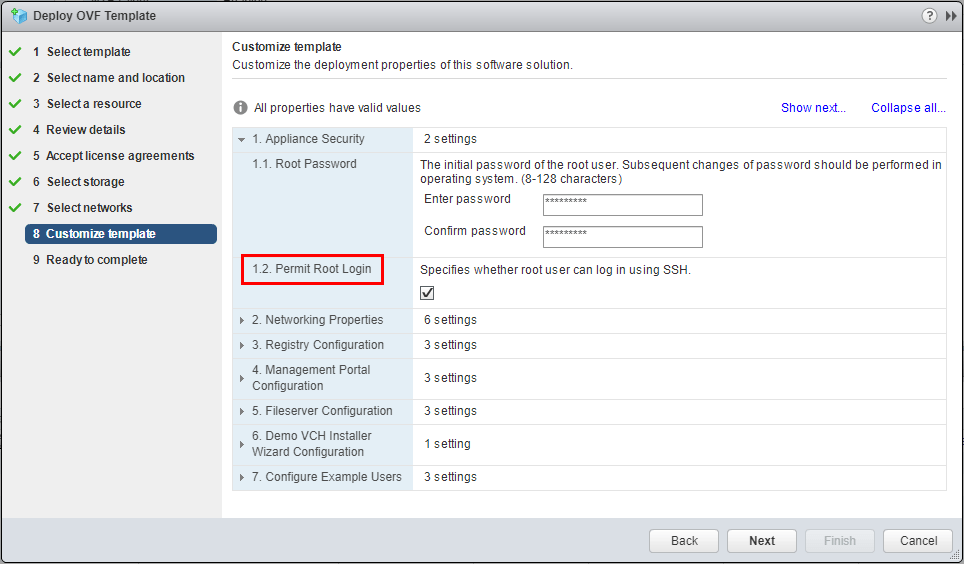
As mentioned earlier in the post, we download the OVA appliance file and deploy the OVA. We aren’t going to show the entire process here as it is a pretty standard OVA deployment scenario. One thing to note on the customize template be sure and not miss the checkbox to permit root login.
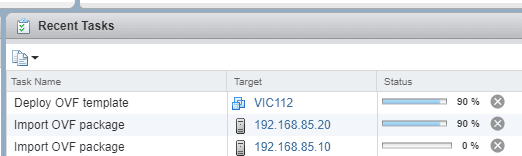
After completing the OVA deployment wizard, we will see the task kick off for the deploy of the new VIC 1.2.1 appliance.
Note – Don’t boot the new appliance at this time as we have some work to do with the hard disks before powering it up.
Copy Over Second Hard Drive from Previous VIC appliance to New Appliance
The process described below is taken straight from the Upgrade the vSphere Integrated Appliance documentation. A high level quick run through of the steps at this point:
- Shutdown the previous VIC Appliance
- Remove the 2nd hard drive from the newly deployed VIC 1.2.1 appliance (deleting it from datastore)
- Remove the 2nd hard drive from the previous VIC appliance (do not delete the drive from the datastore)
- Copy the 2nd hard drive from the datastore folder of the previous appliance to the folder of the new appliance VM
- Attach the hard drive to the VM in vSphere
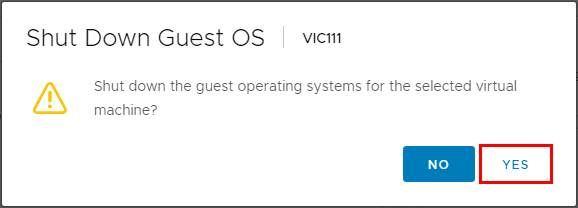
Following the steps outlined that are contained in the Upgrade guide, we shutdown the previous VIC appliance which in our case is 1.1.1.
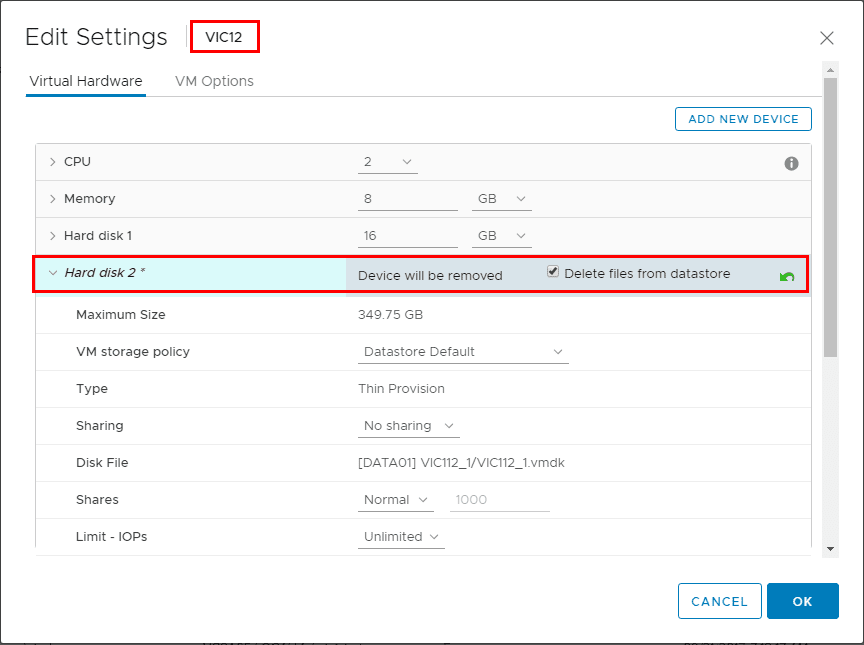
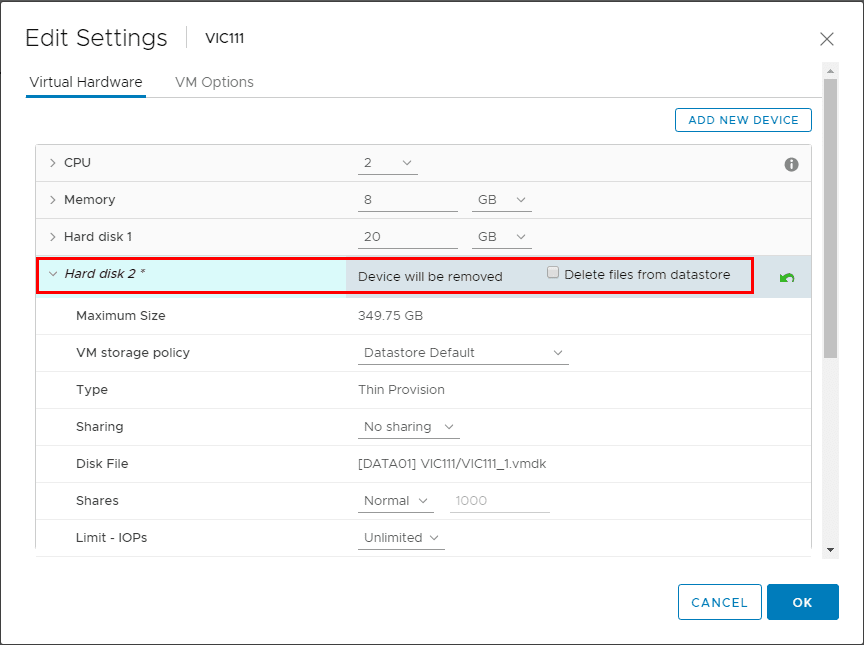
Now, we remove the 2nd hard drive from the new VIC appliance and Delete files from datastore.
For our previous VIC appliance, we remove the 2nd hard drive. Note We do not delete files from datastore.
Next, we need to move the 2nd hard drive from the folder of the old VIC appliance on the datastore to the folder of the new VIC appliance on the datastore.

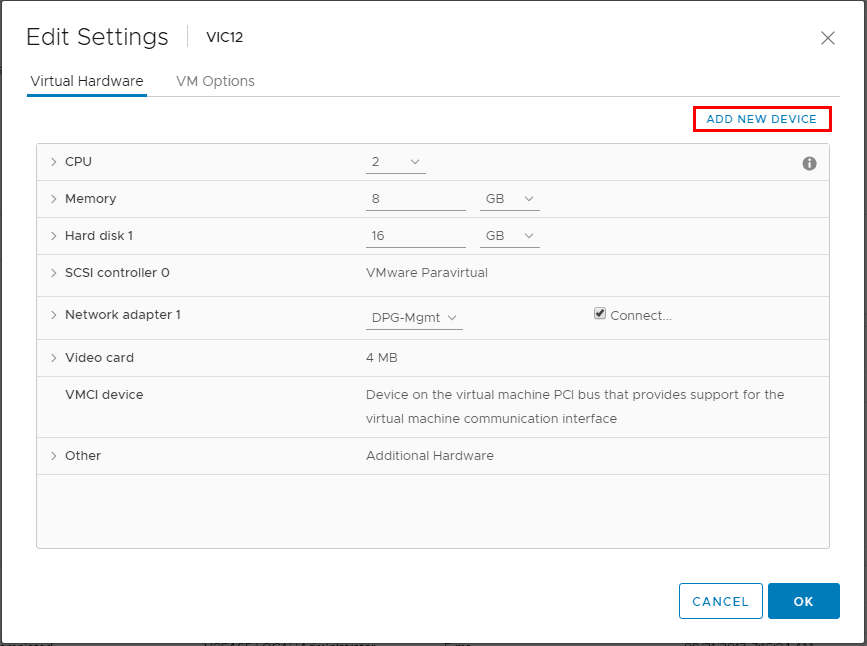
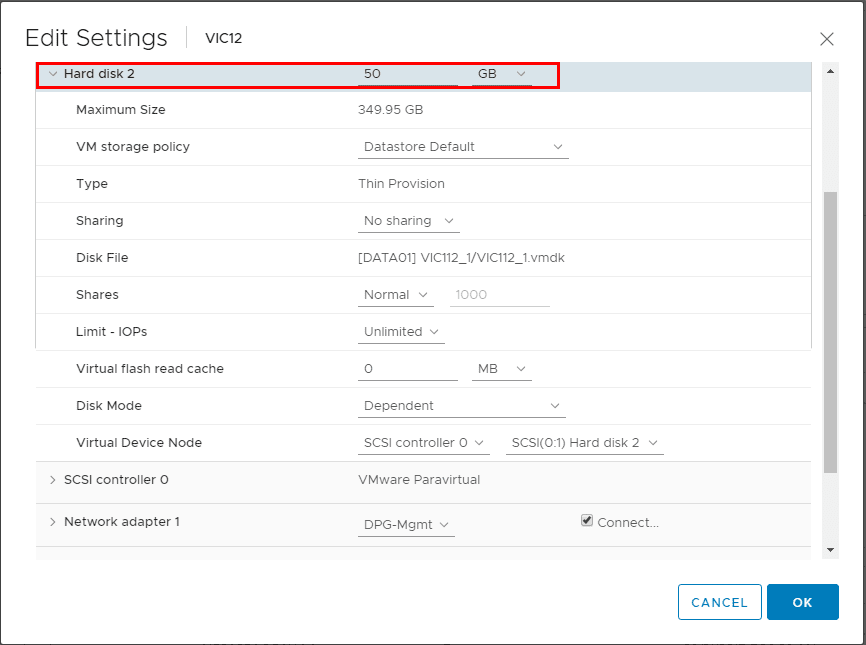
After moving the 2nd hard drive over, we edit the settings of our new VIC appliance and choose Add New Device.
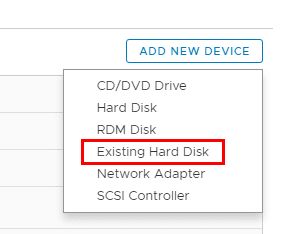
Select the Existing Hard Disk option.
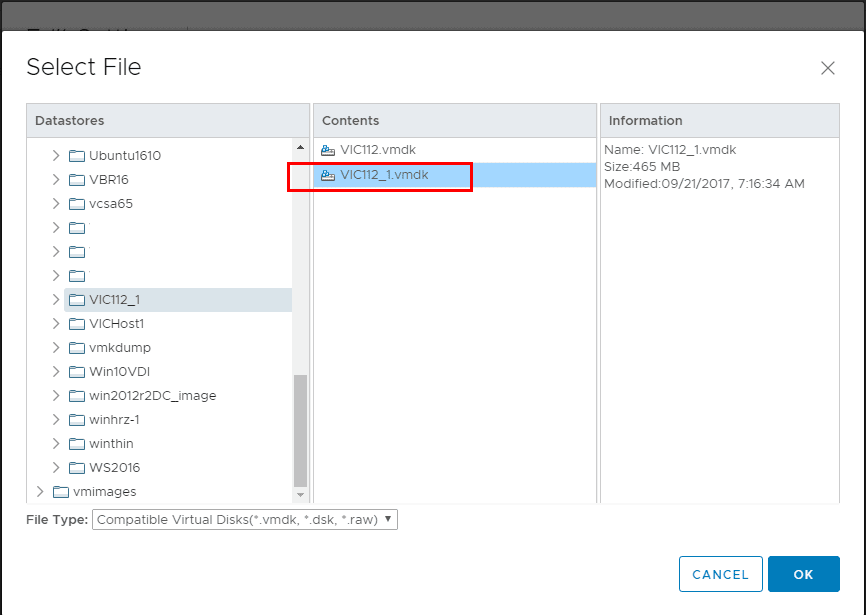
Choose the Hard Drive that was moved over from the old appliance.
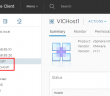
After adding, verify the hard disk was added to the appliance.
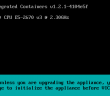
Run the vSphere Integrated Containers Upgrade script
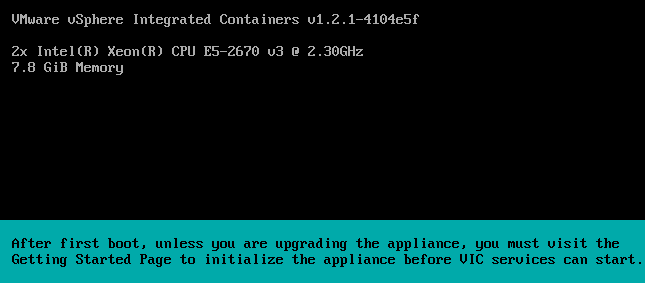
Now, we boot up our new VIC appliance.
The upgrade script is found in the /etc/vmware/upgrade folder and is called upgrade.sh. Change your directory to that folder and run the script:
./upgrade.sh
The upgrade script will ask a series of questions including the vCenter Server FQDN or IP, vCenter Administrator Username, vCenter Administrator Password, and will also ask whether or not you are running an external PSC.
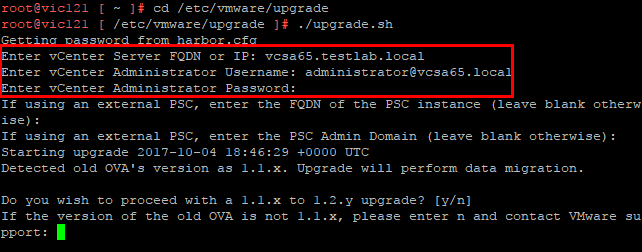
Confirm the version you are upgrading from with a “y“.
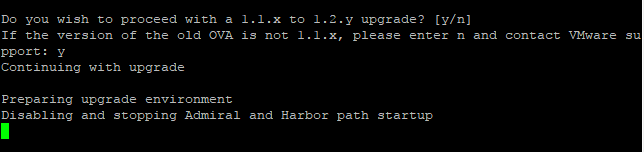
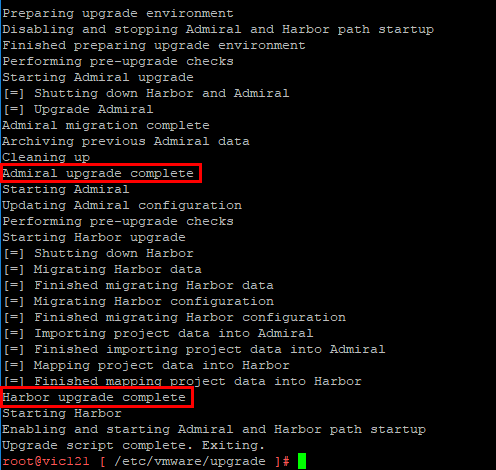
Now we let the script run and do the upgrading of both Admiral and Harbor. We should see both operations complete successfully.
Troubleshooting vSphere Integrated Containers Appliance Upgrade
For the most part, my experience with upgrading the appliance was not too problematic. I do want to mention however, that I did experience issues trying to upgrade from VIC 1.1.1 to VIC 1.2.0. However, after waiting on the VIC 1.2.1 release, the upgrade went through without a single issue.
If you do run into issues with the VIC appliance upgrade, the upgrade log is generated on the vSphere Integrated Containers appliance at:
/var/log/vmware/upgrade.log
The log is fairly detailed and will generally help you find the culprit if you run into issues.
Thoughts
The process to Upgrade VMware vSphere Integrated Containers VIC Appliance is well documented on the GitHub page as is the rest of the process. Hopefully, this visual walkthrough of the process to upgrade the vSphere Integrated Containers appliance will help others who are upgrading their labs, etc. Stay tuned for additional posts on upgrading the Virtual Container Host.
Google is updating how articles are shown. Don’t miss our leading home lab and tech content, written by humans, by setting Virtualization Howto as a preferred source.
About The Author