Add iSCSI Shared Storage in Windows Server 2016
If you are configuring a Windows Server 2016 Failover cluster or you are building a Windows Server 2016 Hyper-V cluster, you will need shared storage so that either the file or virtual machine resources don’t live on local storage which would negate the high availability benefits of a Windows Server 2016 cluster. A very popular and useful storage protocol in use everywhere today is iSCSI or Internet Small Computer System Interface that allows SCSI messages to be sent end to end in conjunction with the TCP protocol. Let’s take a look at how to add iSCSI shared storage in Windows server 2016.
Add iSCSI Shared Storage in Windows Server 2016
Before we begin, let’s talk about prerequisites. We need to have connectivity from the iSCSI initiator which will be our Windows Server 2016 server and the iSCSI target, which in this demonstration will be a FreeNAS appliance. You need to take into consideration any firewall or filtering issues that would prevent communication between the devices. Typically, iSCSI uses TCP ports 860 and 3260 for communication.
In Windows Server 2016, you can find the iSCSI Initiator application by clicking the Windows button and then starting to type iSCSI to initiate the search. It should populate. However, you can also launch the application by simply typing iscsicpl.exe in the run or search menu.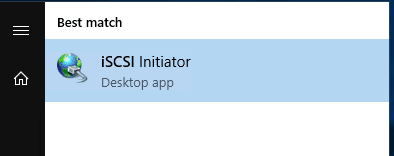
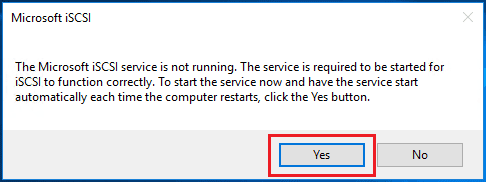
You will see a dialog box pop up when you first launch the iSCSI initiator application. This dialog lets you know that the Microsoft iSCSI service is not running. If you click Yes, it will start the service and it will set the service to start automatically. When thinking about mounting storage, we definitely want the Microsoft iSCSI service to start automatically as this will allow any storage targets to mount when the server is started or rebooted, etc.
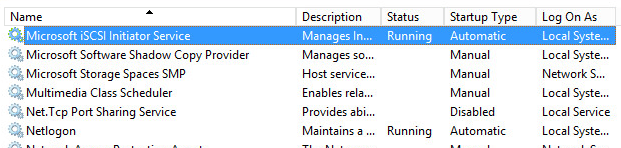
After clicking Yes on the dialog box, we can check the services console and see the Microsoft iSCSI Initiator Service is now Running and also set to the Automatic Startup Type.
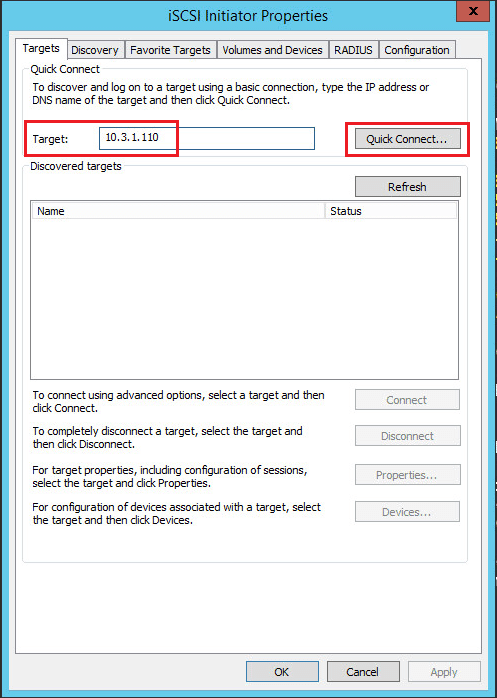
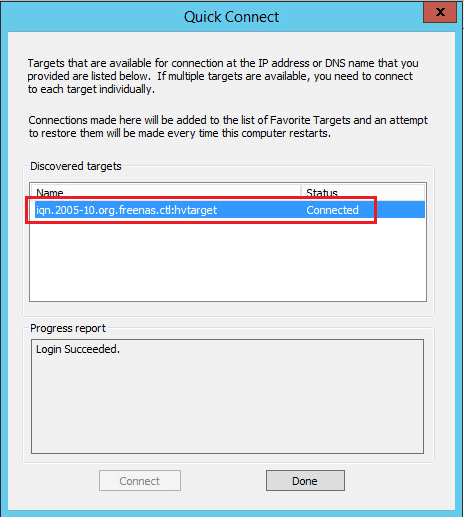
Now that we have the iSCSI Initiator Properties dialog box open, we can enter the IP address of the iSCSI Target. In my case there are no special connection considerations that I have setup for the FreeNAS target, so I can simply hit the Quick Connect button which will automatically connect to the iSCSI target.
Notice when clicking the Quick Connect button, I see the Status of Connected and the target name matches the target setup in FreeNAS.
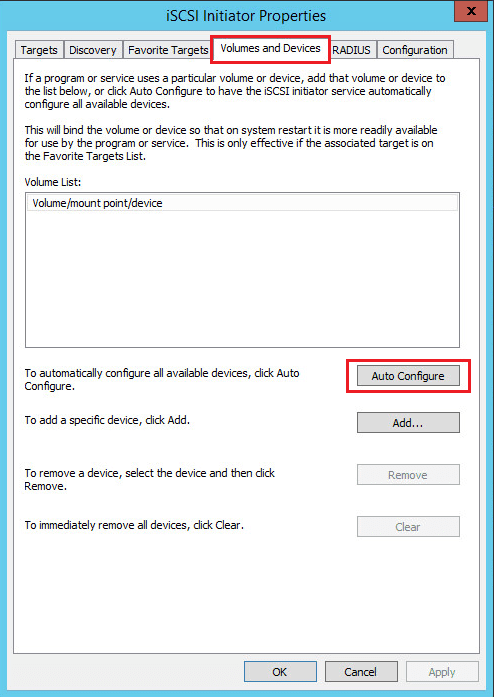
Next, we need to click the Volumes and Devices tab to setup the iSCSI volume. Again, here I click the Auto Configure option as this will automatically add and configure all available devices in the target.
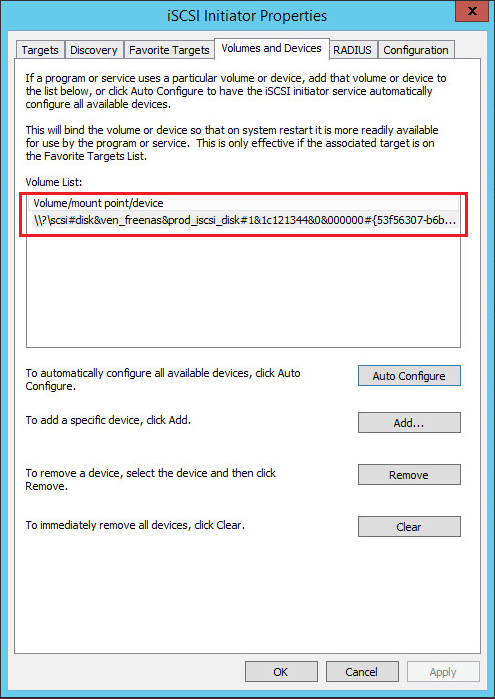
Now, I see the device volume mounted.
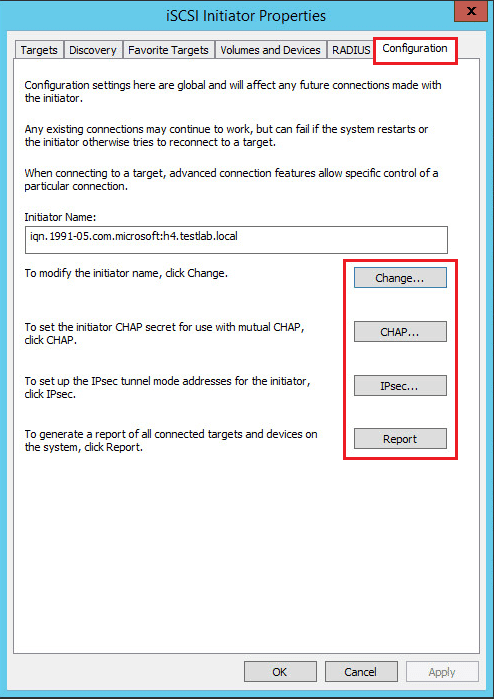
If you have any special considerations to be made in the configuration of the iSCSI connection, those can be setup under the Configuration tab. These include CHAP or IPsec credentials, etc. You can also generate reports about the connected targets and devices as well as change the initiator name from the configuration tab.
Adding iSCSI Storage in Disk Management Windows Server 2016
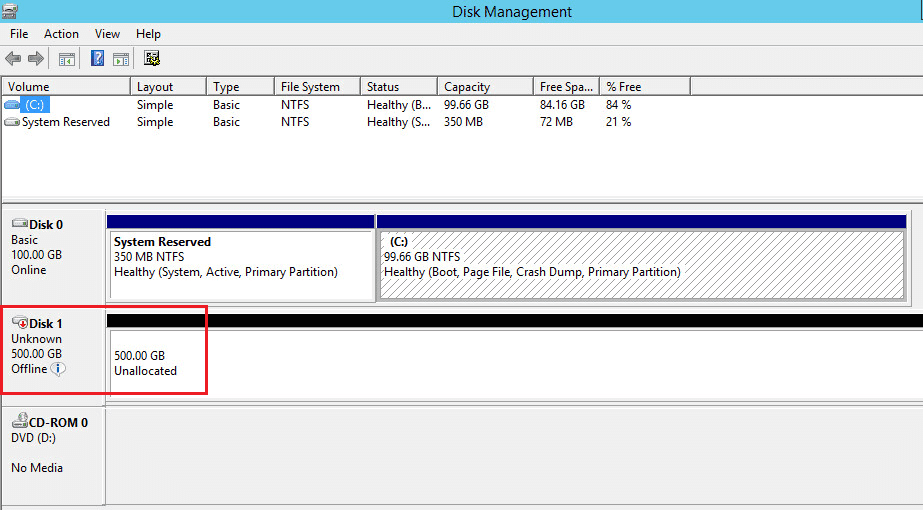
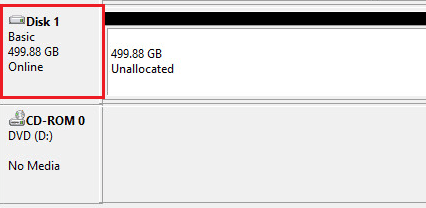
Our work is not done yet. We still need to add the volume in Windows Server 2016 Disk Management so the volume can actually be used by Windows. Notice below, after rescanning the disks we see our iSCSI volume now showing up. It will be added as Offline when it is brought in initially.
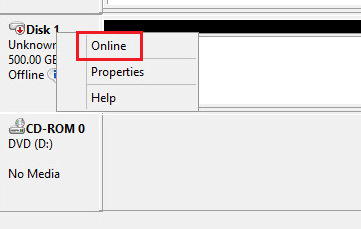
Right-click the new volume and select Online. This will bring the disk online.
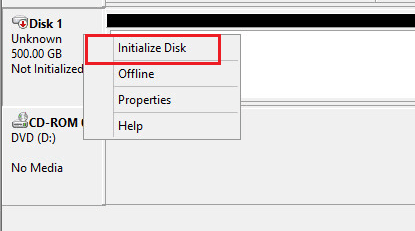
Next, we need to Initialize the disk. So again, we right-click and select Initialize Disk.
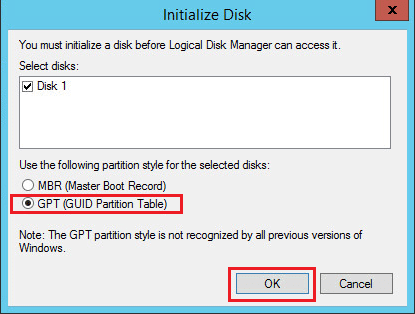
We have the option here for either MBR or GPT which for all volumes to support large volumes sizes, etc, we want to choose GPT.
Now we have a new disk that is ready to be provisioned, formatted, etc.
Thoughts
The process to Add iSCSI Shared Storage in Windows Server 2016 is very straightforward. After we have network connectivity between our initiator and the iSCSI target, we can use the GUI setup shown above to actually setup the connection between the two. Additionally, we have to add the storage in disk management to Windows so that it has the storage provisioned and ready to use.