VMware vSAN 6.6 Configuration and new features
With the recent release of the vSphere 6.5d update, VMware vSAN 6.6 is added as part of the update. VMware vSAN 6.6 includes many enhancements to the technology as each iteration brings maturity to the technology. VMware’s vSAN is one of those exciting technologies that we know to expect new things each version. This release includes exciting new features such as Encryption for data at rest, access to vSAN through the ESXi Host Client, more intelligent rebuilds of failures, more proactive detection of failures, enhanced stretched clusters with Local failure protection, and many others. Let’s take a look at VMware vSAN 6.6 configuration and new features.
Lab Setup
Just a quick overview of the setup for the lab, I am running (3) nested ESXi 6.5d hosts in a cluster configuration. I simply added (3) 10GB disks to each host in the nested configuration so I would have a few disks to work with in a disk group for each host as well as to have a small footprint since I don’t have a lot of space to burn in my lab environment.
On the networking side, I am running Distributed Virtual Switches and have a dedicated vSAN port group with my vSAN vmkernel ports added. Also, I have the normal nested lab configuration additions such as running promiscuous mode on the physical host that is housing the nested lab. Other than the above however, for the most part, it is a normal vSphere cluster configuration.
New Features
As mentioned above, let’s list off a few of the big new features in VMware vSAN 6.6.
Encryption
- Full Data at rest encryption
- Encryption of all objects on a vSAN cluster including the entire vSAN datastore.
- Doesn’t depend on hardware specific technology.
- Available in all flash vSAN as well as hybrid setups.
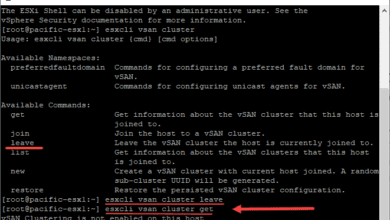
New ESXi host management of vSAN
- In the event that vCenter is down, now you can manage vSAN through the ESXi host client
Enhanced and more intelligent rebuilds
- The amount of overhead with detection and analyzing of failures as well as rebuilding is significantly reduced.
Capacity and Policy Pre-Checks
- vSAN 6.6 now has builtin prechecks and policies that help with maintenance planning and checks before certain actions such as maintenance mode on a host.
Stretched Clusters with Local Failure Protection
- Stretched clusters have already been proven with vSAN, however with 6.6 this goes further in allowing storage redundancy within a site and across sites at the same time
- Also new site affinity is possible to configure policies to keep certain data within a single site of a stretched cluster.
New Unicast Networking
- Need for multicast is removed
Many other improvements:
- vSAN Cloud Analytics
- Management at Scale
- Easier Deployment and Configuration
How to Configure VMware vSAN 6.6
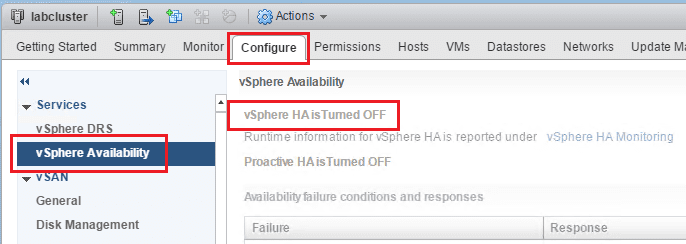
The first thing we want to do is make sure we have vSphere HA turned off. To verify that, we navigate to our cluster object Configure >> vSphere Availability and we can verify our settings.
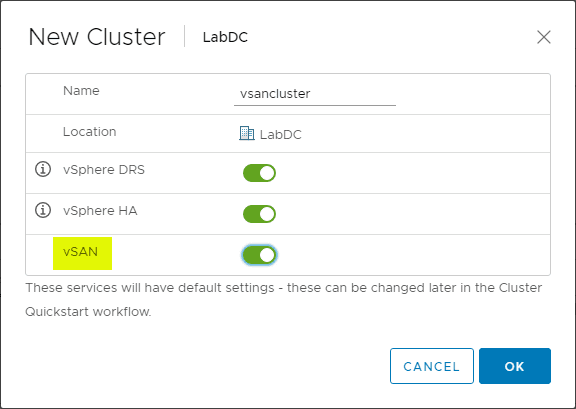
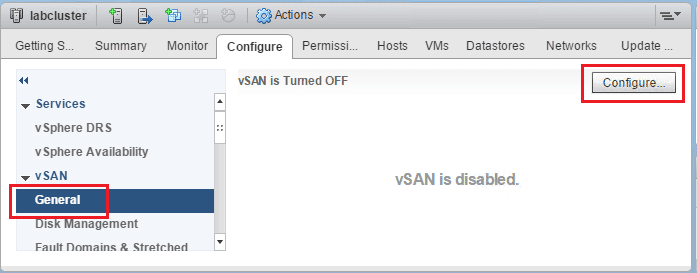
To get started configuring vSAN 6.6 on the cluster, we configure the settings on the cluster object. Navigate to Configure >> vSAN >> General and click the Configure button.
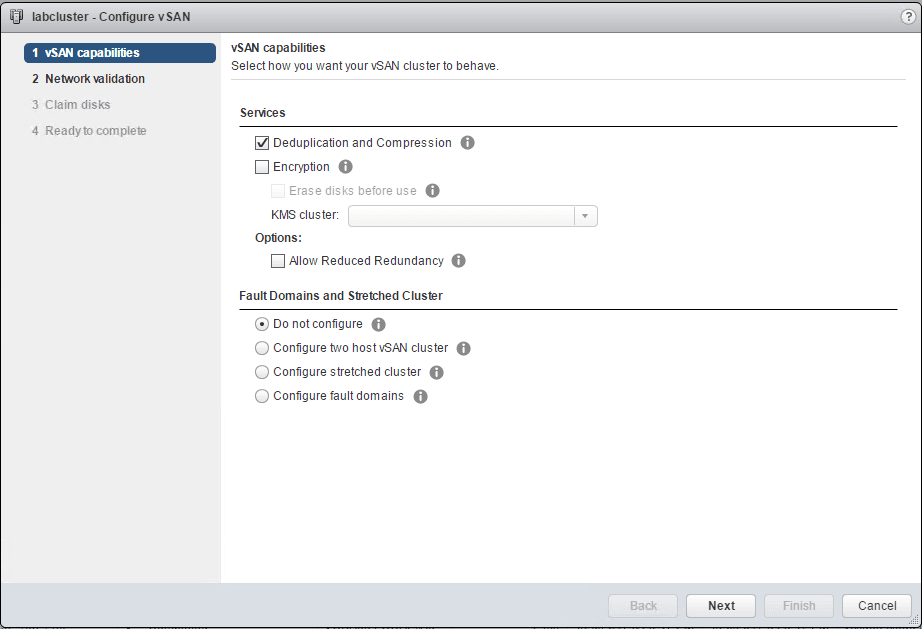
This will launch the Configure vSAN wizard. As you can see we have the Encryption option on this screen now which is a new feature of vSAN 6.6. Also, as you can see below, I am running the Deduplication and Compression option which is explained really well in this blog post by Cormac Hogan – “In all-flash VSAN, which is where deduplication and compression are supported, data blocks are kept in the cache tier while it is active/hot for optimal performance. As soon as the data is no longer active (cold), it is destaged to the capacity tier. It is during this destaging process that VSAN does the deduplication (and compression) processing.”
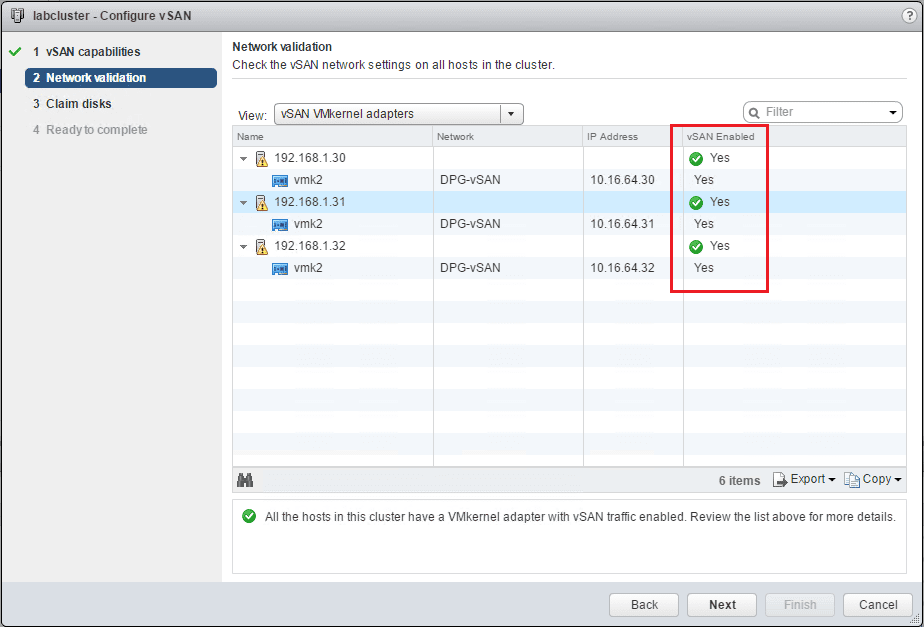
As we move to the next screen, we validate that we have vmkernel adapters setup for vSAN traffic. The wizard will notify us if there are any issues here.
The next screen is important as here we claim our disks on our hosts. For lab purposes as well, you can since 6.0 mark your disks as either flash or HDD through the GUI. This is again especially helpful if you are emulating flash disks in your lab environment. The Group by drop down box is helpful as well as you can display the disks by Host instead of by Disk model/size.
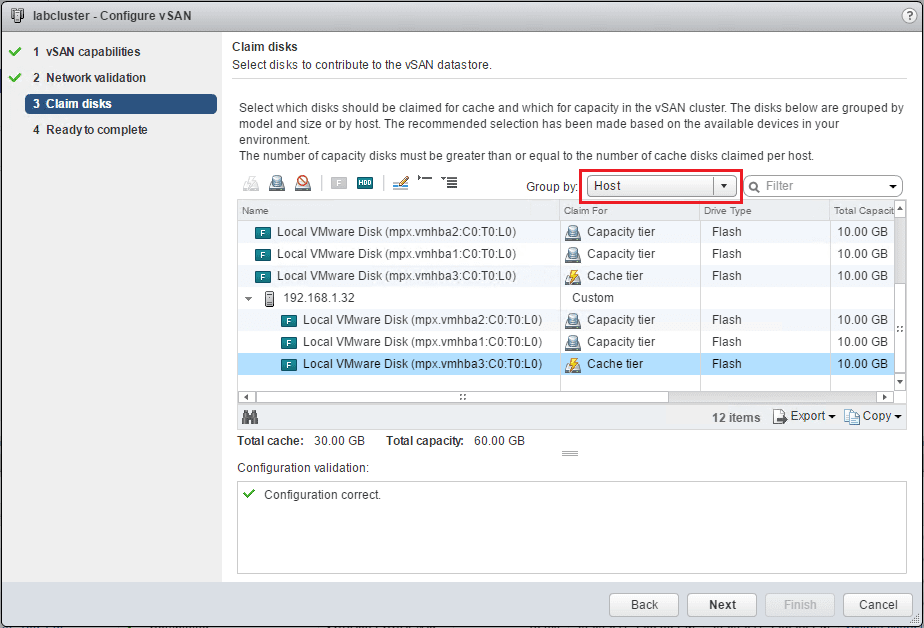
Showing the Disk model/size view.

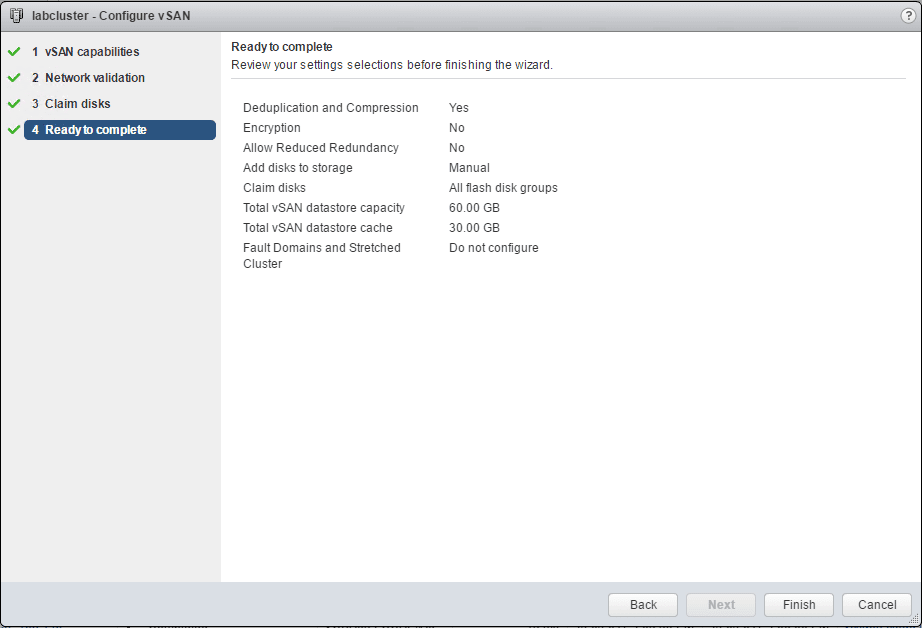
Finally, we reach the stage of the summary screen showing our choices in setting up vSAN.
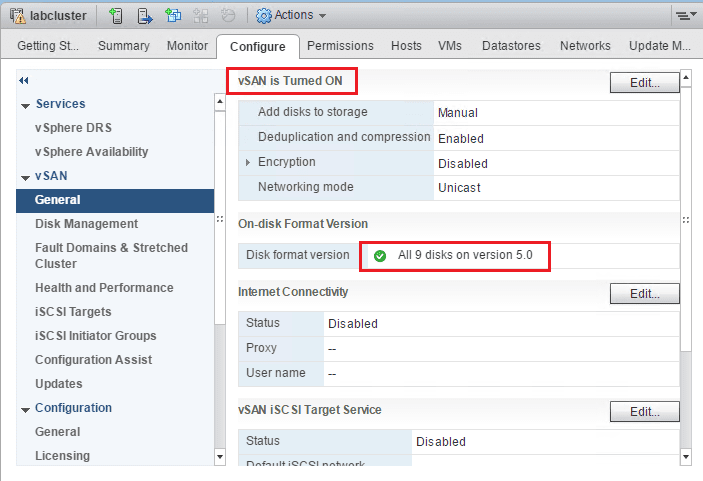
Notice now when we go to our General configuration for vSAN, we see that it is turned on and all disks are on version 5.0.
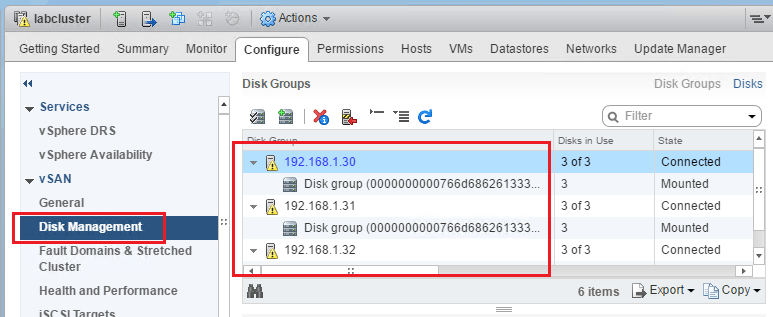
Under our Disk Management configuration we see our disk groups, they are mounted and connected.
Thoughts
Hopefully, you have enjoyed this look at VMware vSAN 6.6 Configuration and new features. Each version gets better and better and the technology is definitely maturing at a rapid pace with thousands of customers now utilizing vSAN technology. Version 6.6 has pushed the envelope even further. Stay tuned for more vSAN 6.6 posts soon.