
When it comes to storage specific operating systems that are popular in the home lab, most of the time names like TrueNAS are the ones that come to the top of the list. UnRAID also has a huge following. OpenMediaVault is another one in this space that gets mentioned a lot. Even projects like StarWind VSAN and open-source HCI like Ceph are popular in home labs. But, every now and then I stumble across a project that I haven’t heard about before. This is the case with OviOS. On the surface, it looks like another Linux storage appliance. But, after digging into the project and understanding what it is trying to do, I realized it has an interesting place I think. It is purpose-built for storage workloads. This would include things like virtualization storage, cluster shared storage, etc. Let’s take a look at this OviOS review to see what this storage operating system has to offer.
What is OviOS?
OviOS is a Linux-based storage operating system that is provided in an appliance-like storage OS. It has been designed to strip out anything unnecessary for storage, including unnecessary dependencies. This is a refreshing stance I think that will definitely help to reduce any bloat.
Also, the entire solution is built around ZFS which is a powerful file system that many of us are familiar with in the home lab running it with Proxmox. ZFS gives you a lot of advantages, including data integrity, snapshots, and replication features.
It is also a RAM-loaded architecture. So it gives you maximum performance as it dedicates all the disk bandwidth to taking care of your data. It also has a CLI frontend that is menu-driven like a TUI that allows you to have easy access to manage your storage with OviOS.
The project focuses heavily on technologies that home labbers and virtualization enthusiasts care about:
- ZFS
- iSCSI
- NFS
- SMB/CIFS
- Snapshots
- Replication
- Clustering
- High availability
- Object storage
Architecture is mostly open source
The OviOS platform has the following architecture to note with the latest release which is OviOS Linux v6:
- Linux kernel – 7.0 stable
- OpenZFS – 2.4.2
- Pacman package management
- Systemd services moved from SysVinit prior to v6
- OviOS Shell administration tools
- Built-in replication management
- Automatic boot recovery tools
- Web-based management interface
There is a small part of the OviOS platform that is proprietary. These components include ovios-shell, retadm, OviOS Tools Suite, and the ovios-web. These components in particular are provided free of charge under the OviOS Free Use License. This license lets you use OviOS under the following found on their terms and agreements page:
| License allows | Details |
|---|---|
| Home lab use | Run OviOS in personal and lab environments |
| Business use | Deploy OviOS in production environments |
| Administration tools | Use OviOS Shell and other bundled management tools |
| Infrastructure integration | Connect OviOS to existing storage and virtualization environments |
| Multi-system deployments | Install and operate OviOS across multiple servers |
| Community participation | Submit bug reports and feature requests |
| Open-source customization | Modify supported open-source components according to their respective licenses |
Installing OviOS and frustrations
The installation process with OviOS was, well………..sort of straightforward. I think I flat out uncovered a bug when installing the latest OviOS v6. Before I get into those details, make sure you have the following prerequsites met, including the following:
- 5 GB minimum system disk
- BIOS or UEFI firmware
- DHCP or static IP address ready for provisioning
By default it has the following credentials provisioned:
ovios-shell | root | ovios | OviOS guided shell — default on boot |
| Bash | ovios | ovios | Standard Linux shell |
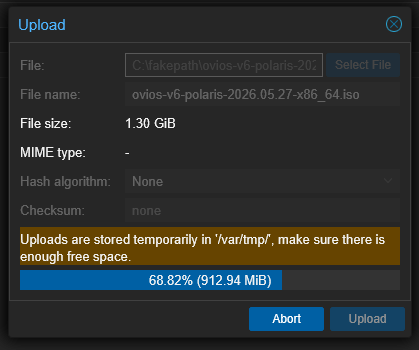
Let me first show you what the installation process is supposed to look like. I am installing OviOS v6 inside of a Proxmox virtual machine. So after downloading the ISO, uploaded this to Proxmox:
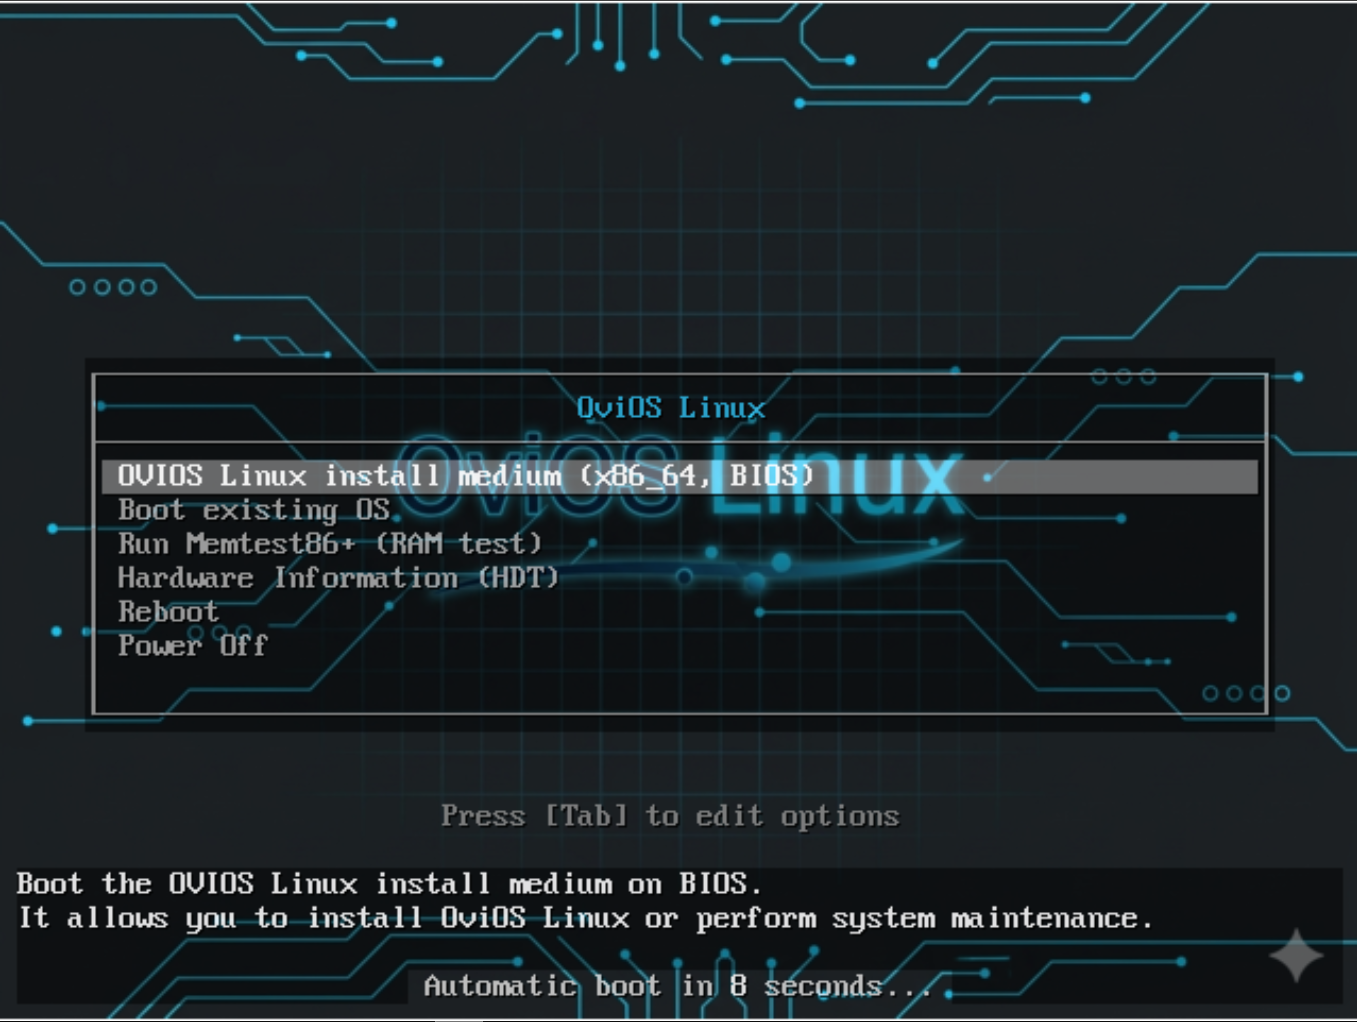
After creating a new virtual machine and booting it from the ISO, I powered it on and began the install.
Next, you login with the defaults and run the setup:
- root / ovios
Run these commands:
su-ovios

sudo setup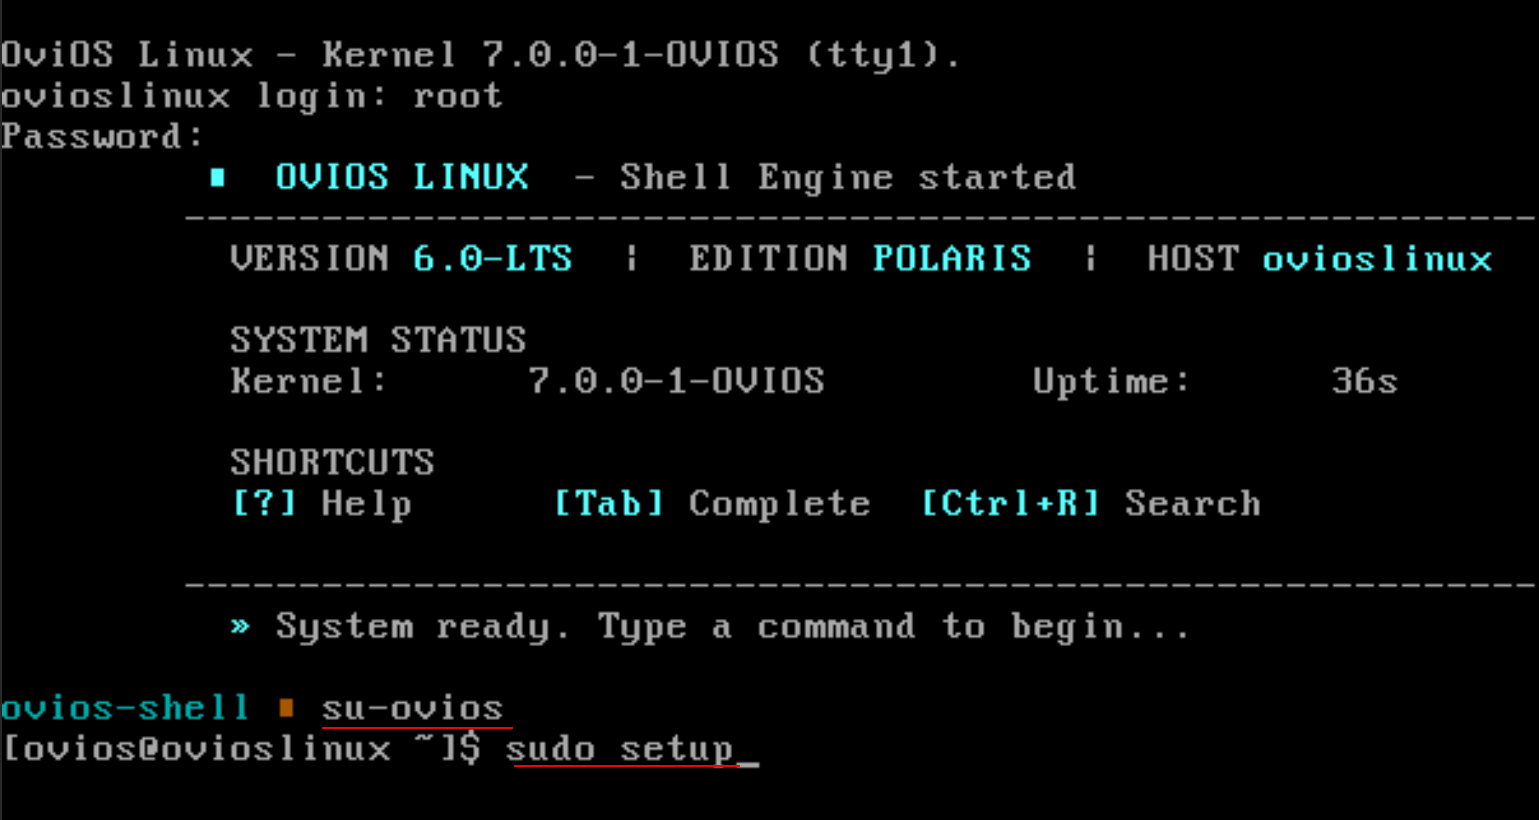
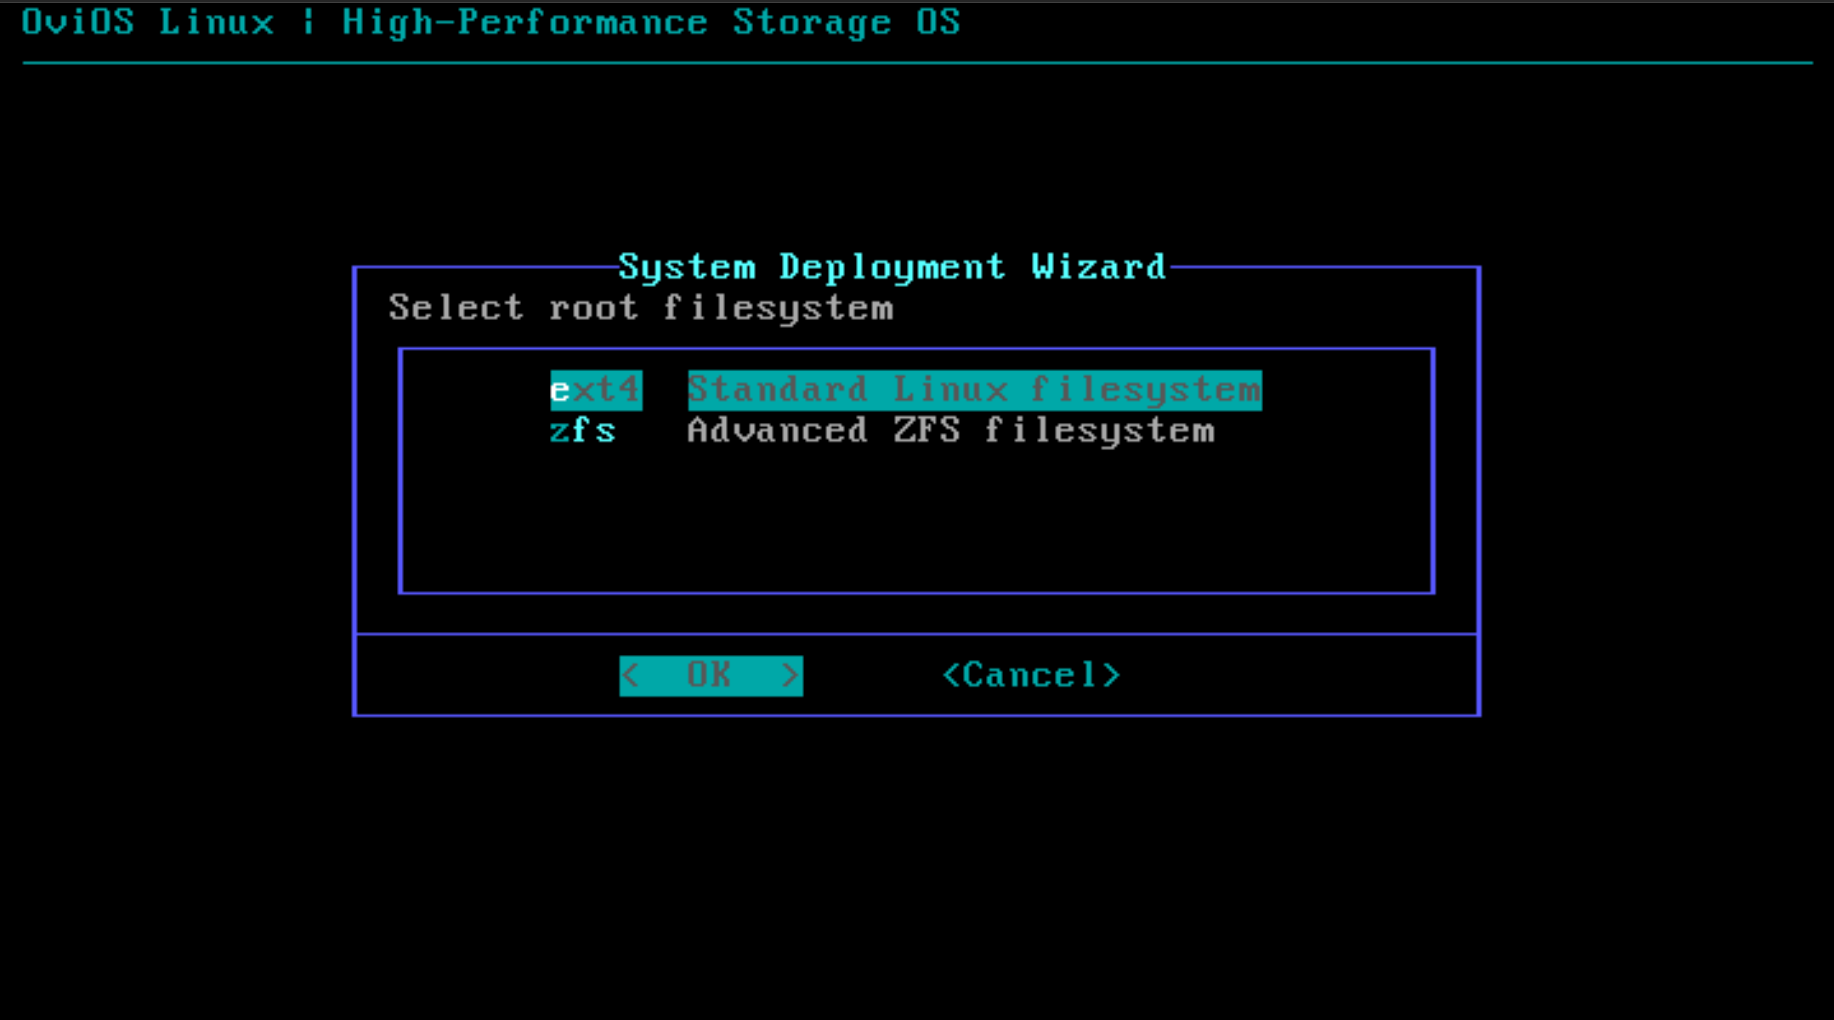
Choose which filesystem to use for the root filesystem.
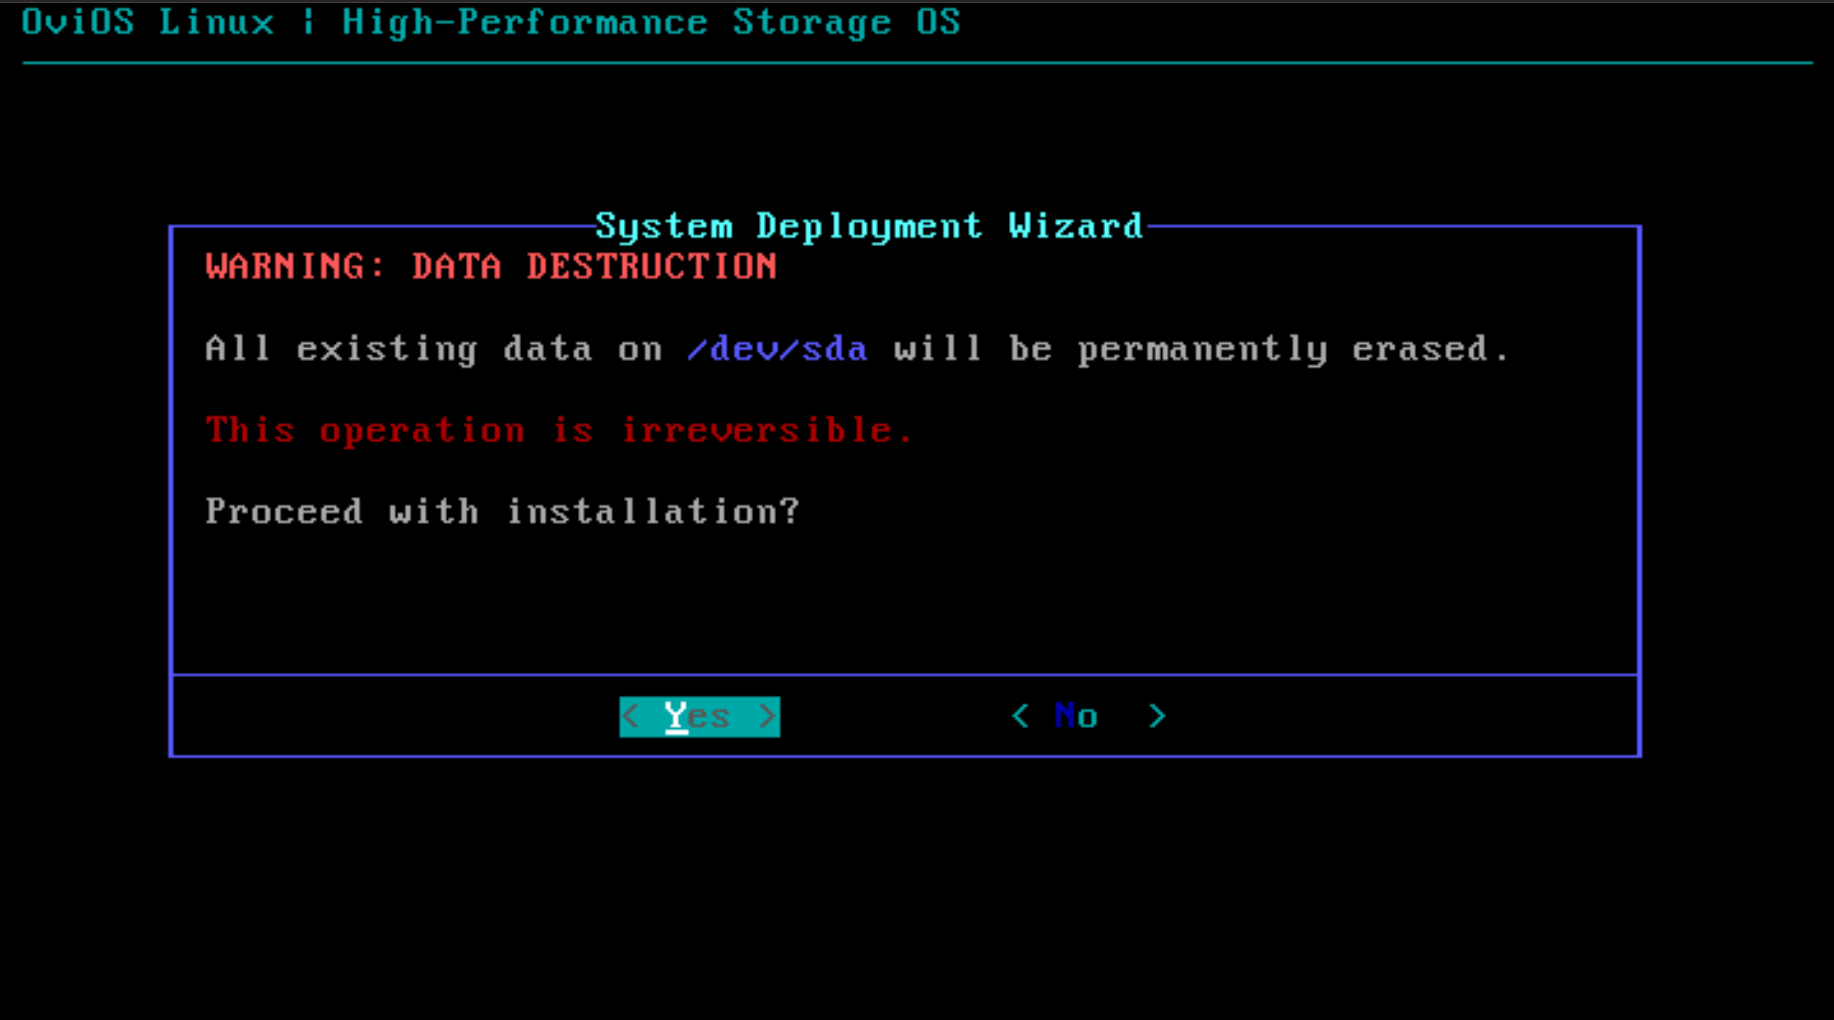
Confirm that you want to erase the data on the local disk.

Proceed with the installation after formatting the disk.
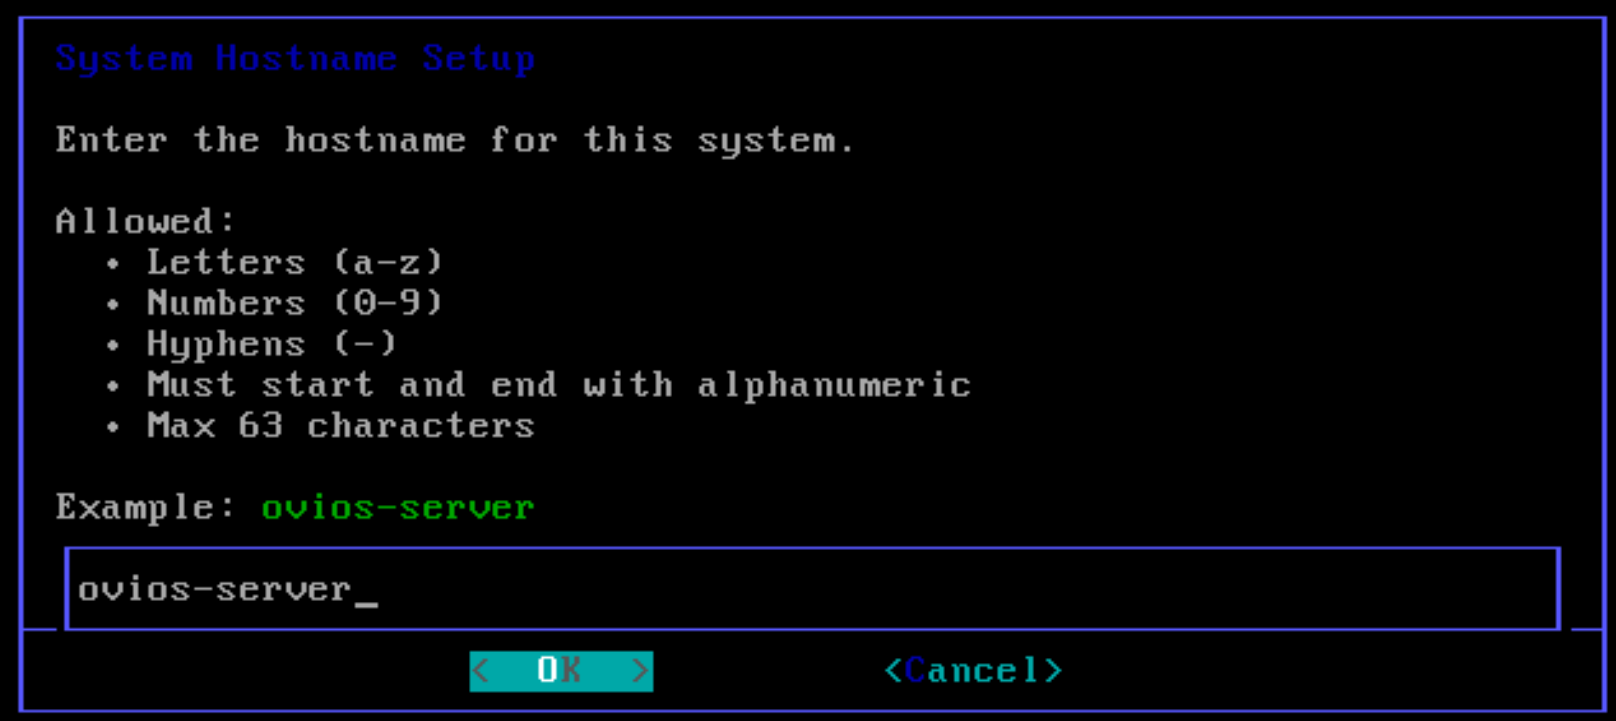
Name your OviOS server:
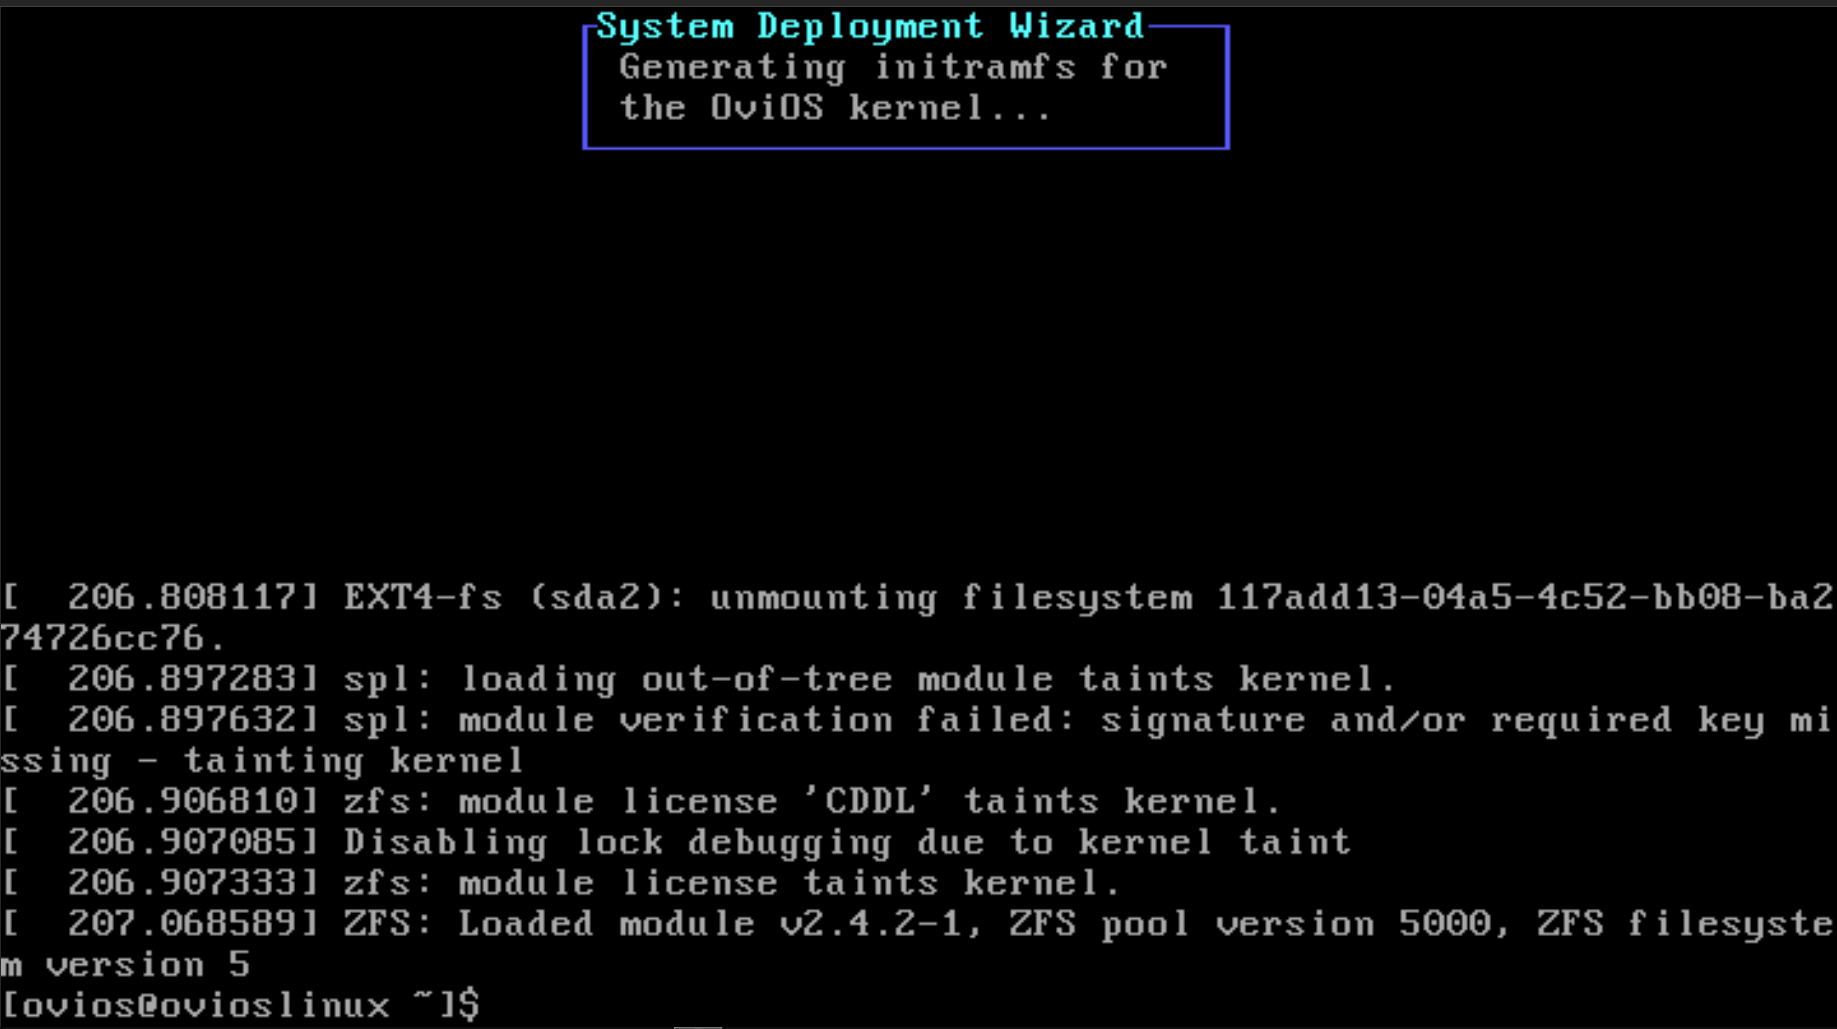
Once I clicked OK above, the server finished out the installation and just returned to a command prompt. It would do this if I chose ZFS or EXT4 and I also tried between BIOS and UEFI. Whatever I did, the server would act like it finished the installer, but it would not boot.
Troubleshooting the boot issue
As it turns out in this OviOS review, there appears to me to be a bug in the existing v6 installer than doesn’t account for the new kernel image. Here are the commands that led me to that conclusion:
Checked installed modules:
ls /lib/modules
uname -r
Output showed:
/lib/modules/7.0.0-1-OVIOSBut checking the kernel image:
file /boot/vmlinuz-linuxshowed:
6.19.0-3-OVIOSTo repair the installation, I ran the following command:
Repair kernel installation
Reinstalled kernel package:
pacman -S linux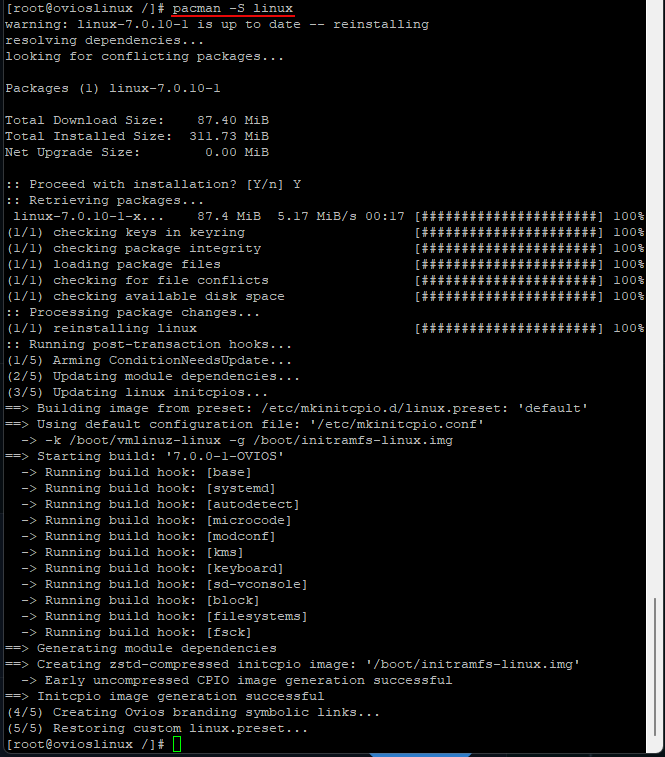
Then I ran:
sync
sudo reboot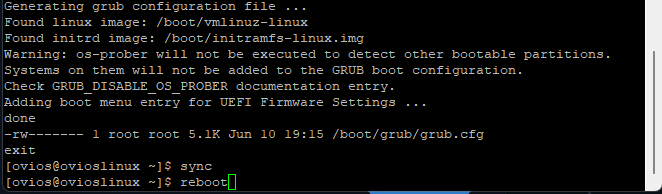
Setting up the networking
If you want to customize and configure the networking with OviOS, you can do that after the initial reboot from the install, by using this command:
sudo netsetup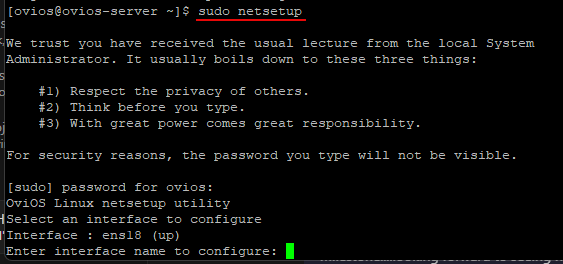
Changing password and enabling services
You can also at this point change your password from the default out of the installation:
passwd rootAlso, enable services:
options iscsi.enable on
options smb.enable on
options nfs.enable on
options ovios-web.enable on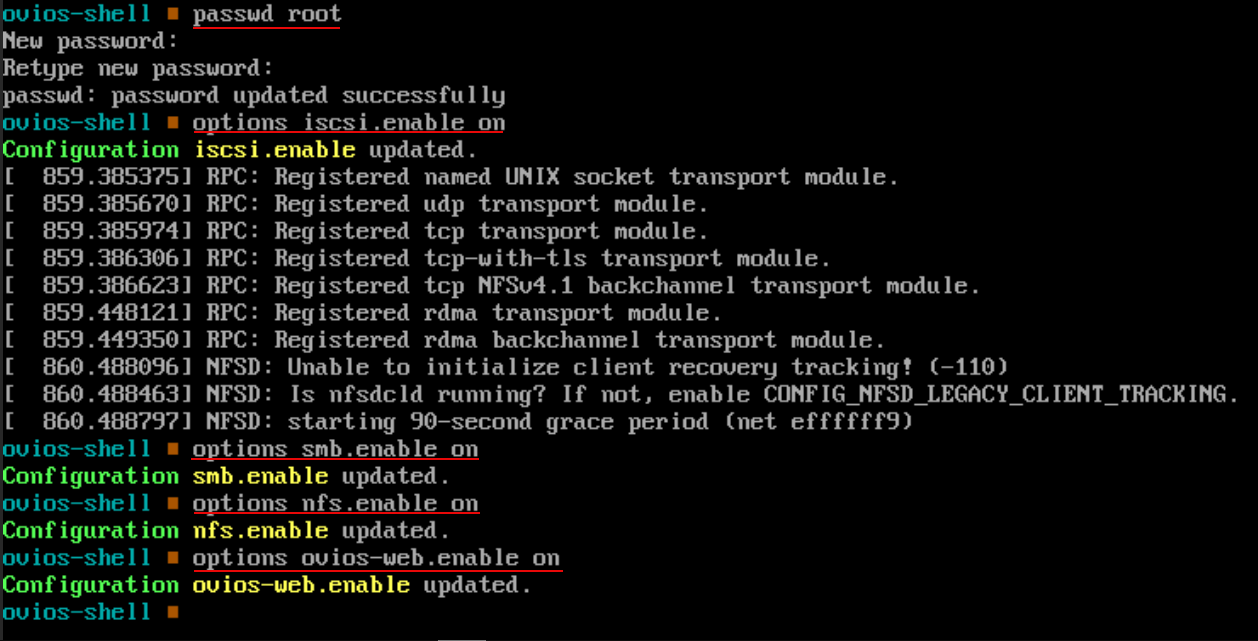
Enabling the web server and accessing
You can enable the web server as part of the commands above. But again to make sure it is running, do the following:
options ovios-web.enable on
service ovios-web start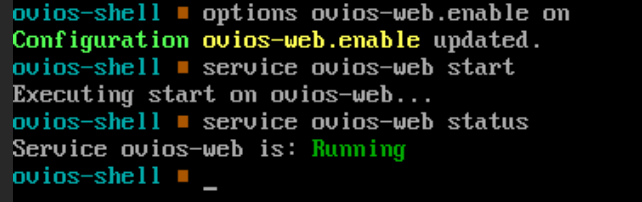
Access it on port 8443.
https://<ovios-ip>:8443Browse out to your host IP or FQDN on port 8443 and access it using the default creds for the web:
- oviosadm / ovios
Listing disks and creating a storage pool
Setting up a pool is fairly easy from the command line. After you have logged in, you can list the disks with:
listdsk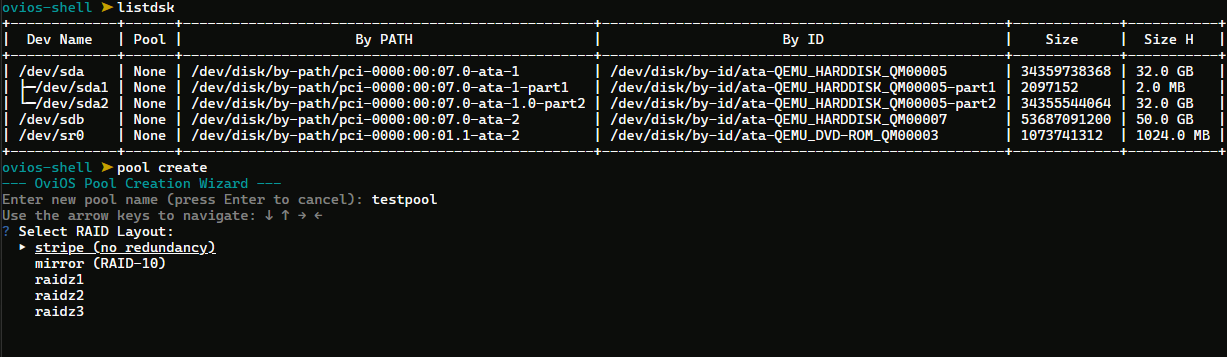
Then to begin pool creation:
pool createThen you just follow the prompts here. Enter the name for the new pool and the type of redundancy which it will prompt you for in the above pic. Then proceed with the creation as shown in the below pic by specifying the disk or disks to add to the pool. Confirm it and create.

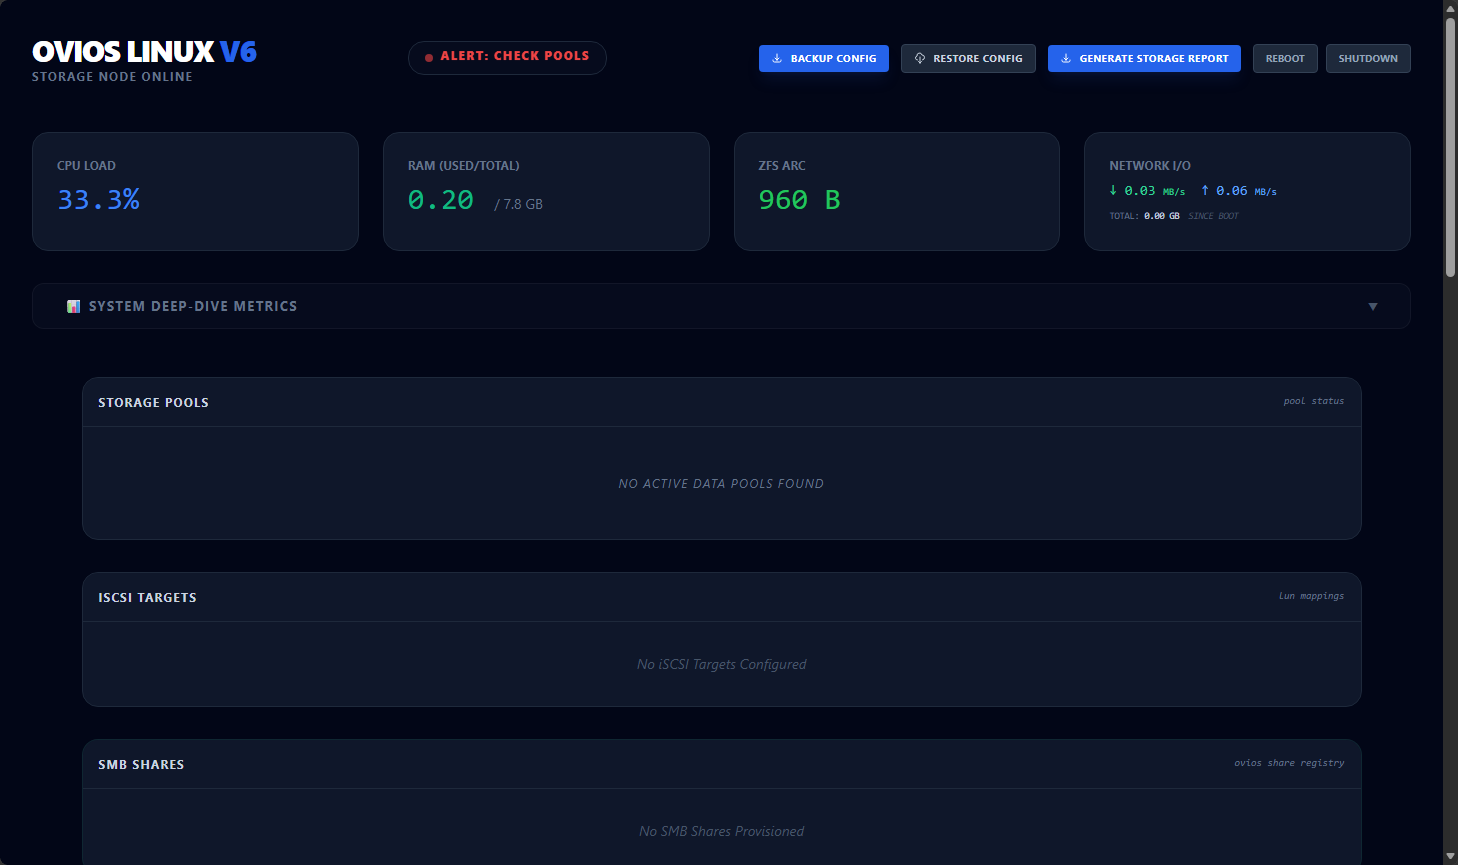
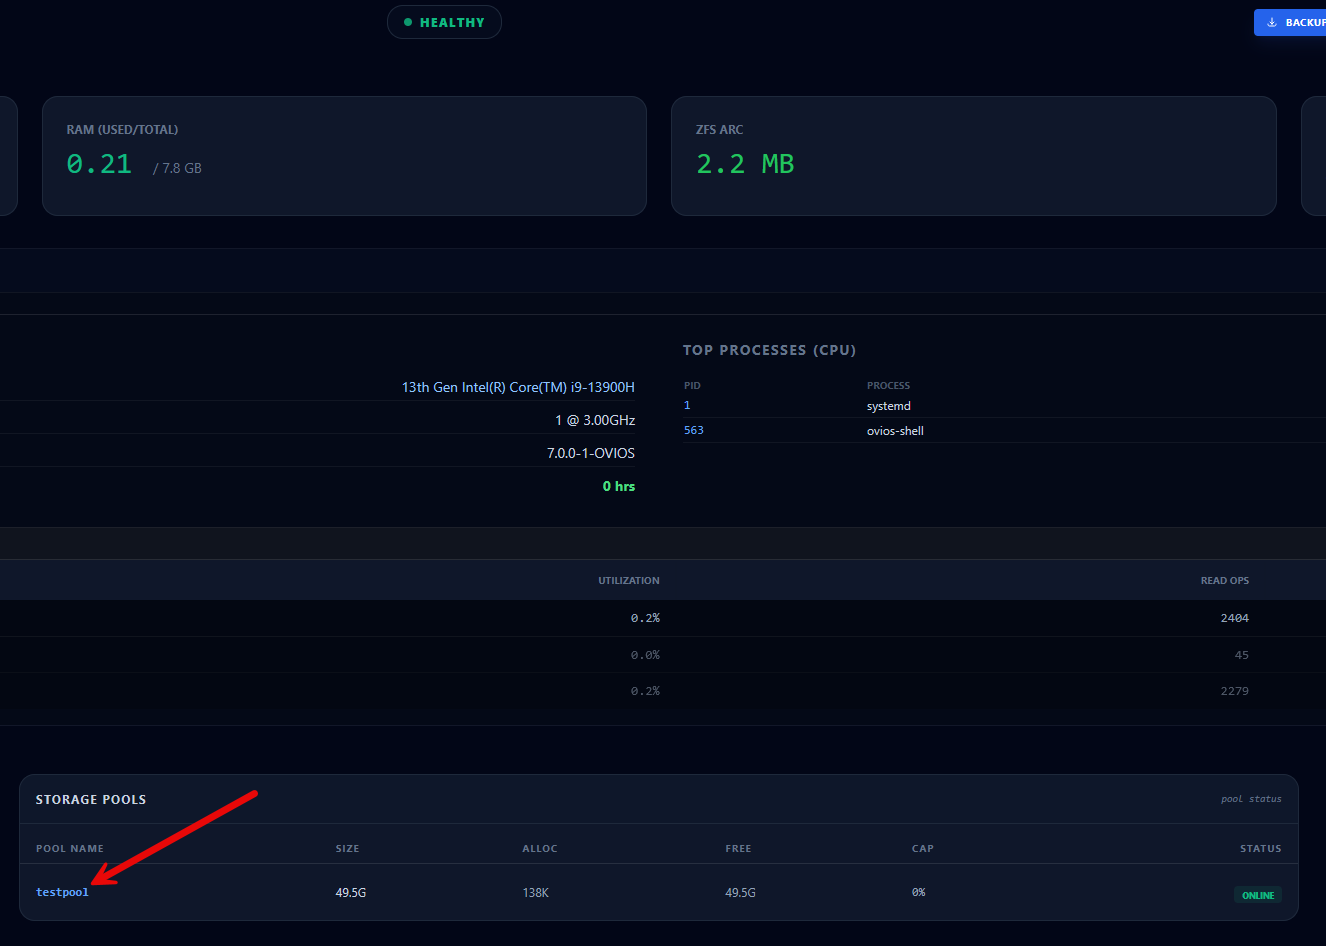
After creating the pool, this immediately displayed in the web interface.
Creating an iSCSI target and LUN in OviOS
The process to create an iSCSI target and LUN are straightforward as well. To create the target:
target createName your target you want to create like tg-proxmox01, then ENTER. You can specify the initiator IP or no and all hosts will be allowed to connect.

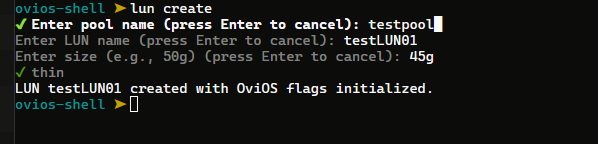
We can easily create a new LUN as well with:
lun createName the LUN, define the size you want to make it and then press ENTER to confirm.
Could OviOS replace TrueNAS?
This is really not a true comparison here as I don’t think OviOS is trying to be a replacement of TrueNAS, but putting this out here as I know it is a question that ones will want to have answered. Just know that TrueNAS is an everything and the kitchen sink type NAS OS that does it all with way more bells and whistles. OviOS is trying to focus on one specific area and that is extremely performant, ZFS-based storage for virtualization, etc.
| Category | TrueNAS | OviOS |
|---|---|---|
| Installation experience | Excellent | Poor (good other than manual troubleshooting at the end with kernel issues) |
| Documentation and community | Excellent | Fair |
| ZFS capabilities | Excellent | Good |
| Virtualization storage | Excellent | Good |
| Enterprise storage learning | Good | Good |
| Home lab friendliness | Excellent | Fair |
Wrapping up
I do think in my OviOS review, I found it can fulfill an interesting niche that many home labbers may be looking for. This for me felt a lot like the experience I remember from setting up FreeNAS servers back in the day to have shared storage in virtualization labs. But I am keen to see how this project develops and comes along and what features are added. I was a bit bummed with the experience simply trying to get the storage OS installed. The installation process had no obvious errors, but simply didn’t finalize the installer so that the disk was bootable. As shown in the post, I had some manual steps here to troubleshoot the issue and get the installer to finalize so it would boot. How about you? Have you heard about OviOS before? Tried it out in your lab?
More in this topic


Discuss this in the Community
Google is updating how articles are shown. Don’t miss our leading home lab and tech content, written by humans, by setting Virtualization Howto as a preferred source.
About The Author

Nice. Have you seen ZFSNAS ? I think it’s a much better UI experience
Alexa,
No, will have to check this one out! 100%
Brandon
hey,
my colleagues just sent me this link and i’d like to thank you for taking the time to review OviOS.
Your review raised some really interesting points.
We would love to hear more about your ideas for the OS. Specifically, what do you believe we could do to improve the ZFS experince and functionality, at the same time staying in line with the KISS principle?
Our goal is keeping OviOS a dedicated appliance storage OS that is simple, extremely fast, and completely bloat-free.
Your detailed feedback could really help us maintain that focus.Thanks again, and looking forward to hearing your thoughts.
Best regards,
ovi chis
Chris,
Thank you so much for the comment. I really appreciate you taking the time to read it and hopefully had some beneficial points in there on polishing up the install process, etc. Please keep me in the loop on planned features and other things in the works for the project. I would like to keep it in the lab for a more longer term review.
Brandon
Hey,
Great review, this reminds me of some software I used may years ago, https://www.open-e.com/
Thanks Chris,
I will check this out.
Brandon