
When I first started running Proxmox seriously in the home lab, I mostly accepted the default virtual machine disk settings. If a VM booted successfully and performance felt “good enough,” I moved on to the next project and didn’t really think about the defaults that I accepted. However, over time, I came to realize the default disk settings in Proxmox are not always the best settings for performance or efficiency. The really interesting thing is that most of these settings are simple checkboxes or dropdown changes in the Proxmox UI, but they make a huge difference. I want to walk through the exact Proxmox VM disk settings I use today and why they are important.
Why VM disk settings matter more than most people think
VM disk settings become important especially if you are running larger Proxmox environments where you care more about storage performance and efficiency. Sometimes if you have performance issues or something else, it could come down to how the VM is configured.
Sometimes the issue is simply how the VM disk is configured. Even if you have fast storage that may be backed by fast NVMe storage, Ceph clusters, enterprise SSDs, and 10 gig networking, you can still end up with mediocre VM performance because of inefficient virtual disk settings.
Virtualization adds layers between the guest operating system and the physical storage. Every decision made at the virtualization layer affects how efficiently IO requests move through the stack. The good news is that Proxmox gives us a lot of flexibility here.
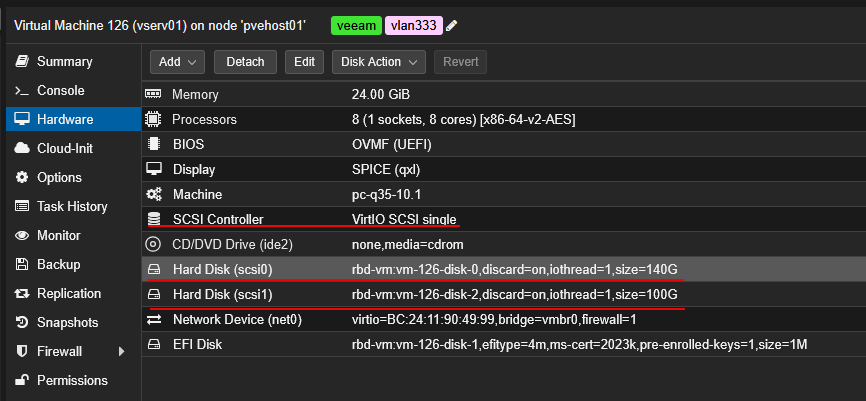
Use SCSI disks with VirtIO SCSI Single
This is one of the biggest changes that I make on each new VM. Especially, you need to give attention to this when you are migrating VMs from something like VMware vSphere. When you are running a migration from vSphere or another hypervisor over to Proxmox, the controller may not get brought over as VirtIO, or you may have needed to change to IDE or SATA to get your boot device to boot, until you have the VirtIO drivers installed.
In Proxmox, there is often confusion between:
- VirtIO Block
- SCSI disks
- VirtIO SCSI controller types
What I use now is:
- Disk bus: SCSI
- SCSI controller: VirtIO SCSI Single
This combination gives excellent performance and better scalability for modern workloads that you are running in your home lab or production environments. A lot of users see “VirtIO” and assume they should choose VirtIO Block for maximum performance. Years ago that was often the recommendation. Today though, VirtIO SCSI has matured significantly and is generally the better choice.
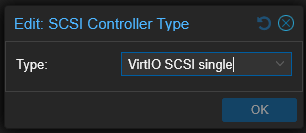
There are also two different VirtIO SCSI controllers. By default, Proxmox often uses:
- VirtIO SCSI
- VirtIO SCSI Single
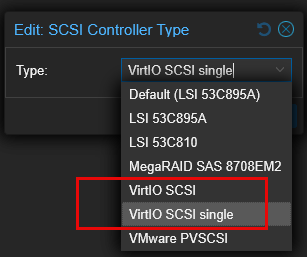
There is a subtle difference between the two that I think is important to note. VirtIO SCSI Single creates a dedicated controller per disk. This improves parallel IO handling and reduces lock contention between virtual disks. So if you are running virtual machines with the following, they may have a noticeable benefit from chosing the VirtIO SCSI Single controller:
- Multi-disk VMs
- Database workloads
- Kubernetes nodes
- Docker hosts
- High IO concurrency environments
It also unlocks another important setting that I always enable next.
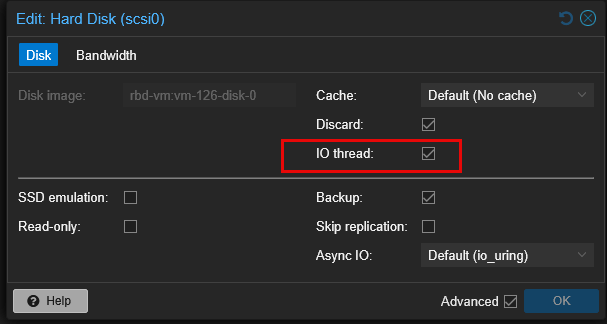
Enable IOthread
Once I switched to VirtIO SCSI Single consistently, I started enabling another related setting. This is the setting IOthread on almost every VM disk. This is another setting that many users either overlook or misunderstand.
IOthread allows disk IO operations to run in their own dedicated thread instead of sharing the main QEMU thread. In simple terms, this helps prevent storage operations from bottlenecking the rest of the VM processing pipeline.
The benefit of turning this on becomes more obvious when you have a VM that is under storage load, multiple VMs that are active simultaneously, or your VM is running a lot of parallel workloads. With modern NVMe storage and Ceph clusters, virtualization overhead is much more visible because the physical storage itself is no longer the bottleneck.
So, today, I am enabling IOthread as part of my standard VM deployment process in the home lab and production environments.
Enable discard
I wrote up a whole post on this one as I think it is one of the most important for modern enterprise environments for efficiency purposes. If you want a deeper dive into just this topic, read that post here:
Especially if you are coming off of a VMware vSphere environment where some of this is abstracted in the newest versions of VMware (do you remember the older days when you had to manually run “unmap”? I do 🙂 ). In Proxmox, there are a few t’s to cross and i’s to dot before you can make sure that your unmapping works like you expect.
First, you need to make sure your underlying storage supports unmap (Ceph, LVM thin, etc). Then you need to enable discard support on your virtual machine’s disk. I now enable discard on all my VMs unless I have a very specific reason not to.
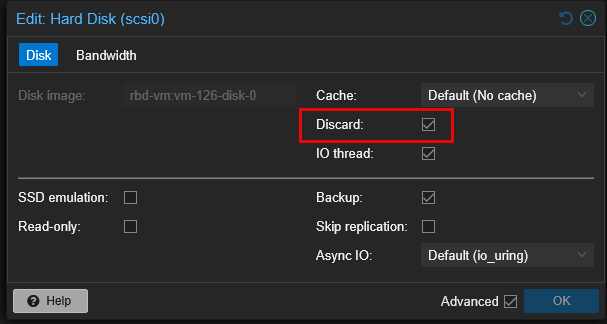
Discard allows the guest operating system to tell the underlying storage when blocks are no longer needed. This is called TRIM operations inside the guest operating system. This enables:
- Thin provisioning to reclaim blocks
- SSDs to be efficient
- Better storage use
- Less wasted space
- Better Ceph reclaim behavior
- Better SAN reclaim behavior
Without discard enabled, when you delete data inside the guest operating system running in a VM, it will continue consuming backend storage space indefinitely. I don’t have to explain why that is a bad thing. You will check your VMs and see lots of what it thinks is free space, but then your storage subsystem itself, will still see the storage consumed. In my environments today, I view discard as basically mandatory because I rely heavily on thin provisioning and keeping my storage efficient for home lab use.
Use io_uring for async IO
This is another setting that can be confusing or unknown as well. But unlike the other things I have mentioned, this is one that I leave at the current default. Under the disk settings in Proxmox, you can choose the async IO engine and set this to one of the following:
- Native
- Threads
- io_uring
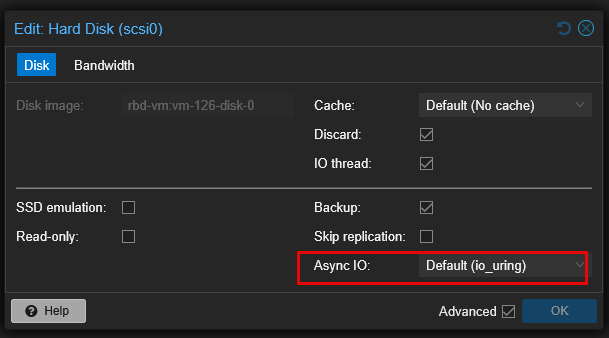
For modern Linux kernels and modern Proxmox hosts, io_uring is generally the best choice. The io_uring is a newer Linux asynchronous IO framework designed for high efficiency and lower overhead. When you compare this setting tot he older async methods, the io_uring setting helps to:
- Reduce syscall overhead
- Improve queue handling
- Improve throughput
- Lower latency
- Better utilize modern NVMe storage
In real-world usage you will see benefits with fast SSD storage, NVMe-backed Ceph clusters, high density environments with lots of VMs and for things like parallel workloads. The nice thing is that this setting is easy to change and usually just works well set to the default.
In 2026 Proxmox environments, io_uring is where I generally start.
Use No cache for “most” workloads
Cache mode is also a misunderstood Proxmox disk setting among others. In reality, the cache mode you choose is dependent on things like your storage backend, workload type, power protection, filesystem, and other factors.
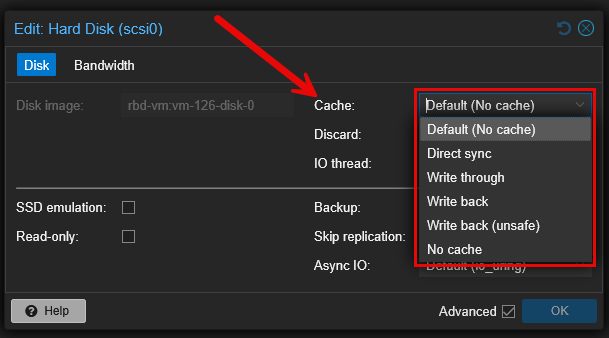
For most of my environments today, especially Ceph and shared storage, I use:
- No cache
You can definitely choose a more popular mode here like “write back cache”. If you are like me and had many miles of experience behind you with RAID controllers, you know that write-back cache is WAY faster than “write through”. However, write-back cache can increase the risk of data corruption without the right protections during things like:
- Power loss
- Host crashes
- Abrupt shutdowns
When you already have fast storage underneath, no cache tends to provide more predictable behavior and better data integrity. This is especially important because many enterprise storage systems already implement their own intelligent caching and “double caching” might actually hurt instead of help.
You also get better compatibility with distributed storage and better interaction with backend caching layers. But you may not have what would be considered “enterprise” storage underneath and more on that later.
With this cache setting, what “device” is Proxmox using for the cache? It is actually using RAM for this. If you notice when you set this, there is not a configurable option to set VM A gets 4 GB of cache, while VM B gets 2 GB of cache. Proxmox uses dirty page thresholds to determine when data gets written to disk. Dirty pages are basically just data that exists only in RAM that is yet to be written to disk.
Is there a scenario where I would set this to “write back”? I do think there might be a really strong use case with this configuration if you have very “slow” storage on your backend. Let’s say you have a spindle disk underneath (spinning rust). If this is the case, enabling the write back may actually benefit you.
The benefits however will be limited to “short bursty” writes. Some candidates for that scenario might be the following:
- Great candidate
- A small Linux VM
- light workloads
- package installs
- log writes
- config changes
- Docker host metadata
- web server
What might not be a good candidate for this type of cache? Large, sustained writes are usually not ideal. Some examples of this include:
- backups
- Plex transcoding temp storage
- heavy databases
- big rsync jobs
- large file copy workloads
My current default Proxmox VM disk settings
Below is a summary fo the settings I am currently using in my home lab environment and why. These settings have worked extremely well for me across:
- Ceph clusters
- NVMe storage
- Local SSD storage
- Kubernetes environments
- Docker hosts
- Windows VMs
- Linux servers
That does not mean they are perfect for every workload. Tiny utility VMs, test systems, databases, or special storage environments may benefit from different tuning. However, these have become my defaults for the vast majority of my Proxmox virtual machines.
| Setting | My default choice | Why I use it |
|---|---|---|
| Disk bus | SCSI | Better scalability, modern VirtIO performance, and compatibility with advanced disk features |
| SCSI controller | VirtIO SCSI Single | Enables cleaner IOthread and better parallel IO handling |
| IOthread | Enabled | Improves responsiveness by giving disk IO its own thread |
| Discard | Enabled | Allows trim/UNMAP operations for reclaiming thin-provisioned storage |
| Async IO | io_uring | Modern async IO engine with lower overhead and better efficiency on modern Linux kernels |
| Cache | No cache | For already fast storage (NVMe) it has predictable behavior and avoids extra host RAM write buffering for most workloads |
Wrapping up
Hopefully, my thoughts here on the Proxmox VM disk settings that are beneficial and what I am using in the home lab will help clear up some of the lesser known settings when creating a VM or editing an existing VM in Proxmox. There are many settings that can be tweaked and especially if you have migrated a VM from another hypervisor, it is a good idea to check which settings are configured for those VMs. Let me know in the comments which settings you are running with today and what you change when setting up something new or VMs you have migrated over.
Google is updating how articles are shown. Don’t miss our leading home lab and tech content, written by humans, by setting Virtualization Howto as a preferred source.
About The Author


A nice summary with cogent explanations about your conclusions as to what works best. I’ve just been through an exercise looking up all of these details to confirm my choices, and this article would have saved me time as well as kept me from agonizing over whether I had properly interpreted the often scant documentation.
Much appreciated advice!