Many in the home lab these days are running Proxmox, XCP-ng, or “maybe” back to the now free “again” VMware ESXi. However, another really cool hypervisor that you may not have heard about is one called IncusOS. In fact, it was announced not long ago as a new offering that is free to download and run VMs and containers. Let’s take a look at this project and what IncusOS is exactly. Also, how do you install it and get up and running with a new installation? Let’s dive in.
What is Incus
First of all, to fully understand what IncusOS is exactly, we need to take a quick look at Incus itself. What is this project? Incus is the community fork of LXD that was created when the LXD project was moved under Canonical control. Today the project maintained as Incus supports system containers, OCI compatible containers, and running virtual machines.
Incus is built around an unprivileged security model. This means your containers do not need to have root access on the host. Also, important to note for storage purposes, it supports ZFS, Btrfs, Ceph, and LVM Thin. Also, networking is flexible in that it supports Linux bridges, VLANs, OVNs, bond interfaces, and routed networking. It does also have an API for automation purposes, and a CLI you can interact with it for orchestration purposes, using Incus clusters.
Now with this in mind, we can take a look at the new IncusOS, what it is, and where it fits in, inside the overall Incus ecosystem.
What is IncusOS
IncusOS is a purpose-built hypervisor operating system to run Incus containers and virtual machines. It cuts out a lot of the overhead of a general Linux distro. With the official announcement, IncusOS uses a minimal Debian 13 base and combines with Zabbly builds of the LInux kernel, also ZFS, and the Incus runtime.
The operating system when booted, boots directly into an Incus environment. Also, a very cool aspect of the system is that it is locked down and manages itself with automated, atomic updates. So, much like NixOS or another immutable type operating system, it uses an A and B partition so to speak.
Updates are downloaded into the inactive slot while the system keeps running. After a reboot the system boots into the new OS version. I have used the analogy of a network switch firmware upgrade. This is typically how these are carried out as weell. If something goes wrong, it automatically rolls back to the previous slot.
It also supports full disk encryption and secure boot with a TPM 2.0 module. So, in other words, IncusOS is much like a special-purpose appliance and it keeps you from having to think about operating system level maintenance which is great!
Background of IncusOS and advantages
One of the huge advantages and use cases for IncusOS came about due to the inconsistency that you see from running Incus on different distros or different OS builds over time. Most of the big Linux distros that are used for production or home labs like Debian, Ubuntu, Arch, Fedora, or openSUSE all act differently. So with that, kernel versions, ZFS builds, networking stacks, systemd changes, etc can all diverge and be different across the different distros. When you run multiple hosts in a cluster, drift becomes an issue.
So, with IncusOS, you solve this by having a reproducible and consistent host build on each update. Each IncusOS machine runs a specific version and is going to be identical, bit for bit, with the other host machines on that same version.
Immutable operating systems have gained a lot of traction over the past couple of years since they dramatically reduce the times when things break, they are simple to update, and the remove configuration creep across your nodes. So IncusOS does this very well and is basically an appliance to do one specialized thing and that is to run Incus.
IncusOS is immutable and how upgrades work
IncusOS works very differently from a typical Linux distribution. Instead of installing packages, updating with apt, or manually managing services, IncusOS handles the entire system lifecycle for you.
It uses a minimal root filesystem based on Debian 13. The OS image is read only and is validated during updates. The A and B partition system makes upgrades atomic and safe. If an update fails the system automatically reverts to the previous working version.
Incus is baked into the operating system. There is no need to install it manually or manage its dependencies. IncusOS runs Incus from the moment it boots.
The OS also uses reproducible builds. This means that the developers can rebuild the exact same version of IncusOS anywhere and get identical binaries. This ensures consistency across clusters and eliminates machine specific differences.
IncusOS checks for updates automatically every few hours. When an update is available, it downloads the new OS image, writes it to the inactive partition slot, and waits for a reboot. After rebooting, the new OS slot becomes active. This is the same pattern you see in ChromeOS, Talos, MicroOS, and other modern immutable platforms.
There is no traditional package manager on IncusOS and no expectation that you will modify the host OS. All workloads are managed through Incus in the form of containers or virtual machines.
How to Install IncusOS
The installation process for IncusOS is a little bit different than what you may be used to in a couple of aspects. However, for the most part, we do get our hands on an ISO image as part of the process and this allows us to install the IncusOS installation on bare metal, or as a guest virtual machine in something like Proxmox or VMware.
Requirements:
- Modern Intel/AMD (x86_64) or ARM (aarch64) system
- For x86_64, the CPU must support x86_64_v3
- Support for UEFI with Secure Boot
- TPM 2.0 security module
- At least 4GiB of RAM (for system use only)
- At least 50GiB of storage
- At least one wired network port
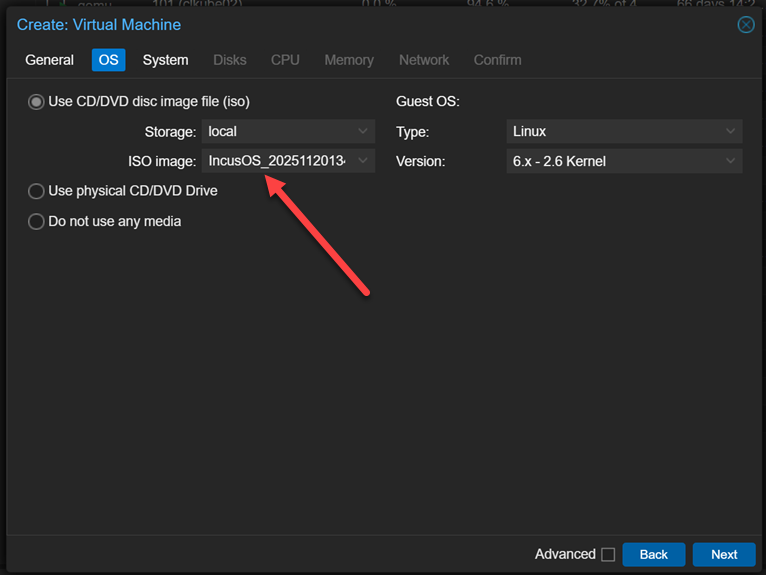
The first thing we need to do is visit the IncusOS Image Downloader site, which is found here: IncusOS image downloader. On this page, you will be able to choose the Image usage, Image application, and the Application configuration as part of the process.
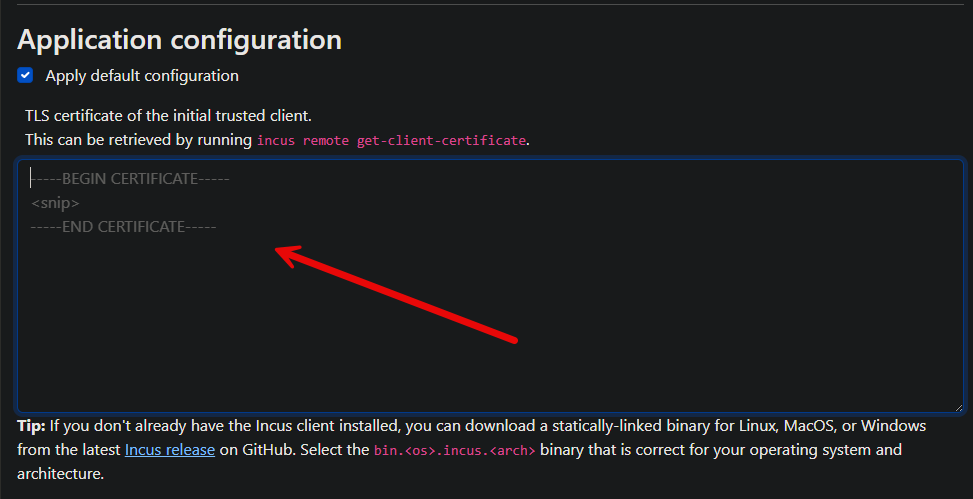
Below is what a section of this screen looks like. The interesting part that we will key in on is the Application configuration. We have to generate a certificate that will be used to authenticate to our IncusOS instance.
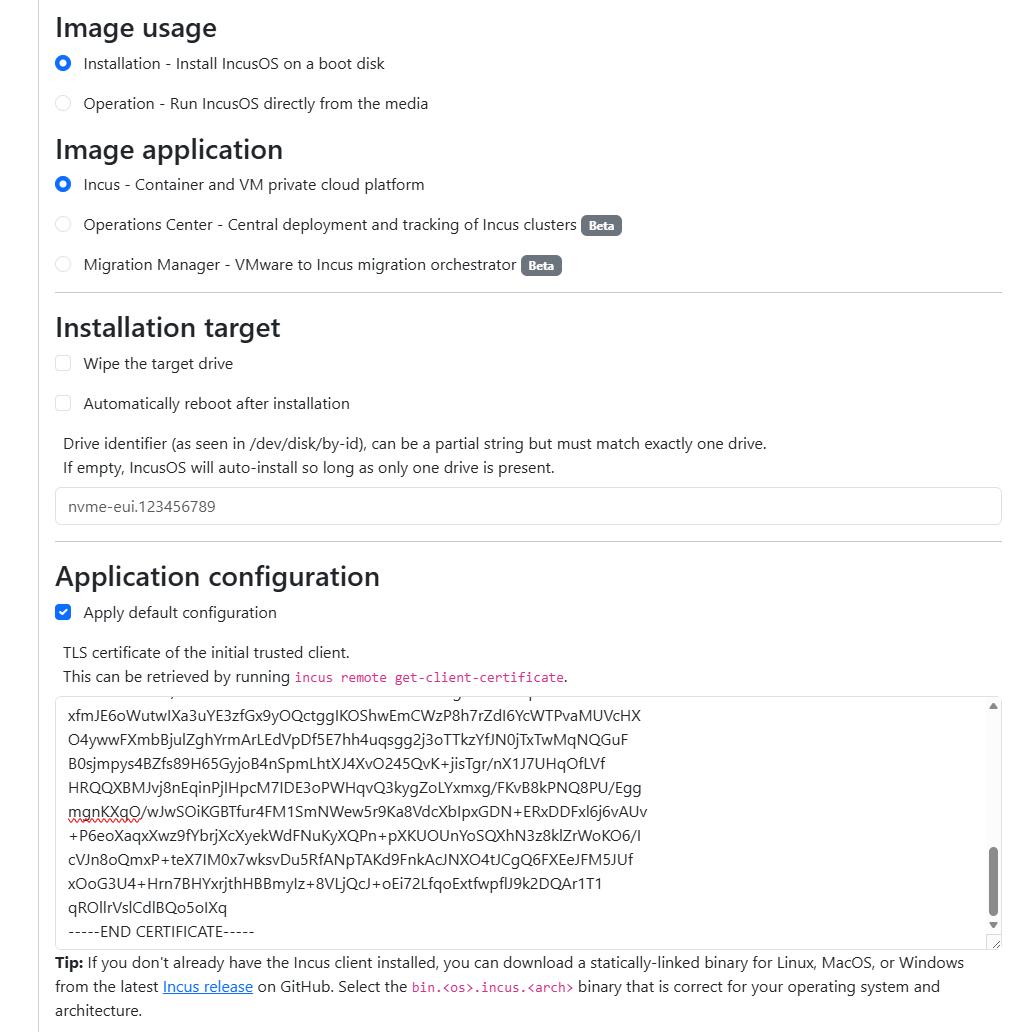
Creating the TLS certificate for the initial trusted client
We need to create a certificate that will be used for the trusted client. To do this, I created a simple little shell script to create the certificate needed for my purposes.
#!/bin/bash
set -e

mkdir -p incus-client-cert
cd incus-client-cert

openssl genpkey -algorithm RSA -out client.key -pkeyopt rsa_keygen_bits:4096

openssl req -new -x509 -key client.key -out client.crt -days 3650 \
  -subj "/CN=$(hostname)-incus-client"

cat client.crt client.key > client.pem

echo "Client certificate generated successfully."
echo "Files located in: $(pwd)"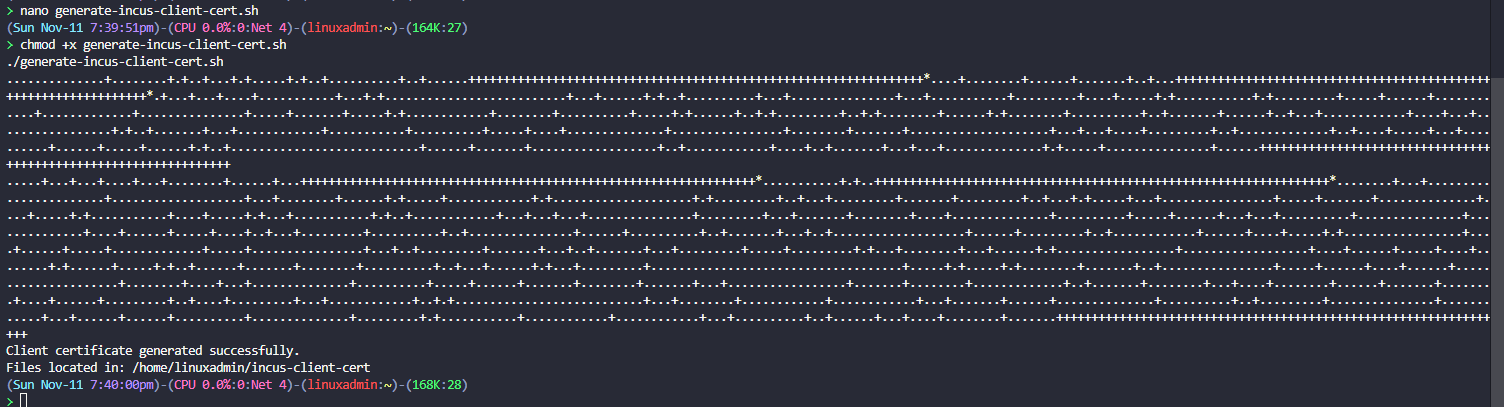
Then we need to make it executable and run the script:
chmod +x generate-incus-client-cert.sh
./generate-incus-client-cert.sh
Run the script and then you can take the contents of the cert that is generated (.crt) and paste it into the application configuration.
After pasting in the certificate file contents, you can download the IncusOS ISO. The IncusOS ISO downoad is around 3.5 GB.

For authenticating to the IncusOS web iterface, we need to create a .pfx file from the certificate and private key we created, which includes both the public and private key. We can do that with:
openssl pkcs12 -export \
  -out client.pfx \
  -inkey client.key \
  -in client.crt
So, once you have the PFX file, we can just sit tight with that file and wait til we get the IncusOS virtual machine provisioned.
Creating an IncusOS in Proxmox
For testing out IncusOS, I decided to spin up a virtual machine in Proxmox. This process is the same as you would do for any other virtual machine. Here I am pointing it to the ISO image that we have downloaded for IncusOS after
You need to set the BIOS to OVMF (UEFI), uncheck the Pre-Enroll keys and set the TPM storage and version to 2.0.

Sizing the disk for IncusOS. As a note here. You are required to have a 50 GB disk for the install. I just bumped it up slightly to be good to go.
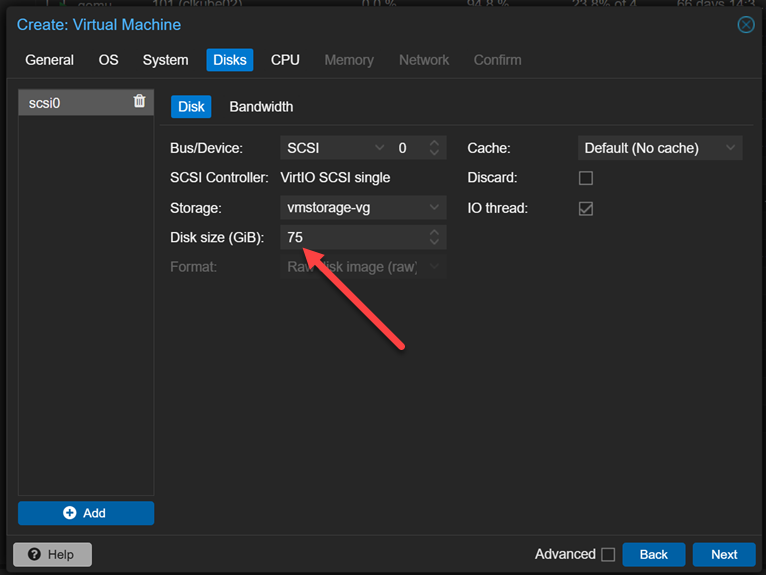
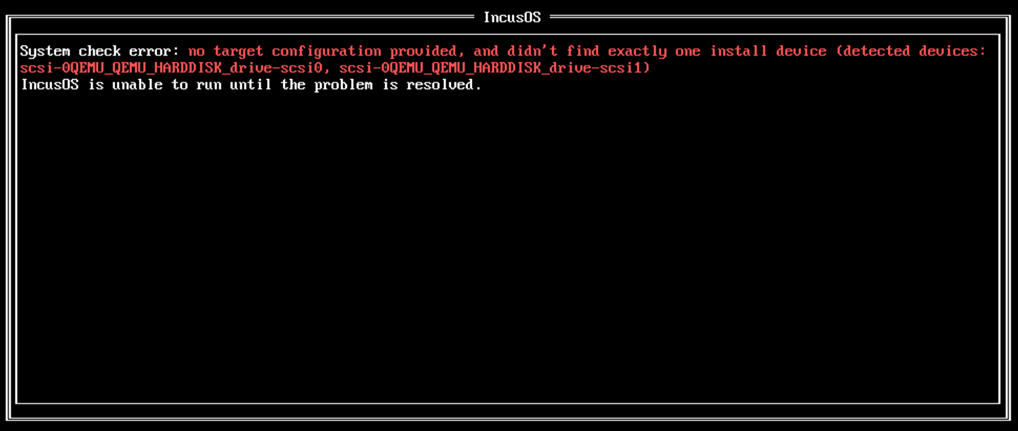
Also, as a note, don’t add multiple disks. I thought I would go ahead and add a second disk for my workloads, but if you do that, you will see this:
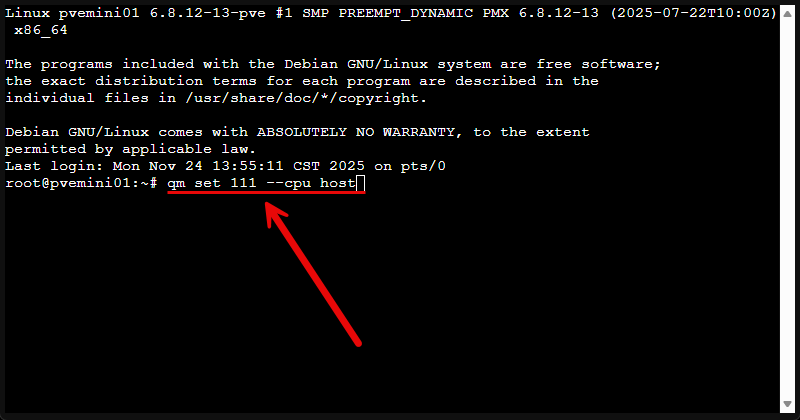
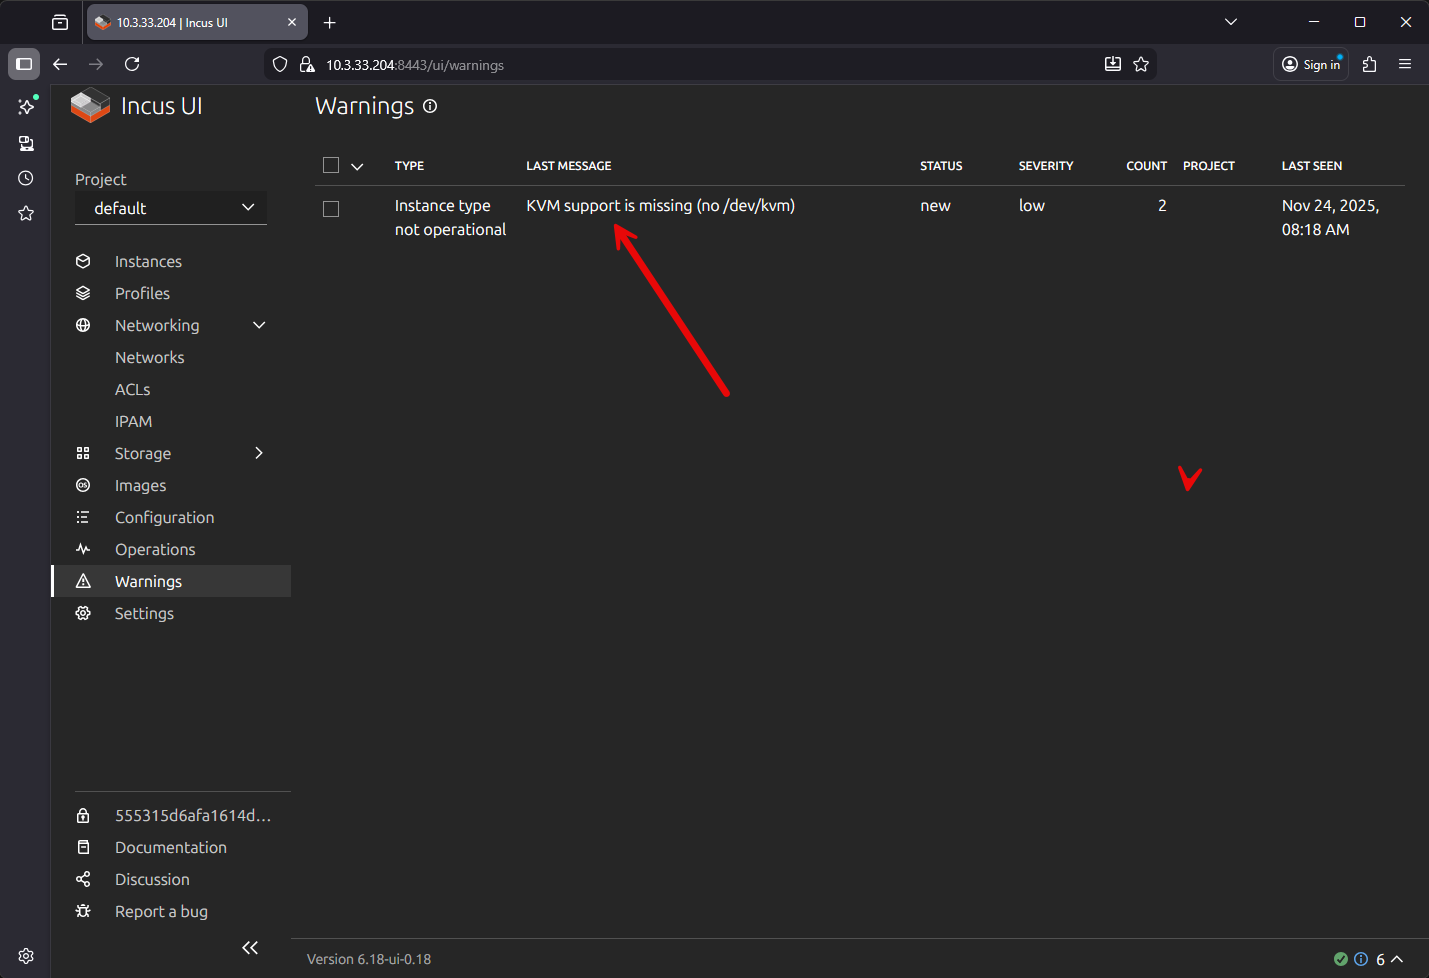
Next, add the CPUs you want to assign, the memory allocation and network settings (VLANs, etc). Create the VM and power it on. ***Note*** you will need to enable nested virtualization in Proxmox.
If you don’t enable nested virtualization, you will see the below in your Incus UI Warnings menu:
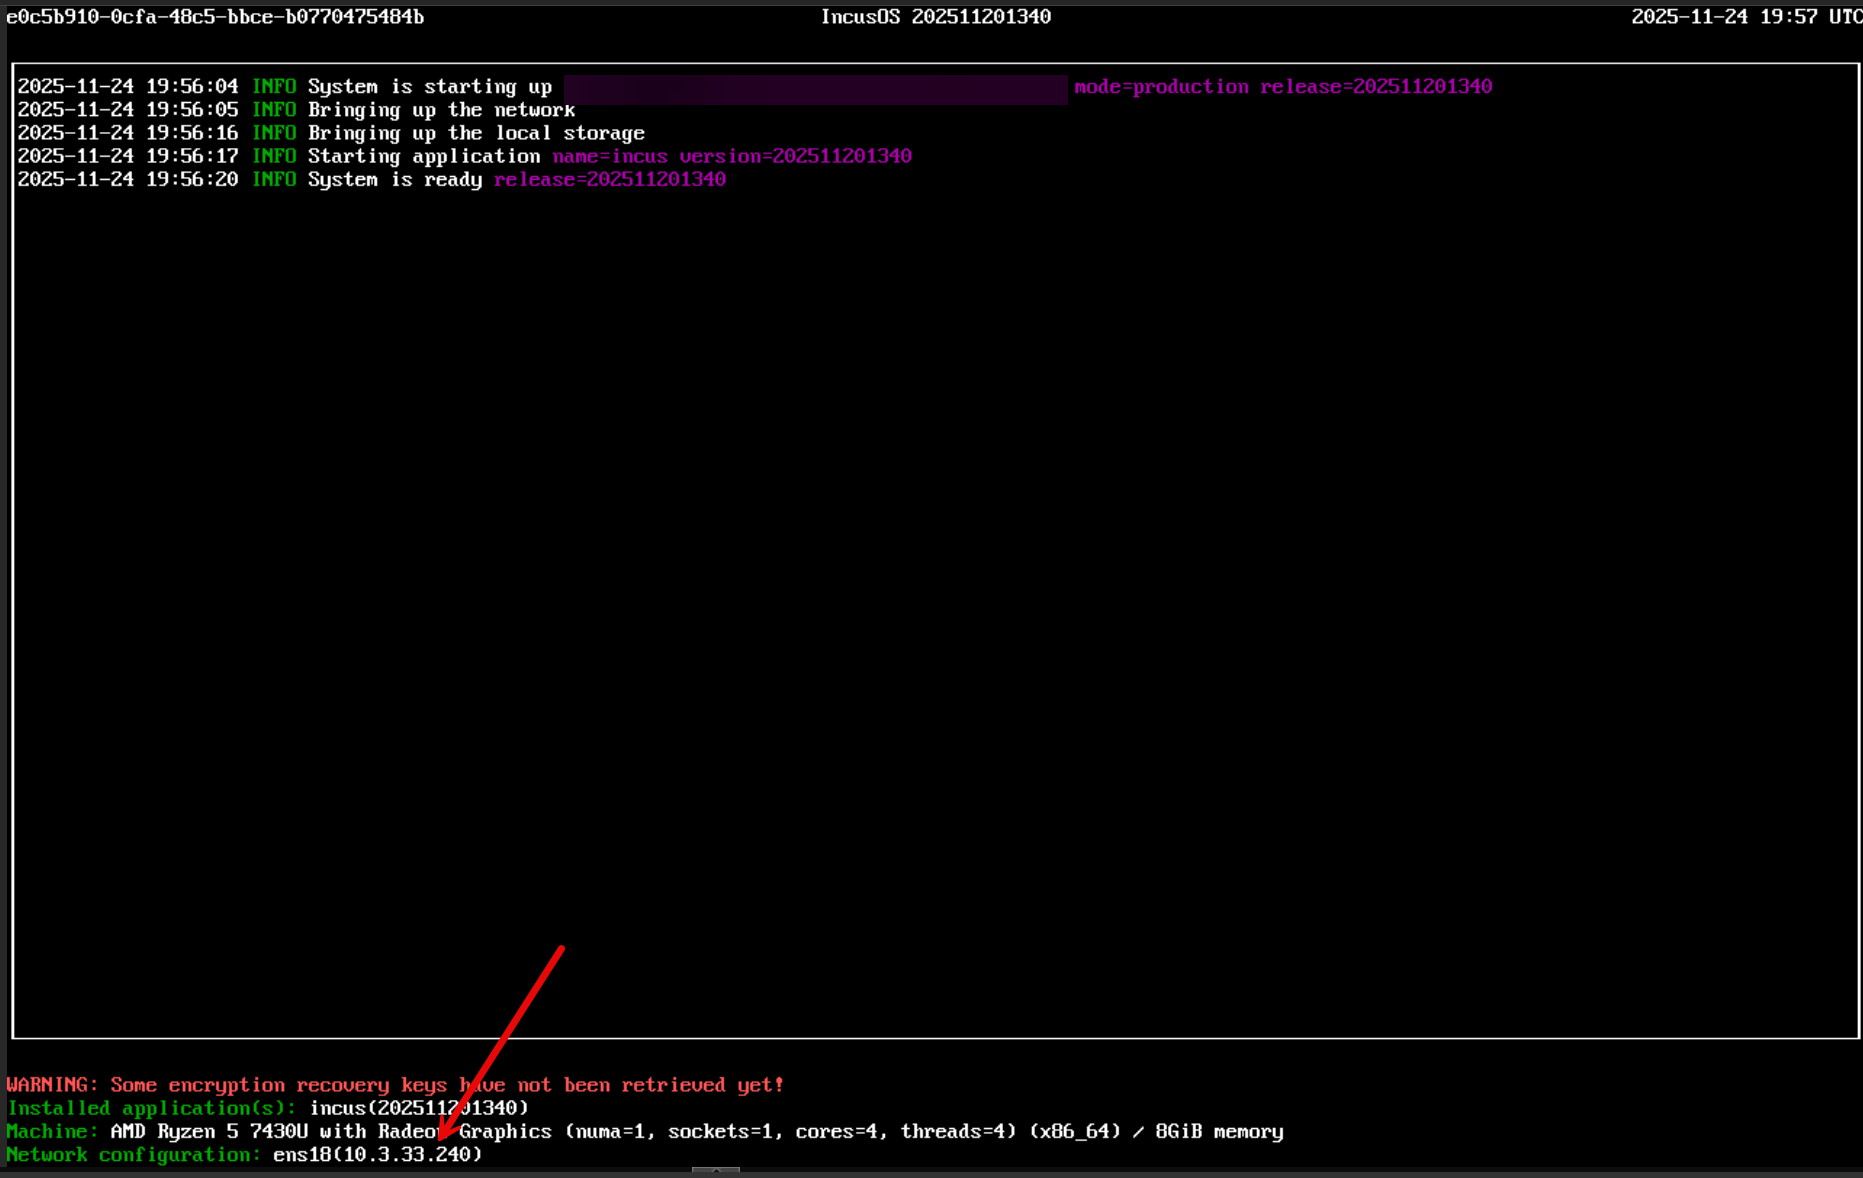
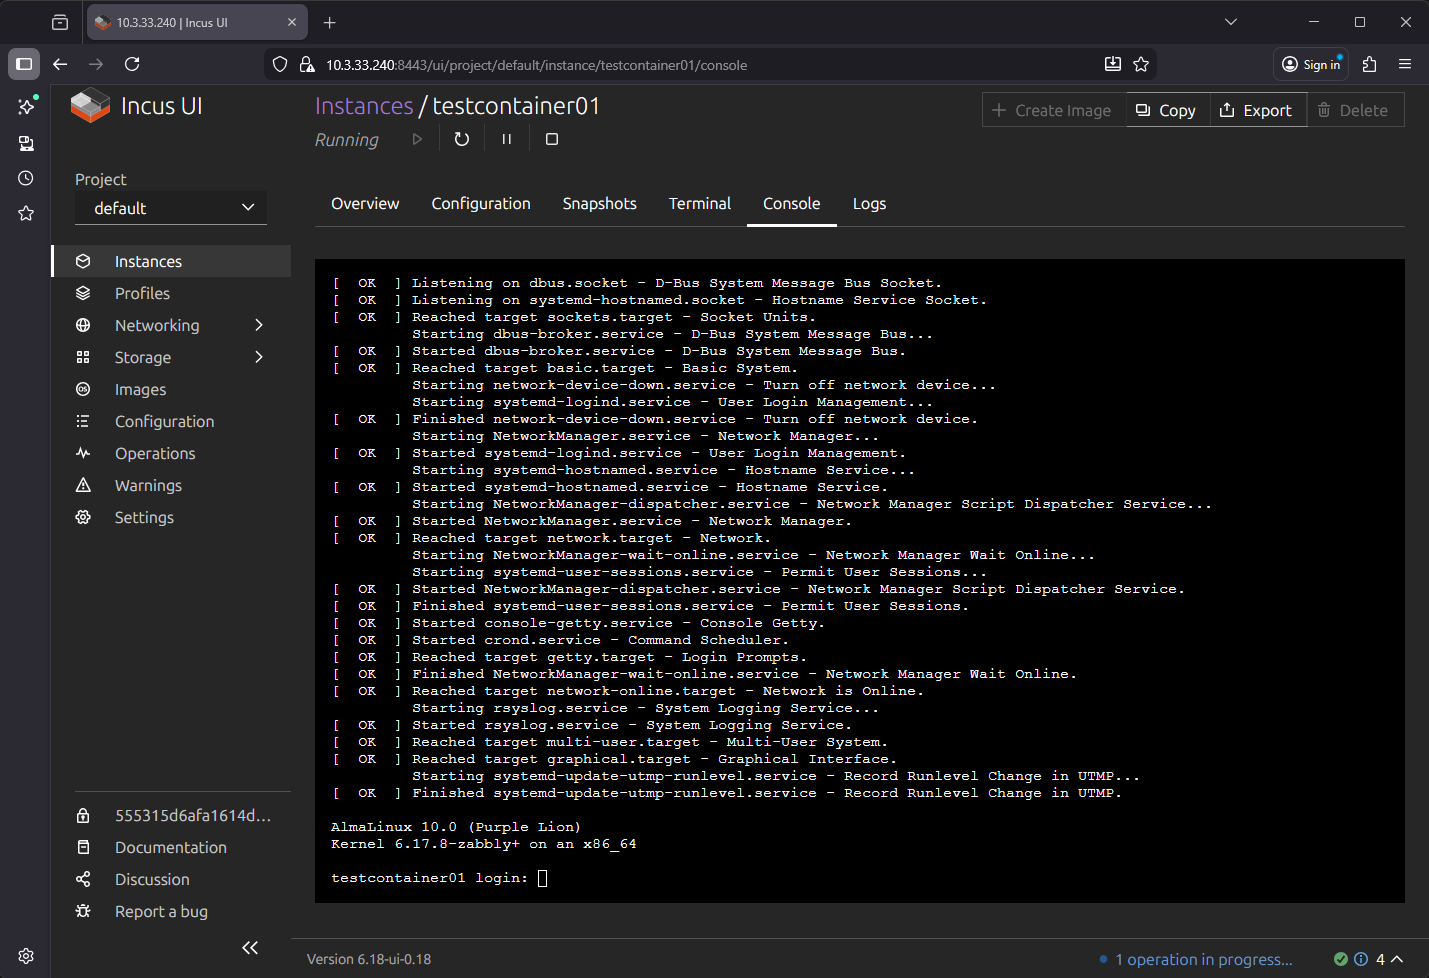
Finally, you will let the IncusOS boot and install from the ISO. Then, you will restart the VM, and it should boot up to the console screen below. In the bottom left-hand corner you will see the IP address. This should be the address you can use to connect to the Incus UI.
Adding the client certificate to your browser
My setup involves using WSL in Windows. I used WSL to create the client certificate with the script shown above. Then I used the command to create the PFX file that is needed. What do we do with the PFX once it is created? Well, once you have the PFX file, you need to import this into your user configuration.
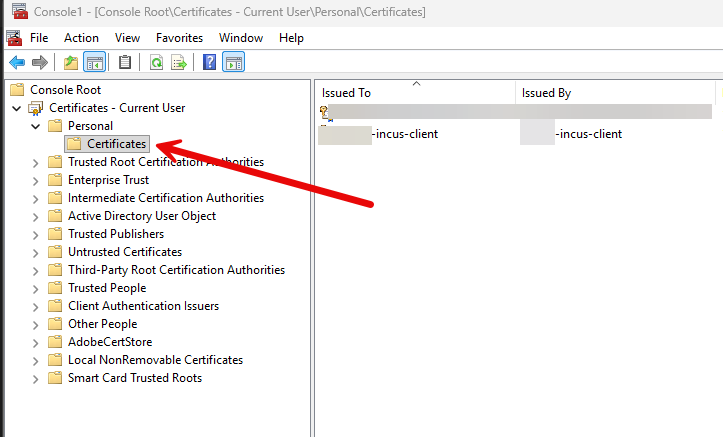
Once you import the certificate here under the Current User > Personal > Certificates, you can launch a browser session to your IncusOS host port 8443 and it will prompt you for the certificate to use. Pick the one you imported:
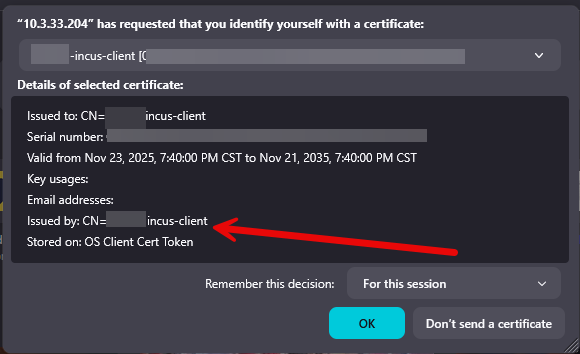
When you do, it will log you in:
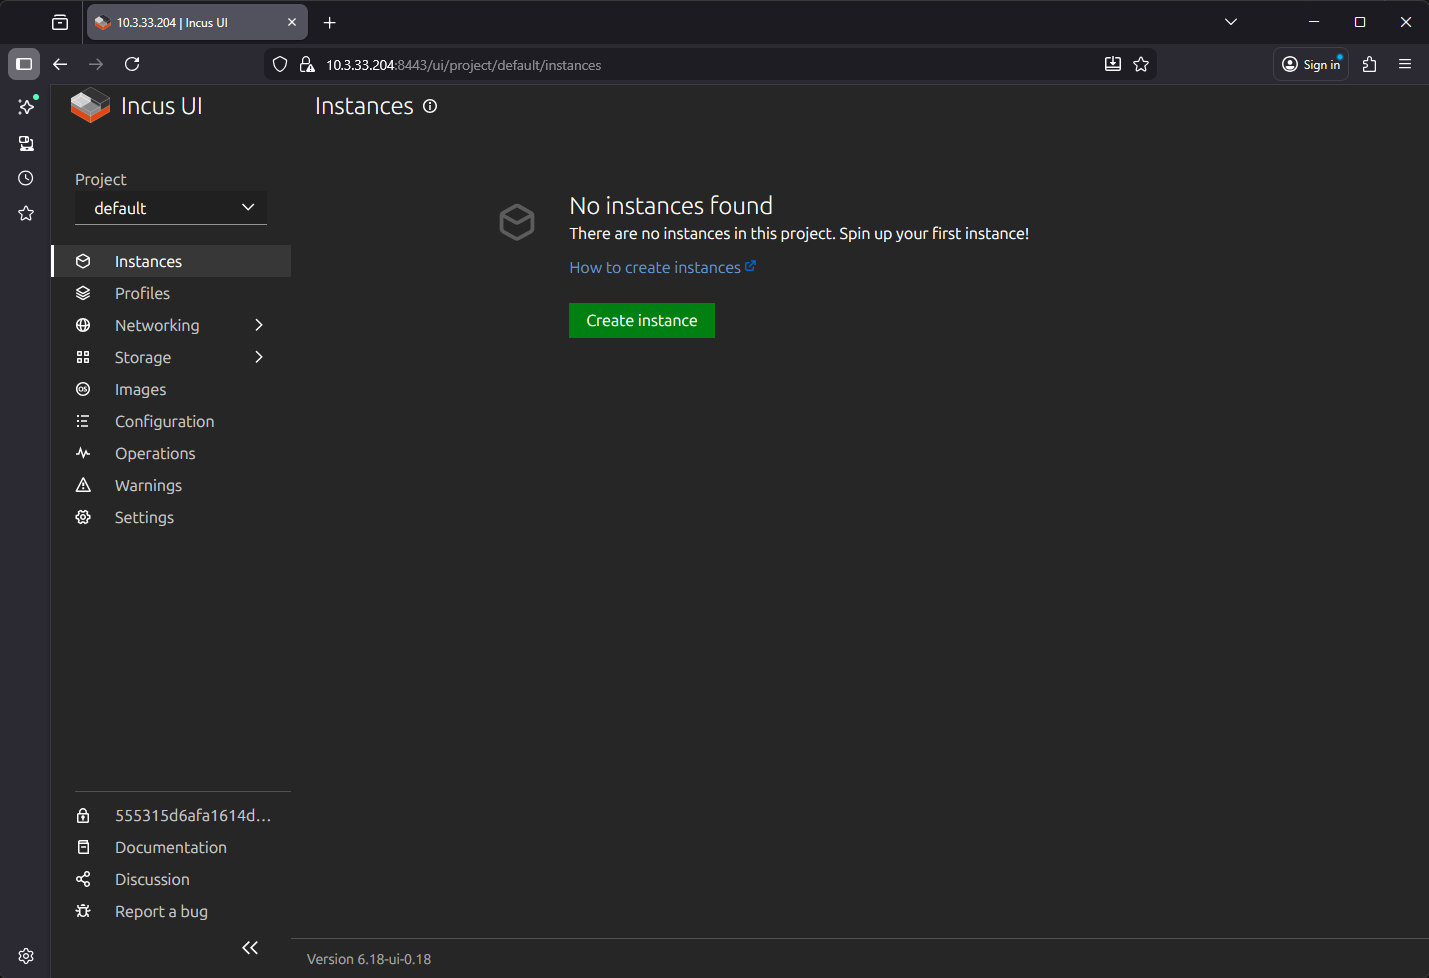
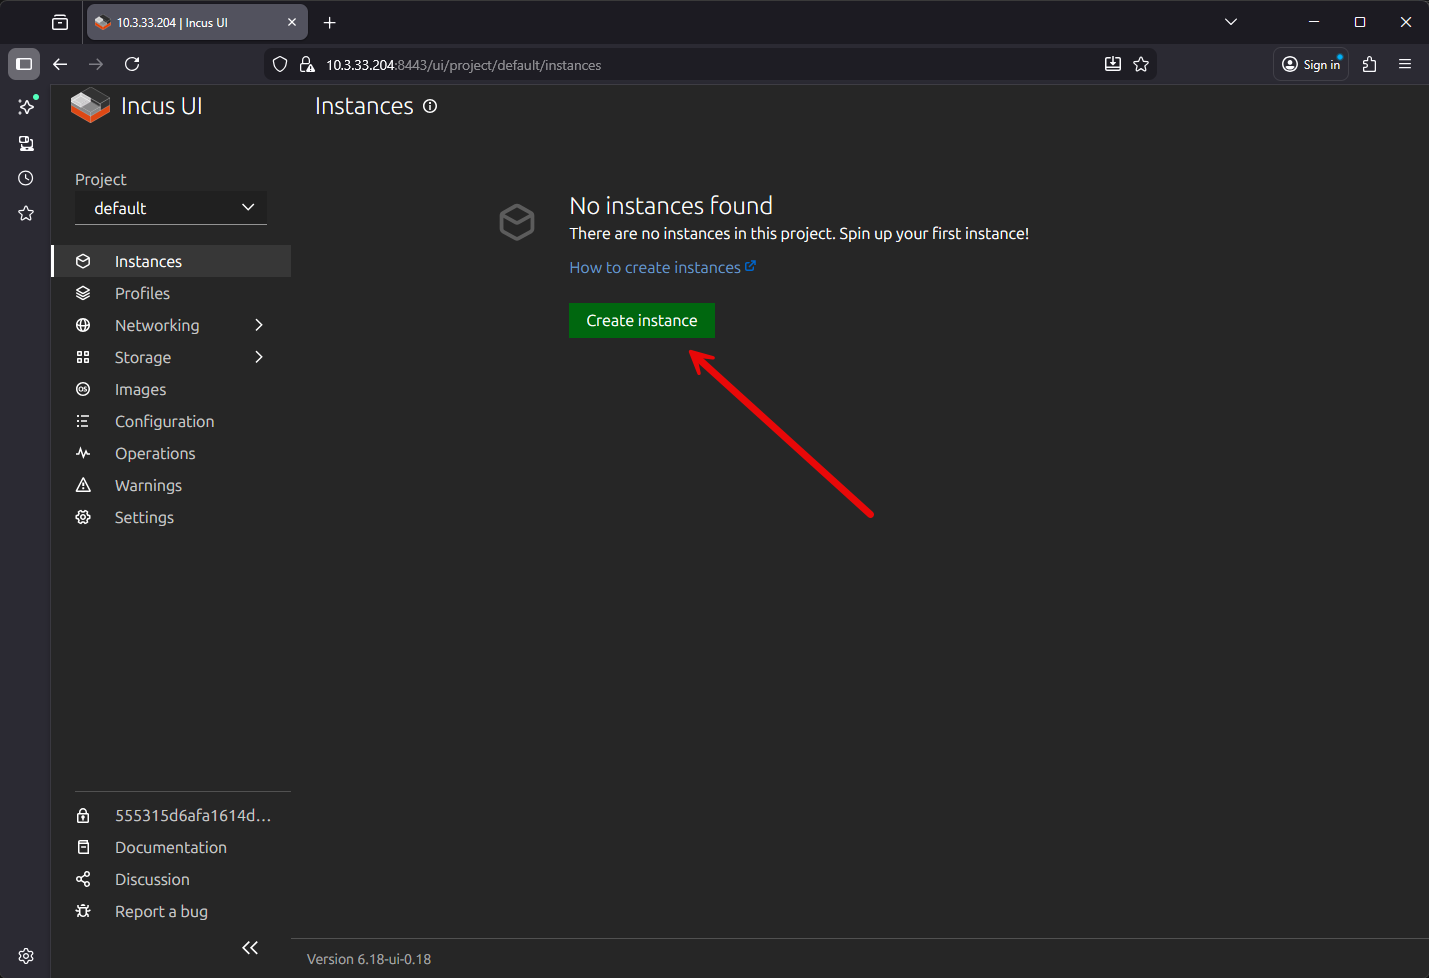
Creating a new container
Let’s go through the process of creating a new container instance in IncusOS and see what this looks like.
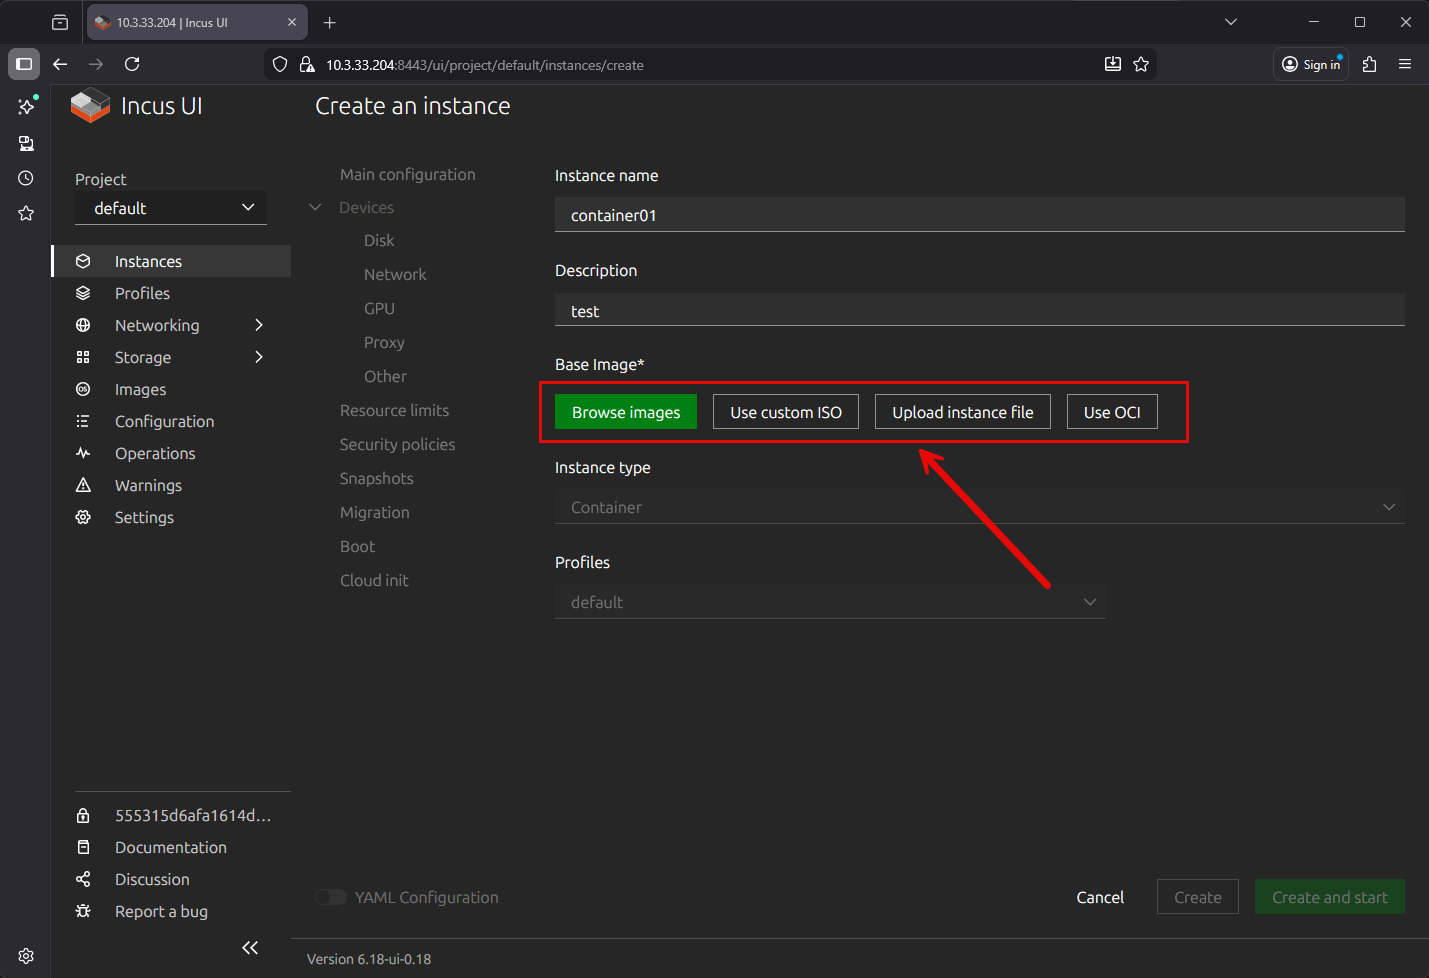
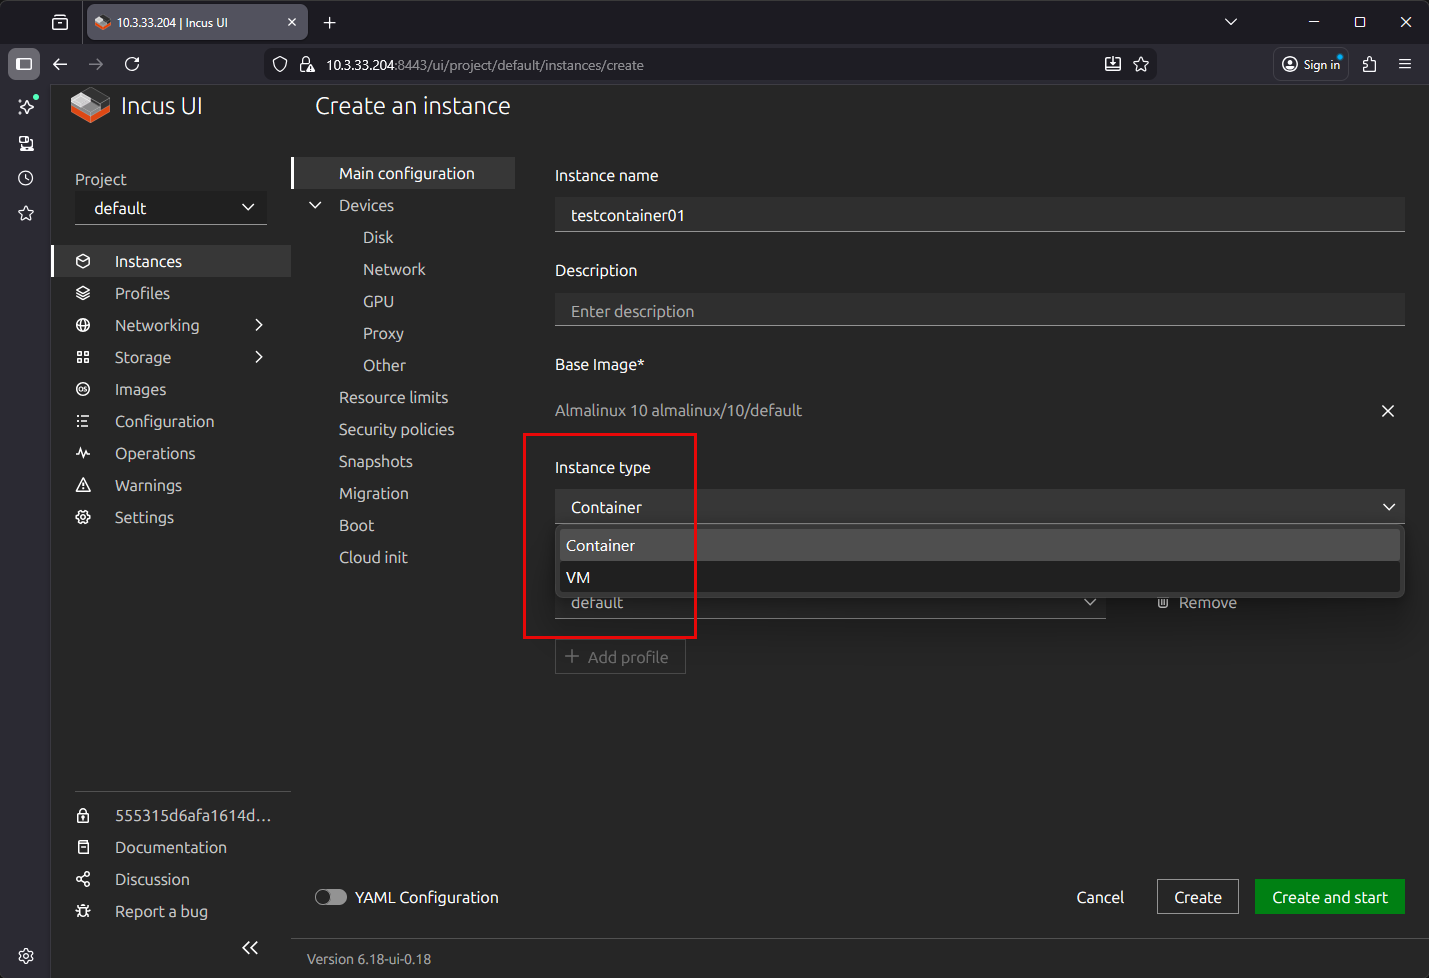
Next, you see we are at the Create an instance screen. Here we first name the container instance, and put an optional description. Note on the Base image* configuration, we have several choices:
- Browse images
- Use custom ISO
- Upload instance file
- Use OCI
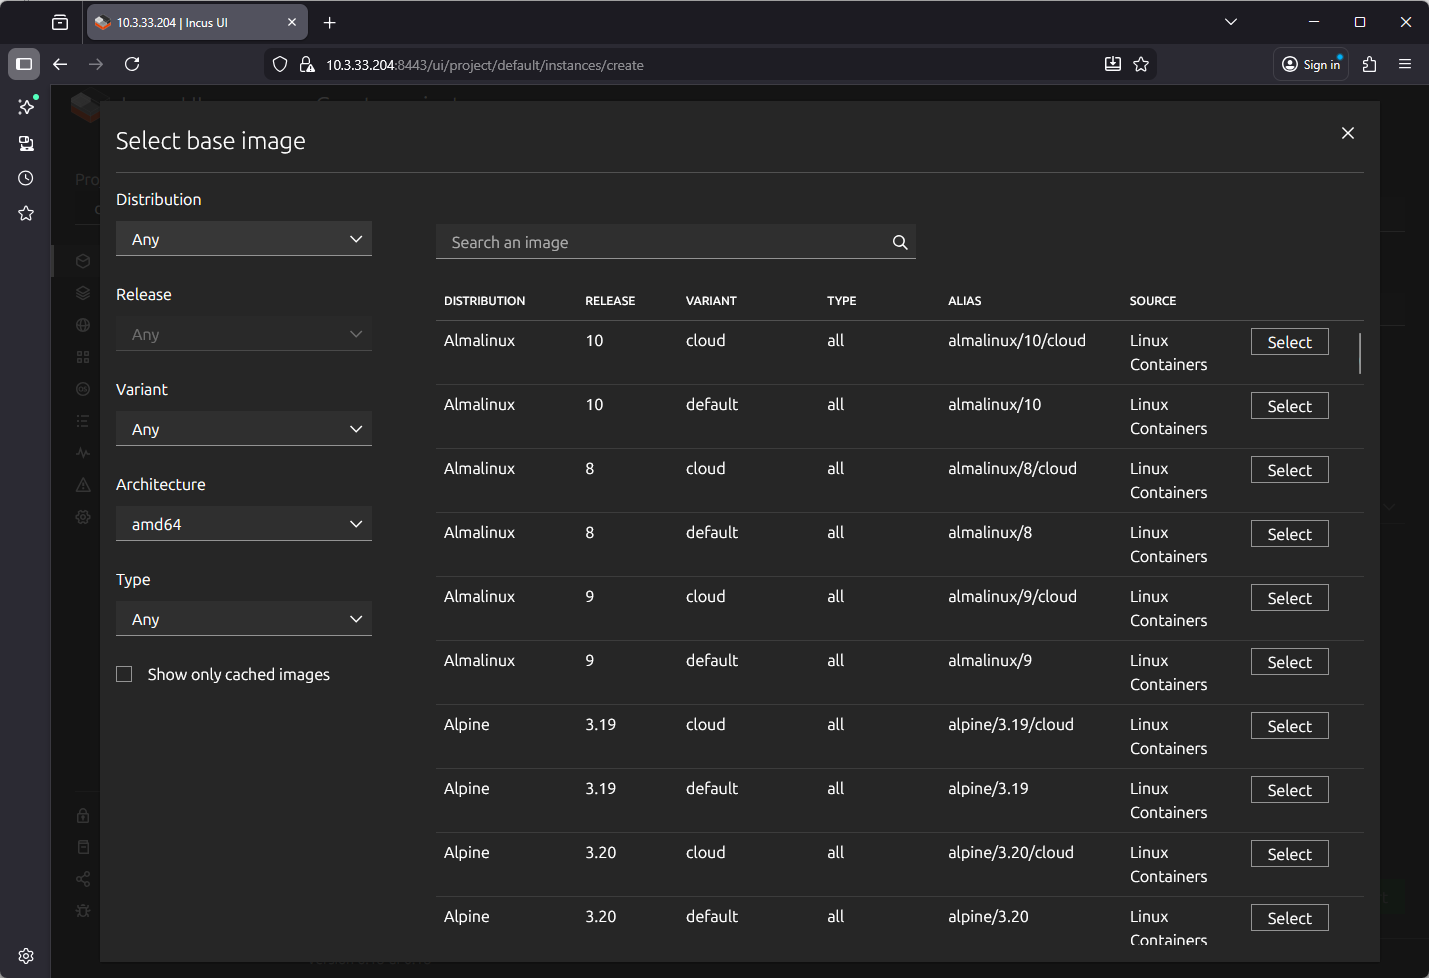
Below, I have clicked the Browse images button. This brings up the screen below, where you can filter images and select the one you want to download as the base for the container.
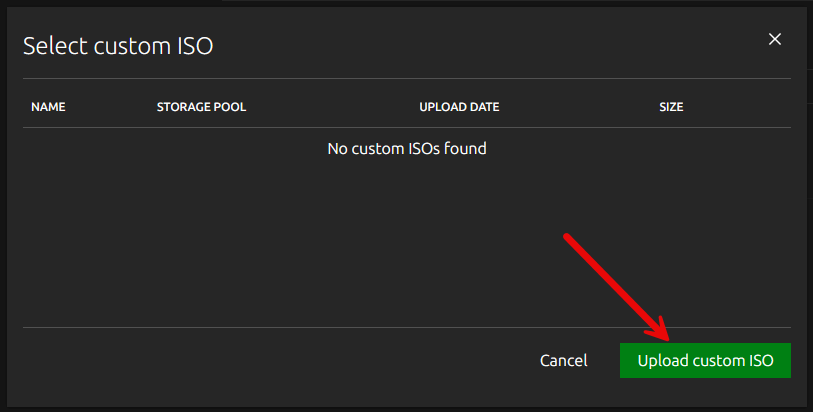
If you click the Use custom ISO button, you will see the below. it will bring up the box where you can select an existing ISO you have uploaded, or you can choose to Upload custom ISO from this screen.
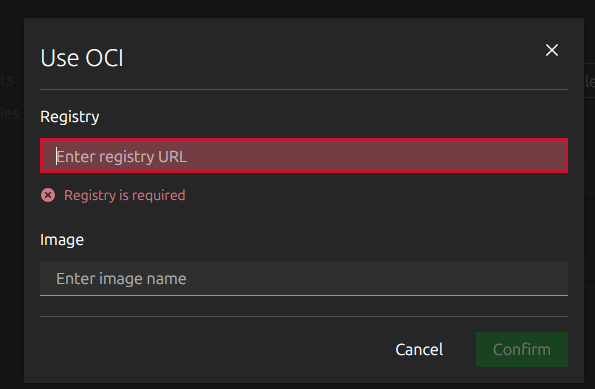
Interestingly, IncusOS can do what the latest Proxmox VE 9.1 can do as you can also pull an OCI formatted container image. This is pretty cool as this opens up basically any container that exists on most Docker registries as viable options here.
Also, what I think is really cool is that once I selected Alamalinux in the Base image from the catalog that I posted earlier, we can actually choose which we are created: a virtual machine, or a container. Then, finally, select Create and start.
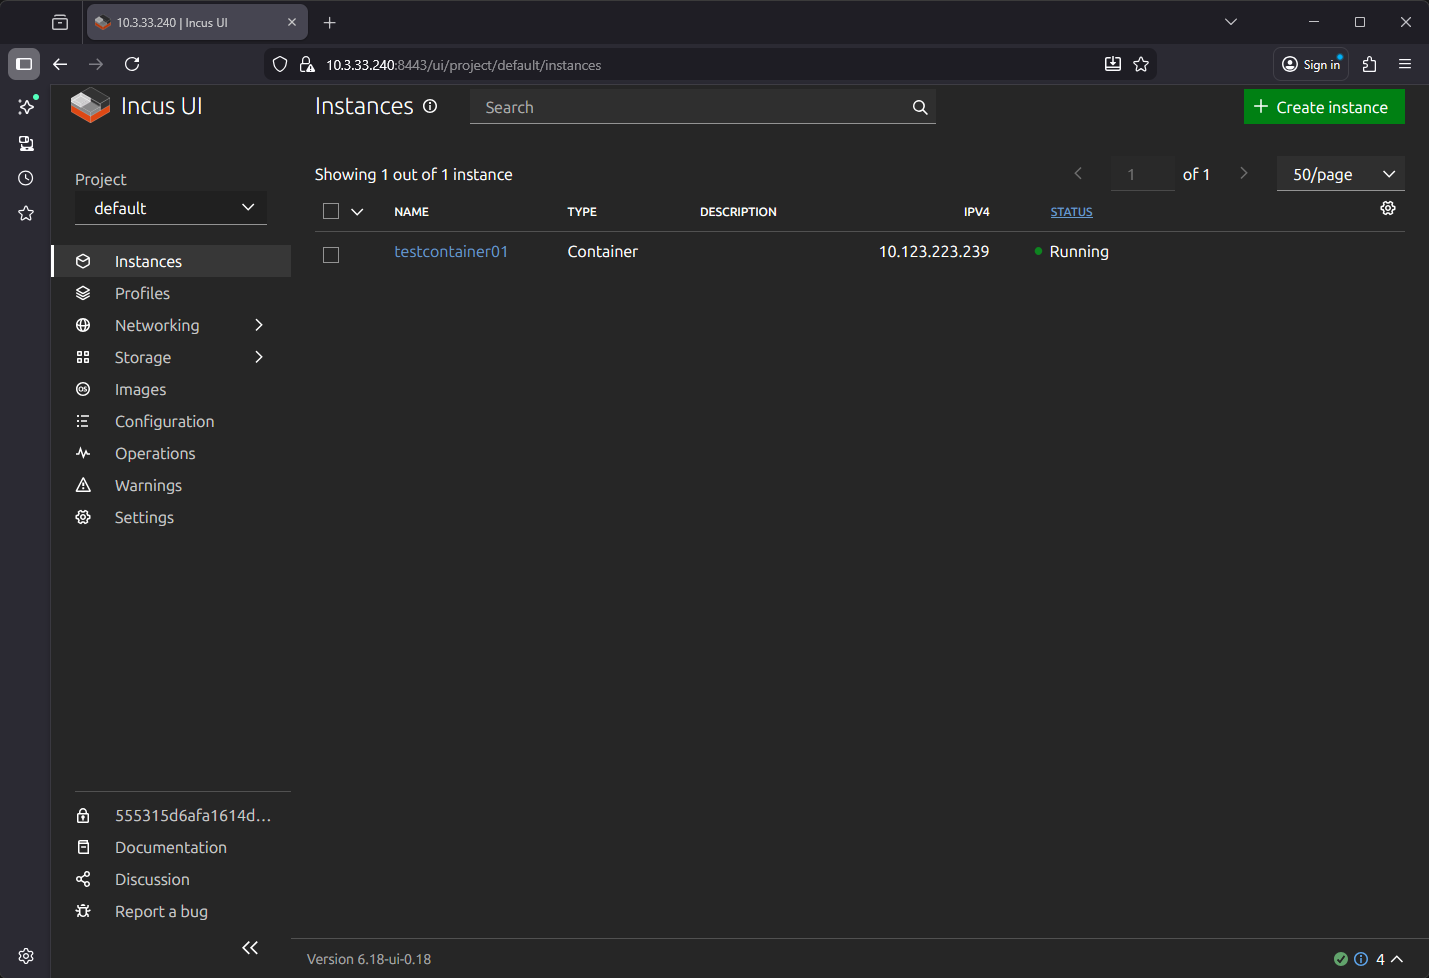
After creating the container, we can see that it has booted and grabbed an IP address from the default NAT.
Here, I am looking at the Console tab.
How does IncusOS fit into the home lab?
It hink the trend among home labbers is they want fewer moving pieces and parts for the host OS. Also, they want to have something that is easy to manage and has clean updates built in so they have very few surprises. Immutable operating systems are gaining momentum.
IncusOS fits all of these trends by removing traditional Linux overhead from the host. It is purpose-built and helps manage the OS as it is effectively an appliance that hosts containers and virtual machines.
There is a clear trend happening in home labs. Users want fewer moving pieces on the host OS. They want predictability, clean lifecycle updates, easier cluster setups, and fewer surprises when a kernel update ships. Immutable operating systems have solved this problem in the container world and now they are becoming popular in the virtualization world too.
Think of it as a platform that can host:
- Lightweight containers
- Virtual machines
- Media servers running in containers
- GitLab runners or CI nodes
- Remote edge nodes
- Proxy servers
- Kubernetes management nodes
- Small form factor clusters
Comparison to Proxmox VE, NixOS, MicroOS, and Talos
Note the following between Proxmox VE, NixOS, MicroOS, Talos, and IncusOS.
| Platform | Primary Purpose | Strengths | How It Differs From IncusOS | Best Fit For |
|---|---|---|---|---|
| Proxmox VE | Full hypervisor and container platform with good UI | Very intuitive, everyone is familiar with it | Much heavier than IncusOS and is an all in one platform. IncusOS is minimal and focused only on Incus workflows. | Home labs and production workloads |
| NixOS | Declarative Linux with custom configuration with a *.nix file | Ultimate control, reproducible builds, highly customizable | Much steeper learning curve. IncusOS requires no host configuration and is simpler to manage. | Users who want everything in infrastructure as code and complete system customization |
| MicroOS (SUSE) | Immutable OS for container workloads | Atomic updates, lightweight, flexible host | Similar update model, but does not integrate Incus directly. IncusOS is designed for Incus containers and VMs. | Lightweight hosts for containers or edge workloads |
| Talos | API driven, and fully locked down OS for Kubernetes | Secure, immutable, built only for Kubernetes clusters | Very similar immutability approach, but Talos is designed around Kubernetes while IncusOS is designed around Incus. | Kubernetes clusters that need a minimal, locked down host |
| IncusOS | Minimal OS dedicated to Incus containers and VMs | Simple, focused, and it integrates Incus directly | Lightest and most purpose built option. Expects all workloads to run under Incus. | Users who want a clean, appliance style Incus hypervisor with no OS overhead |
Wrapping up
I really liked playing around with IncusOS. It is fairly straightforward to get up and running with once you understand the authentication using the TLS certificate. I spent more time trying to figure out how to make my browser trust the certificate than I did actually installing IncusOS. However, hopefully my notes in this post will help everyone circumvent any frustration knowning where to go and what to do in getting IncusOS up and running. I think this could be a very viable option for the hom elab and even production environments for those looking for lightweight edge nodes that can host virtualized resources. It also is great that it is immutable. Let me know if you have played around with Incus or if you have downloaded and used IncusOS as of yet.
Google is updating how articles are shown. Don’t miss our leading home lab and tech content, written by humans, by setting Virtualization Howto as a preferred source.
About The Author


Very cool…I had heard of Incus, but not IncusOS before. This will be on my list of things to try shortly 🙂
You may not have known this, but TrueNAS was suppose to move to Incus as a replacement for kubernetes. Not sure why they didn’t.
TrueNAS does use Incus starting with 25.04 and extended support in 25.10.
They also wrote a native storage driver for Incus so you can remotely attach your Incus server(s) to your TrueNAS server.
stgraber,
Very nice insights here! Also, great notes on the storage driver for Incus and remotely attaching Incus servers to TrueNAS. Are you currently using Incus for your home lab? Curious how many are using it as a platform as of yet.
Brandon
I’m the Incus maintainer 😉
stgraber,
Very nice, so good to have you comment here on the post and share insights on the project. Any other roadmap of features you want to share here would be awesome too! Thanks again.
Hello Brandon I’m a new home labber and i got my 1st network card old nc523sfp 2 10 gigabit ports im trying to get it working but it became a hassle you suggest me anything to do with it appreciate it 😅
Yea, so basically another hack tech blogger wannabe writing about something he doesn’t understand. Why in the world would you ever try to run a hypervisor inside of another hypervisor? Why in the world would you want a hypervisor OS that needs to be rebooted every time they release an update?
Absolute garbage as a reliable base on which to run your other apps.
I love it when newbies who don’t understand infrastructure AT ALL make comments like this. Immutable OS’es are where it at bro. Some how some of the best platforms to run resources in the data center are immutable, Talos Linux, MicroOS, and Core OS to name others besides IncusOS. And running in Proxmox is for testing, LOL like we all do. Give me a break.