If you have been keeping up with my home lab projects lately, you know I have been playing around with a lot of different reverse proxies and learning as much as I can about these. Traefik has been my recent go to in the home lab. However, there is another reverse proxy that is simple and effective and it also aligns with infrastructure as code principles. It is called Caddy and it is often described as simpler than Traefik and many like it better. Let’s learn more about it and why it may be the simplest reverse proxy you can use for your docker setup.
Quick primer on why you need a reverse proxy
In case you are wondering why you need a reverse proxy, these are used to expose your web services that you are running in Docker and even physical hosts, APIs, etc. A reverse proxy accepts the incoming requests and then routes them to the right service on the backend.
In addition, modern reverse proxies allow you to make SSL termination very easy. These proxies have built-in Let’s Encrypt support that automatically issues these certificates for your backend services. So, even though your container may be serving out a service on plain-text port 80 or 8000 or 3000, you can make sure these are only reachable via the HTTPS URL that users need to navigate to in the browser.
I, like many, have used Nginx Proxy Manager and Traefik as my typical go-to solutions. However, in 2025, Caddy is another reverse proxy that is gaining traction.
What is Caddy?
So, to learn more about Caddy, it is an open-source web server and a reverse proxy that is written in Go. It was designed originally to terminate TLS by automatically handling the certificate lifecycle with Let’s Encrypt certificates. Caddy has ow evolved into a fully featured reverse proxy that also has features like load balancing, HTTP/3 support and automatic HTTPS.
A few of the features that make it worthwhile are the fo
- Automatic HTTPS
- Simple configuration syntax that most can read and edit
- Docker support out of the box
- Modern features built in like HTTP/3 and metrics endpoints
Why use Caddy in a home lab?
Well, we have established the fact that most of us need to run some type of reverse proxy to front our web services and terminate SSL in our home labs. Most are running multiple services like dashboards, monitoring tools, Grafana, Nextcloud, custom Docker projects, etc. If you expose all of these without a reverse proxy, it would mean you are having to manage multiple ports, SSL certificates, and firewall rules for each one, individually.
Caddy makes a good choice since it is fairly easy to setup and it provides the automatic HTTPS configuration that most are looking for in regards to their services. Also, it is simple to configure. Just as a comparison, Nginx can require dozens of lines of configuration for a single host rule. Caddy configs are human-friendly. You can get a site online with just a few lines.
It also has good Docker integration. Caddy works very good in containerized setups. You can mount a Caddyfile into the container and let it handle all your routes. Being written in Go, it is fast, secure, and lightweight. It makes it perfect for small servers or mini PCs.
When you compare Caddy with Nginx Proxy Manager, NPM is still a solid choice, but it requires a MariaDB backend. Traefik is one of my favorites and one that I use as my primary reverse proxy, but the learning curve can feel steep with labels and middlewares configuration. Caddy seems to hit a sweet spot of being both simple and infrastructure as code friendly.
Comparing Caddy to Nginx Proxy Manager and Traefik
| Feature | Caddy | Nginx Proxy Manager (NPM) | Traefik |
|---|---|---|---|
| Ease of Setup | Very simple, minimal config, automatic HTTPS out of the box | Easiest for beginners thanks to web GUI | Moderate, requires labels or YAML config |
| TLS/HTTPS | Fully automatic cert issuance and renewal (Let’s Encrypt, ZeroSSL) | Let’s Encrypt support via GUI, requires port 80/443 open | Automatic via ACME, supports DNS/HTTP challenge |
| Wildcard Certificates (DNS Challenge) | Yes, via DNS provider plugins (needs plugin build) | Limited, not as flexible | Yes, built-in DNS challenge support with many providers |
| Configuration Style | Text-based Caddyfile (declarative, simple) or JSON API | Web GUI only (not IaC-friendly) | Labels in Docker Compose or CRDs in Kubernetes (highly IaC-friendly) |
| GUI Availability | No native GUI (file/API driven only) | Yes, polished web UI | No GUI, config via labels/files |
| Ecosystem & Plugins | Smaller ecosystem, but supports modules (DNS, auth, etc.) | Limited to built-in GUI features | Large ecosystem, first-class support in Docker/K8s |
| Kubernetes Support | Usable via custom manifests but not first-class | No native Kubernetes support | Strong Kubernetes integration (Ingress, CRDs, Helm charts) |
| Resource Usage | Lightweight Go binary | Relatively heavier (MariaDB backend required) | Lightweight but more complex configs |
| Best For | Users that want simplicity, automatic HTTPS, clean configs | Beginners that want a GUI and don’t care about IaC | Power users running Docker Swarm or Kubernetes and want full automation and IaC alignment |
Installing Caddy with Docker
Now let’s get into the fun part, deploying Caddy in your home lab. We will use Docker Compose, which makes it easy to manage containers and configs.
Step 1: Create a directory
On your Docker host, create a folder for Caddy. This can be anywhere and serves the purpose to contain your files and resources for Caddy, like the docker-compose.yml file, Dockerfile, .env file, and Caddyfile.
mkdir -p /opt/caddy
cd /opt/caddy
Step 1: Create a Dockerfile
Since we are going to build in the cloudflare DNS plugin with the container, we are going to use a Dockerfile to add the cloudflare plugin.
FROM caddy:2-builder AS builder

RUN xcaddy build \
    --with github.com/caddy-dns/cloudflare

FROM caddy:2

COPY --from=builder /usr/bin/caddy /usr/bin/caddy
Step 2: Write a Docker Compose file
Create a docker-compose.yml file. here we are using the Docker file as the build stanza for the container. It will build the image and then use that for our docker-compose setup.
services:
  caddy:
    build:
      context: .
      dockerfile: Dockerfile
    container_name: caddy
    restart: unless-stopped
    ports:
      - "80:80"
      - "443:443"
    environment:
      - CLOUDFLARE_EMAIL=${CLOUDFLARE_EMAIL}
      - CLOUDFLARE_API_TOKEN=${CLOUDFLARE_API_TOKEN}
    volumes:
      - ./Caddyfile:/etc/caddy/Caddyfile
      - ./data:/data
      - ./config:/config
    env_file:
      - .env
This configuration maps ports 80 and 443 for HTTP and HTTPS, mounts a Caddyfile, and stores persistent data and configs in local folders.
.env file
In this .env file, we will place in our Cloudflare email address and Cloudflare API token.
# Cloudflare credentials for DNS challenge
# Replace with your actual Cloudflare email and API token

CLOUDFLARE_EMAIL=<your email>
CLOUDFLARE_API_TOKEN=<your token>

# To get your Cloudflare API token:
# 1. Go to https://dash.cloudflare.com/profile/api-tokens
# 2. Click "Create Token"
# 3. Use "Custom token" template
# 4. Set permissions:
#    - Zone:Zone:Read
#    - Zone:DNS:Edit
# 5. Set Zone Resources to include your domain(s)
# 6. Copy the generated token and paste it above
Step 3: Create the Caddyfile
Create a file named Caddyfile in the same directory:
{
    # Global options
    email {env.CLOUDFLARE_EMAIL}
}

# Reverse proxy configurations for your domain
# Replace yourdomain.com with your actual domain and backend services with your actual services

yourdomain.com {
    tls {
        dns cloudflare {env.CLOUDFLARE_API_TOKEN}
    }

    reverse_proxy localhost:8080 {
        # Optional: Add headers for better proxy behavior
        header_up Host {host}
        header_up X-Real-IP {remote_host}
        header_up X-Forwarded-For {remote_host}
        header_up X-Forwarded-Proto {scheme}
    }
}

api.yourdomain.com {
    tls {
        dns cloudflare {env.CLOUDFLARE_API_TOKEN}
    }

    reverse_proxy localhost:3000 {
        # Optional: Add headers for better proxy behavior
        header_up Host {host}
        header_up X-Real-IP {remote_host}
        header_up X-Forwarded-For {remote_host}
        header_up X-Forwarded-Proto {scheme}
    }

    # Optional: CORS headers for API
    header Access-Control-Allow-Origin "*"
    header Access-Control-Allow-Methods "GET, POST, PUT, DELETE, OPTIONS"
    header Access-Control-Allow-Headers "Content-Type, Authorization"
}

app.yourdomain.com {
    tls {
        dns cloudflare {env.CLOUDFLARE_API_TOKEN}
    }

    reverse_proxy localhost:8081 {
        # Optional: Add headers for better proxy behavior
        header_up Host {host}
        header_up X-Real-IP {remote_host}
        header_up X-Forwarded-For {remote_host}
        header_up X-Forwarded-Proto {scheme}
    }

    # Optional: Enable compression
    encode gzip

    # Optional: Add security headers
    header Strict-Transport-Security "max-age=31536000; includeSubDomains"
    header X-Content-Type-Options "nosniff"
    header X-Frame-Options "DENY"
    header X-XSS-Protection "1; mode=block"
}

# Wildcard subdomain example for any subdomain
*.yourdomain.com {
    tls {
        dns cloudflare {env.CLOUDFLARE_API_TOKEN}
    }

    reverse_proxy localhost:8082 {
        # Optional: Add headers for better proxy behavior
        header_up Host {host}
        header_up X-Real-IP {remote_host}
        header_up X-Forwarded-For {remote_host}
        header_up X-Forwarded-Proto {scheme}
    }
}

# Static file serving example
static.yourdomain.com {
    tls {
        dns cloudflare {env.CLOUDFLARE_API_TOKEN}
    }

    root * /var/www/html
    file_server
}
In this example, yourdomain.com is the hostname you want to use (replace with your actual domain). yourservice:8080 is the backend service you are proxying, such as Grafana running on port 8080 inside Docker.
When Caddy sees this, it will automatically issue a Let’s Encrypt certificate for yourdomain.com and proxy traffic to the service.
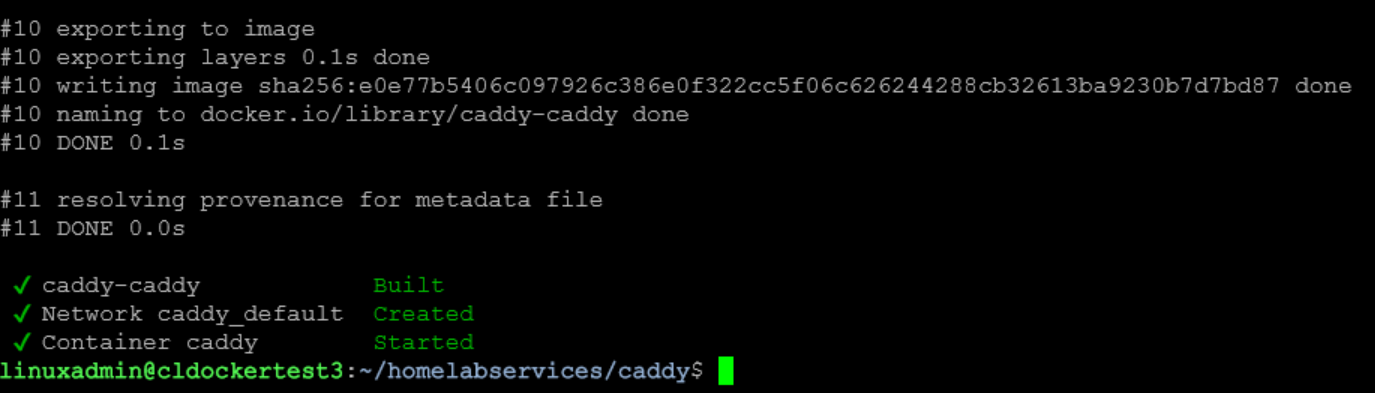
Step 4: Start Caddy
To start Caddy, we run the following command.
docker compose up -dCaddy will spin up, fetch certificates, and start handling traffic.
Testing it out
Browse out to your https://yourdomain.com domain URL and you should see your proxied service. The SSL certificate should already be valid and active with no manual work.
To check logs:
docker logs -f caddyYou will see details about certificate provisioning and request handling.
Adding more hosts
Once you have one service working, adding more is easy. Just extend the Caddyfile:
grafana.mydomain.com {
    reverse_proxy grafana:3000
}

nextcloud.mydomain.com {
    reverse_proxy nextcloud:8080
}
Each block defines a hostname and backend. Caddy handles the rest, including HTTPS certificates.
You can also add extra features such as:
- Basic authentication for protecting services
- Load balancing across multiple containers
- Wildcard certificates for subdomains
When you might want to choose something else
While Caddy is excellent for simplicity, there are times when you might still choose another reverse proxy tool. If you absolutely need to have a GUI for management, Nginx Proxy Manager is still easier for most people. For very dynamic and production-like environments, Traefik is probably going to be a notch better. Also, some of the enterprise features are only available in the Caddy commercial build which you have to pay for. That said, for most home labs, especially smaller ones, Caddy is more than capable.
Wrapping up
I think in 2025, Nginx Proxy Manager and Traefik are my main two go-to reverse proxies for the home lab. However, I think Caddy is quickly becoming one that I am going to start using and recommending. Like Traefik it can fully support your infrastructure as code objectives and since it can run in Docker it is one of the easiest to get running (especially with this guide 🙂 ).
Let me know. Are you running Caddy or thinking about running it? If you have tried it and went to something else, what made you switch? I would like to hear your thoughts in the comments.
Google is updating how articles are shown. Don’t miss our leading home lab and tech content, written by humans, by setting Virtualization Howto as a preferred source.
About The Author


Nice article, Brandon! One caveat, though. I think it’s worth mentioning that Traefik does have a GUI (for monitoring only) in the comparison table. I do have to try Caddy since I have both NPM and Traefik.
Jorge,
Yes great point there. I will make that note. Although it isn’t know for its GUI like NPM, it is a great tool to see what is going on with routes, etc.
Brandon