One of the most important parts of any virtualization solution is the networking. It doesn’t matter how awesome your storage is or how many capabilities your hypervisor has if you can’t control the flow of the bits. Proxmox is built upon native Linux networking technologies which are awesome and can do just about anything you need it to do. With Linux bridges and VLANs, you can segment traffic, you can setup link aggregation, jumbo frames, storage networks, dedicated management interfaces, and the list goes on and on. In this post we will explore Proxmox networking best practices and configurations for home lab to be aware of.
Planning your Proxmox network
I think the first step ANYONE should do designing any network is before you toggle any configurations, sit down and plan it out. Thinking through things isn’t just an exercise, it will help you understand how you want to design the network. Sketch out the different segments you want to implement and what if any public services you want to host and how you want the traffic to be delivered.
I suggest that you think about the following segments:
- Management segment: A dedicated subnet such as 192.168.10.0/24 to keep Proxmox’s web GUI (TCP/8006), SSH (TCP/22), and clustering traffic apart from other workloads and your other virtual machines and network traffic.
- Workloads segment: You may actually have several workloads segments (VLANs) for VMs and containers so these can live on their own networks in your home lab. You might group test environments on VLAN 20 and production-style services on VLAN 30 as an example, each with its own IP range for clear separation and routing policies.
- Storage segment: If you run iSCSI, NFS, or Ceph, you need to isolate storage traffic on its own VLAN to prevent backup or replication operations from congesting your management or VM networks and it also serves the purpose to make sure your storage traffic isn’t having to compete with other traffic types as well. Storage performance is key in virtualized environments.
- DMZ/public segment: Any VMs you expose to the outside world like web servers, reverse proxies, or VPN gateways need to live in a firewall-protected DMZ VLANi. This limits the blast radius if something is compromised.
Document your switch port mappings, router/firewall rules, and IP schemes. You will not be able to thank yourself enough if you keep a living topology diagram. After the planning phase, you will be able to move forward with configuration in a very deliberate and thoughtful way which helps to avoid mistakes or overlooking something. OK, now that we have that out of the way, let’s dive into the networking concepts we need to be familiar with.
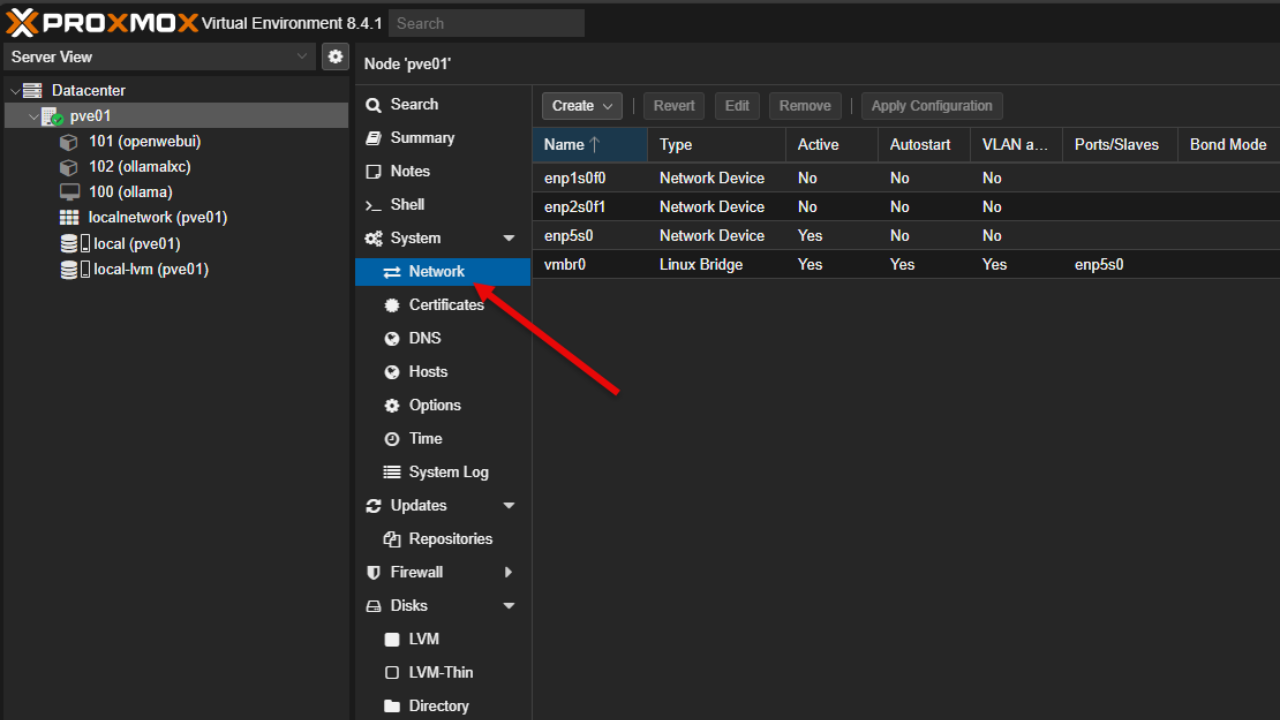
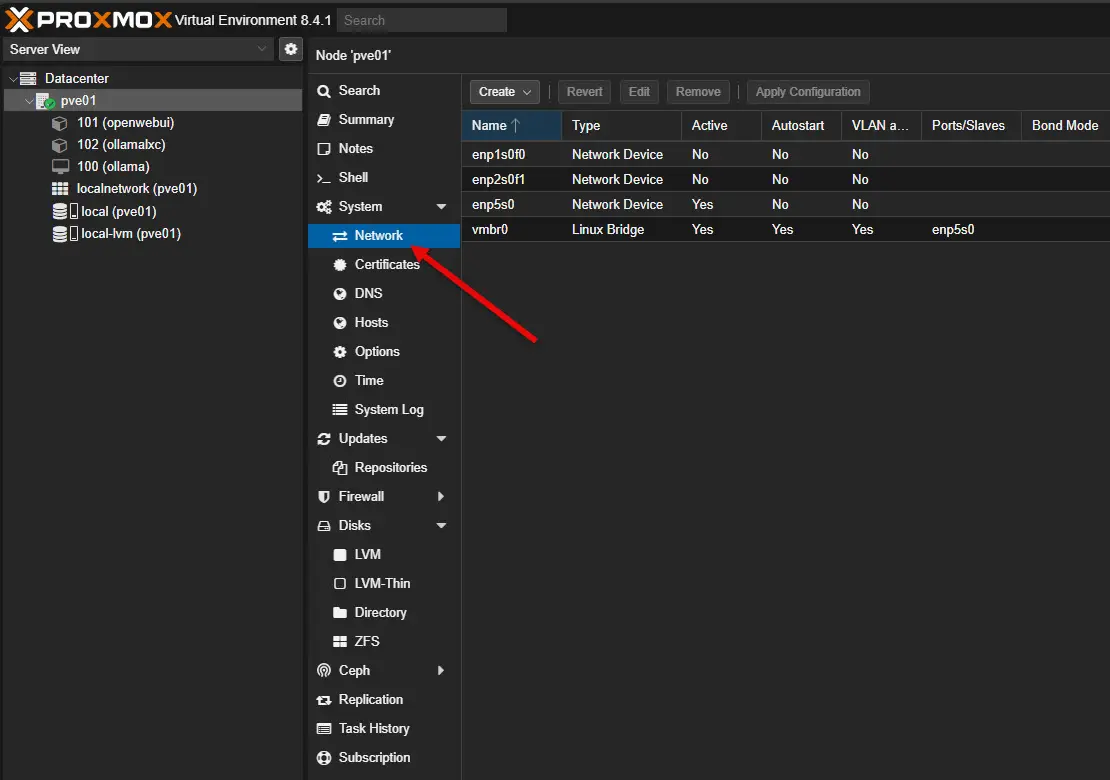
Understanding Linux Bridges
Proxmox uses Linux bridges (logical Layer 2 switches) to bind virtual NICs inside VMs and containers to physical network interfaces on the host. A bridge allows traffic to flow between virtual guests and the outside world as if they were plugged into a physical switch.
Creating a Bridge
Here’s a basic snippet from /etc/network/interfaces illustrating a management bridge:
auto vmbr0iface vmbr0 inet static
    address 192.168.10.11/24
    gateway 192.168.10.1
    bridge-ports eth0
    bridge-stp off
    bridge-fd 0
bridge-ports eth0tells Proxmox to enslave the physical NICeth0under the bridge. Virtual machines attached tovmbr0will send and receive oneth0.bridge-stp offdisables Spanning Tree Protocol on the host side, which is acceptable if your physical switch port is already properly configured to avoid loops. This speeds up VLAN trunk initialization.bridge-fd 0sets the forwarding delay to zero. Normally a bridge waits a few seconds before forwarding after topology changes; zero delay helps VMs come up faster at the cost of trusting your topology design.
You can enslave multiple interfaces (or bonds) in a bridge for redundancy or combined bandwidth. Naming bridges clearly—like vmbr-mgmt or vmbr-storage—helps keep complex setups understandable.
Check out my in-depth video on Proxmox networking here:
Isolating traffic with VLANs
VLANs are an essential part of any network that performs well and is secure. VLANs provide (802.1Q tags) that segment a single physical network into multiple logical networks. In Proxmox, you create VLAN sub-interfaces on top of your NIC, then connect them to separate bridges. If you want VLAN 100 for Docker workloads as an example, first, you would define a VLAN sub-interface:
auto eth0.100
iface eth0.100 inet manual
vlan-raw-device eth0eth0.100names the new interface carrying VLAN tag 100vlan-raw-device eth0tells Proxmox to tag outgoing frames with 100 and only accept frames for that VLAN.
Next, we need to bind it into its own bridge:
auto vmbr100
iface vmbr100 inet static
    address 10.100.0.1/24
    bridge-ports eth0.100
    bridge-stp off
    bridge-fd 0
Now if you attach any VM o vmbr100 you will get an IP in 10.100.0.0/24 range and its traffic tagged as VLAN 100 on the physical switch. Make sure your switch port is set to “trunk” mode. This allows VLAN 100 (and any others you need to add) to flow.
Link Aggregation for redundancy and better throughput
If your switch supports LACP (Link Aggregation Control Protocol), you can combine multiple NICs into a single interface bond in Proxmox. This gives you higher bandwidth and automatic failover if one cable fails. Trust me, having more than one cable uplinking your Proxmox host is a great idea. It gives you the flexibility to be able to unplug cables if needed in the future for maintenance or other needs. Also, accidentally unplugging something doesn’t bring everything down.
Configuring a bond in Proxmox
Here is an example of configuring a bond in Proxmox:
auto bond0
iface bond0 inet manual
    bond-slaves eth0 eth1
    bond-miimon 100
    bond-mode 802.3ad
    bond-lacp-rate 1
bond-slaves eth0 eth1lists the member interfaces.bond-mode 802.3adenables LACP. Keep in mind your switch must also be configured for LACP on your port uplinksbond-miimon 100checks link status every 100 milliseconds to detect failuresbond-lacp-rate 1sets LACP to “fast” mode. This tells it to exchange control packets every second for quicker convergence
Once the bond is up, bridge over it just like a physical port:
auto vmbr0
iface vmbr0 inet static
    address 192.168.10.11/24
    gateway 192.168.10.1
    bridge-ports bond0
    bridge-stp off
    bridge-fd 0
If either cable goes down, traffic will continue to flow on the other link, and depending on your switch’s hash algorithm, you will see aggregate throughput across both links for better performance.
Tuning MTU and jumbo frames
On networks carrying large data flows like Ceph or iSCSI, enabling jumbo frames (usually an MTU of 9000) helps reduce CPU overhead. It does this by sending more data per packet.
You need to make sure that all switches and NICs between your Proxmox hosts and storage targets support 9000 bytes. Mismatched MTUs result in silent packet drops.
Configuring MTU
Here is how you adjust the MTU value when configuring the bridge:
auto bond0
iface bond0 inet manual
    mtu 9000
    bond-slaves eth0 eth1
    bond-mode 802.3ad
    bond-miimon 100
And on the storage bridge:
auto vmbr-storage
iface vmbr-storage inet static
    address 10.0.1.11/24
    bridge-ports bond0
    mtu 9000
    bridge-stp off
    bridge-fd 0
Finally, you can verify end-to-end with a ping that forces jumbo frames to see whether or not it is successful:
ping -M do -s 8972 10.0.1.1Here, -M do tells the kernel not to fragment, and -s 8972 plus 28 bytes of headers equals 9000.
Management interface hardening
Security is definitely important when thinking about Proxmox networking. Setting up vmbr-mgmt on its own VLAN allows you to use firewall rules that only allow SSH and HTTPS from a trusted jump host can access. On your main router or firewall, you can block any other subnets from reaching that VLAN.
Lock Down SSH
Another good idea for security purposes is to lock down SSH. To do that, edit /etc/ssh/sshd_config to disable password or root logins:
PermitRootLogin no
PasswordAuthentication no
This means you will need to use SSH keys for authentication which is more secure. Changing the default port (e.g., to 2222) can reduce noise from automated scans. Keep in mind that “security through obscurity” in itself isn’t a guarantee for keeping things secure and it isn’t a replacement for key-based auth. It is just another “layer” of security that you can add.
Use the Proxmox firewall
Under Datacenter → Firewall in the GUI, you can set up rules at the datacenter, node, or VM level. For example, on the datacenter INPUT chain, you can restrict traffic such as only permitting:
- TCP 8006 (Proxmox GUI)
- TCP 22 (SSH)
- ICMP (ping from your trusted network)
All other traffic is dropped by default. Then, for any VM you want isolated, apply stricter rules on its vmbr interface. I like to apply the “broad brushstrokes” of security at the firewall level, such as blocking entire subnets. Then more granular security firewall rules at the Proxmox host or VM level which can be easier to tweak.
Monitoring and troubleshooting
Monitoring is also a key part of Proxmox networking best practices. Here are a few command line commands that can definitely help with visibility and seeing what is going on:
ip addrshows interface states and MTU valuesbridge linkdisplays which ports are up on each bridgecat /proc/net/bonding/bond0reveals which slave link is active and error counts
Traffic captures
Tools like iftop or nload installed on the Proxmox host let you watch bandwidth per interface. If you need historical trends, deploy Prometheus with node_exporter on each Proxmox node, then visualize in Grafana dashboards.
Packet Captures
To run a capture, you can do something like:
tcpdump -i vmbr0 port 80This captures HTTP traffic on the bridge, letting you see source/destination IPs, TCP flags, and any retransmissions that hint at congestion or MTU mismatches.
Documentation
Treat your network config like any other code like IaC. I like to have a copy of my Proxmox config stored in git.
- Version-Control: Store
/etc/network/interfaces, your Proxmox firewall XML exports, and switch configurations (where possible) in a Git repository. - Diagrams: Save your topology diagrams in a folder alongside your network code. Keep these updated whenever you add a VLAN or host
- Change logs: In your Git commits, explain why you tweaked MTU or added a new bond. This will be golden a few months later if you are wondering why you have something configured a certain way.
Proxmox networking best practices cheat sheet
I have created a Proxmox networking best practices cheat sheet for helping ones have a quick reference guide to understanding Proxmox networking and which commands to use where. Download it below:
Wrapping up
A well-designed network will pay for itself many times over when you are running “production” workloads in the home lab or in a real production environment. Thoughtful design is an area that most may skip over, but it is an essential part of designing, configuring, and managing a Proxmox environment. Keep things in Git in terms of your configs and it will allow you to have a source of truth that you can reference later on when you need to troubleshoot or even for disaster recovery. Let me know in the comments any other best practices you have discovered working with Proxmox networking.
Google is updating how articles are shown. Don’t miss our leading home lab and tech content, written by humans, by setting Virtualization Howto as a preferred source.
About The Author