Everyone starts out using the default bridge network in a Docker container environment. And, if you are running standalone Docker hosts there is likely nothing wrong with using this network type because it just works. However, like any tool, knowing the details of other functionality can help to have the configurations you need with different use cases. Over time is a great idea to experiment with the other docker network types. What are these? These include bridge, macvlan, and overlay. Let’s take a look at each and when they are used, as well as how to configure them.
Docker networking choices
Choosing the right network type in Docker networking is an important decision. The default bridge network however, generally works in 99% of the cases as long as you connect your containers to the same bridge if they need to talk to one another.
Keep in mind that if you connect your containers to the wrong network or wrong network type, you can see certain issues crop up, including:
- Isolated containers: Containers may not be able to communicate with containers they need to communicate with, such as a web frontend not able to “see” a web backend database server
- Performance issues: NAT’ing or encapsulation can add unwanted latency when it isn’t needed
- Scaling problems: Some drivers simply won’t span beyond a single host
- Overly complex: If you don’t need a complex setup, using an overlay or other network type when it isn’t needed adds complexity and introduces issues
1. Bridge Networks: Ideal for Single-Host Stacks
A Docker bridge network is created on a single Docker host and only lives on one host. This is the default network configuration when you install Docker. It creates a default bridge network that assigns IP addresses to containers that are connected to that bridge. Usually, the bridge network is in the range or looks like 172.17.0.0/16.
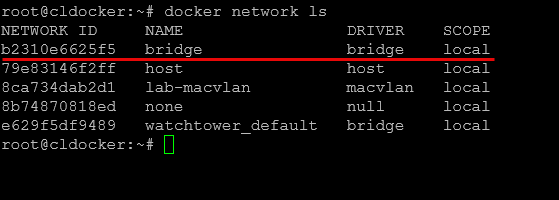
Containers then communicate using the host’s virtual bridge interface, docker0.
When do you use the default bridge or bridge networks?
These are easy and simple to use if you have a single Docker host and you have many containers running on the same host, like a web server, database, and monitoring all on the same host whether virtual or physical.
Also, it is setup by default and ready to go, so you don’t have to create anything in addition to what Docker automatically spins up for you. It also creates basic isolation for you when you create user-defined bridges. These will not be able to talk to one another unless you explicity connect them.
Exampel of creating a monitoring network and stack
Below is something you might do on your Docker container host to create a monitoring network and stack.
#Create the docker network
docker network create monitor-net

#Create a prometheus container and connect it to the monitoring network
docker run -d --network monitor-net \
  --name prometheus prom/prometheus

#Create a grafana container and connect it to the monitoring network
docker run -d --network monitor-net \
  --name grafana grafana/grafana
Prometheus and Grafana get private IPs on monitor-net. All traffic stays internal unless I publish ports, keeping firewall rules simple.
Pros & Cons
- Pros
- Zero extra configuration
- Fast packet path (no encapsulation)
- Solid default isolation
- Cons
- Host-only—won’t span multiple machines
- Potential subnet conflicts if you create multiple bridges
- Hair-pin NAT for published ports
2. Macvlan
Another interesting Docker network configuration is the macvlan. With the macvlan driver, each container gets its own MAC address and is attached directly to your physical LAN. In the default configuration, Docker uses its internal IPAM to assign static IPs from the subnet you specify. So, this is an important aspect. It doesn’t automatically request leases from your DHCP server, which is a bit of a bummer and always has been.
When to Use It
- LAN services: Apps that you need to appear as devices on your network (e.g., VoIP, network printers) etc, this is a type of network that can allow that
- Avoiding NAT: Avoid double-NAT and hair-pin routing through the host
- Predictable IP address: Great for services that need an IP address without port mapping
Configuring Static IPs
Check out the configuration examples below on how to create the macvlan network and
Create the macvlan network, pointing to your host interface (eth0): docker network create -d macvlan --subnet=10.1.149.0/24 --gateway=10.1.149.1 -o parent=ens192 lab-macvlan

Launch a container with a static IP: docker run -d --network lab-macvlan --ip 10.1.149.150 --name zigbee2mqtt my-zigbee-image
Enabling True DHCP (Optional)
If you want containers to actually request a lease from your DHCP server, you must do one of the following
- Run a DHCP client inside the container
- Omit
--subnet/--gatewaywhen creating the network so Docker doesn’t pre-assign IPs. - Include and start a client like
dhclientordhcpcdin your container’s startup script.
- Omit
- Use a DHCP IPAM plugin
- Leverage a community or experimental plugin that integrates DHCP into Docker’s IPAM: devplayer0/docker-net-dhcp: Docker network driver for networking on a host bridge with DHCP-allocated IP addresses
Without one of these approaches, your macvlan containers will only ever use static IPs assigned by Docker.
Example
I needed my Zigbee2MQTT container to integrate seamlessly with my smart-home controller. By statically assigning it 10.1.149.150 on the macvlan network, my router saw it as a full-blown LAN device and no port mappings were required. Voice-assistant integrations worked very well.
Pros & Cons
- Pros
- Containers appear as native LAN hosts
- No port mapping or NAT overhead
- Straightforward firewall rules
- Cons
- Host cannot natively ping macvlan containers without a shim (look at the Troubleshooting section)
- Docker’s macvlan driver won’t do DHCP out of the box, you will need a plugin or other workarounds
- Risk of MAC flooding if misconfigured
3. Overlay Networks for Swarm
Overlay networks use VXLAN to encapsulate container traffic across multiple Docker hosts. In Swarm or Kubernetes, a key-value store tracks IP allocations, and built-in DNS/Routing Mesh handles service discovery.
When to Use It
- Distributed services: Databases, queues, and web servers across multiple hosts like in Swarm
- Built-in discovery: DNS and load-balancing come out of the box which is cool
- Encrypted traffic: Optional VXLAN encryption keeps container traffic private
Configuring Overlay in Swarm
- Initialize Swarm on your manager node:
swarm init --advertise-addr 10.0.0.1 - Create the overlay network:
docker network create -d overlay --attachable webnet - Deploy services onto it:
docker service create --replicas 3 --name web --network webnet nginx
Example
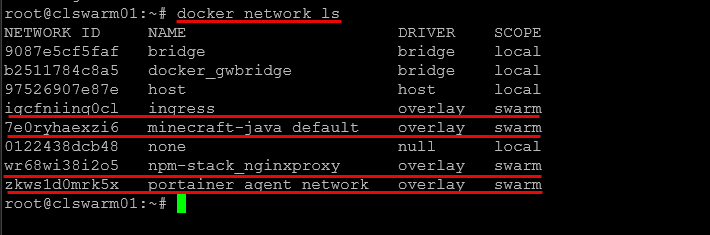
My three-node Docker Swarm clusters takes advantage of the Docker overlay network so that no matter which host the container is running on, connections still flow between the hosts. It means that if you have a Traefik or Nginx Proxy Manager network that incorporates your containers, you can run these across different hosts and they all have connectivity.
Pros & Cons
- Pros
- Multi-host networking that can span across hosts
- Integrated DNS and load-balancing
- Optional encryption for inter-host traffic
- Cons
- CPU overhead from VXLAN encapsulation
- Requires orchestration (Swarm/K8s)
- Potential MTU fragmentation – you may need to adjust overlay MTU or host MTU as needed
Quick Comparison
| Feature | Bridge | Macvlan | Overlay |
|---|---|---|---|
| Multi-host | No | No | Yes |
| Native LAN IPs | No (NAT only) | Yes but static only | No these are encapsulated |
| Requires Orchestration | No | No | Yes (Swarm/K8s) |
| Performance Overhead | Minimal | Minimal | Moderate as packets are encapsulated |
| Common Use Case | Single-host and containers and works for most use cases | LAN apps | Distributed microservices |
Troubleshooting Cross-Host Connectivity
- Host Macvlan Isolation – By default, the host can’t ping macvlan containers. Create a shim interface on the host:
ip link add macvlan-shim link eth0 type macvlan mode bridge ip addr add 192.168.1.200/32 dev macvlan-shim ip link set macvlan-shim up - Overlay MTU Mismatch – If you see “fragmentation needed” errors or sluggish performance, lower the VXLAN MTU:
docker network create -d overlay --opt com.docker.network.driver.mtu=1400 --attachable webnet - Firewall for VXLAN – Overlay uses UDP port 4789. Open it on all hosts:
ufw allow udp from any to any port 4789 - Bridge Subnet Conflicts – Multiple bridges with overlapping subnets cause routing chaos. Inspect and adjust:
docker network inspect <network-name> - Swarm DNS Failures – If
webwon’t resolve to its tasks, ensure all nodes share identicalcluster-storeconfig in/etc/docker/daemon.json, then restart Docker and checkdocker service ps web.
Wrapping up
My rule of thumb is just to use the bridge networks most of the time as this is sufficient for most containers and and use cases in the home lab. Macvlan is used when you need containers to connect to LAN segments or subinterfaces like VLANs on your Docker hosts. Just remember you’ll need to configure IP addresses yourself and manage these unless you run DHCP clients inside the container or use a plug as we mentioned earlier.
Google is updating how articles are shown. Don’t miss our leading home lab and tech content, written by humans, by setting Virtualization Howto as a preferred source.
About The Author