I caught wind a few weeks back of a new tool that I know I hadn’t heard about as of yet. It is called ProxMenux and after 5 minutes of using it, I knew that it is probably the best Proxmox tool that everyone needs to know about but that you probably aren’t using as of yet. Well, that is what this post is for. I want to spread the word about this new and exciting tool for managing your Proxmox environment. Let’s dive in and take a look and see what ProxMenux is all about.
What Is ProxMenux?
In case you haven’t heard about ProxMenux as of yet, let’s talk about what it is and some of the key features of the tool. Proxmenux is an open-source project and tool that provides a menu-driven interface for managing your Proxmox VE server environment. Instead of you having to rely on memorized commands or jumping between screens in the GUI, Proxmenux allows you to have simple menus to perform rather complex or complicated tasks and you can click through and do things you need to do quickly.
It provides a text-based interface that allows you to navigate and perform administrative functions, including even spinning up virtual machines or LXC containers with a few simple number selections on the text-based menus.
Keep in mind, the purpose of the project is not to be a replacement for the web UI or native CLI with Proxmox, but rather it is to be an enhancement to those. Especially for running very CLI-driven processes that you may have needed to drop to the CLI to perform, Proxmenux allows you to perform those commands from the menus it provides.
You can view the official documentation and site found on GitHub to learn more about Proxmenux: https://macrimi.github.io/ProxMenux/docs/introduction.
Features of ProxMenux
Let’s take a look at a few of the key features that are offered by ProxMenux and what it can do for your Proxmox workflows.
- System resource overview: Take a look at your system performance, CPU, RAM, and disk usage
- VM and LXC: You can create, delete, start, stop, or restart virtual machines and containers
- Network config: It allows you to setup and manage bridges, physical interfaces, etc
- Storage management: You can configure and monitor ZFS pools, add disks, and manage storage volumes
- Hardware: It allows you to detect and manage PCI devices, IOMMU status, and it helps with passthrough setup
- Proxmox updates: You can install system updates and package upgrades
- Power management: Reboot or shut down the node
Why use Proxmenux for Proxmox management?
There are definitely some great use cases that I can think of with this tool, especially for beginners or ones coming over to Proxmox from something else.
- Helpful for beginners This tool is a great tool for those new to home labs, enthusiasts, learners, and admins who want to have a menu-driven UI compared to remembering or running commands from the CLI
- Faster management: It allows you to get things done quickly without needing to look up commands
- Lightweight: You don’t have to install heavy dependencies or a lot of apps that consume valuable resources
- Good for learning: You can actually learn a lot by using the tool. If you are like me, I learn what is possible by looking at what tools can do sometimes. I think to myself, “wow I never knew about that command or functionality when I see it in these kinds of tools
Installing Proxmenux
One of the things that I really like about this tool is that it is super easy to install. You just run a Bash script for the installation and it installs a few prerequisites that it needs for running the tool.
SSH into your Proxmox VE Server and run the following command to install Proxmenux:
bash -c "$(wget -qLO - https://raw.githubusercontent.com/MacRimi/ProxMenux/main/install_proxmenux.sh)"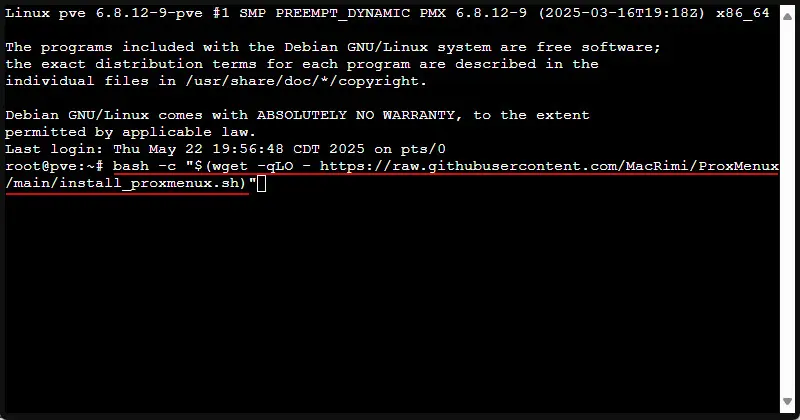
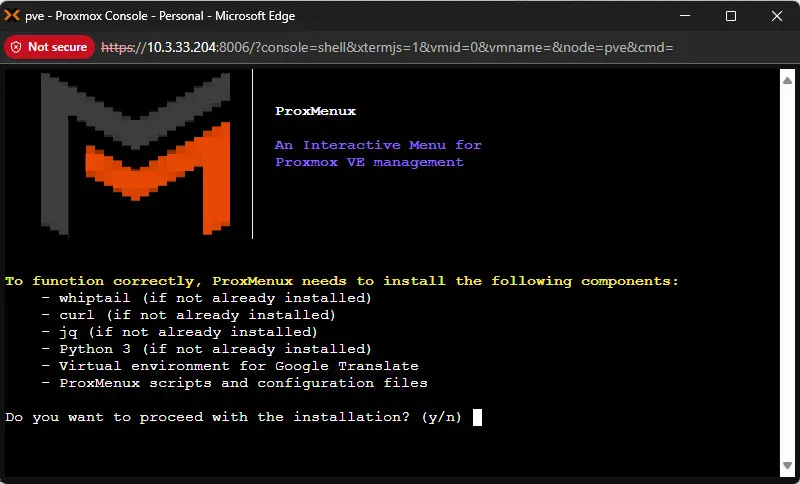
Enter Y to begin the installation of Proxmenux. As you can see below, it will install the following:
- whiptail
- curl
- jq
- Python 3
- Vitual environment for Google Translate
- PrxMenux scripts and configuration files
After the script finishes, you will see the following message that the installation was successful and you need to execute the menu command at the console or terminal.
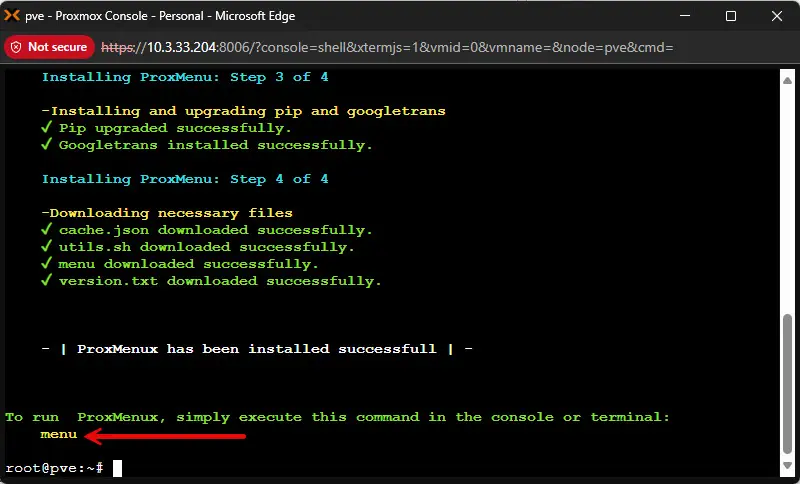
The script performs all the heavy lifting of the installation. It will download the ProxMenux files, set up the directories and permissions, and it will create a shell alias called menu that will launch the Proxmenux interface.
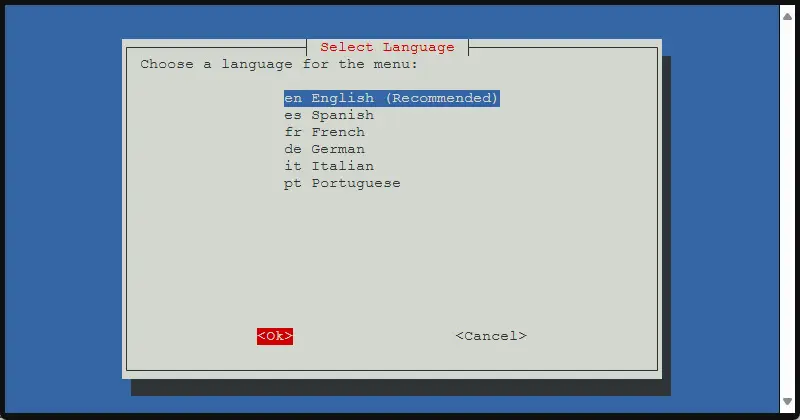
After the installation script completes, one of the first things you will need to do when you launch “menu” for the first time is set the language.
Navigating the ProxMenux Menu System
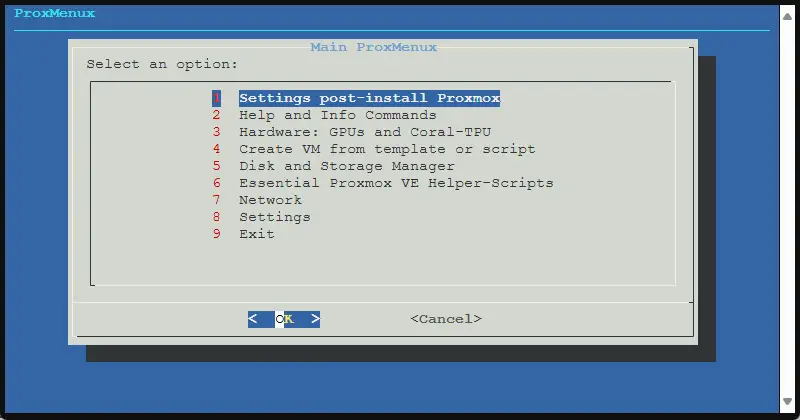
Once launched, you’ll see a clean, numbered interface that looks something like this:
1) Settings post-install Proxmox
2) Help and Info Commands
3) Hardware: GPUs and Coral-TPU
4) Create VM from template or script
5) Disk and Storage Manager
6) Essential Proxmox VE Helper-Scripts
7) Network
8) Settings
9) Exit
Use your keyboard to type the number for the action you want to take. Let’s break down what each menu does:
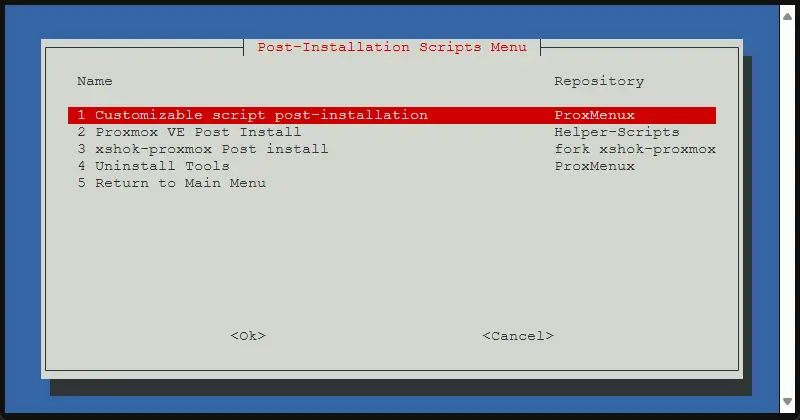
1. Settings post-install Proxmox
On this menu you will find a wide range of tools:
- customizable script post-installation
- Proxmox VE post install
- xshok-proxmox post install
- uninstall tools
- return to main menu
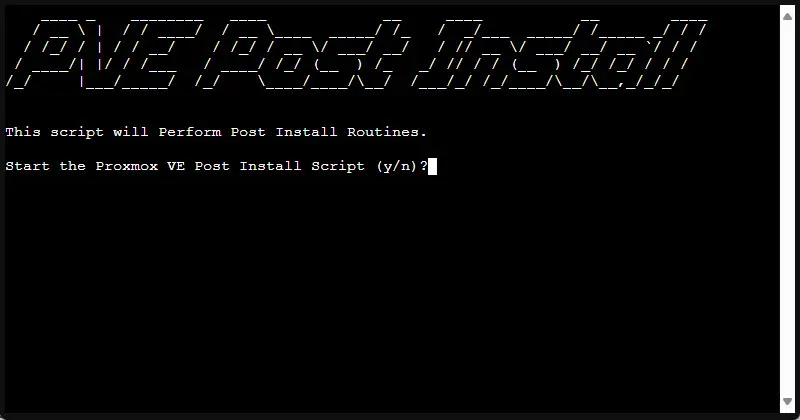
After choosing Proxmox VE Post install:
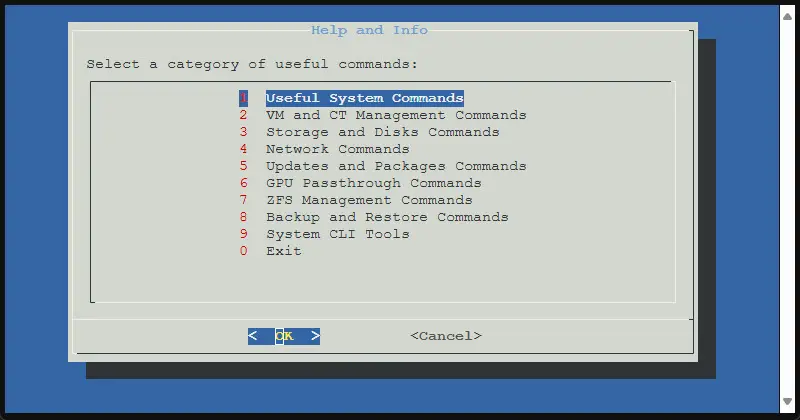
2. Help and info commands
This menu option gives you a wide range of useful commands with Proxmox, including:
- Useful system commands
- VM and CT management commands
- Storage and Disks commands
- Network commands
- Updates and Packages commands
- GPU passthrough commands
- ZFS management commands
- Backup and Restore commands
- System CLI tools
3. Hardware: GPUs and Coral-TPU
On this screen you get options to do the following:
- Add HW iGPU acceleration to an LXC
- Add Coral TPU to an LXC
- Install/Update Coral TPU on the host
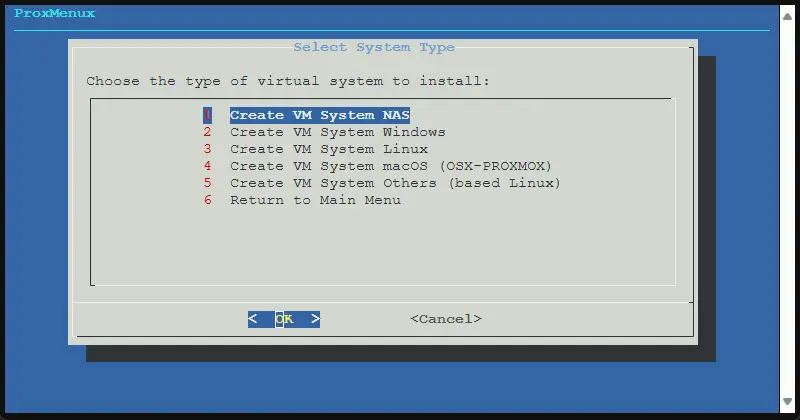
4. Create VM from template or script
I think this one is super cool. It allows you to have many options to automatically create and provision virtual machines based on what you need and does the setup and installing for you. The options include:
- Create VM System NAS
- Create VM System Windows
- Create VM System Linux
- Create VM System macOS (OSX-PROXMOX)
- Create VM System Others (based Linux)
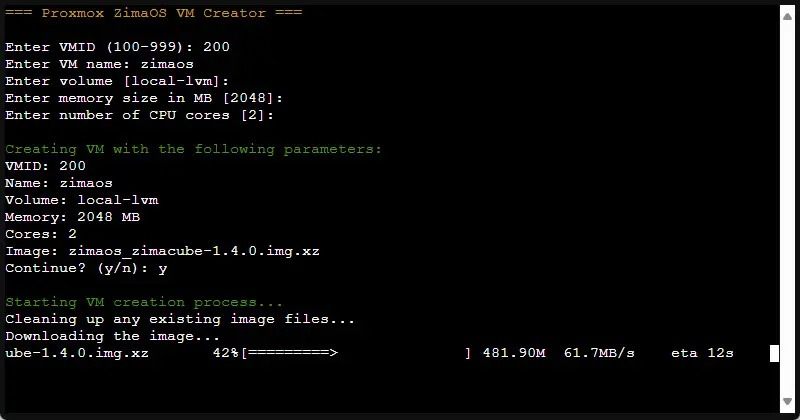
It allowed me to easily setup a new ZimaOS virtual machine without any setup on my part required. Just choose your NAS that you want to install and it will do the heavy lifting for you.
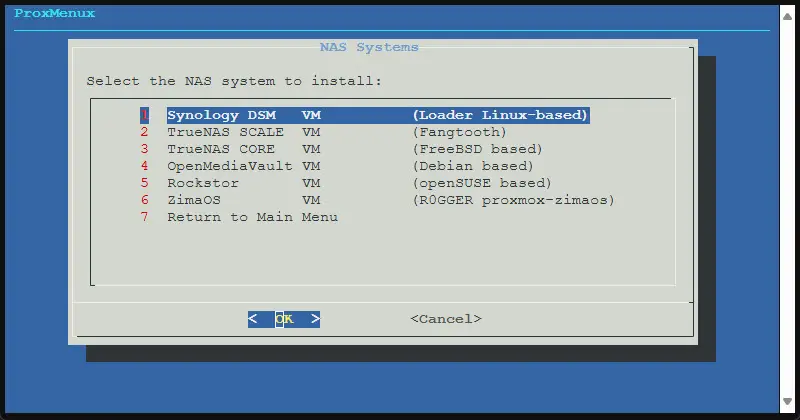
After selecting ZimaOS, it asks you a few questions and then starts pulling the operating system and setting it up for you, pretty cool!

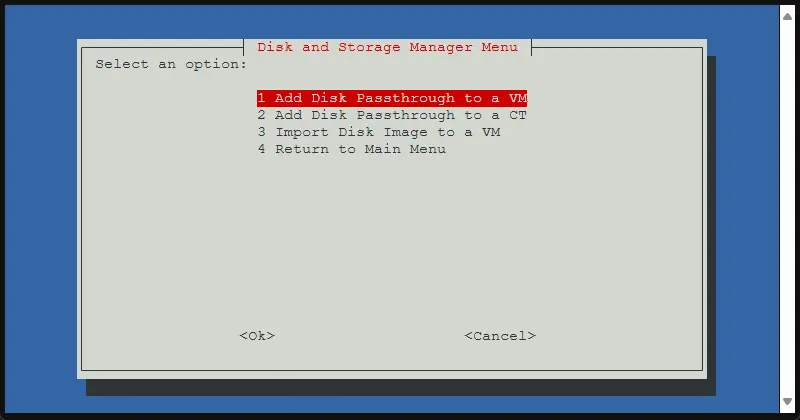
5. Disk and storage manager
The disk and storage manager offers you several options and tools that are handy, including:
- Add disk passthrough to a VM
- Add disk passthrough to a CT
- Import disk image to a VM
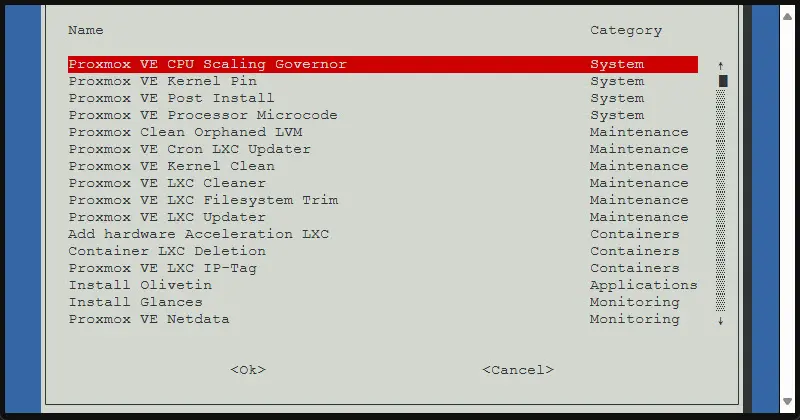
6. Essential Proxmox VE Helper-Scripts
On this screen you have many different scripts that are easy to run from the menu. These include:
- Proxmox VE CPU scaling governor
- Proxmox VE kernel pin
- Proxmox VE post install
- Proxmox VE processor microcode
- Proxmox VE clean orphaned lvm
- Proxmox VE cron LXC updater
- Proxmox VE kernel clean
- Proxmox VE LXC cleaner
- Proxmox VE filesystem trim
- Proxmox VE LXC updater
- Add hardware acceleration LXC
- Container LXC deletion
- Proxmox VE LXC IP-tag
- Install Olivetin
- Install Glances
- Proxmox VE Netdata
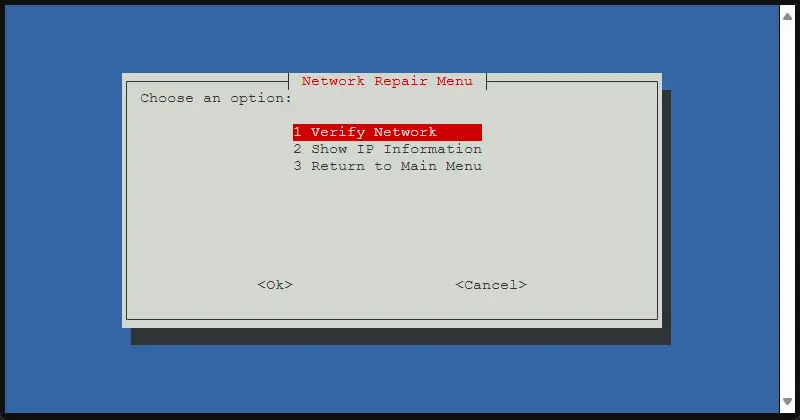
7. Network
This menu in Proxmenux gives you quick and easy access to view and verify your network information.
- Verify network
- Show IP information
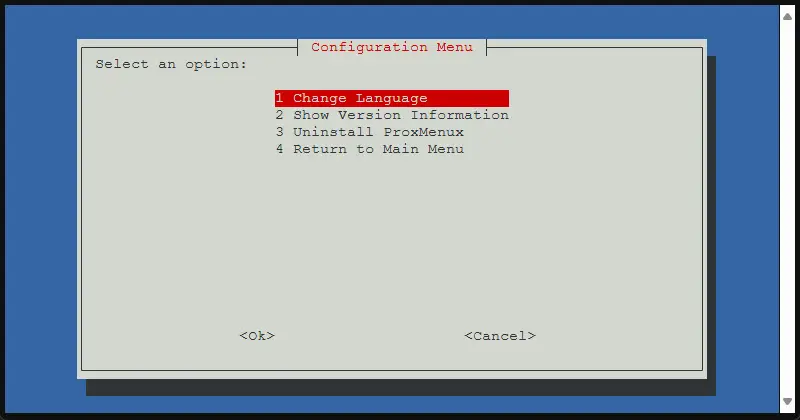
8. Settings
This is basically a settings menu for Proxmenux that allows you to perform admin configuration on the tool itself, view version information, uninstall it, etc.
- Change language
- Show version information
- Uninstall Proxmenux
Staying Secure and Up to Date
- Review the GitHub repo regularly for new features or updates: https://github.com/MacRimi/ProxMenux
- Join community discussions or suggest new features
- Consider donating to support ongoing development via Ko-fi or GitHub sponsors
Wrapping up
For those wanting a great way to perform Proxmox admin tasks quickly and easily without having to remember a lot of artisanal commands or other functions, Proxmenux is a great tool that I think will quickly gain a lot of traction in the community. Kudos to MacRimi for creating this really great gem for the community and those who are using Proxmox for homelabs or even production environments.
I think Proxmenux is a must-have tool for those interested in running Proxmox and looking for an even easier way to get up to speed with it. I think though for even seasoned veterans who know Proxmox really well, this tool has value just from an ease of administration standpoint. Let me know in the comments if you have tried out the solution and what your thoughts are.
Google is updating how articles are shown. Don’t miss our leading home lab and tech content, written by humans, by setting Virtualization Howto as a preferred source.
About The Author

wow.. awesome post.. love seeing this tool get some love!
David,
This tool is great and looks like the developer is working on a feature to easily switch GPU passthrough between VM and LXC, very cool!
Brandon
Not working for me:
root@pve:~# curl -sSL https://raw.githubusercontent.com/MacRimi/ProxMenux/main/install.sh | bash
bash: line 1: 404:: command not found
root@pve:~#
Dan,
Apologies for that! I corrected the install script command, I had noted the wrong command there.
Brandon
Hi
Nice catch I must say. Already trying it to a demo proxmox setup. Looks promising indeed. What I noticed though up unitl now
-no way to update the program itself
-trying to install a linux server disto, it s only up to 22.04. Official distribution as it calls it in the title also includes 24.04 as well.
dmtsou,
It will be interesting to see how the solution matures with lifecycle management, etc.
Brandon