For years now, organizations have based application access and access to resources and files on identity. Typically, this is based on memberships to groups in Microsoft Active Directory Domain Services (ADDS). We have all seen this in the corporate environment and managed this most likely, where we place users in groups to allow them access to a network share. What if network access, in general, could be based on identity? Well, with VMware NSX-T, this can easily be done with identity based firewall. Let’s look at identity based firewall configuration with NSX-T and vSphere and see how easy it is to add your directory, and start creating distributed firewall rules based on group memberships.
Why use identity based firewall?
You may wonder if you are already attaching group permissions at the application level, why do you need identity based firewall? Identity based firewall allows micro-segmenting your network so that at a network layer, you can filter traffic and prevent access by specific network addresses to target network clients or resources. So, not only can you specify permissions at the application level, you can prevent a source machine from accessing the resource altogether.
This is immensely beneficial from a security perspective. It helps to prevent an attacker who makes his way onto a client machine from accessing network endpoints altogether. It essentially prevents an attacker from having the opportunity to run scans against or search for vulnerabilities on the target endpoint. Only having application permissions in place does not prevent the attacker from doing this.
Using the identity-based firewall allows applying the same role-based access controls that are already in place in your organization to secure your environment from a network perspective. Imagine, you may not want your customer service agents to be able to hit port 1433 of a business-critical SQL server that they cannot access directly anyway.
Identity based firewall workflow
Note the following workflow for identity based firewall as noted in the VMware KB here.
The Northbound flow of IDFW:
- A user logs in to a VM.
- A user login event is received by the NSX management plane.
- The NSX management plane looks at the user and receives all of the Active Directory (AD) groups the user belongs to. The NSX management plane then sends group modify events for all of the affected AD groups.
- For each Active Directory group all of the Security Groups (SG) including this AD group are flagged, and a job is added to the queue to process this change. Because a single SG can include multiple Active Directory groups, a single user login event will often trigger multiple processing events for the same SG. To address this, duplicate Security Group processing requests are removed.
The Southbound flow of IDFW:
- A Security Group processing request is received. When a SG is modified, NSX updates all affected entities and triggers actions per IDFW rules.
- NSX receives all of the Active Directory groups for a SG.
- From Active Directory, NSX receives all of the users belonging to the AD groups.
- The Active Directory users are associated with their IP addresses.
- The IP address are mapped to vNICs, and then the vNICs are mapped to virtual machines (VMs). The resulting list of VMs is result of Security Group to VM translation.
How does NSX-T know which user is logged in?
There are two ways this can be determined. Note the following directly from the VMware KB here.
There are two methods IDFW uses for logon detection: Guest Introspection (GI) and/or event log scraping. Guest Introspection is deployed on ESXi clusters where IDFW virtual machines are running. When network events are generated by a user, a guest agent installed on the VM forwards the information through the Guest Introspection framework to the NSX Manager. The second option is the Active Directory event log scraper. Event log scraping enables IDFW for physical devices. Configure the Active Directory event log scraper in the NSX Manager to point at an instance of your Active Directory domain controller. NSX Manager will then pull events from the AD security event log.
Event log scraping can be used for virtual machines, however when both the AD log scraper and Guest Introspection are used, Guest Introspection will take precedence over event log scraping. Guest introspection is enabled through VMware Tools, and if you are using the complete VMware Tools installation and IDFW, guest introspection will take precedence over event log scraping. Note that if both the AD event log scraper and Guest Introspection are used, the two are mutually exclusive: if one of these stops working, the other does not begin to work as a back up.
Identity Based Firewall configuration with NSX-T and vSphere
Let’s look at identity based firewall configuration with NSX-T and vSphere. If you haven’t seen my post already on how to deploy NSX-T in vSphere, take a look at that post here:
VMware has really made the process to provision NSX-T in vSphere much easier in recent versions of NSX-T releases.
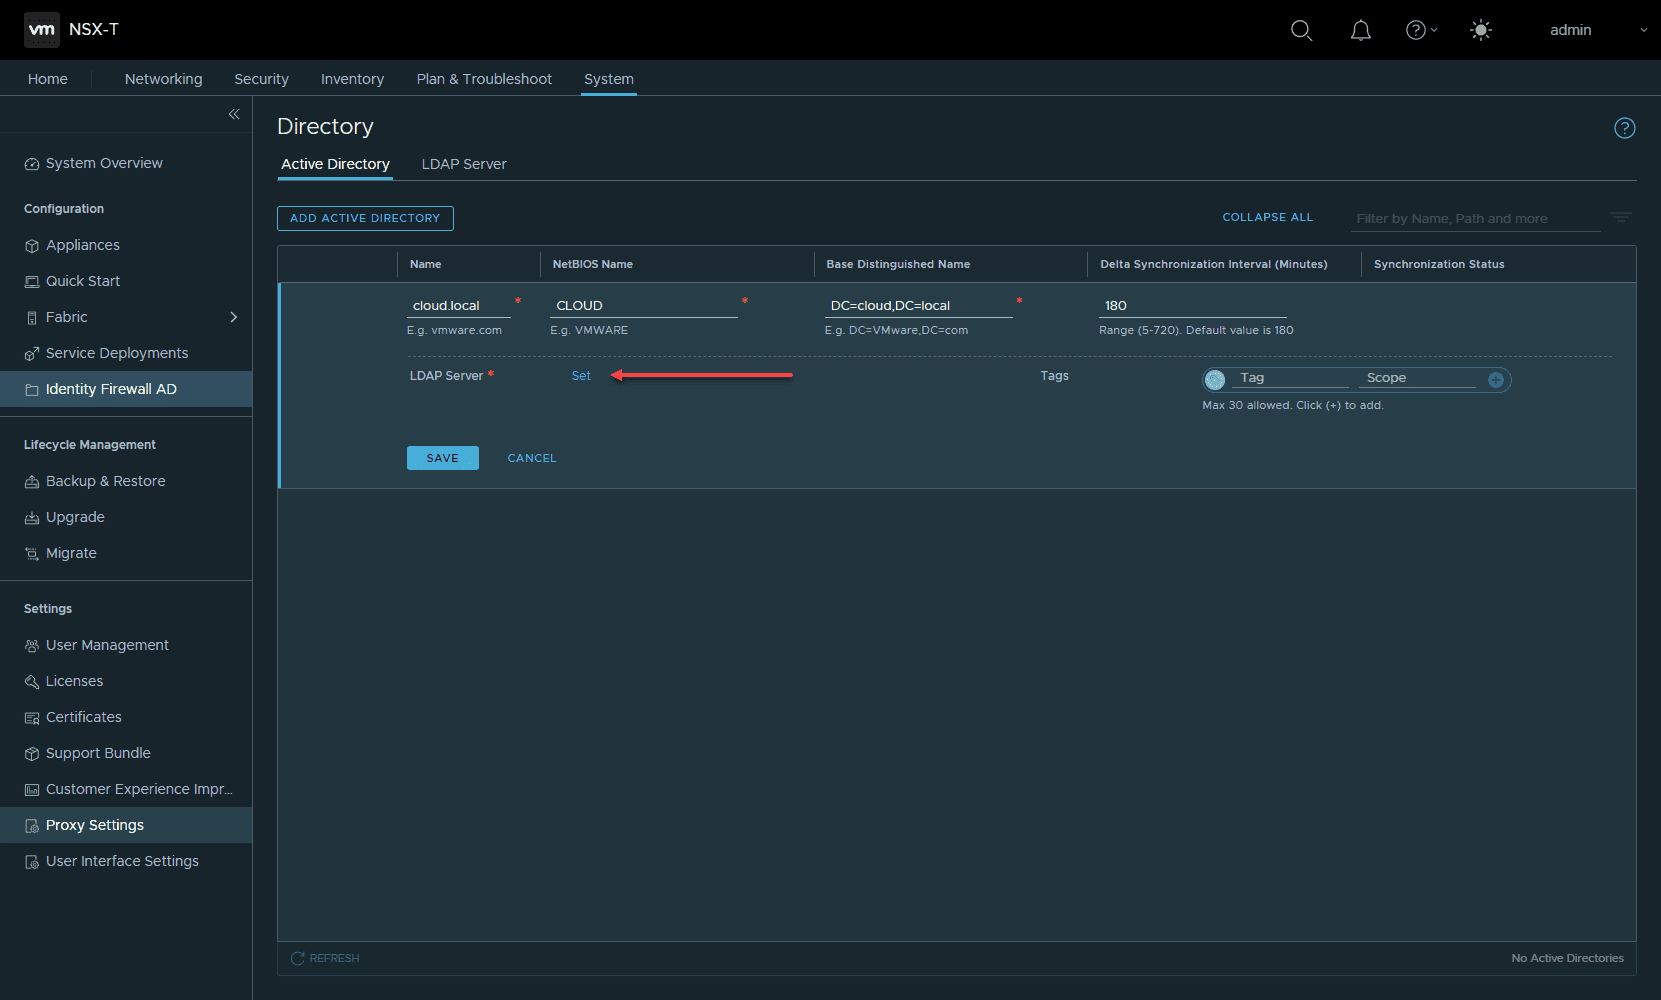
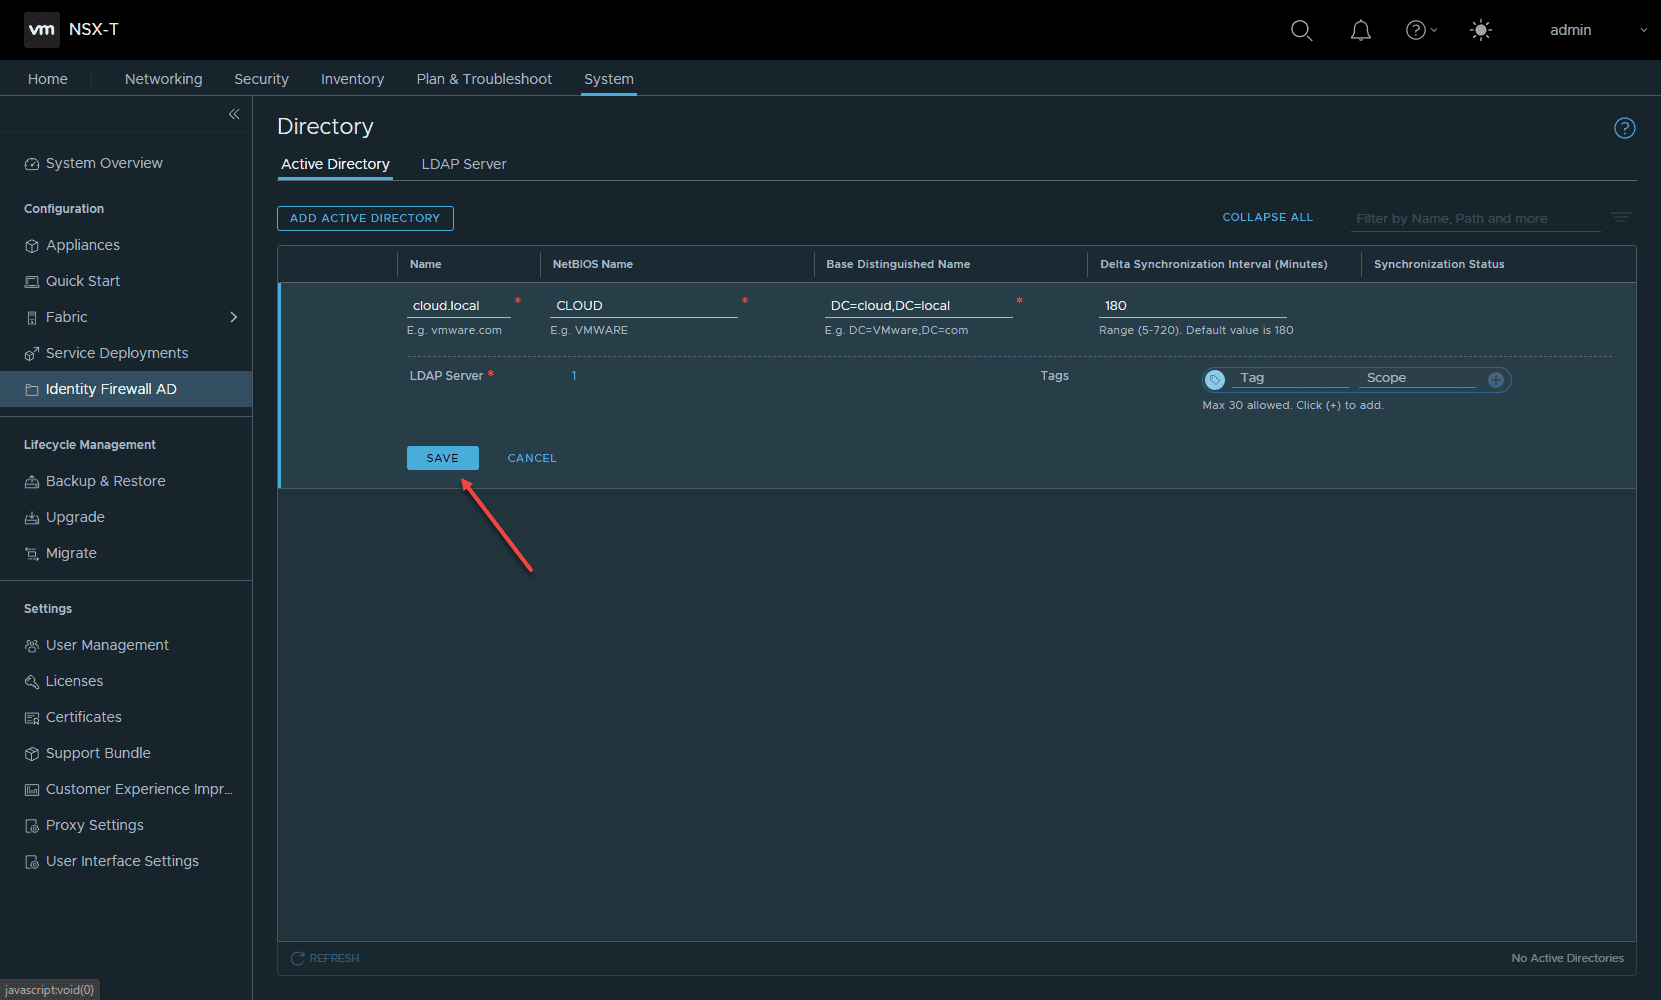
Let’s first add our Active Directory directory to the NSX-T environment. Navigate to System > Identity Firewall AD > Active Directory > Add Active Directory.

On the settings of the new Active Directory entry, you can set your LDAP server after you add a name, NetBIOS Name, Base Distinguished Name, and other settings. Click the Set link next to LDAP Server.
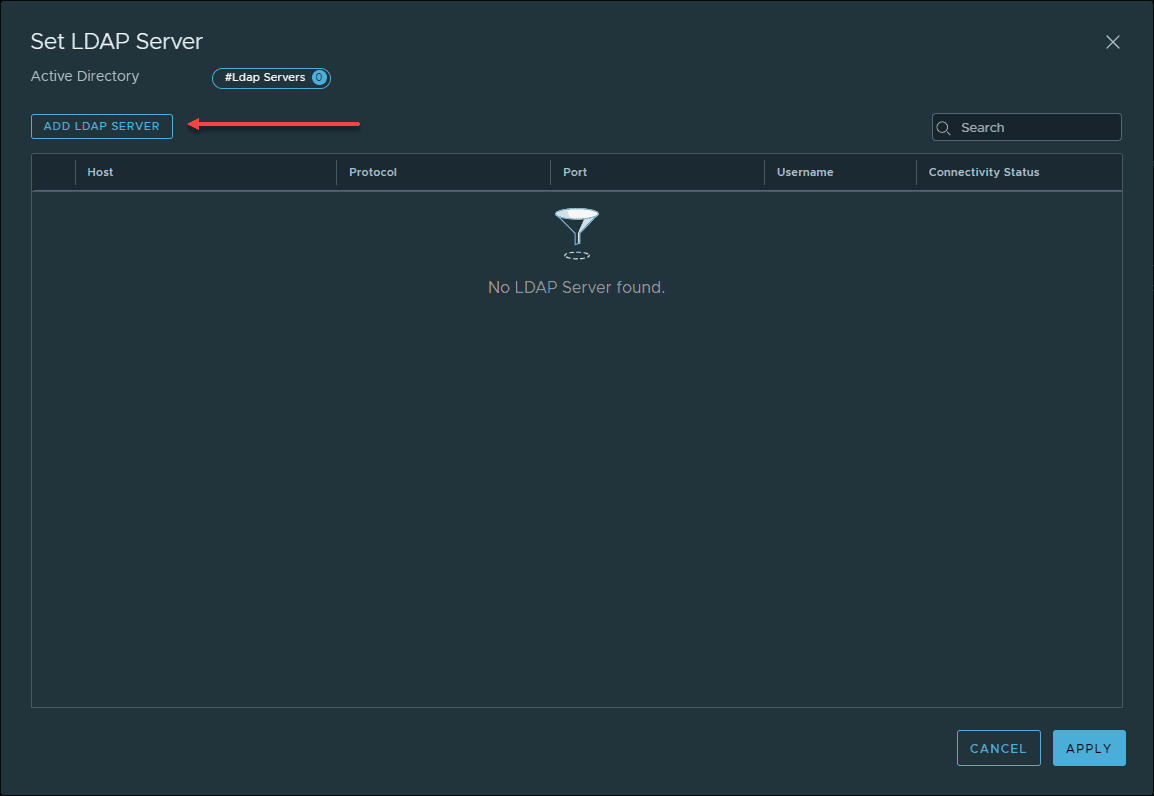
Click the Add LDAP Server button.
On the next screen, enter the host, protocol, port, username, and password. As a note here, your username, does not need to be in UPN format with the @ in between the username and domain (email format), or in the DOMAIN\ format. Only enter the username as the username only as it uses the DOMAIN configured in the previous screen.
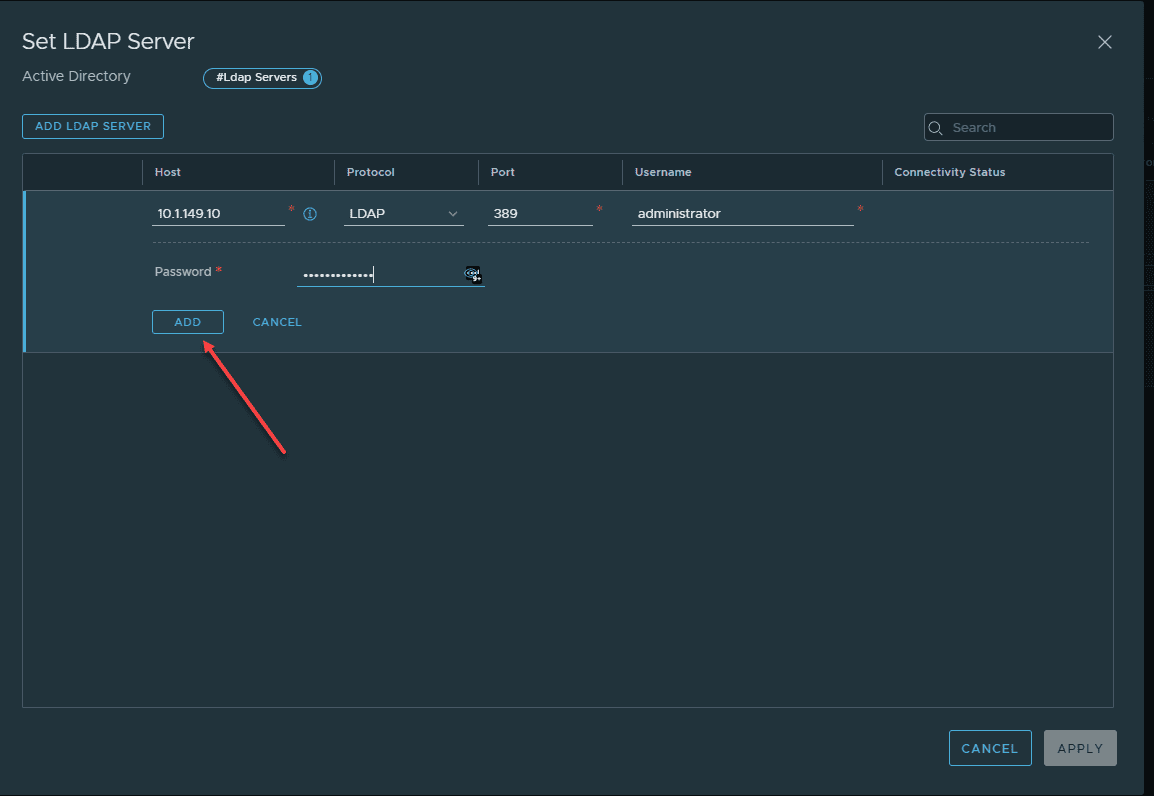
Click the Apply button.
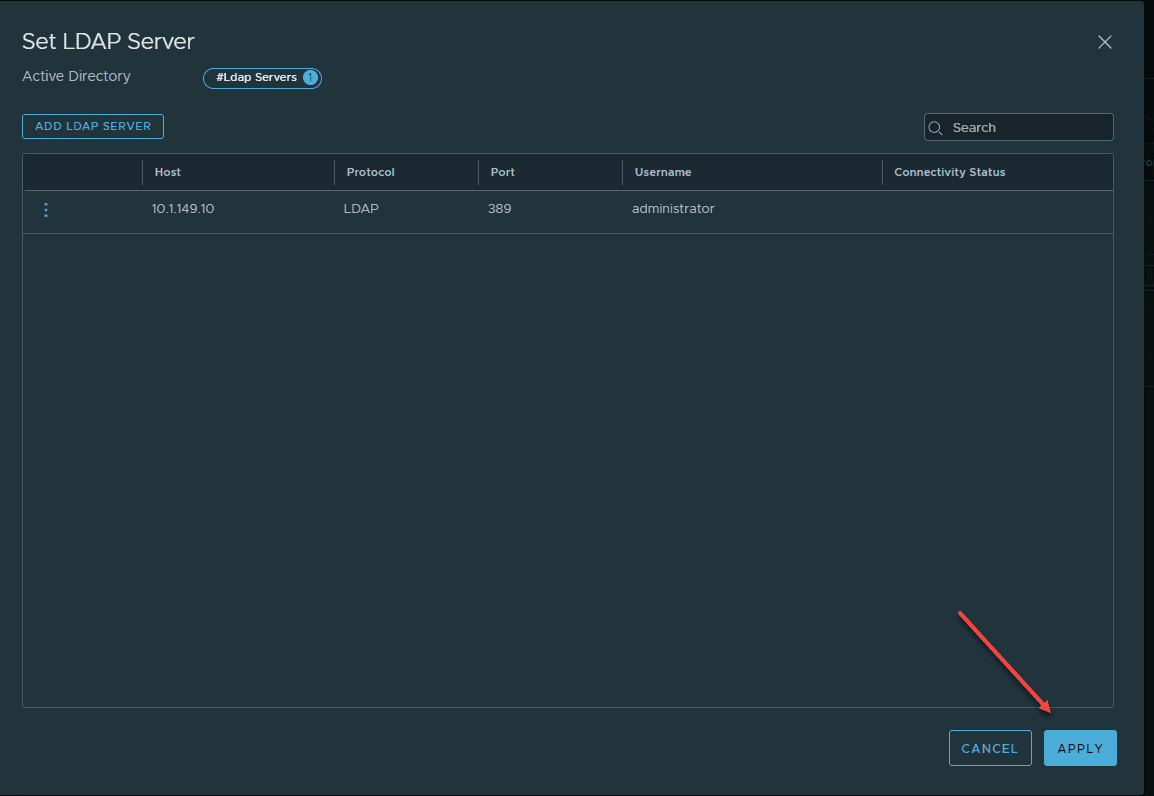
Click the Save button.
The Active Directory entry is saved successfully.
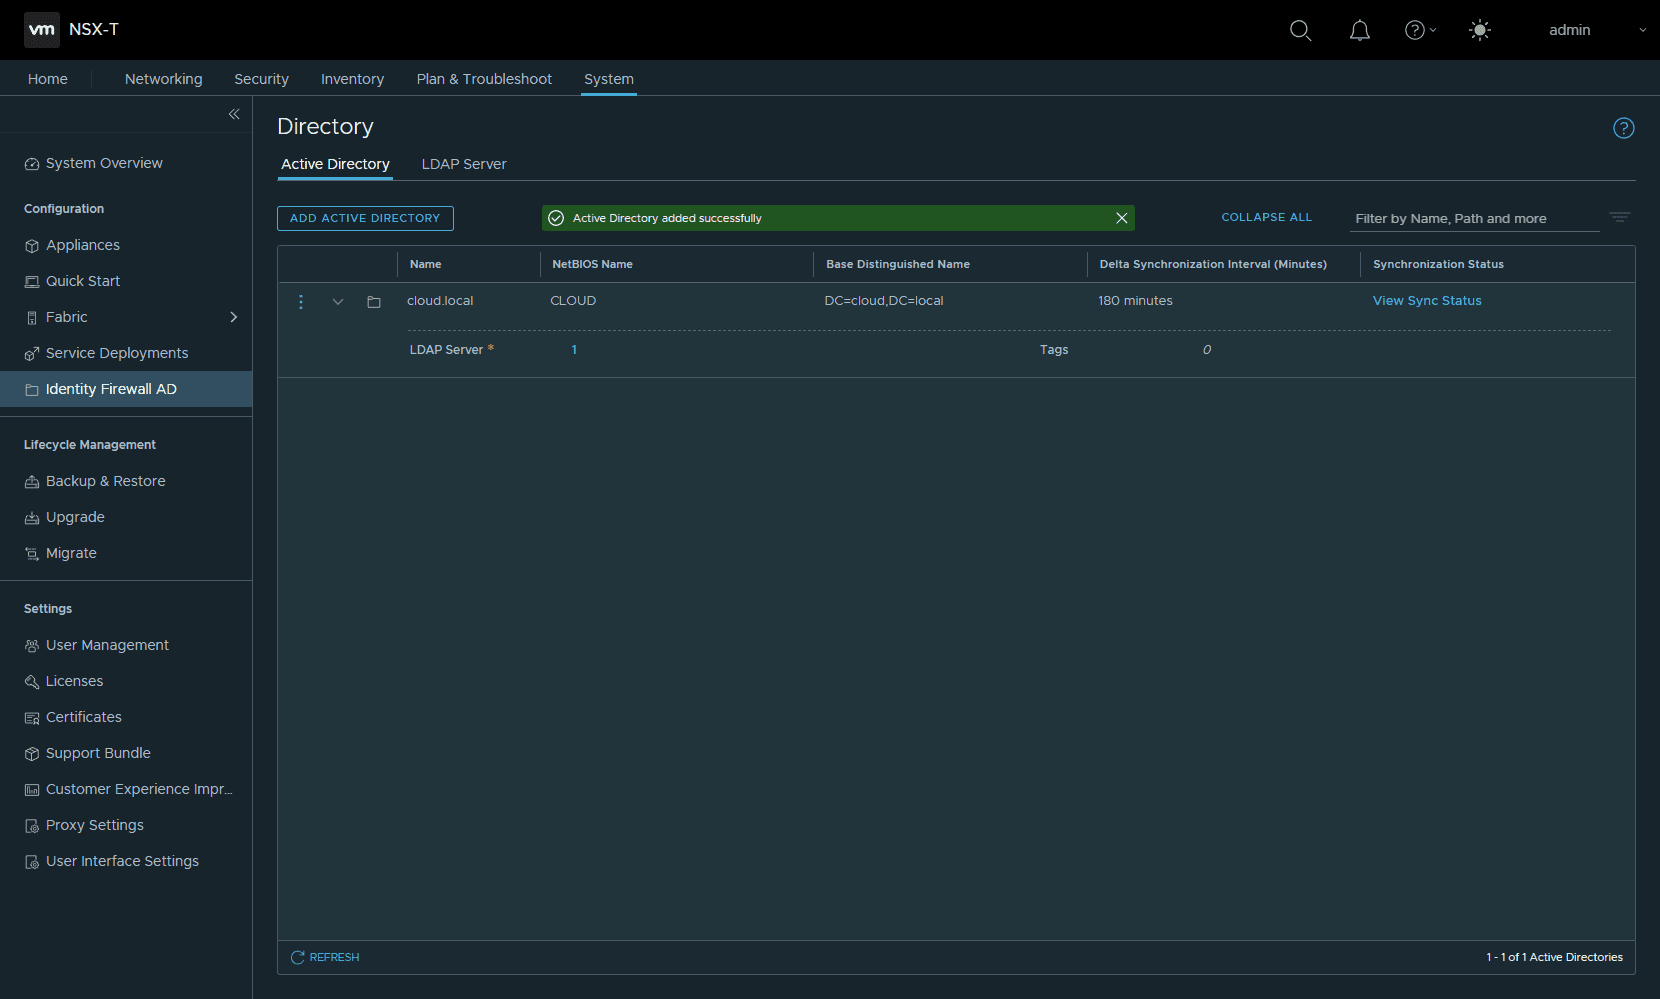
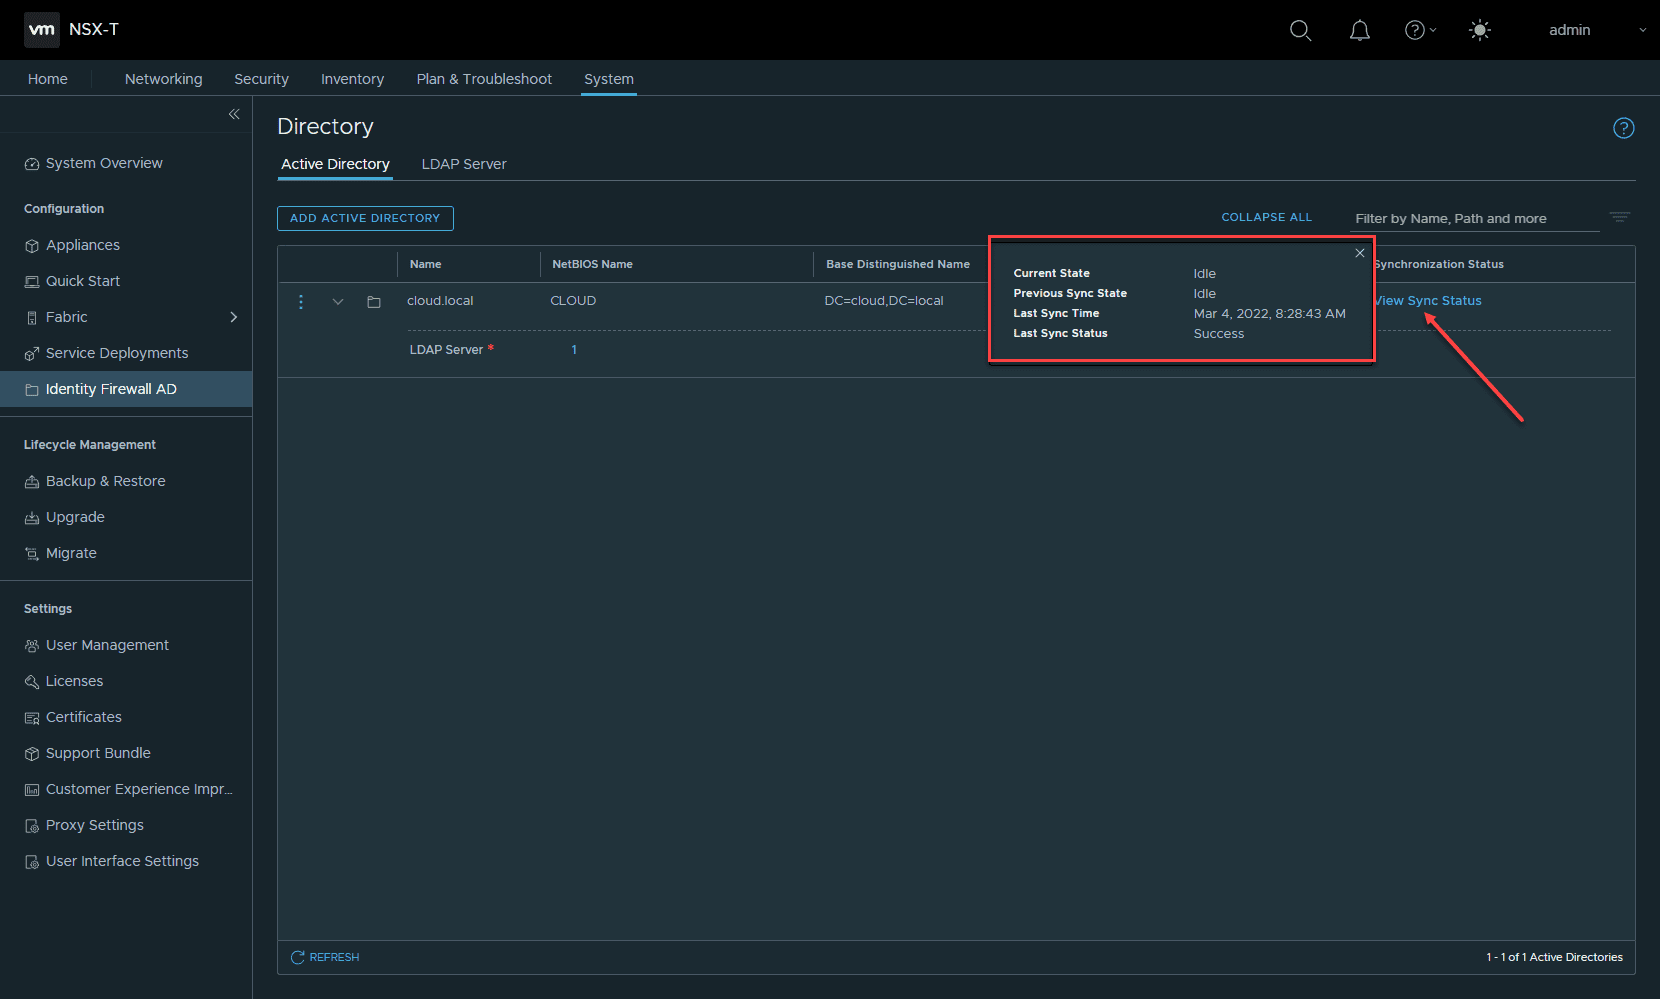
The NSX Manager will synchronize with the Active Directory domain controllers configured. You can click the View Sync Status to see the last sync result and last synchronization time.
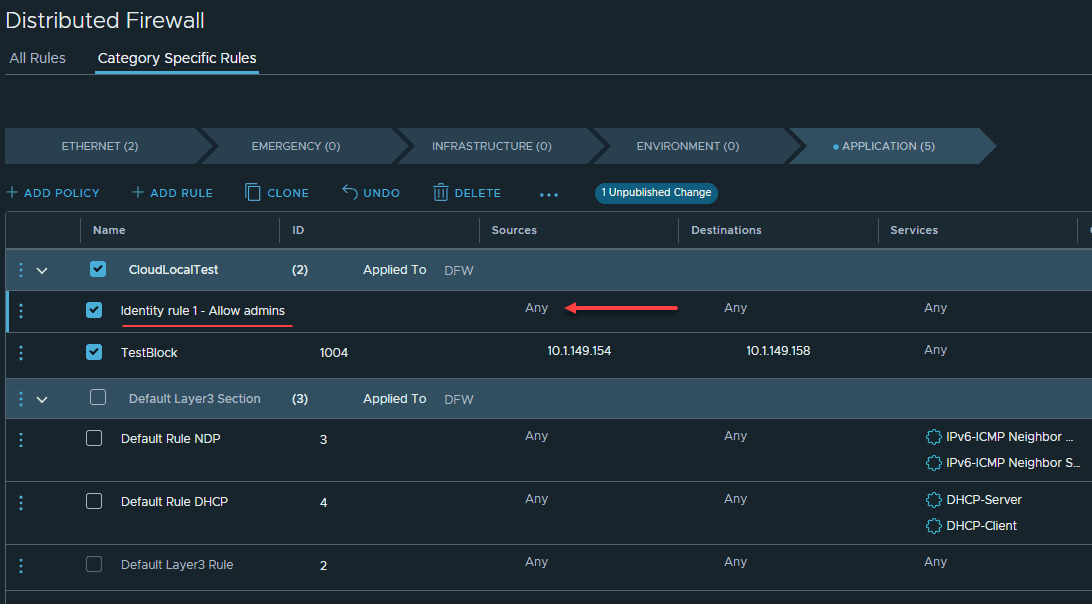
Creating an identity based firewall rule in distributed firewall
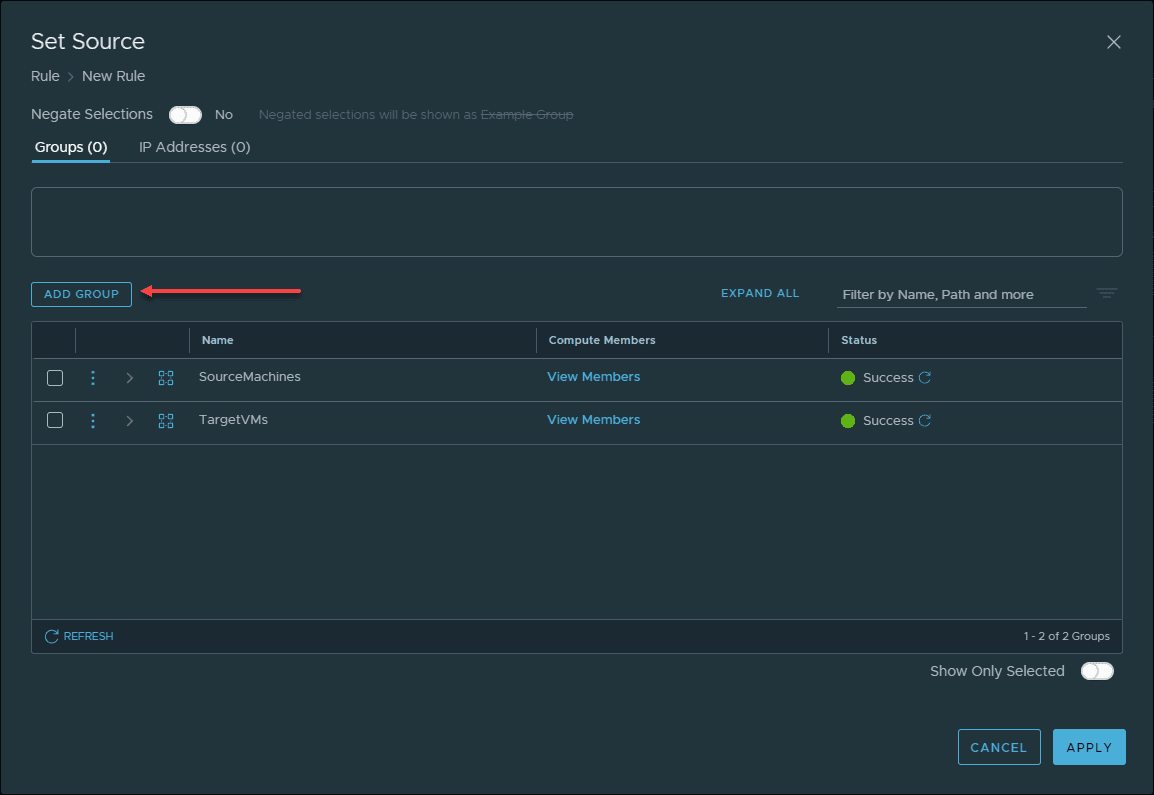
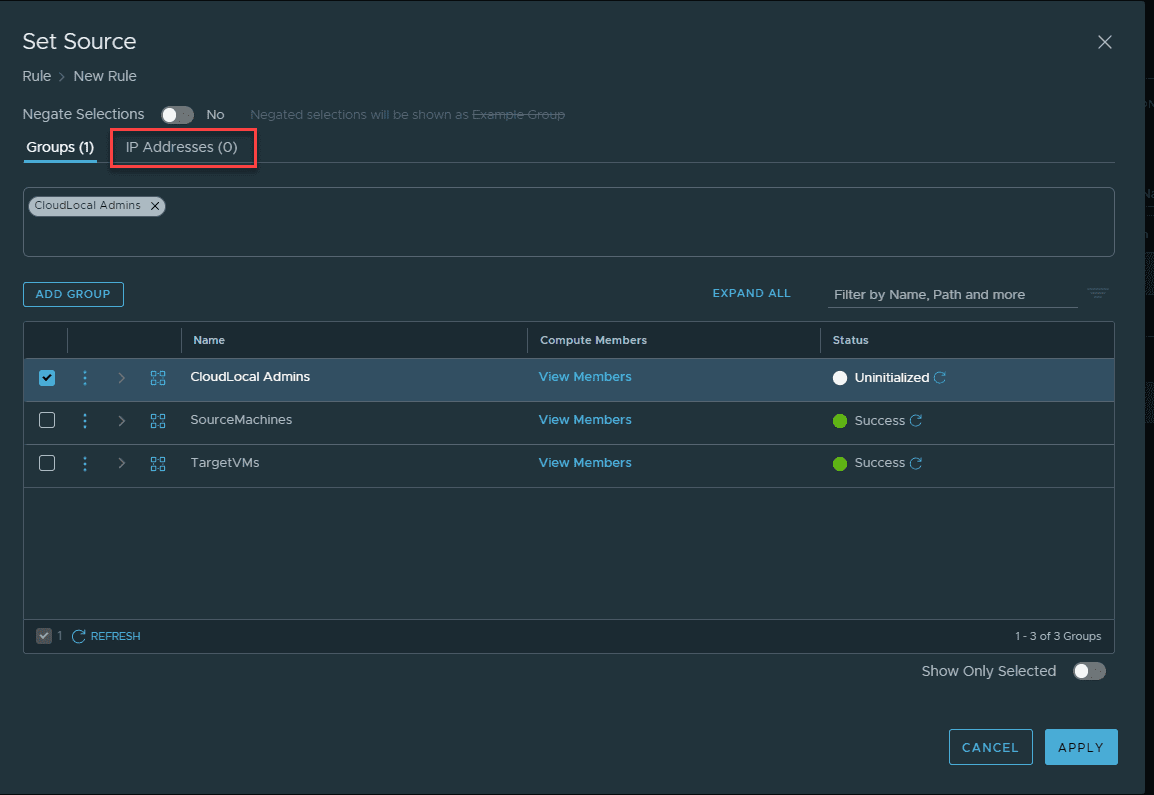
Now, let’s see how to create an identity based firewall rule in your distributed firewall rules. Below I am adding a new distributed firewall rule. After naming the rule, click the default ANY entry in source and let’s configure it to use an Active Directory group.
Click Add Group.
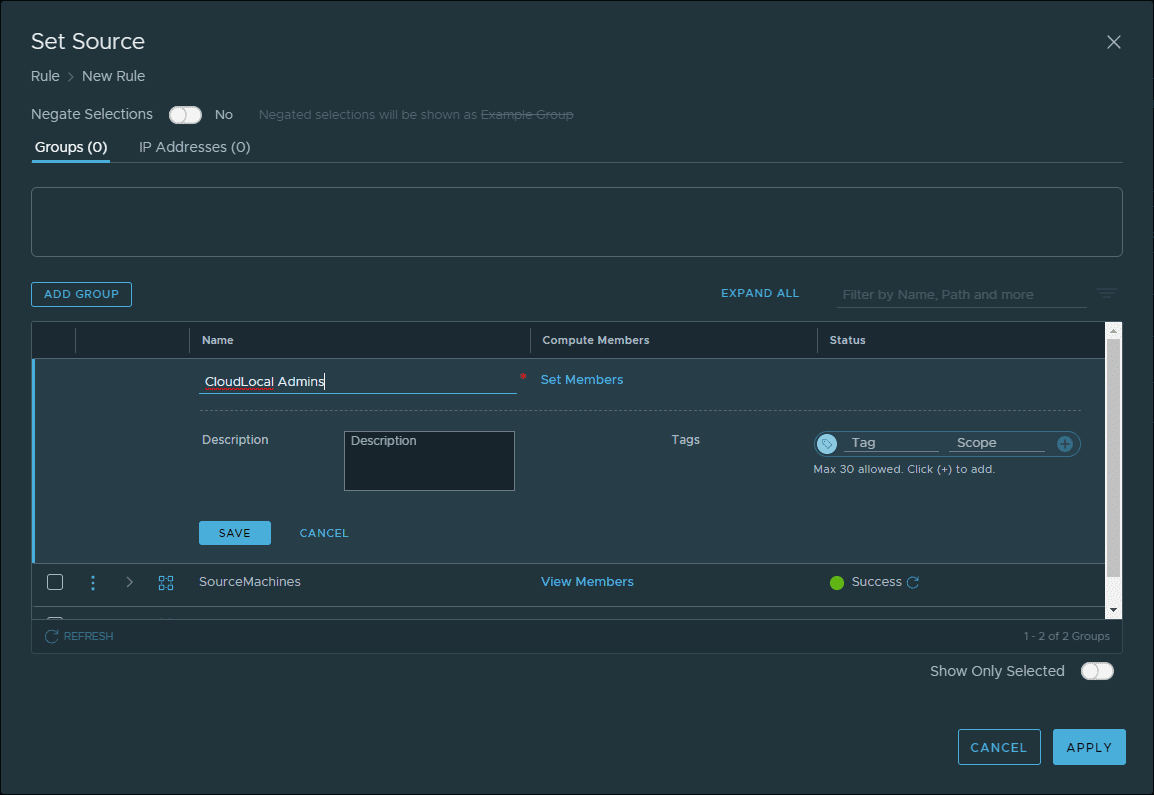
Name the group, and then click the Set Members link.
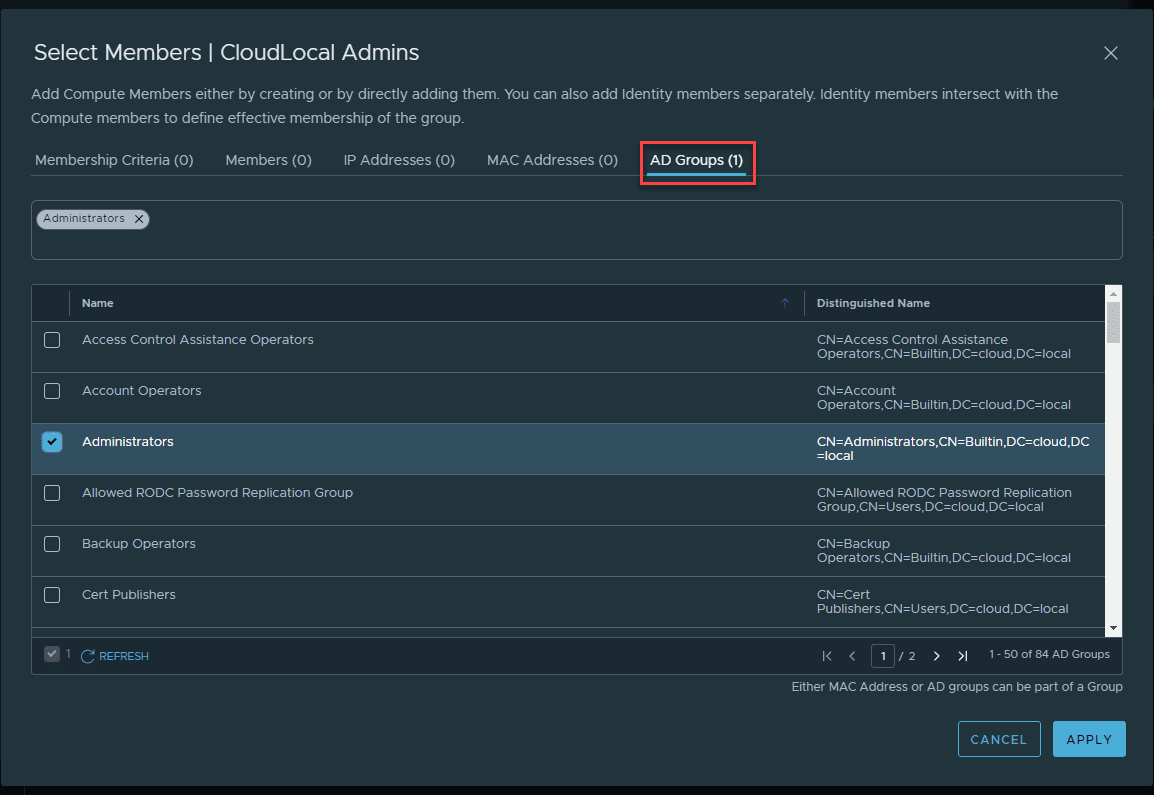
On the Select Members dialog box, click the AD Groups tab. Find the Active Directory group to add and place a check next to the group. Then click Apply.
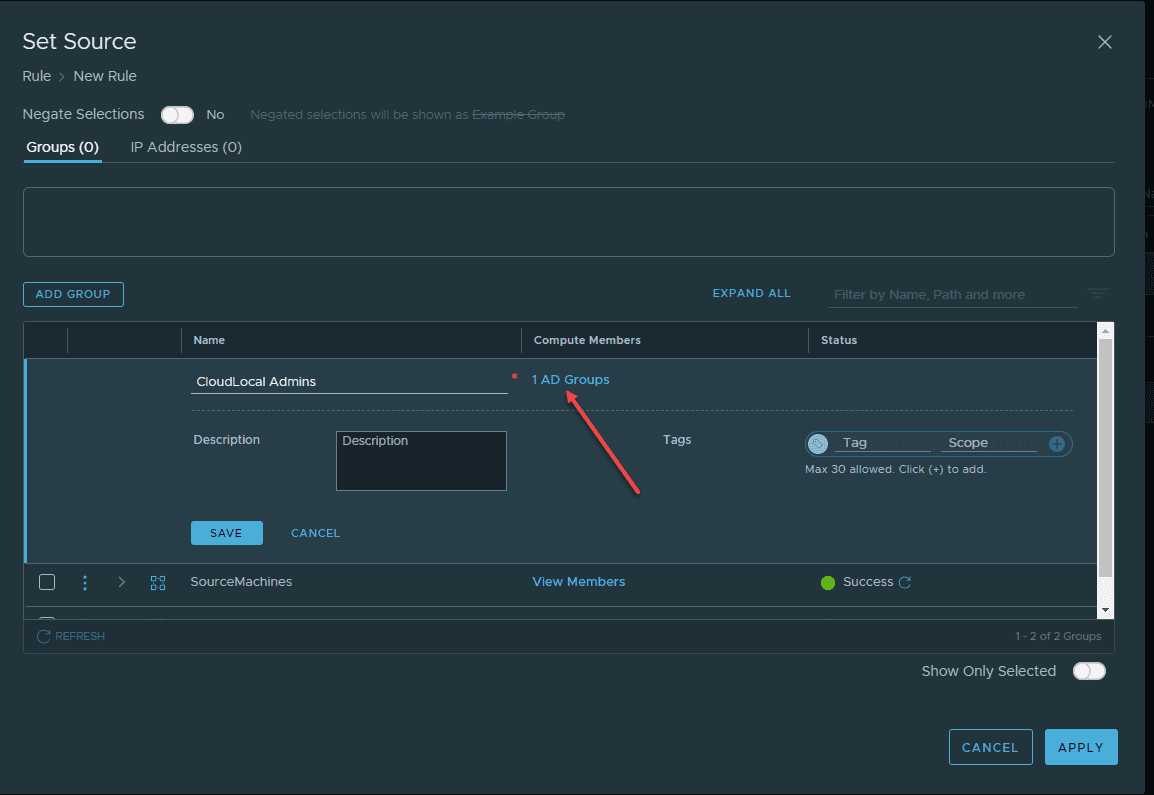
Back at the Set Source screen, we see we now show “1 AD Groups” on the members. Click the Apply button.
The powerful configuration of the identity based firewall configuration also allows the ability to add a source IP address in addition to the group filtering. So not only does the user have to be a member of the specified group, they also have to be coming from the configured IP address, making it extremely granular.
Here, I am adding the IP Address.
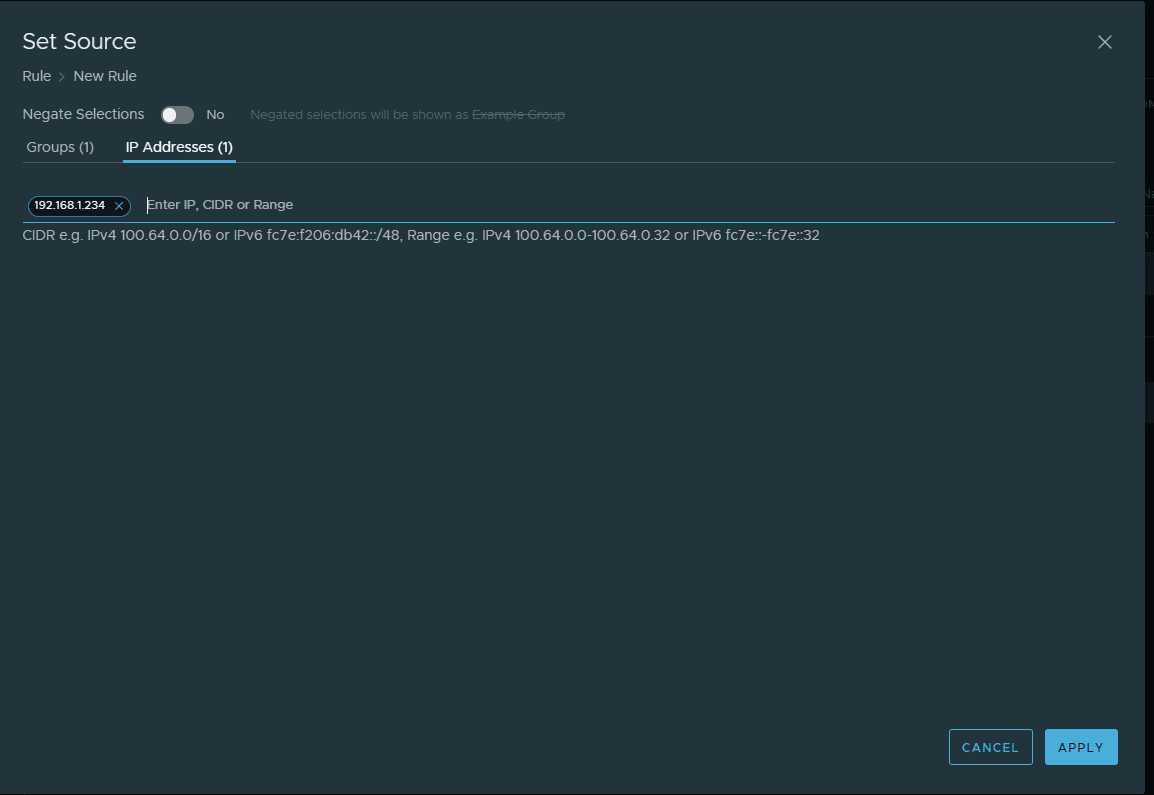
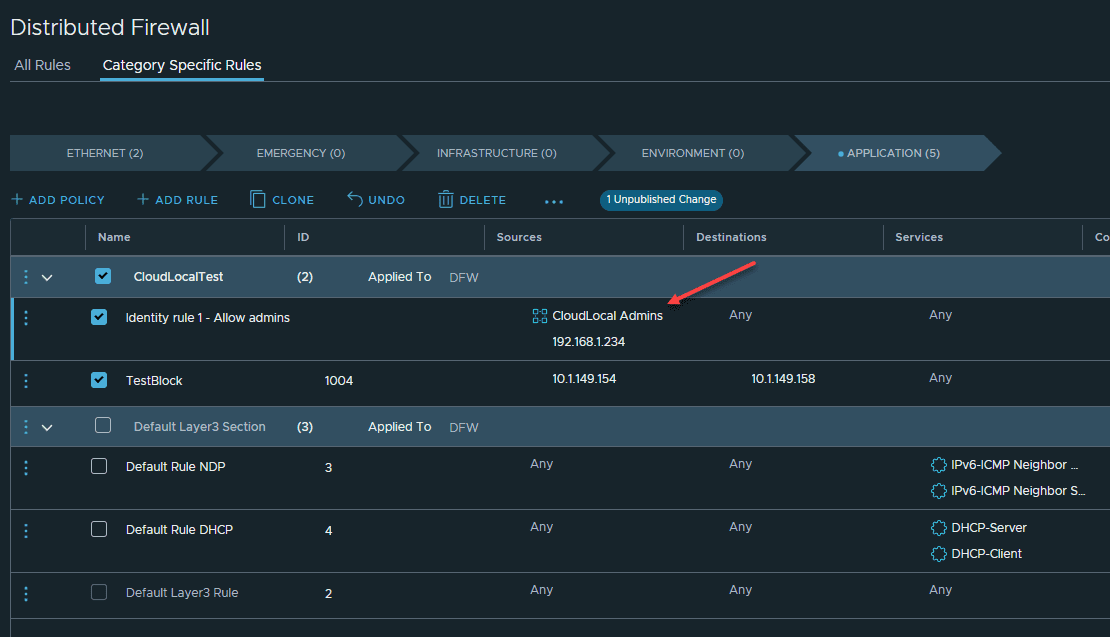
Now, the rule shows both the AD Group and the source IP address specified in the rule configuration.
Turning on identity based firewall for standalone hosts and clusters
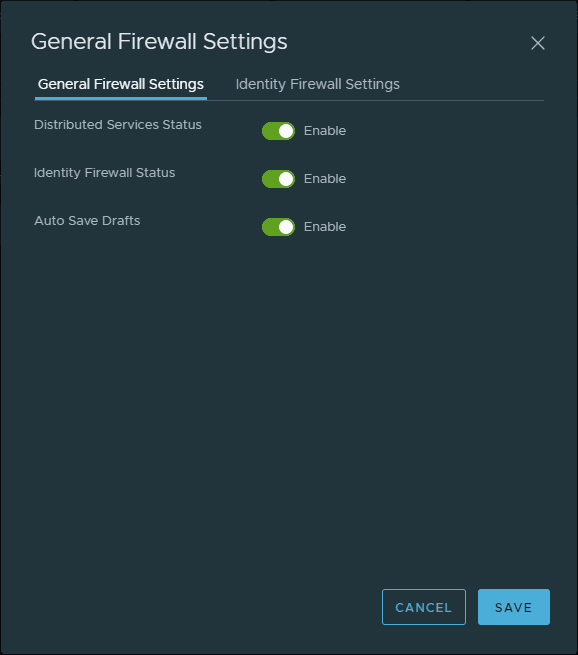
Also, we want to make sure we have identity firewall configured for the ESXi hosts. In the Distributed Firewall screen, click the Actions link and then select General Settings.
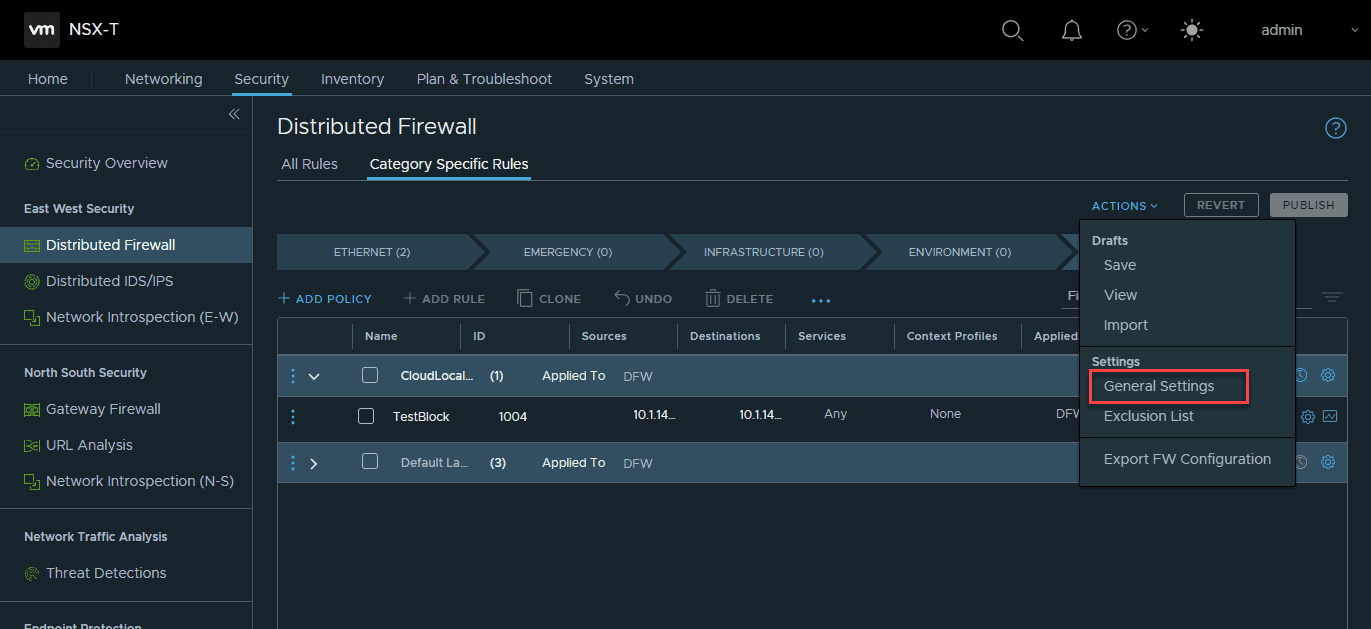
On the General Firewall Settings, make sure you have the Identity Firewall Status enabled.
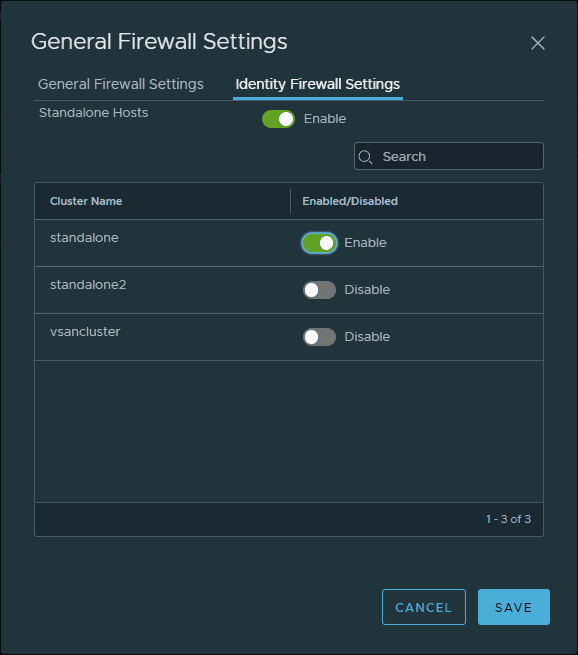
On the same dialog box, click the Identity Firewall Settings and you can enable the Identity based firewall settings granularly for standalone hosts and for specific cluster names.
Identity Based Firewall FAQs
- What is identity based firewall? – Identity based firewall allows building dynamic firewall rules that are built on group memberships from an identity provider such as Active Directory. It allows organizations to build their firewall rules based on the role based access control rules already in place in Active Directory environments.
- How is identity based firewall installed? – With VMware NSX-T, it is a simple process of installing an NSX-T manager, adding an Active Directory environment, and building your distributed firewall rules from the group memberships found in Active Directory.
- What identity sources can be used? – Any LDAP-compatible directory such as Active Directory Domain Services (ADDS).
- Why use identity based firewall? – Using identity based firewall functionality provides businesses with the ability to filter network traffic based on the AD groups a user is a member of. This bolsters application-level security by disallowing network connectivity in general, making it more difficult
Final Notes
Identity based firewall is powerful and allows successfully micro-segmenting your environment from a network perspective using identity as the trigger for the context of the NSX-T distributed firewall rule. NSX-T provides businesses with a great tool to secure not only north/south traffic but also east/west traffic on the same network segments, which is especially beneficial where networks were not really architected correctly with proper segmentation between types of workloads and hosts.
More in this topic
Discuss this in the Community
Google is updating how articles are shown. Don’t miss our leading home lab and tech content, written by humans, by setting Virtualization Howto as a preferred source.
About The Author
