Cloud Storage Windows Server 2022 and Azure File Sync
Most businesses today are looking at some type of cloud storage to go along with on-premises enterprise storage on their Windows Servers. Windows Server 2022 is the most advanced Windows Server to date with a wide range of hybrid cloud options built into the operating system and exposed using Windows Admin Center. In this quick post, we will take a look at cloud storage Windows Server 2022 and see how to connect Windows Server 2022 file services to Azure storage.
What is Azure File Services (AFS)
Azure File Sync allows organizations to centralize file shares in Azure Files. However, it provides a hybrid mix of on-premises Windows Server file services to allow businesses to find the right mix of hybrid cloud with their file services.
It gives businesses the options when looking at cloud storage Windows Server options to allow transforming Windows Server into a quick caching mechanism for Azure file shares. This capability applies to any type of protocol used with Windows Server locally, including SMB, NFS, and FTPS.
Advantages of Azure File Sync
This opens up many advantages for customers with Azure File Sync, including the following:
- Cloud tiering – you can configure the service so that “hot” files are stored locally and “cold” files that are infrequently accessed are stored in the Azure cloud. You as the organization control how much local disk space you want to use for caching. Tiered files can be streamed on-demand. It helps to cut costs since you only need a percentage of the data normally stored on-premises.
- Multi-site access and sync – You can position your Windows Servers in various locations and any changes made in one location are automatically synced to the servers in the other locations.
- Part of your disaster recovery strategy – Azure Files is offered with several redundancy options. It contains resilient copies of your data. If you have a failed on-premises server, you simply add a new server to your Azure File Sync deployment. Instead of having to restore your data, you can install a new server, install the Azure File Sync agent and then allow the deployment to pull down the files once again. You can also setup a warm stand by server.
- Cloud backups – You can also take advantage of cloud backups to centralize backups in the cloud using Azure Backup. Azure Files and the SMB shares configured with it have snapshots capabilities.
Cloud Storage Windows Server Overview Process
Note the following overview of the process to setup Azure File Sync services
- Deploy a Storage Sync Service.
- Create a sync group.
- Install Azure File Sync agent on the server with the full data set.
- Register that server and create a server endpoint on the share.
- Let sync do the full upload to the Azure file share (cloud endpoint).
- After the initial upload is complete, install Azure File Sync agent on each of the remaining servers.
- Create new file shares on each of the remaining servers.
- Create server endpoints on new file shares with cloud tiering policy, if desired. (This step requires additional storage to be available for the initial setup.)
- Let Azure File Sync agent do a rapid restore of the full namespace without the actual data transfer. After the full namespace sync, sync engine will fill the local disk space based on the cloud tiering policy for the server endpoint.
- Ensure sync completes and test your topology as desired.
- Redirect users and applications to this new share.
- You can optionally delete any duplicate shares on the servers.
Cloud Storage Windows Server 2022 setup process with Azure File Sync services
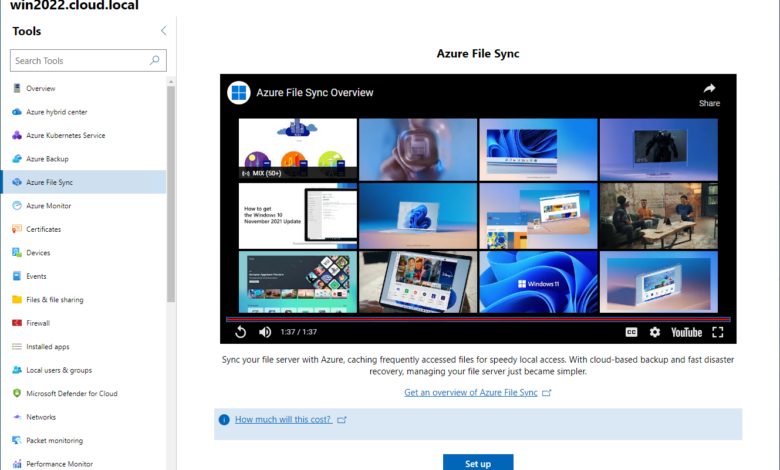
In the test lab, I have a Windows Server 2022 server running with Windows Admin Center installed in Gateway mode. All plugins have been updated. If you navigate to the Azure File Sync, you can get started with the configuration from here.
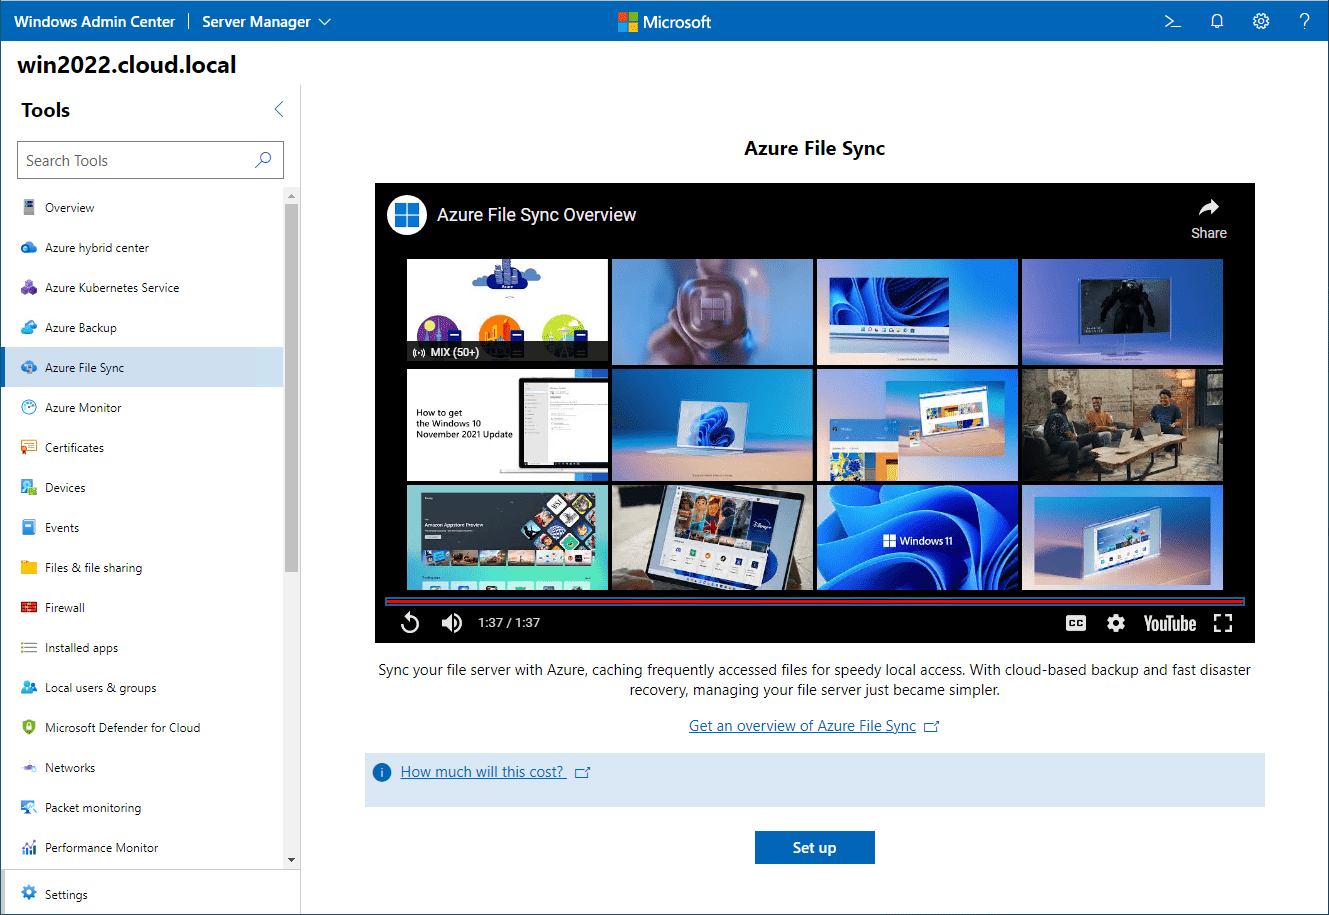
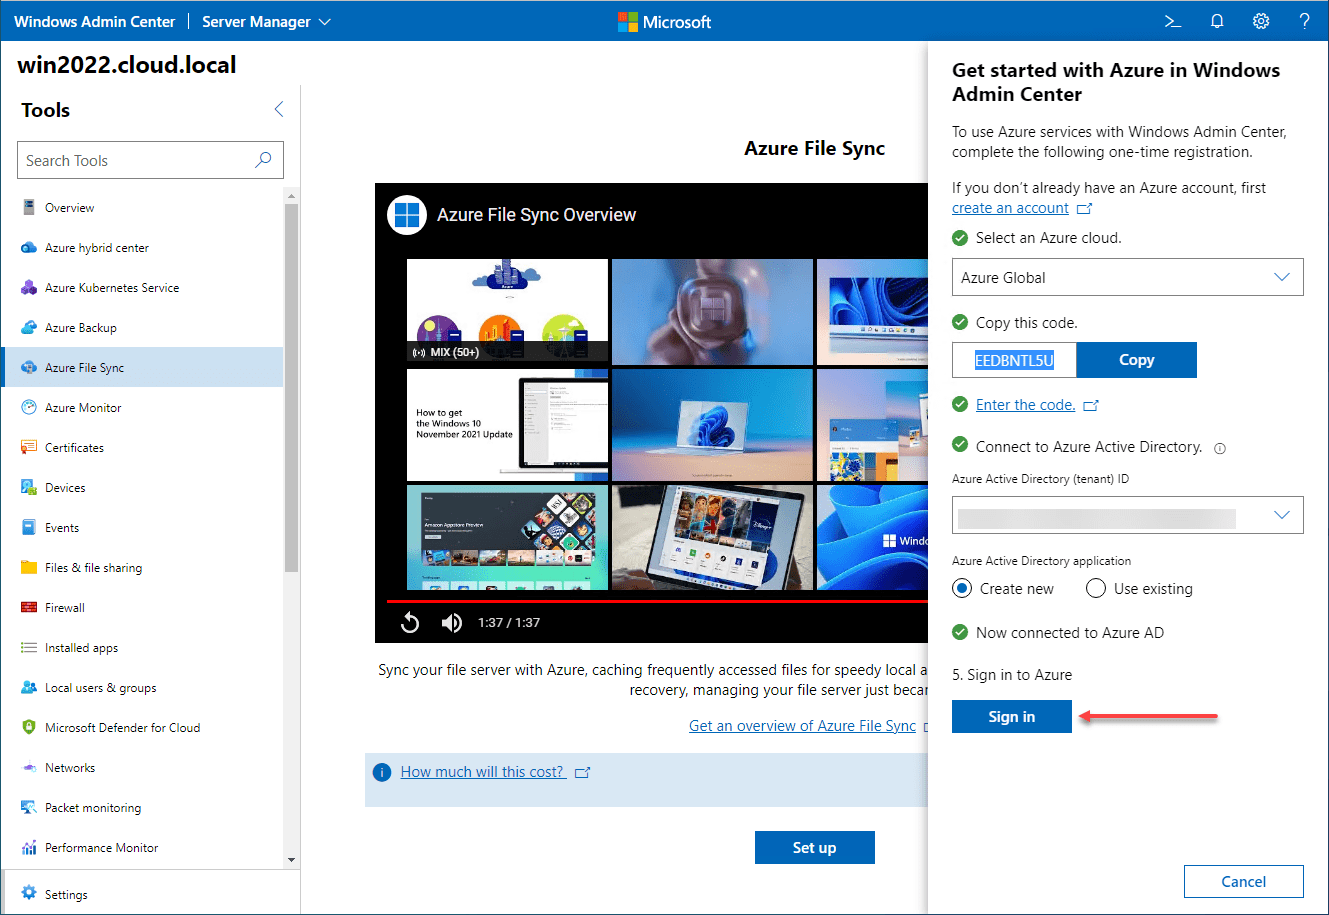
When you walk through the process, you will see the following configuration screen. Windows Admin Center gives you a code to authenticate your Azure account with your Windows Admin Center instance. You then use this code to tie the two together with Azure File Sync.
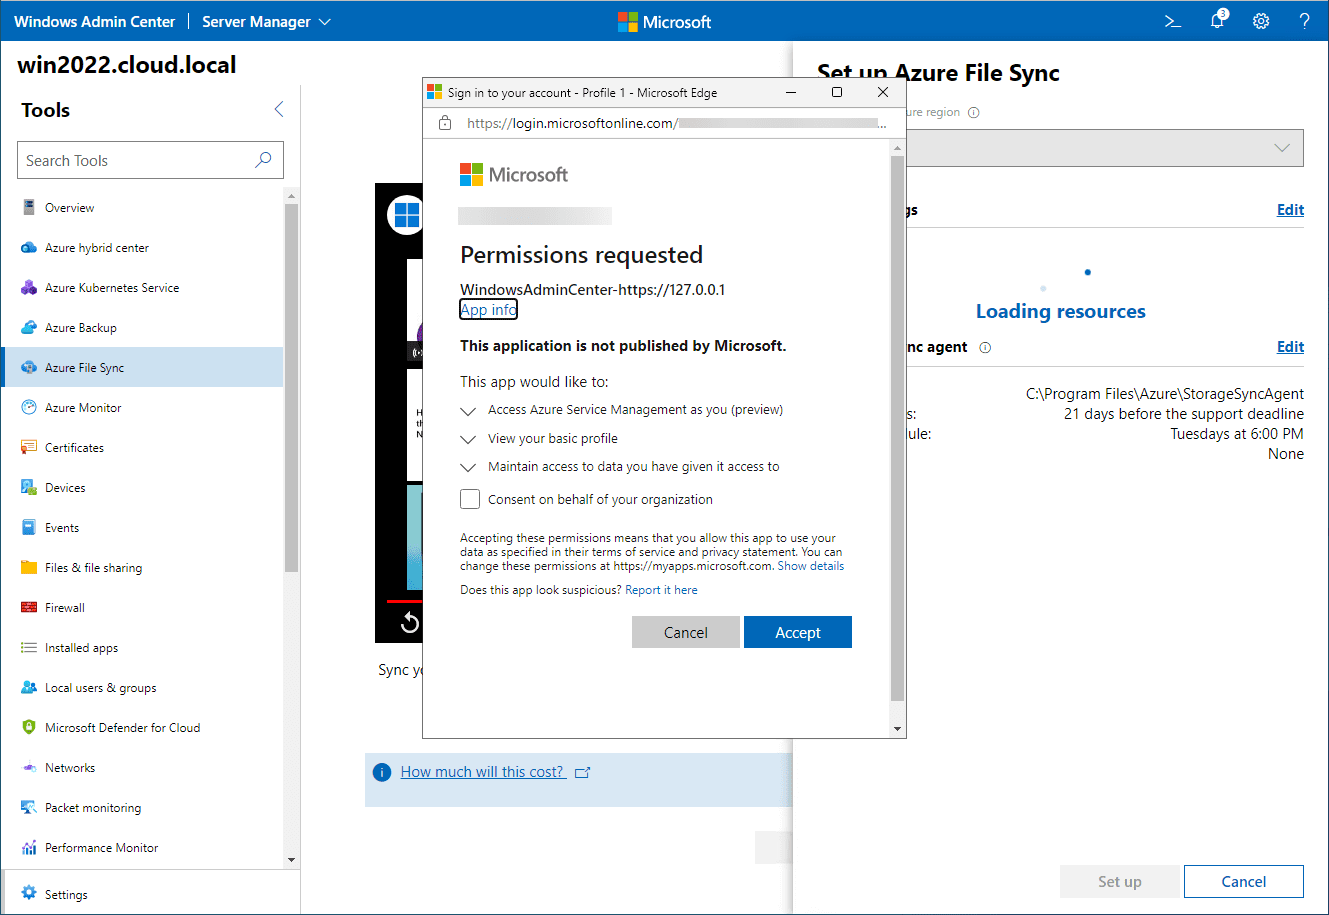
The permissions requested screen will have you authenticate your instance with Azure.
Below, you see the warning that there are no storage services configured. You have to have storage services configured and you have to have a shared folder that you can tie between the on-premises folder and the cloud storage account shared folder.
Note the following from Microsoft on the storage sync services:
The deployment of Azure File Sync starts with placing a Storage Sync Service resource into a resource group of your selected subscription. We recommend provisioning as few of these as needed. You will create a trust relationship between your servers and this resource and a server can only be registered to one Storage Sync Service. As a result, it is recommended to deploy as many storage sync services as you need to separate groups of servers. Keep in mind that servers from different storage sync services cannot sync with each other.
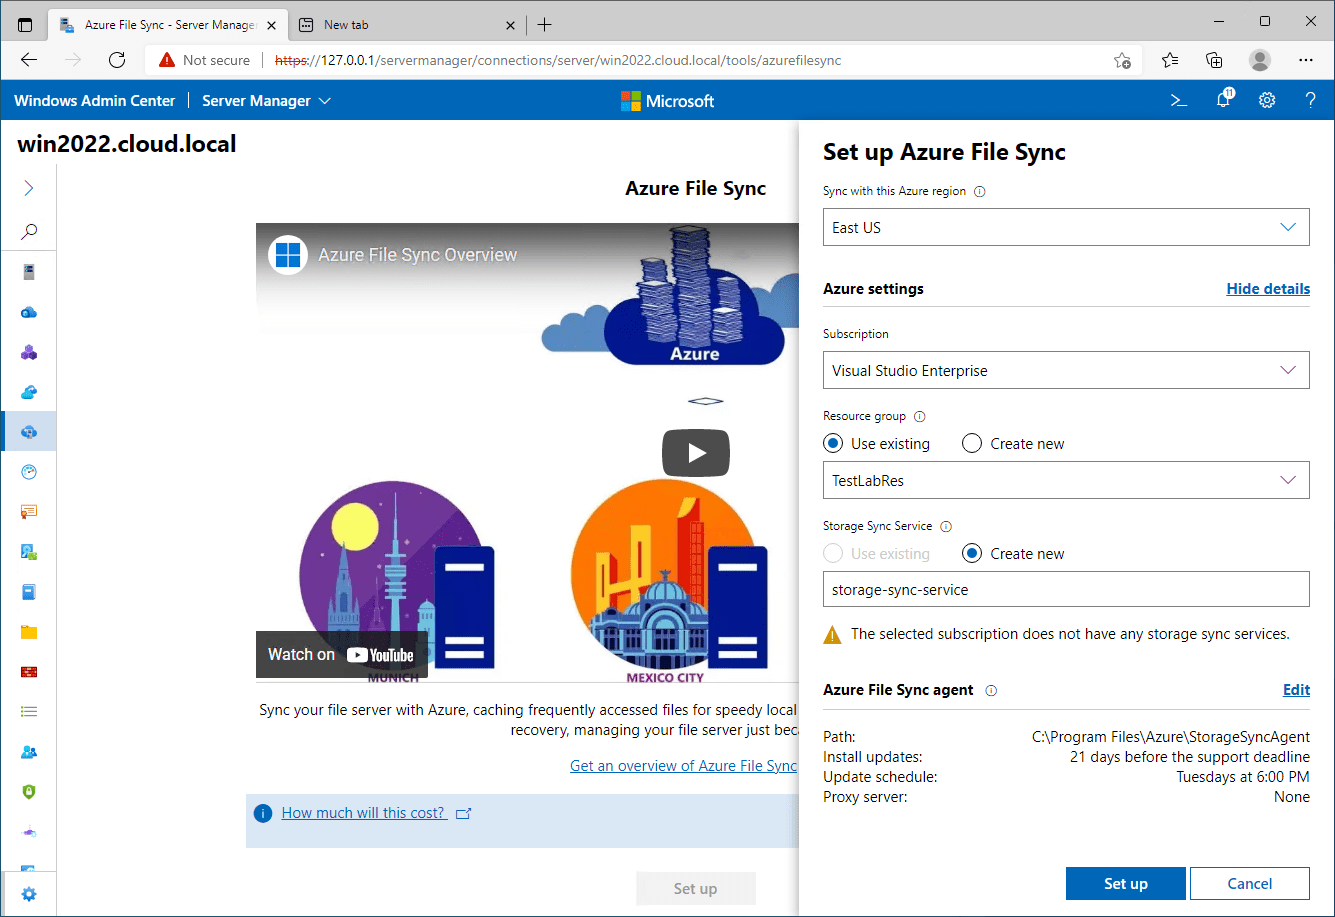
Below, the configuration is set up correctly and ready to go.
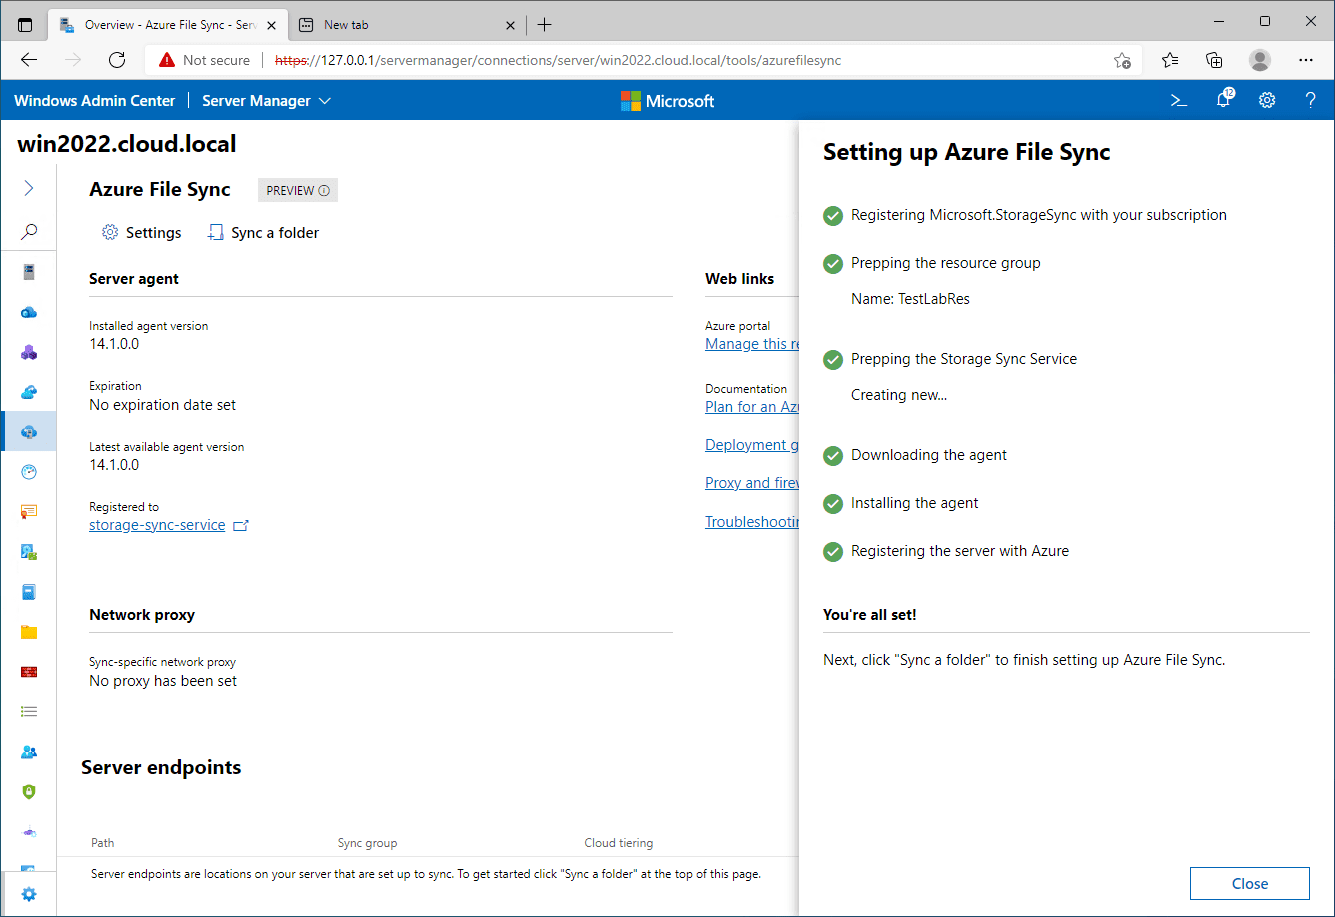
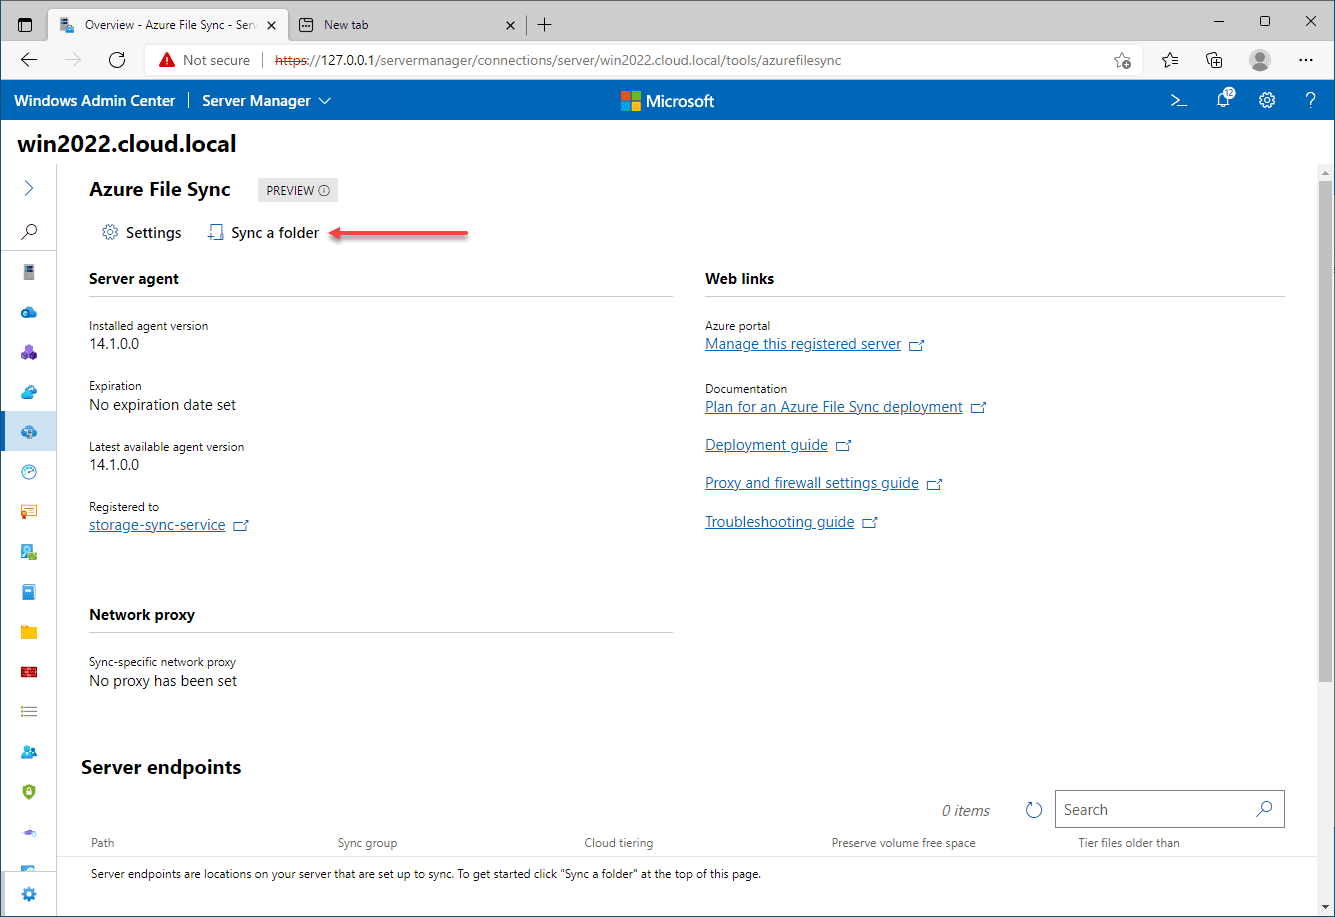
In the Azure File Sync configuration in Windows Admin Center, you now can setup the folder sync. Click the Sync a folder button to start up the configuration folder sync.
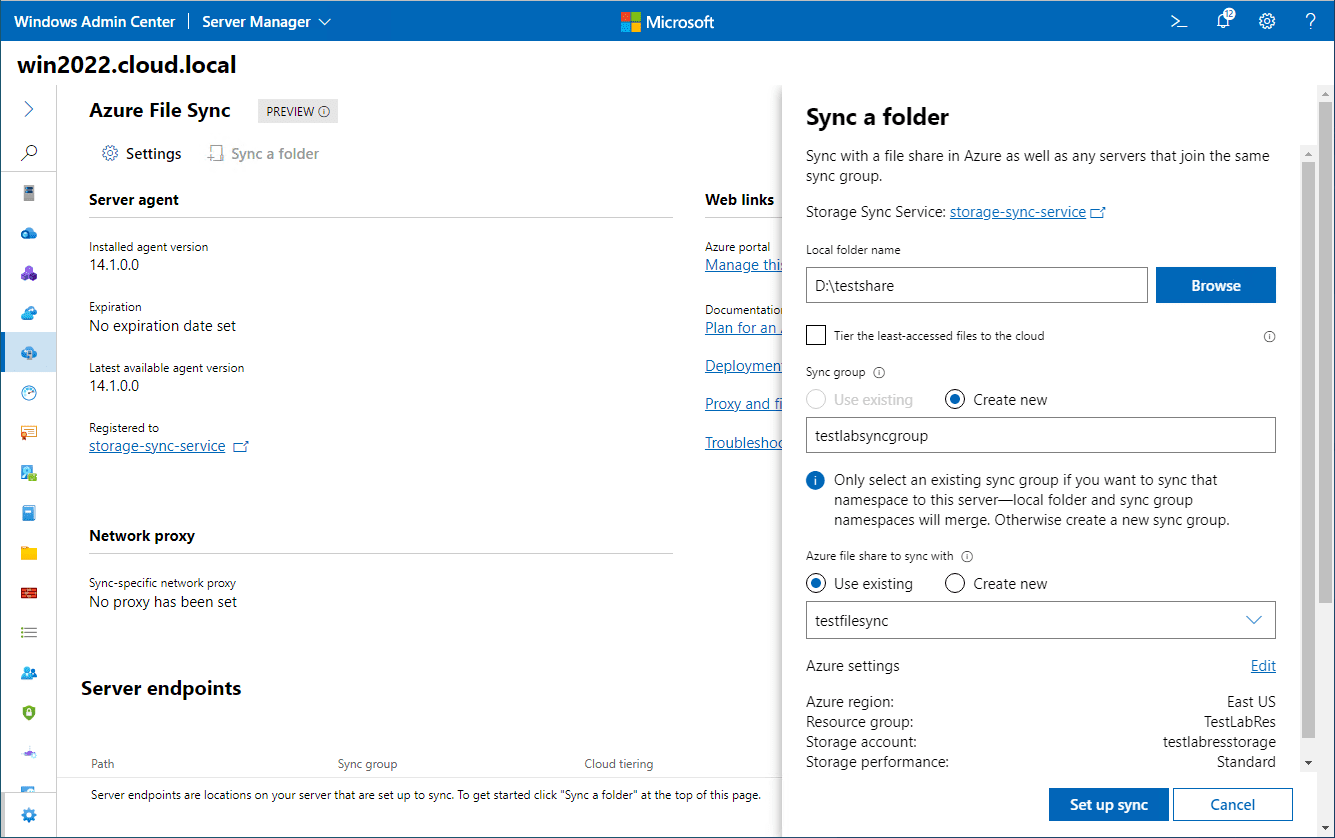
This brings up the Sync a folder configuration. Select the local folder you want to sync in the local folder name field. You need to enter a Sync group name and an Azure file share to sync with.
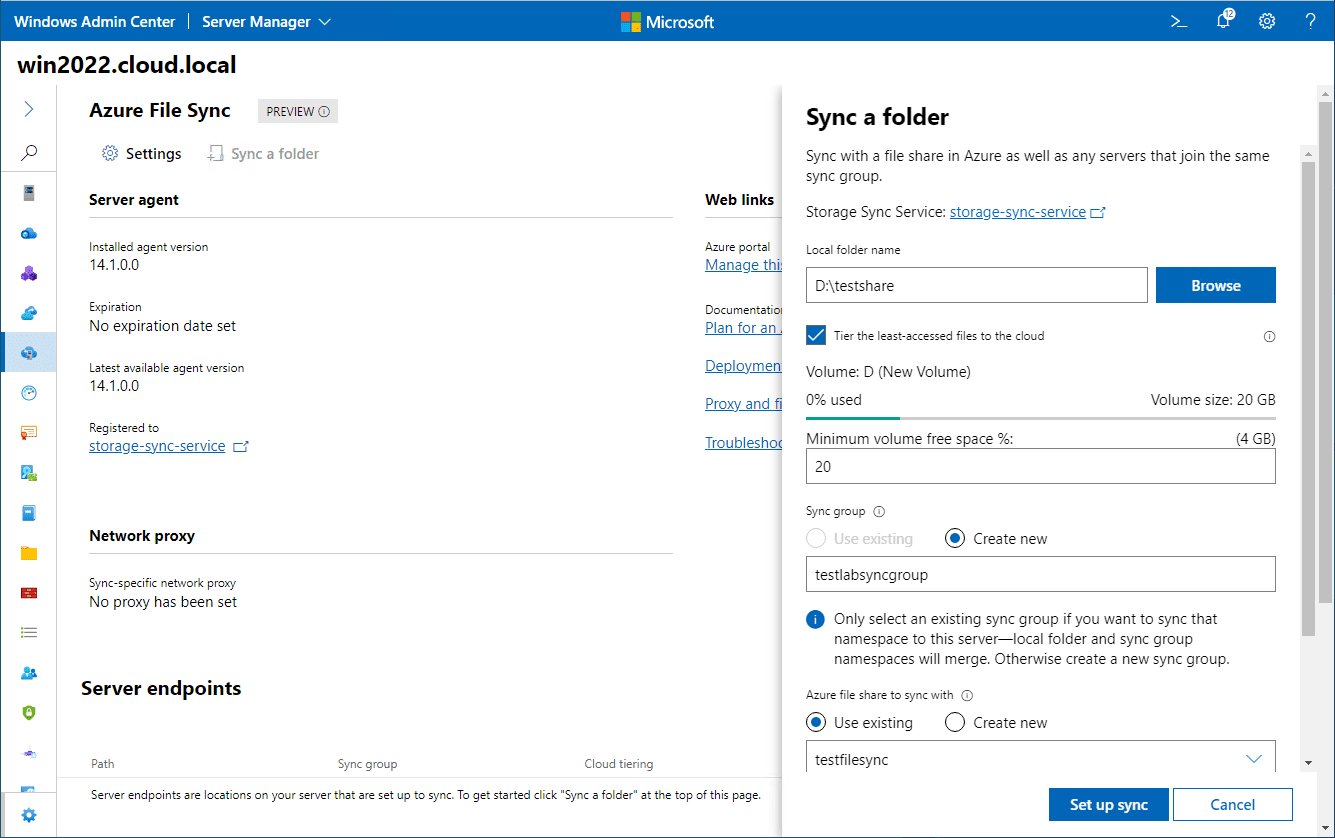
Below, if you notice when ticking the Tier the least-accessed files to the cloud checkbox, you can configure the space used in your on-premises server.
Installing the Azure File Sync Agent with PowerShell
You can install the Azure File Sync Agent with PowerShell using the following code:
# Gather the OS version
$osver = [System.Environment]::OSVersion.Version

# Download the appropriate version of the Azure File Sync agent for your OS.
if ($osver.Equals([System.Version]::new(10, 0, 17763, 0))) {
    Invoke-WebRequest `
        -Uri https://aka.ms/afs/agent/Server2019 `
        -OutFile "StorageSyncAgent.msi"
} elseif ($osver.Equals([System.Version]::new(10, 0, 14393, 0))) {
    Invoke-WebRequest `
        -Uri https://aka.ms/afs/agent/Server2016 `
        -OutFile "StorageSyncAgent.msi"
} elseif ($osver.Equals([System.Version]::new(6, 3, 9600, 0))) {
    Invoke-WebRequest `
        -Uri https://aka.ms/afs/agent/Server2012R2 `
        -OutFile "StorageSyncAgent.msi"
} else {
    throw [System.PlatformNotSupportedException]::new("Azure File Sync is only supported on Windows Server 2012 R2, Windows Server 2016, and Windows Server 2019")
}

# Install the MSI. Start-Process is used to PowerShell blocks until the operation is complete.
# Note that the installer currently forces all PowerShell sessions closed - this is a known issue.
Start-Process -FilePath "StorageSyncAgent.msi" -ArgumentList "/quiet" -Wait

# Note that this cmdlet will need to be run in a new session based on the above comment.
# You may remove the temp folder containing the MSI and the EXE installer
Remove-Item -Path ".\StorageSyncAgent.msi" -Recurse -Force
Azure File Sync Services
- What is Azure File Sync? Azure File Sync services is a service that allows connecting an on-premises Windows Server with Azure Files shares. This allows tiering storage and many other benefits to
- How to access Azure file storage? Azure File storage can be accessed in the Azure portal. It can also be accessed in PowerShell and using Windows Admin Center Azure File Sync.
- What are Azure Files? Azure Files allows exposing SMB, NFS, and FTPs shares in the Azure cloud
- What is cloud-tiered storage? Azure cloud-tiered storage is a capability of Azure File Sync that allows caching “hot files” locally in an on-premises server and then the “cold” data in the cloud or that isn’t access frequently
Final Notes
Windows Server 2022 is the most fully-featured hybrid capable Windows server to date. It allows connecting to Microsoft Azure environments across the board with many different services. Windows Admin Center exposes the ability to configure, manage, and monitor the services connected between on-premises and Azure. Azure File Sync services is a very interesting option for organizations and gives options for how data can be tiered out with virtually unlimited cloud storage.


