How to Sync Passwords between Child and Parent Domain with FIM 2010 R2
For those of you in a multi domain environment due to the structure of your company or from migrations from legacy directory services into AD, there often is the need to synchronize various directory objects with other directory objects, especially if you have a resource domain and an account domain. Recently in working with an Active Directory infrastructure that was setup with disabled user accounts in the parent root domain (was originally setup as a resource forest for Exchange, however external domains had been brought in as child domains), and then had child domains with accounts in them, the need arose to synchronize only passwords from the child domain up to the forest root parent domain.
My first thought here was Forefront Identity Manager 2010. The latest version of FIM 2010 is in R2 trim and is really a very powerful product for synchronizing directories. It is not too difficult to set it up between child and parent domain, however, there are a lot of moving parts and pieces that are a bit tedious to setup. The steps we need to complete are:
- Upgrade the forest schema
- Setup the SPN
- Install the PCNS service on all the child domain controllers
- Setup the management agents in FIM 2010 R2
- Setup the run profiles for the management agents
- Run the “run” profiles to get the correct joins
- Set the logging levels on the PCNS
Upgrading the schema
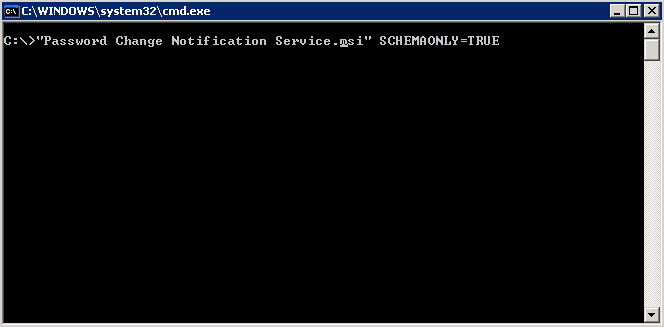
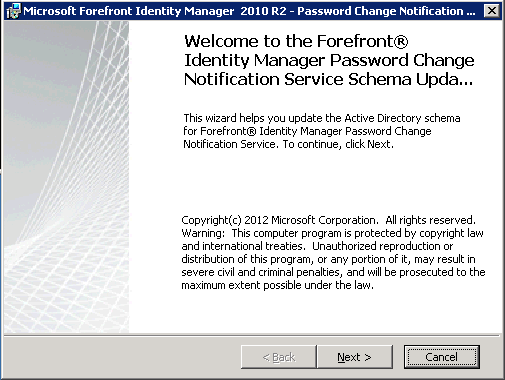
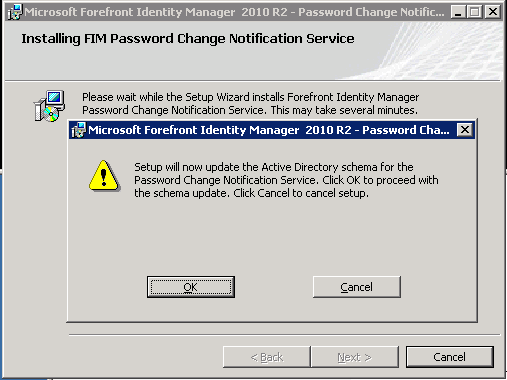
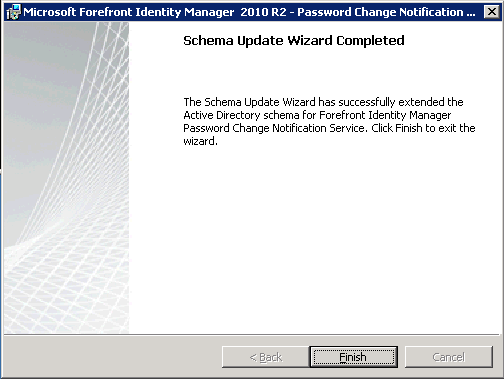
The first thing we need to do is upgrade the forest schema to understand the FIM and PCNS extensions. You need to do this of course in the forest root on the schema master. To do this you need to copy the PCNS MSI installation file to the DC and run a special switch against the MSI found below. Also, make sure you are a member of the Schema Admins group to make the schema changes.
msiexec /i PCNS.msi SCHEMAONLY=TRUE
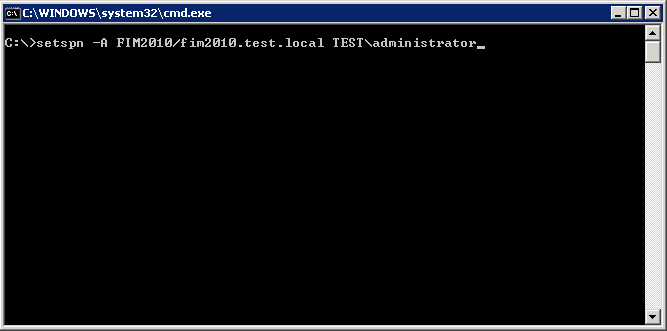
Setting up the SPN
Setting up the SPN for PCNS service to use is easy enough to setup as well. Use the following syntax to setup the SPN to use:
setspn -A PCNSCLNT/fim2010.testl.local TESTDOMAINfimservice
Keep in mind the account you use for the SPN needs to be the same account that you use on your FIM 2010 R2 box to run the synchronization service.
Just a side note, if you make an error in setting up the SPN, the syntax below allows you to delete the SPN you created:
setspn -D PCNSCLNT/fim2010.test.local TESTadministrator
Setup PCNS on all domain controllers
PCNS will need to be setup on all domain controllers that you want to capture password change requests. For instance in the scenario mentioned in synchronizing child domain accounts to parent domain, the PCNS service needs installed on the child domain controllers.
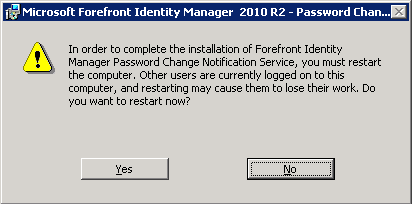
A reboot will be in order after installing the PCNS on your DCs so be sure to plan ahead for that.
Setup the Management agents in FIM
This is probably the most frustrating part from a documentation standpoint. There are a lot of documents out there that tell you how to setup the PCNS service and SPN account, etc as well as a few of the options you need turned on in the management agent config, however, a very important part to getting the PCNS sync to work between child and parent domain are the join and projection rules and attribute flow.
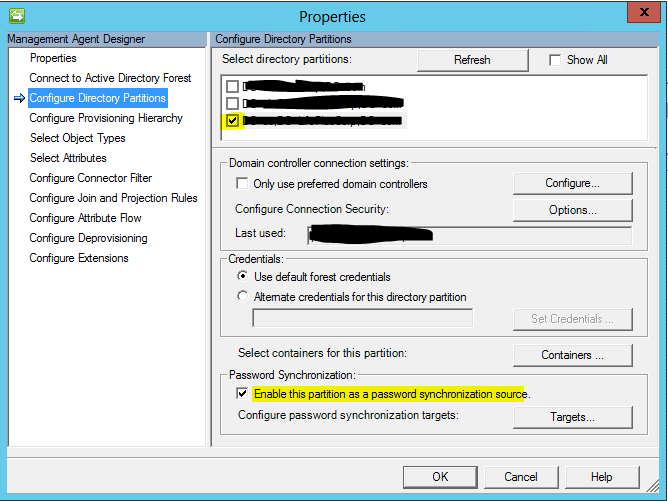
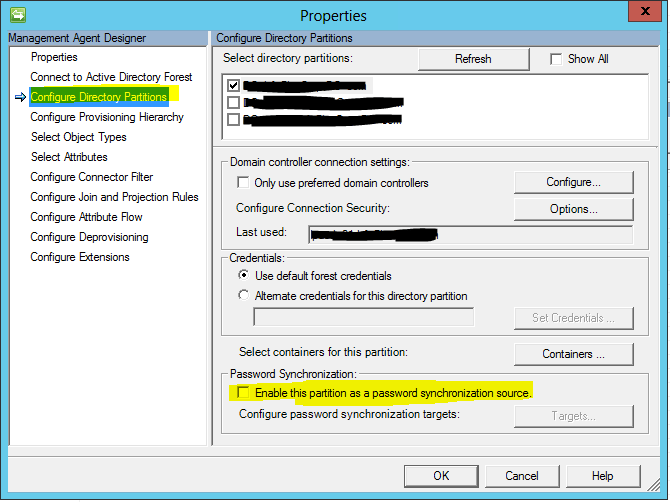
Create the first source Active Directory Domain Services management agent and select the directory partition that you want to synchronize from. Be sure to enable Password Synchronization as we will come back to this one after creating the second target management agent.
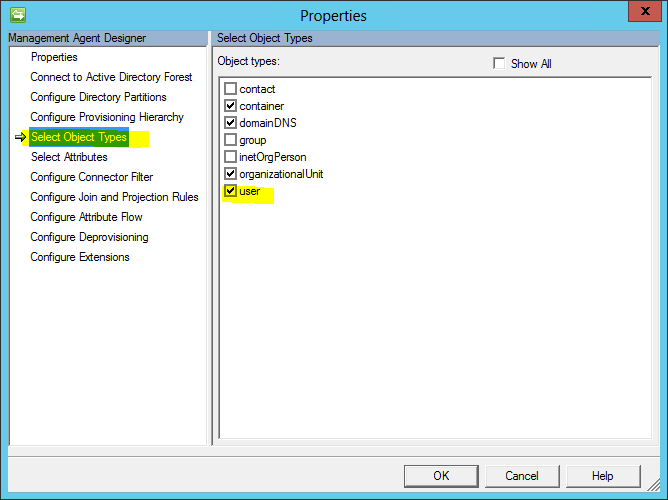
Under the Select Object Types, be sure to select user.

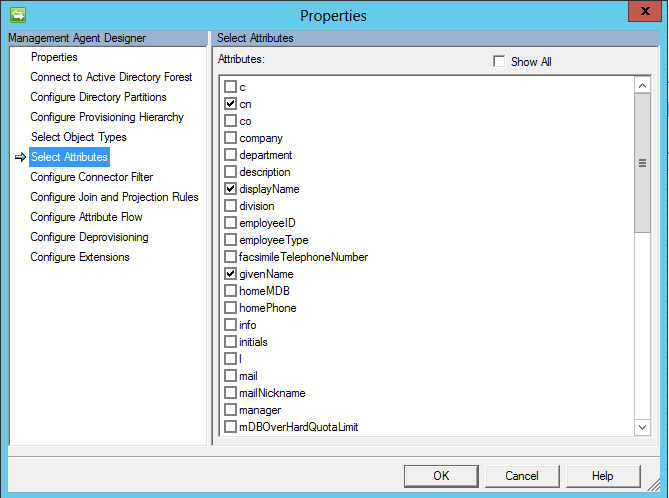
Under the select attributes menu, select cn, displayName, givenName, ObjectSID, SAMAccountName, and sn.
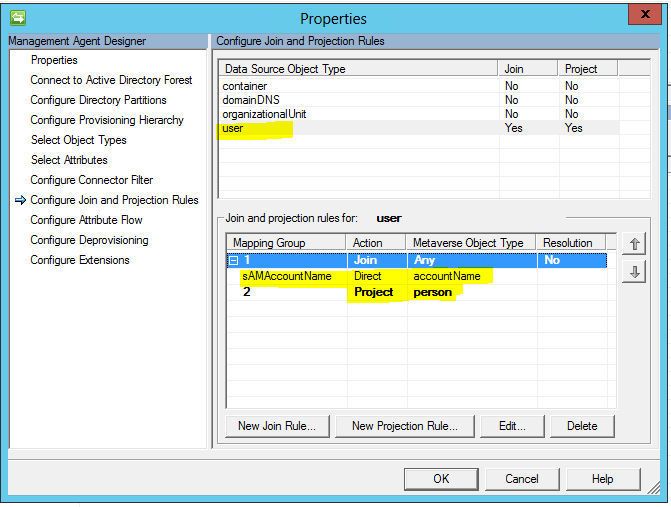
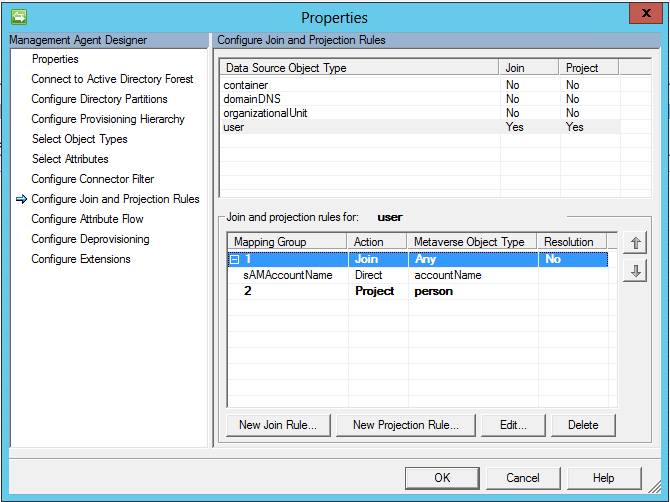
Select user and then click new Projection Rule and select the person option Declared. Then select the New Join Rule and set SAMAccountName direct to accountName
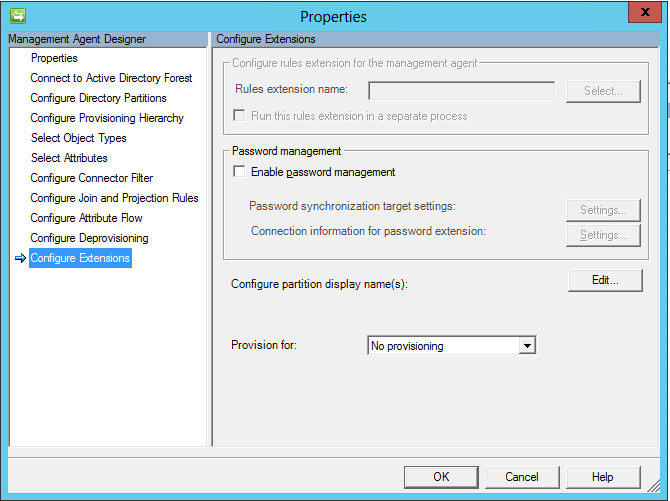
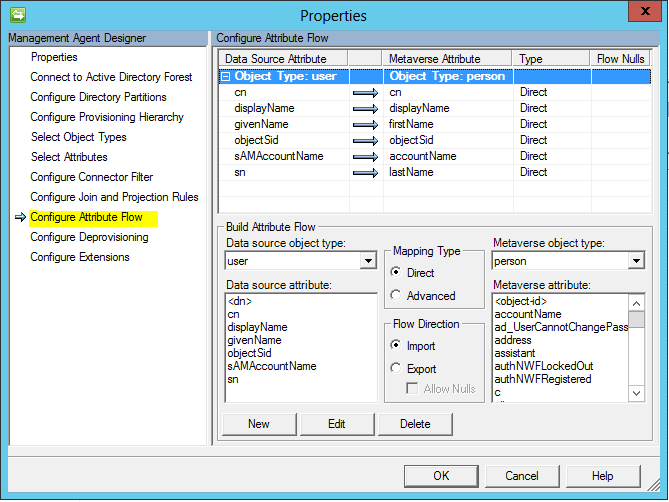
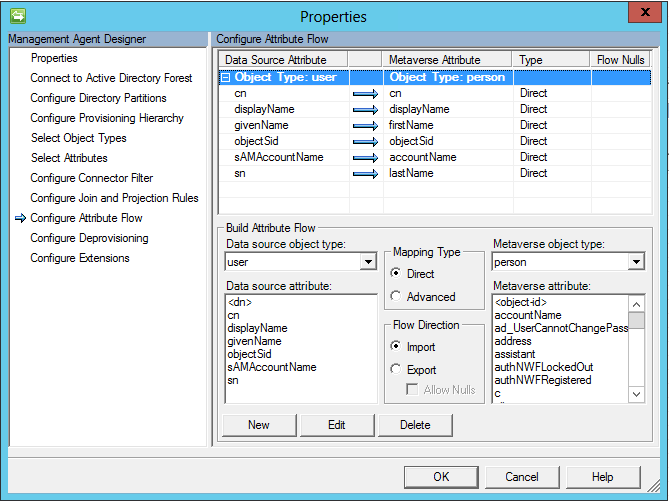
Setup the Attribute Flow as pictured below.
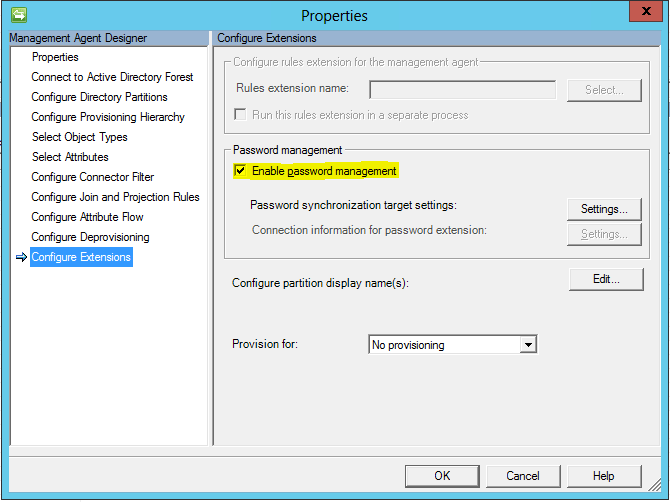
Notice that in the source management agent, we don’t have the Enable password management enabled as this is the source.
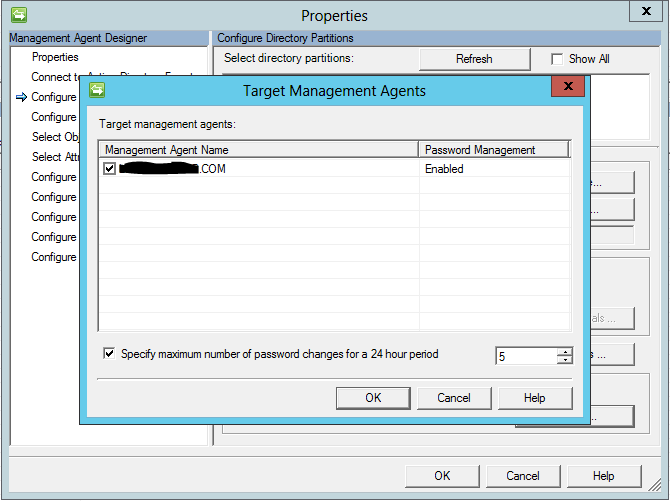
Be sure after you have configured the target agent (steps to follow) that you go back under the Configure Directory Partitions and select Password Synchronization and Targets. Select your target management agent with a checkbox and hit Ok.
Target Agent configuration
The below is very similar to the source management agent. Take note of the differences such as not enabling the Enable this partition as a password synchronization source.

Setup Run Profiles
Setup Run Profiles on both agents that look like this:
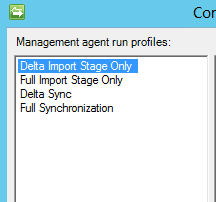
After setting up the management agents for both source and target (child and parent) domain, Run the Full Import Stage Only followed by the Full Synchronization which gets the source objects in the metabase.
After you run the target management agent, you should see joins listed:
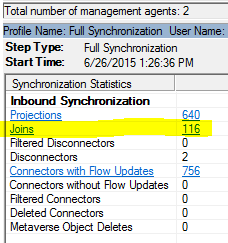
These indicate the users in the source and target that match your criteria.
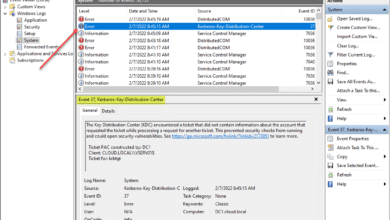
Set Logging levels on both the FIM 2010 R2 server and DCs:
The default logging is not good enough on the FIM Synchronization service or the PCNS service. Set the logging as follows on both:
- 0 = Minimal Logging
- 1 = Normal logging (default)
- 2 = High logging
- 3 = Verbose logging
For PCNS, there are four logging levels that are controlled by adding the EventLogLevel (REG_DWORD) entry to the following registry subkey:
HKEY_LOCAL_MACHINESystemCurrentControlSetServicesPCNSSVCParametersLogging
- 0 = Minimal Logging
- 1 = Normal logging (default)
- 2 = High logging
- 3 = Verbose logging
Test a password reset:
After you have done the following you should be at a point to test the PCNS service and see a successful synchronization of a user account password in a source domain (child) with the parent domain.