In playing around recently in my home VMware lab, I set about created a Windows Server 2012 R2 cluster with iSCSI storage. I have used many products over the years as opensource NAS appliances such as OpenFiler and others out there. Openfiler was my first download of choice. So I quickly got the ISO downloaded and installed into a VM running in my home lab setup and got a separate VMDK mounted as storage.
Of course I had no idea that I would run into any issues with Windows Server 2012 R2 and creating a failover cluster using Openfiler iSCSI storage, but more to come on that in a minute. The servers themselves were “plain jane” installs of Windows Server 2012 R2 Datacenter edition in identical VMs with the latest Windows updates installed. I mounted two LUNs on both servers via iSCSI, one for the data drive and one for the quorum drive.
I configured contiguous manual IPs, named both servers what I wanted them named and installed the Failover Cluster Feature in both VMs. The first step I took before attempting to setup the cluster was to “Validate configuration” on the nodes before running the cluster wizard. In fact, this is what the normal prompting in the wizard will have you do anyway.
Not suspecting any errors, I was surprised to see the storage doesn’t support iscsi-3 persistent reservations error in the validation wizard. In doing some reading others had issues with OpenFiler and even other opensource products out there which offer iSCSI.
I decided to try FreeNas which had been mentioned by a couple of blog posts that it supported the scsi-3 standard. Same setup, I downloaded the ISO, installed in a VM, configured iSCSI LUNs and then mounted these on both VMs. Again! Same error when running the validation wizard!
Napp-it
I had read a blurb from someone that they had used Napp-it and they had verified it will pass the SCSI-3 persistent reservation test. I decided to give it a try. Napp-it is available in a ready to run VM appliance that is free to download from here: https://www.napp-it.org/downloads/index_en.html
The download was painless and was around 1.3G in a .zip file. After extracting the .zip, it weighed in at around 20G. The extracted folder contains the .vmdk and .vmx files that you need to import into your VMware environment.
After doing the initial setup on Napp-it, setting passwords, ip address, etc, I added a couple of Hard Disks to the VM appliance for storage to assign via iSCSI. Napp-it is definitely a lot less intuitive than Openfiler, FreeNas, and others. However, below are the steps you need to follow to get a working LUN setup . Also, make sure your Comstar iscsi service shows online and is running.
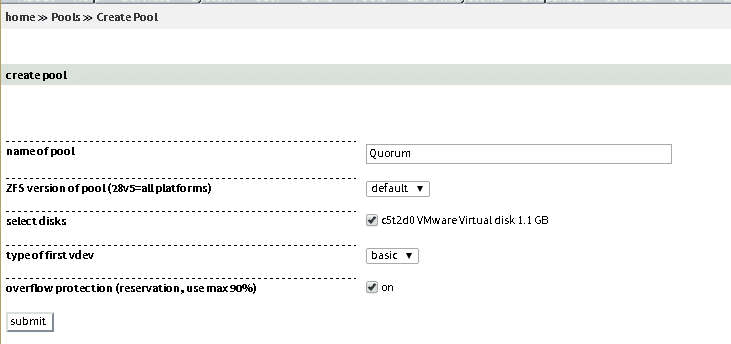
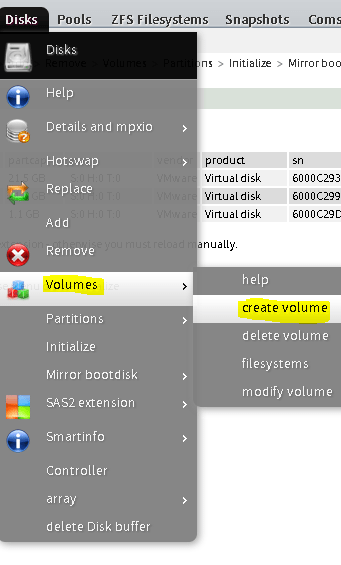
- After you have added the storage physically (hard disks, or vmdk files) you will want to go to Pools >> create Pool to start provisioning your storage.

- Select the name of the pool, ZFS version, the disks you want to provision in the pool, and I just accepted the defaults on the rest
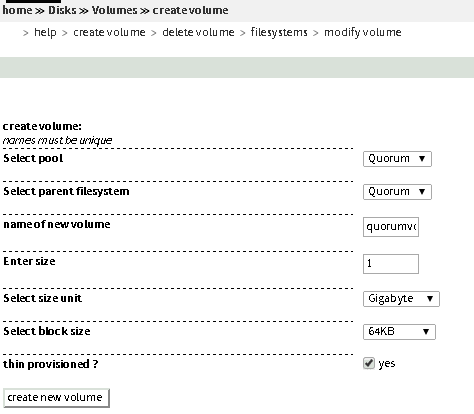
- Next, we can create our volume.
- Select the pool, parent filesystem, and name of the volume along with the size
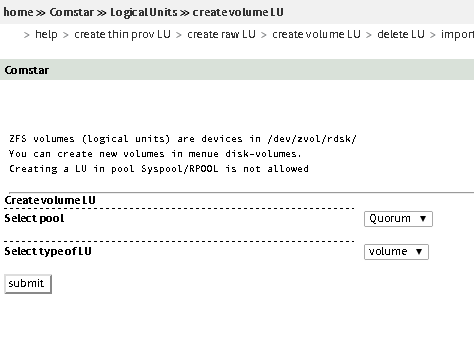
- Next, we create the volume LU under the Comstar menu
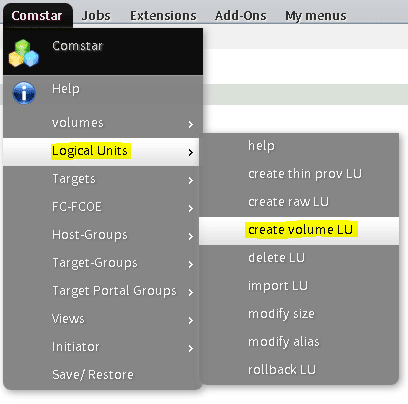
- Select the pool and then the type of LU
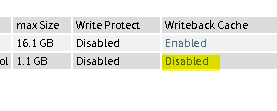
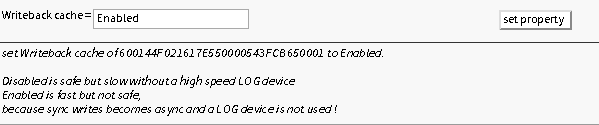
- By default when you create the volume, Writeback Cache is not enabled, I would enable this for best performance
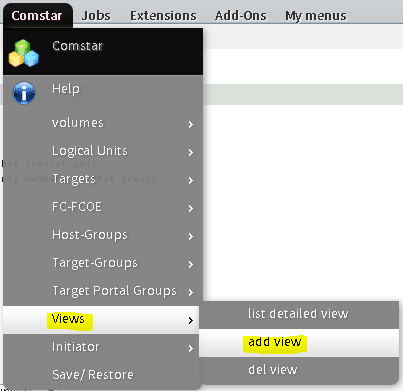
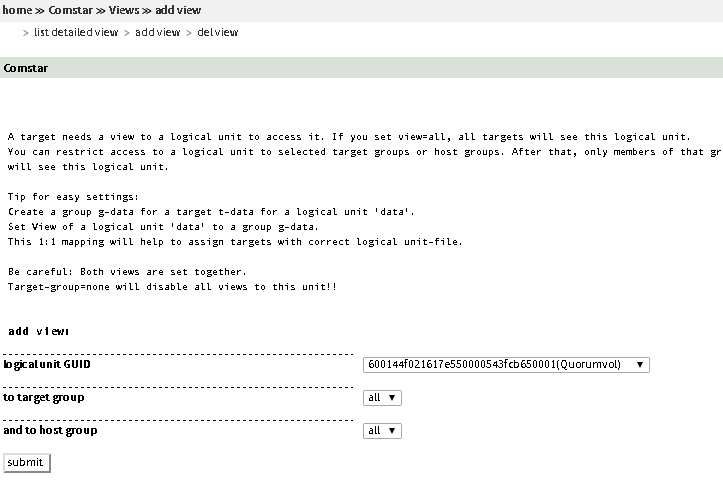
- Next we add a view
- We select the logical unit GUID, and I set the target group and host group to all, since this is in a test isolated network
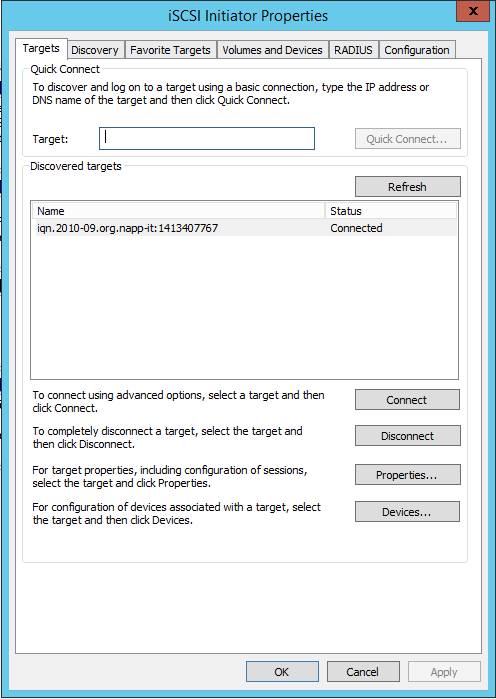
- On our Windows 2012 R2 servers, we need to launch the iSCSI Initiator Properties (select yes to the message about starting the service automatically) and then enter our target. You simply enter the IP address of your napp-it server here.
Additional Windows Considerations
After you configure your iSCSI Initiator Properties, you will need to go into Disk Management and actually Provision the volumes and drive letters within Windows. You may need to bring the disk online and initialize it first, especially on the first host that touches the iSCSI storage.
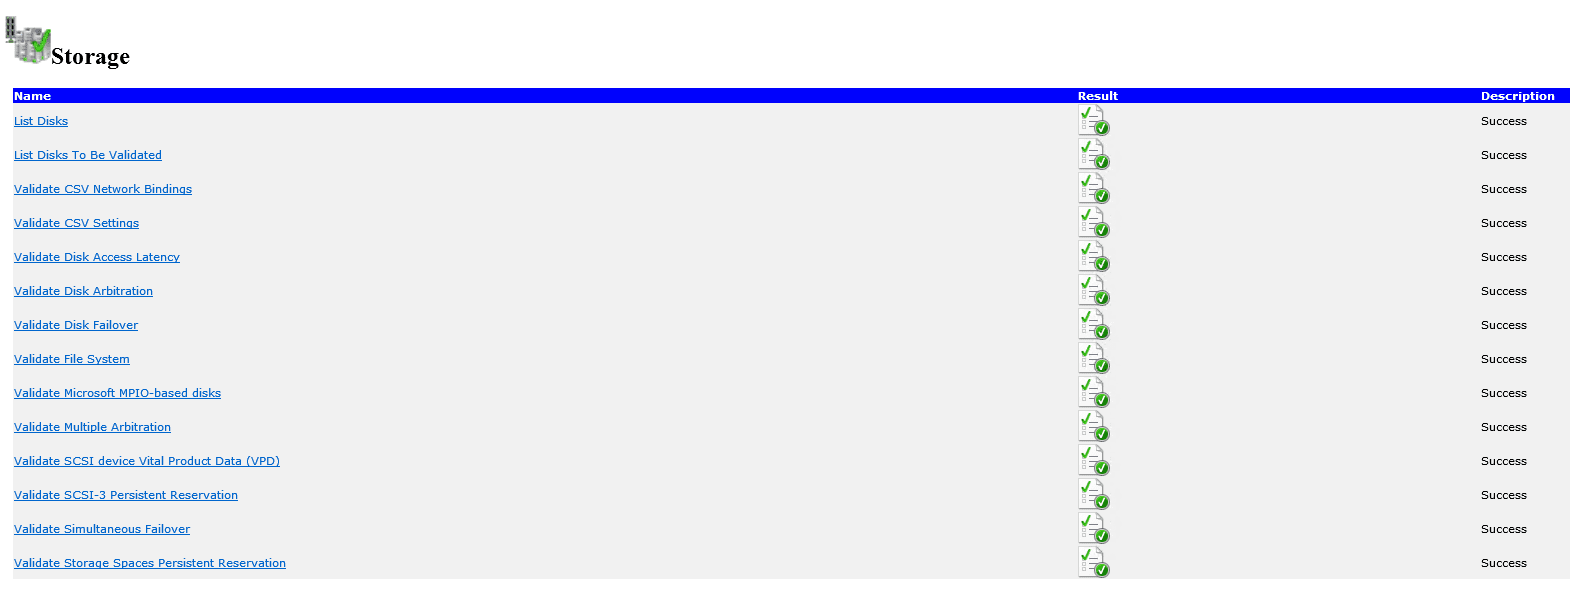
After you setup the storage on both hosts, then install the Failover Cluster Feature, you will then be able to Validate the Cluster and see that the SCSI-3 Persistent Reservations should pass with napp-it.
Google is updating how articles are shown. Don’t miss our leading home lab and tech content, written by humans, by setting Virtualization Howto as a preferred source.
About The Author