Have you ever installed a program that requires a specific resolution that is a different resolution than you normally run? It can be a pain to have to manually change the resolution via the Windows control panel each and every time you want to run the program. This can also be a tremendous pain for system admins who may have a piece of software that is deployed on hundreds of workstations that when launched require a specific resoltion. Admins also do not want the pain of having to reset the resolution back to the original settings once the program has been closed out.
There is a great little free app called Reso made by bCheck which does all the heavy lifting for end users. What is nice about this app is that it is literally a self contained executable that requires no installation that executes the program and changes the resolution for that program. Once the program is closed, it sets the resolution back to the original settings. Also, the display “colors” as well as the “refresh rate” can also be changed.
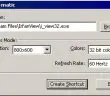
To get started, all that needs to be done is download the Reso executable and place the file anywhere on the computer that you want to change the resolution settings on. A good logical location might be the “C:Program Files” directory. You could create a “Reso” folder and move the .exe there. Next, simply launch the Reso executable and you will see the dialog box below. Notice in the “Application” field, the path to the executable has been populated after “Browsing” or typing in the path.

Once Reso is pointed to the application’s executable file, click the Create Shortcut button which will create a new .lnk file that can be copied anywhere. Using this new shortcut file, Reso automatically launches the program behind the scenes and switches the resolution.
This is a great tool that should be added to the system admin’s bag of tricks. By utilizing this app and the resulting shortcut file, it would be possible to set any number of resolution, colors, or refresh rate settings in Windows for any number of programs.
Google is updating how articles are shown. Don’t miss our leading home lab and tech content, written by humans, by setting Virtualization Howto as a preferred source.
About The Author