Create A Network Between Two Windows 7 Computers

To someone who may be new to computers or to networks in general, to be able to create a successful network between two Windows 7 computers might seem like a daunting task. Granted, everyone’s environment and computers are different, however, there are some general concepts and tricks one can follow to be successful at creating a network between the two computers. The complexities of networks can be broken down into multiple layers, however, in terms of this post, we are going to cover 5 main areas that need to be configured before successful communication between two Windows 7 computers.
- IP addressing
- Windows Firewall
- User Accounts
- Other File system options
- Hardware
IP Addressing
Users may become frustrated by not being able to make communication possible between the computers because of mismatched IP addresses on the two computers. In order to have successful communication the IP addresses need to have “like” configurations. In more technical networking terms they need to be on the same subnet which means they can send packets to one another without having to be routed by a router or some other device to make communication possible.
Since we are talking about only 2 computers, we only need at the very minimum 2 IP addresses. A good range to use that is certainly very common for home networks is the 192.168.1.X 255.255.255.0 network. So you simply need to assign a couple of IPs from the rand 192.168.1.1-192.168.1.254 available IPs. You could very easily use 192.168.1.1 for one computer and then use 192.168.1.2 for another computer.
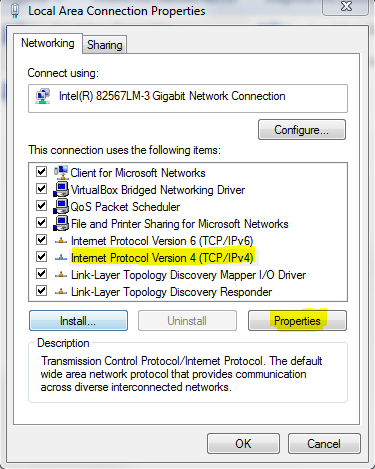
You can get to your network adapter properties by typing ncpa.cpl at a run or search menu. Then simply right-click on the “Local Area Connection” adapter for each machine. Choose TCP/IP. click the “Internet Protocol Version 4 (TCP/IPv4) setting and thne choose “Properties”.
Then it is simply the process of assigning the IP addresses. Below is a screenshot from one of the windows 7 computers. Notice we have assigned the 192.168.1.1 address with the appropriate subnet mask. The Default gateway or DNS settings do not really matter in this scenario since all we care about is being able to communicate between the two computers. If Internet traffic is important, then simply fill in the appropriate Default Gateway and DNS settings for your ISP.
Windows Firewall and UAC
Windows Firewall can potentially pose a problem for network communication since it will by default not allow File or Printer sharing. To enable this we simply need to alter our Windows firewall settings. To do this, type firewall.cpl at a run or search menu.
After you launch Windows Firewall, over on the left hand side you will see the option to “Allow a program or feature through Windows Firewall”.
Notice below that we have “File and Printer Sharing” enabled and set to allowed.
User Accounts
The third ingredient to successful network communication between a couple of Windows 7 computers is user accounts. By default any Windows 7 computer only “knows” about the accounts on its own user database. So if it is not joined to a domain where you have a central user database, you will have to take this into consideration when setting up network sharing between computers.
One of the simplest ways to fudge the system is to create an account on both windows 7 computers that is identical. Both the username and the password have to match exactly. When you have this setup, it won’t matter if you aren’t on the same domain or workgroup and you won’t have to worry about specifying the machine name in front of the user either.
Simply navigate to the local users and groups of each Windows 7 computer by typing in lusrmgr.msc at a run or search menu. Right click the user’s folder and select “New User…” and the new user dialog box will open to allow user creation.
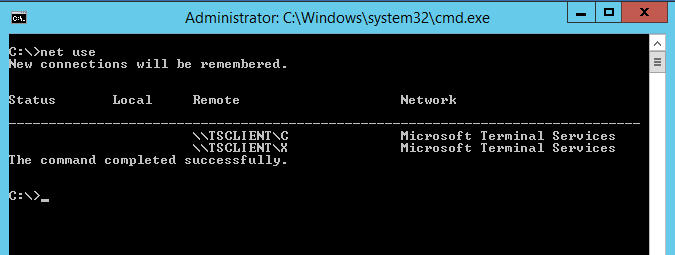
Once you have the users on both machines setup, you will be able to map a share or drive between the two computers. You can do this by right-clicking on “Computer” and selecting “Map Network Drive…” or you can run the following command at a DOS prompt:
net use * \windows7computer2\c$
You would replace the “windows7computer2” with the name of whichever Windows 7 computer you want to map a drive to. The “C$” is an administrative share that is setup “out of the box” in Windows 7 and should allow connection. However, you can create custom shares of a single folder or subset of folders of your choosing.
Other File System Options
There is another File System option that can cause problems when trying to setup a standard network. It is the “Use Sharing Wizard” option in the File and Folder Options. You can get to this dialog box by typing control folders at a run or search menu.
Click on the View menu at the top and then scroll down to the bottom of the options where you see “Use Sharing Wizard (Recommended)” and deselect this option.
Hardware
Now let’s talk about hardware to make this happen. Both computers will have to have a network card that accepts an RJ-45 cable connection. You will need at the minimum 2 RJ-45 cables to connect both computers to a switch.
Some may be saying that you can use a cross over cable to directly connect both computers together. This is true, however, for stability and from the simple fact that most may have problems obtaining or making a crossover cable, we recommend using a very inexpensive switch.
You can purchase a Linksys(Cisco) 8 port 10/100 switch from Newegg for around $39.00.
https://www.newegg.com/Product/Product.aspx?Item=N82E16833124004
Simply hook both RJ-45 cables into the Windows 7 computers and then run those cables to two of the switch ports and having followed the setup the the rest of this how-to, you should be able to map drives and communicate with either machine to the other.
Final Thoughts
Setting up this kind of simple network between two computers is not terribly difficult. Just pay attention to the details of the setup, making sure to address the computers correctly, configure your Windows firewall settings to allow sharing, configure user accounts so that you can authenticate between the computers, cover the bases with the other file options, and finally obtain the needed hardware including a small switch and a couple of RJ-45 cables.
You will love the speed of network file copies as opposed to USB or other media as well as the unlimited amount of data that can be copied at one time since there will be no limit on a storage device that will have to be “sneakernetted” between the two computers.


