Virtualization

Installing vCenter Server 4.1 Step by Step

Installing vCenter Server 4.1 Step by Step

Installing vCenter Server 4.1 update 1 is a fairly straightforward install. In preparation for this demo, we have built a Windows 2008 R2 64 bit server with all Windows updates, downloaded the ISO for vCenter Server 4.1 update 1 (which is roughly 2.3GB) and burned this to our media. So simply run your DVD or mount your ISO file via the method of your choosing to get the setup rolling.

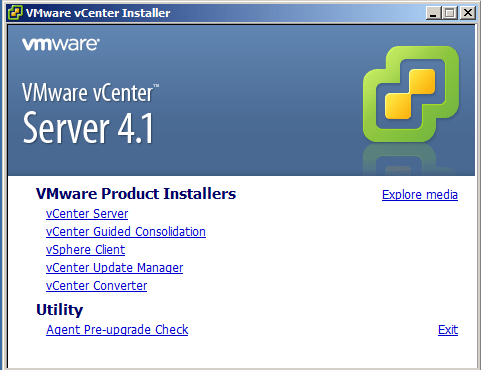
Once you run the DVD, you will be presented with the following installation screen for vCenter Server 4.1.  Notice that you have the options for many other components here, however, for this post, we will focus on the vCenter Server install:

vc1

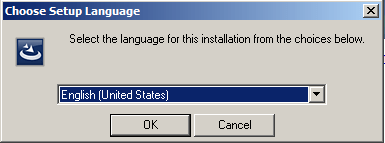
Language selection is next:


vc2

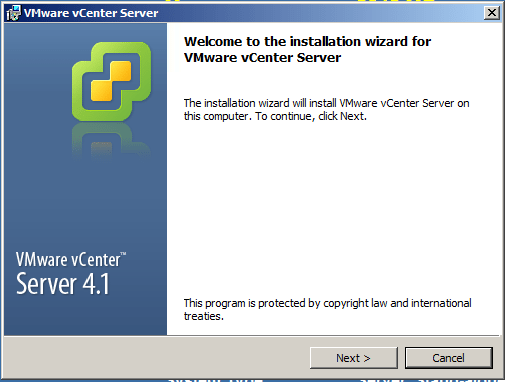
Next comes the “Welcome to the installation wizard for VMware vCenter Server” screen:


vc3


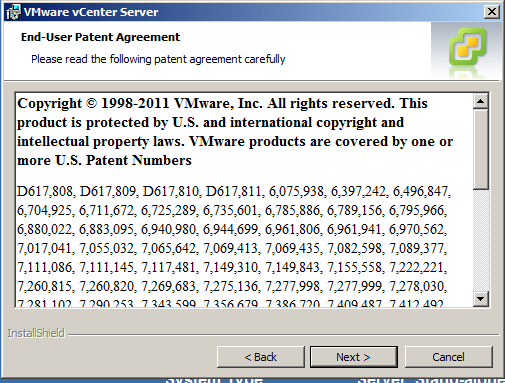
Review and “Next” past the Patent agreement:


 vc4


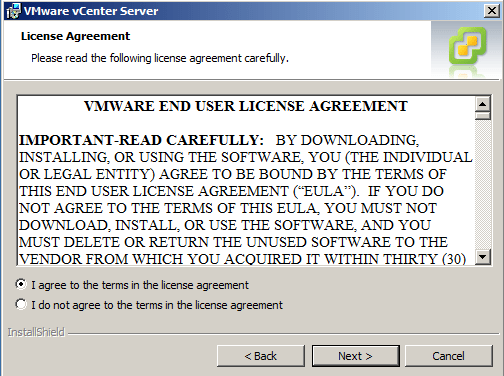
Select “I agree to the terms in the licence agreement”
   vc5

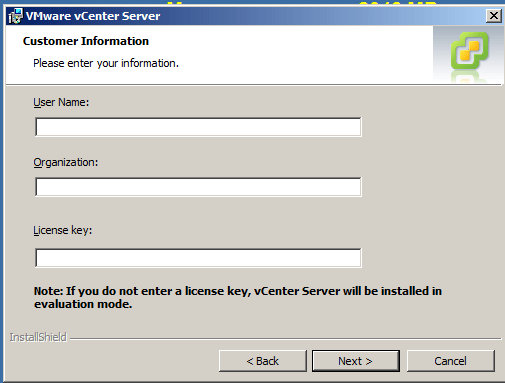
Enter your Customer Information including “User Name” “Organization” and also very importantly your “License Key.”  As noted for the license key field, if you do not enter one, vCenter will be installed in Evaluation Mode.


vc6


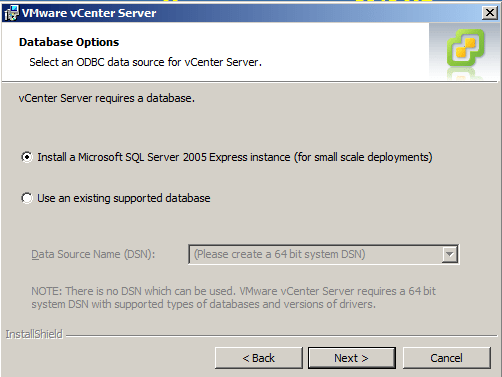
At this point you will be presented with a choice for your database options.  You may point vCenter to a full blown SQL 2005 or 2008 DB if you like, or if you have a small environment or a test environment you will probably want to use the Microsoft SQL Server 2005 Express option:
vc7 
  
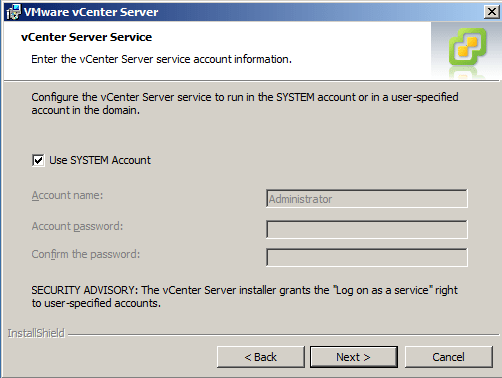
Next you will need to choose which user account will be used for the vCenter Server service.  The default uses the “Local System Account.”  


vc8


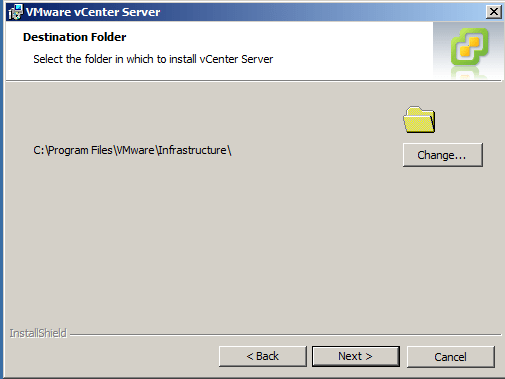
Choose your Destination Folder path where vCenter Server will be installed.  The default is “C:Program FilesVMwareInfrastructure”  
 
 
vc9


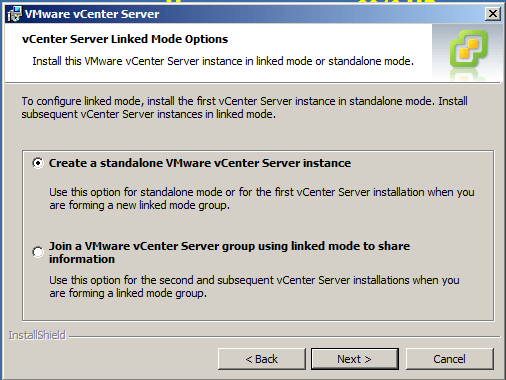
The next option is “vCenter Server Linked Mode Options.”  This allows you to choose whether this is a vCenter standalone installation or if you already have a vCenter Server running in your environment and you are simply wanting to spin up another server to “Join a VMware vCenter Server group using linked mode to share information.
 
 
vc10


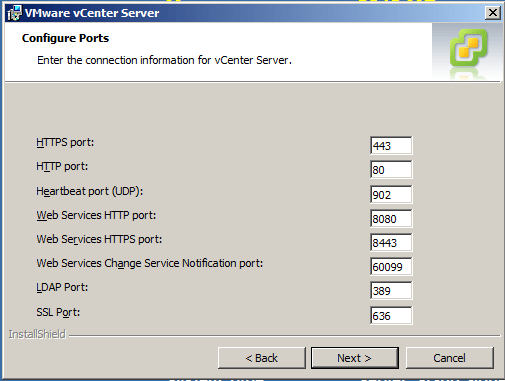
 Next is the “Configure Ports” screen where you can make changes to the default ports if you need:


vc11


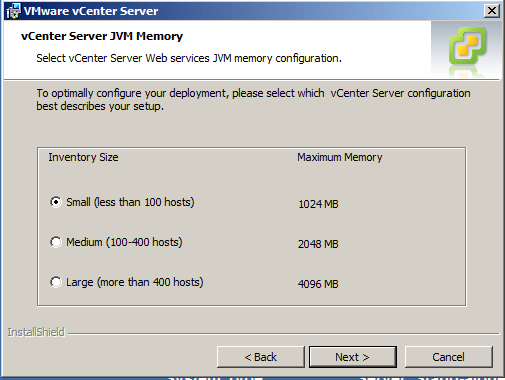
 vCenter Server JVM Memory configuration screen allows you to configure your deployment Memory:

vc12


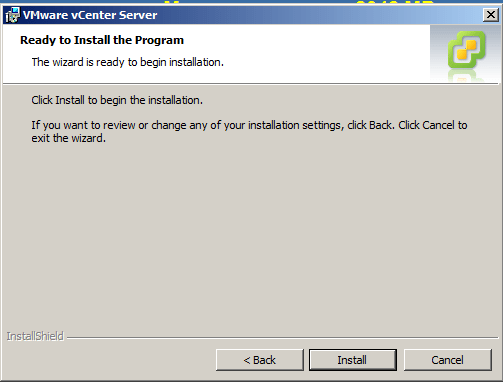
You will next receive the “Ready to Install the Program” screen where you need to click “Install.”


vc13

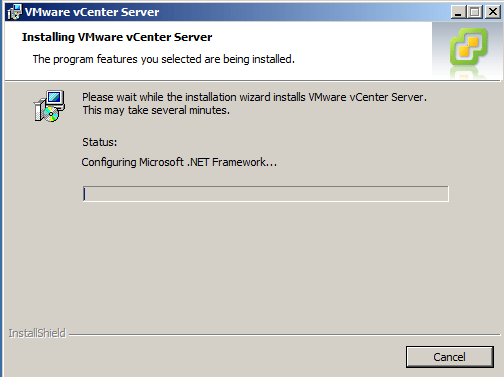
The install will take several minutes while the various components are installed:


vc14


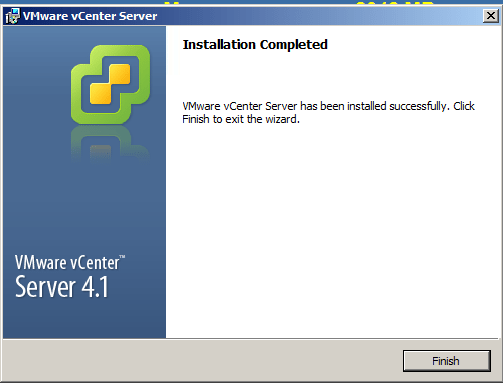
The install will let you know when the Installation is Completed.


vc15

vCenter Server installation is typically a straightforward install without any problems.  The installer does a good job of rolling through the various components installations once you have made all the choices in the installation wizard.


Subscribe to VirtualizationHowto via Email 🔔

Enter your email address to subscribe to this blog and receive notifications of new posts by email.

Brandon Lee

Brandon Lee is the Senior Writer, Engineer and owner at Virtualizationhowto.com and has over two decades of experience in Information Technology. Having worked for numerous Fortune 500 companies as well as in various industries, Brandon has extensive experience in various IT segments and is a strong advocate for open source technologies. Brandon holds many industry certifications, loves the outdoors and spending time with family.

Related Articles

Leave a Reply

Your email address will not be published. Required fields are marked *

This site uses Akismet to reduce spam. Learn how your comment data is processed.