I absolutely think the “star of the show” with the new Proxmox Datacenter 1.1 release is the new automated installation feature that will allow you to create answer files for your Proxmox installations like Proxmox VE Server 9.2. After trying the automated installs feature in Proxmox Datacenter Manager 1.1 with the new answer file process, I don’t see myself going back to the manual installations of Proxmox unless I absolutely have to. In this post, let’s walk through what Proxmox automated installs are, how the answer file process works, how to set it up, and what I learned after trying it in my own environment.
If you haven’t tried Proxmox Automated Installs, you need to
I have installed Proxmox more times than I can count. If you spend enough time in a home lab or production environment, reinstalling hypervisors becomes second nature. I usually in my testing use nested virtualization to install Proxmox and quickly burn the environment down.
You boot the ISO, answer the same prompts, pick storage, configure networking, type hostnames, assign passwords, wait for the install, reboot, and then start the real work of configuring the host. At first, this feels fine.
But, then, eventually you realize you are repeating the exact same steps over and over. That is where the new automated install answer file workflow in Proxmox Datacenter Manager 1.1 comes into play.
When I first heard about it, I assumed this would be one of those features that sounded useful in theory but would take more effort to configure that the time it might save. But, surprisingly, with the new built-in tools, it is way easier than I thought and even practical. With PDM automated installs, you can create an answer file that will configure:
- Hostname
- Networking configuration
- DNS settings
- Storage configuration
- User credentials
- Regional settings
- Installation preferences
If you haven’t seen the news about the new Proxmox Datacenter Manager 1.1 release, you can read my full blog post on it here: Proxmox Datacenter Manager 1.1 Quietly Added Its Best Feature Yet.
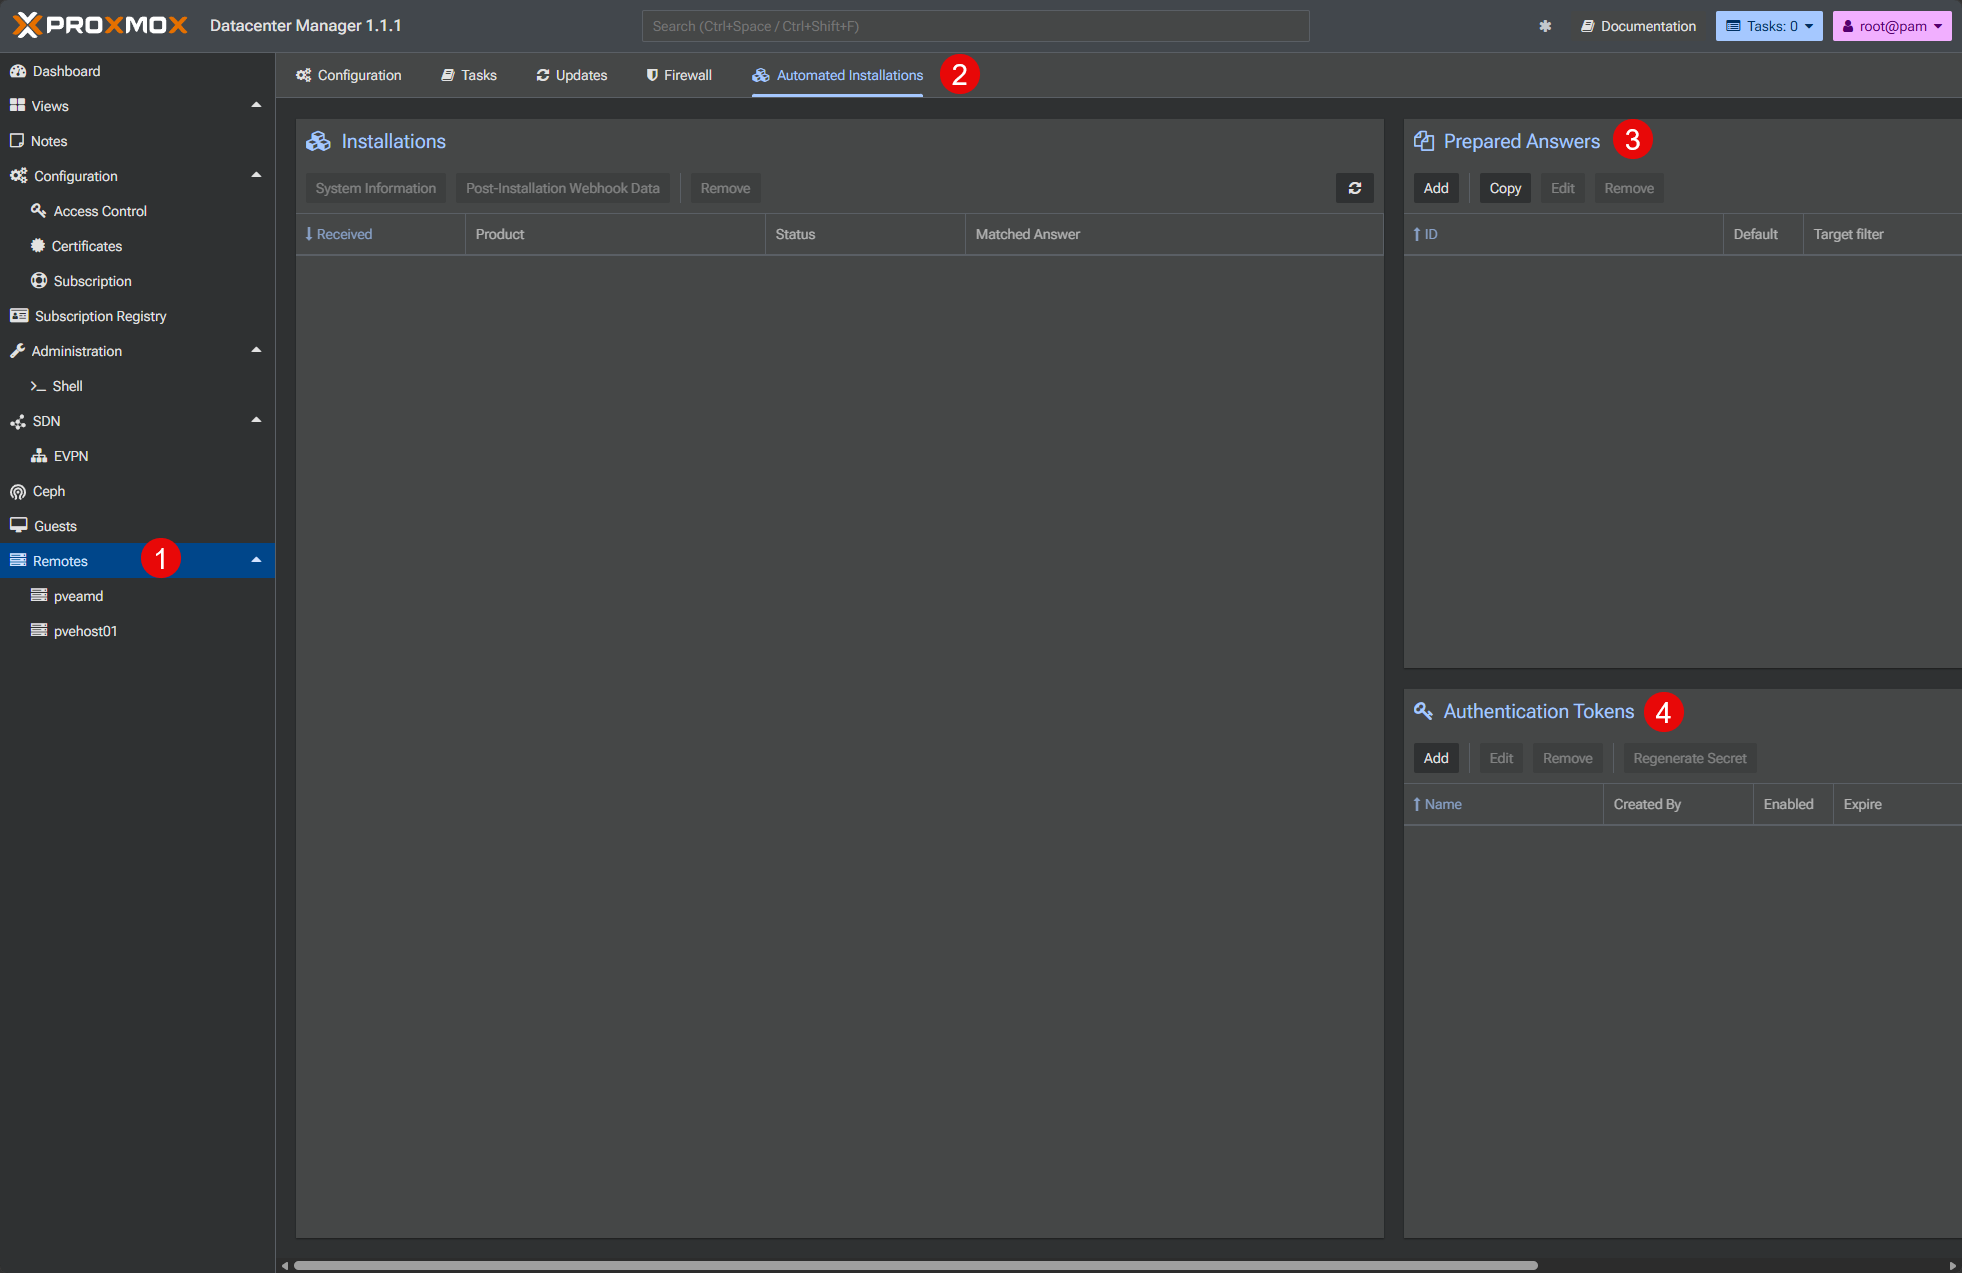
Proxmox Datacenter Manager 1.1 Automated Installation GUI
Let’s look at an overview of the GUI that is now found in the Proxmox Datacenter Manager 1.1 interface for managing these automated installs. Take note of the following screenshot and the corrersponding areas of the interface:
- Remotes – The new automated installations is found under the Remotes menu. This is the menu where you typically configure the remote connections to your Proxmox VE servers.
- Automated Installations – this is the new menu where you click to get to generate or view answer files and authentication tokens
- Prepared Answers – here is where you generate or view answer files for your automated deployments. Clicking the Add button kicks off the wizardized workflow to create a new answer file.
- Authentication Tokens – this is where you generate the tokens to secure your automated installations so that only those clients that you want to target will be able to receive the automated installation answer file
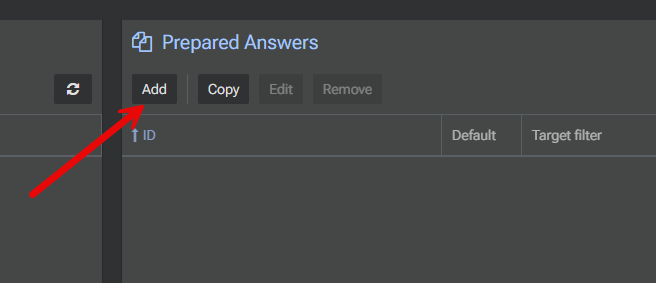
Creating the prepared answer file in Proxmox Datacenter Manager 1.1
Let’s now look at the process to create a prepared answer file in Proxmox Datacenter Manager 1.1. In the GUI section that we detailed in the above section, click the Add button under the Prepared Answers section.
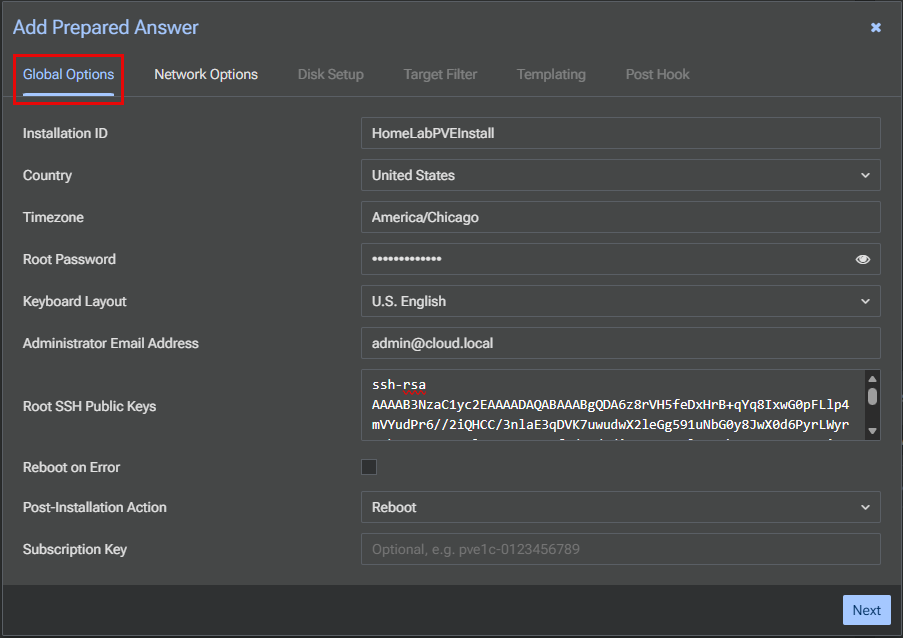
This will launch a wizard of sorts called the Add Prepared Answer file wizard that has global options, network options, disk setup, target filter, templating, and post hook configurations. The first page is the Global Options screen. Here you name the automated installation, set your locale options, root password, add an SSH key if you want, etc.
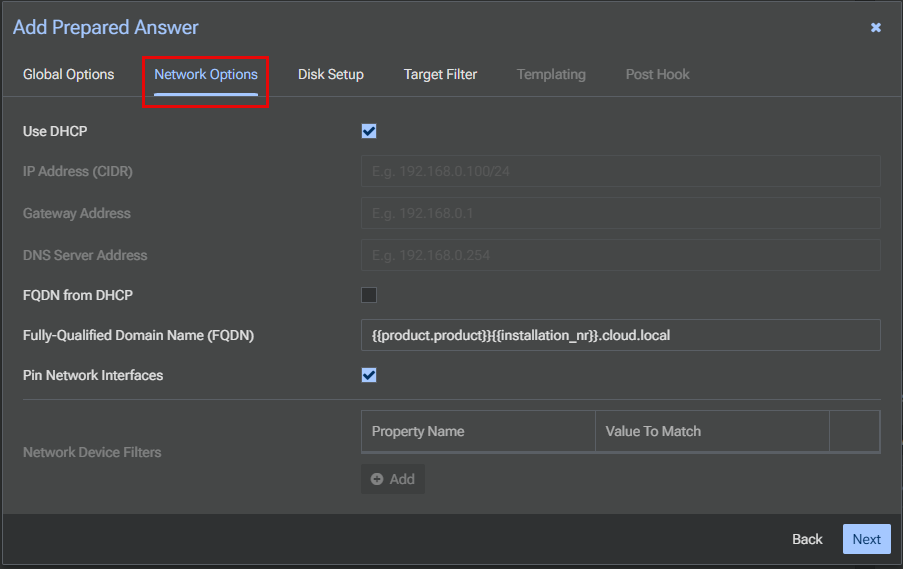
Network options is what you would expect. Here you define how the installation will receive an IP address, either through DHCP or static configuration. You can also use variables to set the FQDN of the machine and decide if you want to pin network interfaces.
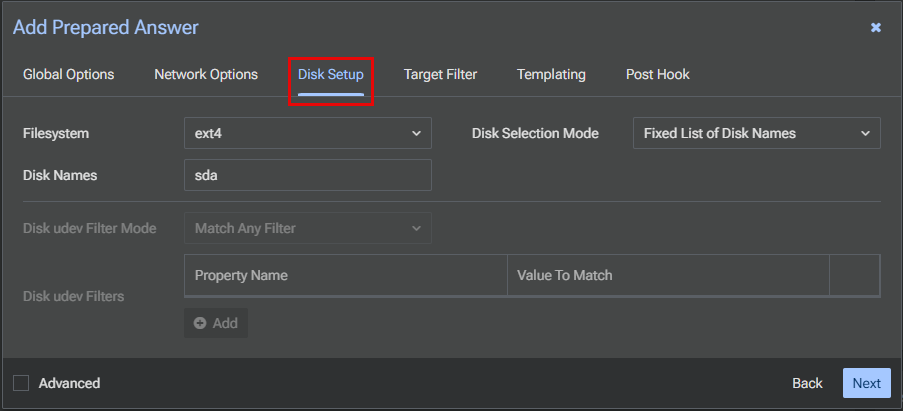
On the disk setup screen, you select the filesystem, and set the disk names.
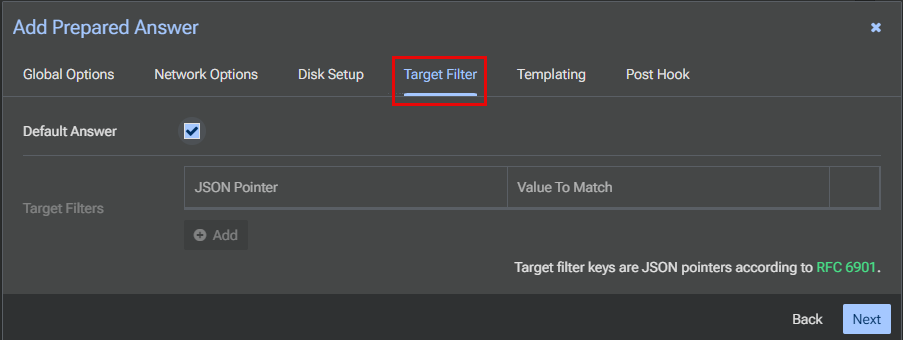
On the target filter screen you can do some pretty cool targeting here. Or, you can do like I did below, just check the Default Answer checkbox and move on.
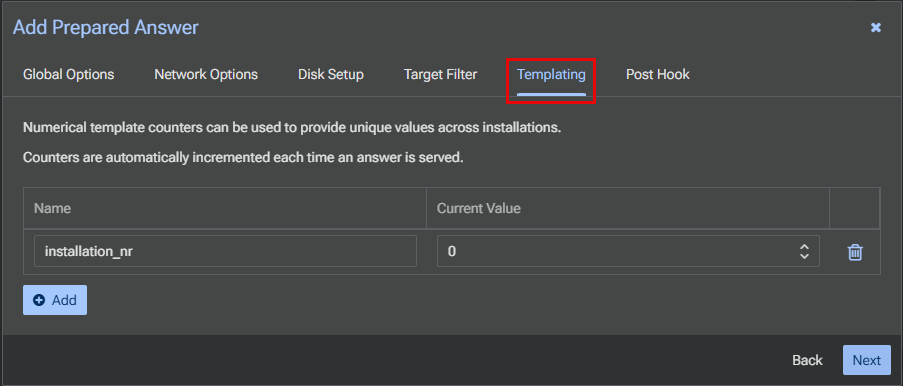
You can add additional templating configuration to provide unique values across installations if you want.
Also, you can have a post hook action as well to do various things. You should here see the Proxmox datacenter manager base URL and SHA265 certificate fingerprint. The fingerprint allows the installation to connect without issues to a PDM instance that is just simply using the self-signed certificate as the SSL cert for the URL.
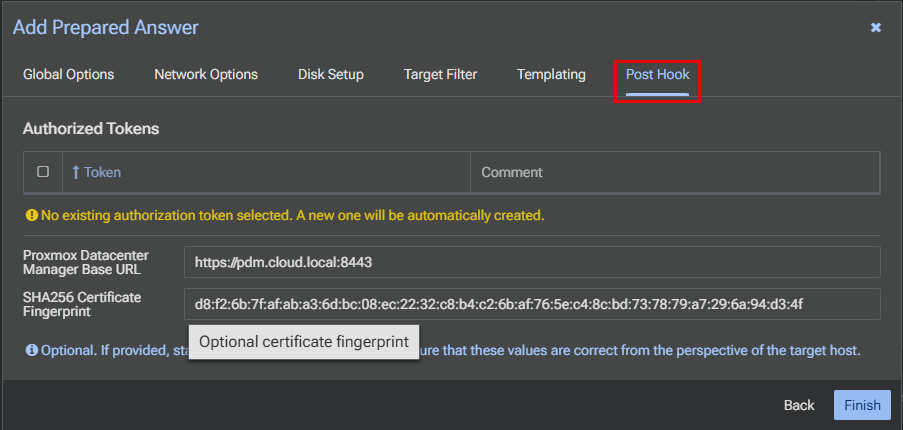
Finally, you will be presented with the New Answer Token screen. Both of these pieces of information are sensitive, so you will only be shown these once.
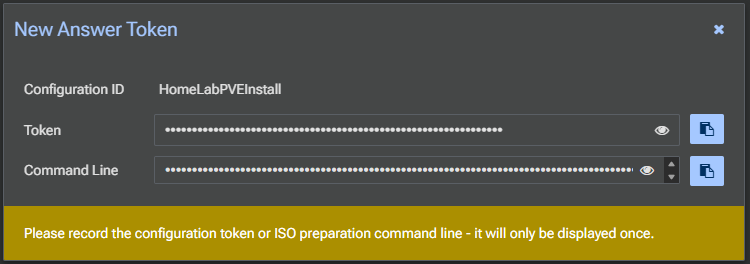
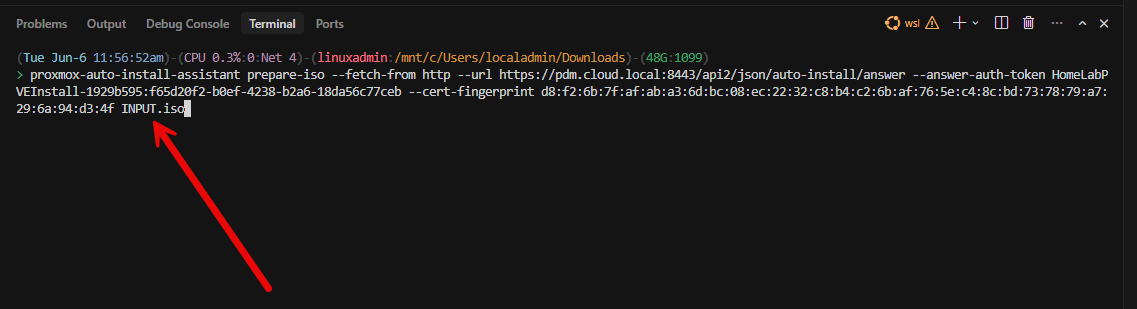
These will look like the following. First is the token by itself, but then the long command is the command you will use with the proxmox-auto-install-assistant command line (don’t worry these are just for my test environment in the lab so I don’t mind exposing these).
HomeLabPVEInstall-1929b595:f65d20f2-b0ef-4238-b2a6-18da56c77ceb


proxmox-auto-install-assistant prepare-iso --fetch-from http --url https://pdm.cloud.local:8443/api2/json/auto-install/answer --answer-auth-token HomeLabPVEInstall-1929b595:f65d20f2-b0ef-4238-b2a6-18da56c77ceb --cert-fingerprint d8:f2:6b:7f:af:ab:a3:6d:bc:08:ec:22:32:c8:b4:c2:6b:af:76:5e:c4:8c:bd:73:78:79:a7:29:6a:94:d3:4f INPUT.iso
Installing the proxmox-auto-install assistant
Once you have the commands above, you need to install the proxmox-auto-install-assistant which is a command line tool that has the sole purpose of working with automated Proxmox installations. In this case, we use the tool to create the new ISO image that has the command set integrated to connect to our Proxmox Datacenter Manager 1.1 instance.
First, to install the proxmox-auto-install-assistant, we need to add the repos that are needed to pull from. I am doing this in Ubuntu running in WSL:
echo "deb http://download.proxmox.com/debian/pve trixie pve-no-subscription" | sudo tee /etc/apt/sources.list.d/pve-install-repo.list

wget https://enterprise.proxmox.com/debian/proxmox-release-trixie.gpg -O /tmp/proxmox-release-trixie.gpg

sudo cp /tmp/proxmox-release-trixie.gpg /etc/apt/trusted.gpg.d/

sudo apt update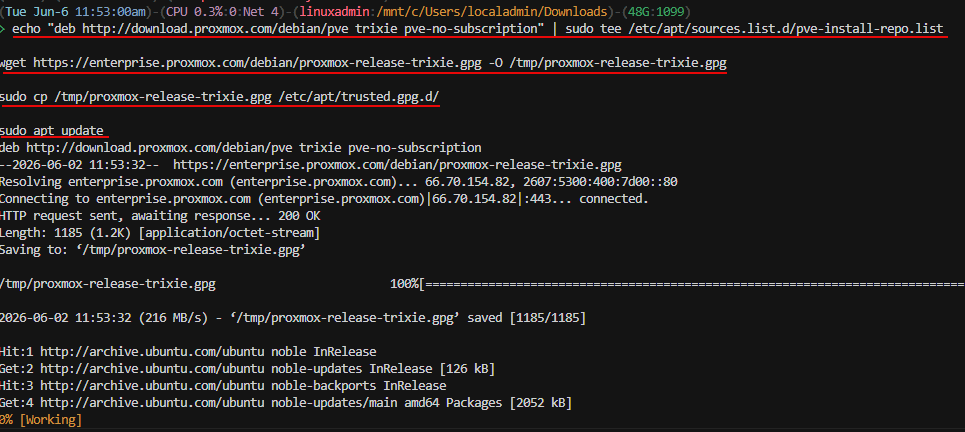
After you add the repos, then install the tool with the command:
sudo apt install proxmox-auto-install-assistant -y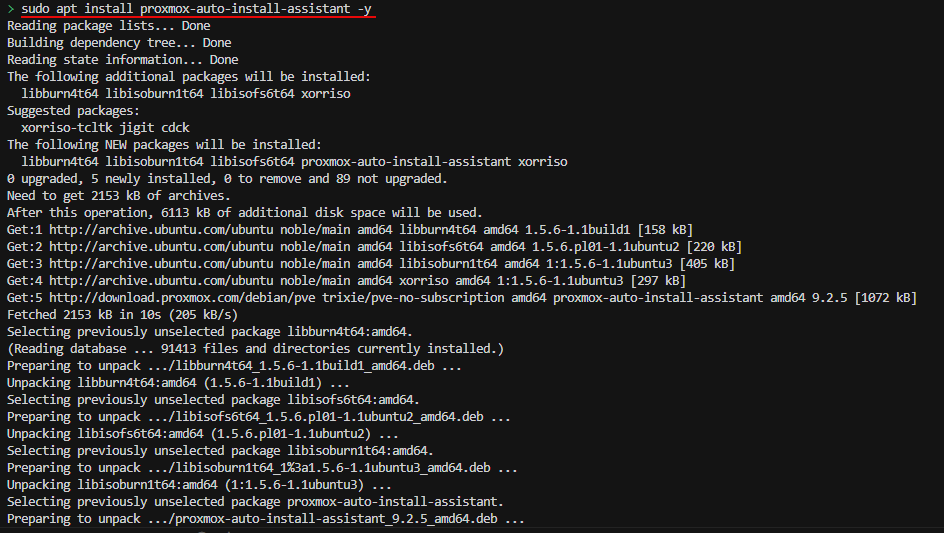
Creating the custom ISO image using the proxmox-auto-install-assistant
Now that we have the proxmox-auto-install-assistant command line utility installed, we can take the command that we received and copied down from the output of the answer file creation result and paste this into our Linux command line where we have the tool installed.
If you notice below, at the very end of the command, we see INPUT.iso. This is just a placeholder.
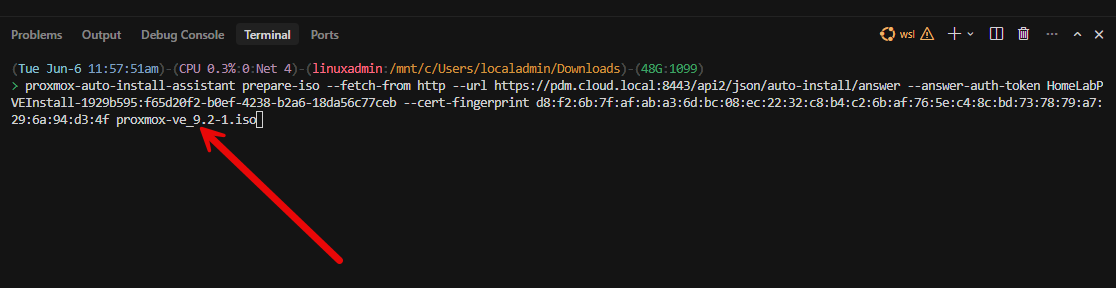
I have downloaded the proxmox-ve_9.2.1-iso and have this in the local path where I am running the command. So, we remove the INPUT.iso and instead replace it with the name of our ISO as you can see below.
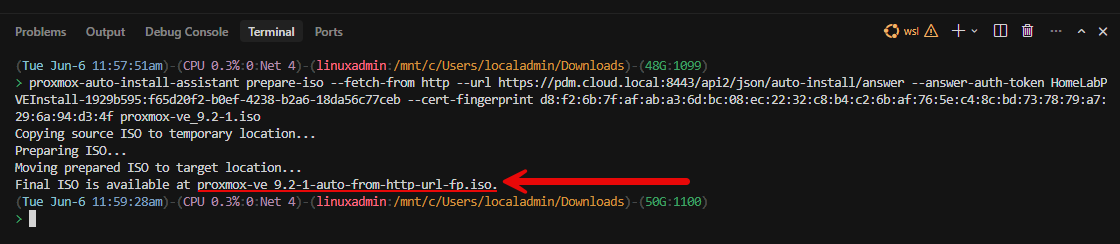
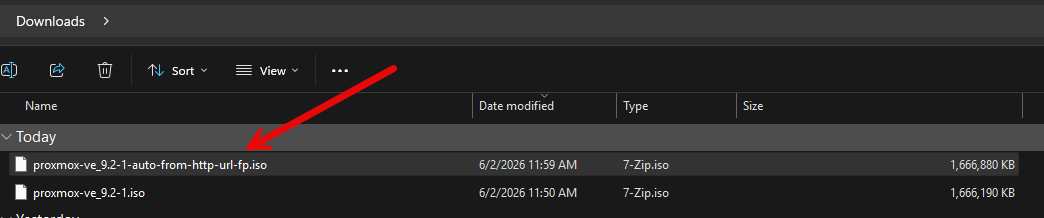
Once we replace the ISO and run the command, we will see it copy the source ISO to temporary storage, prepare the new ISO, and then finalize and output the new ISO name in the terminal.
Testing out the new Proxmox automated install
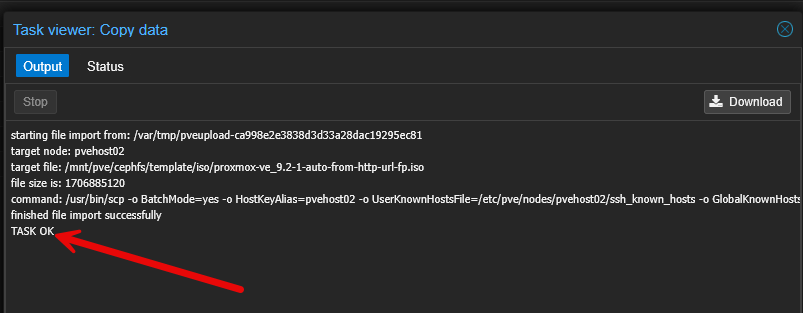
Now that we have the Proxmox Datacenter Manager 1.1 answer file integrated with the Proxmox VE Server 9.2 installation, we are ready to test. Since I am testing a nested installation of Proxmox inside of Proxmox, I uploaded the ISO image to my CephFS datastore to mount to a new VM for installing Proxmox.
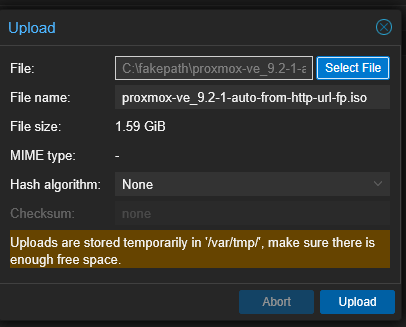
The costom ISO is uploaded successfully to the CephFS datastore.
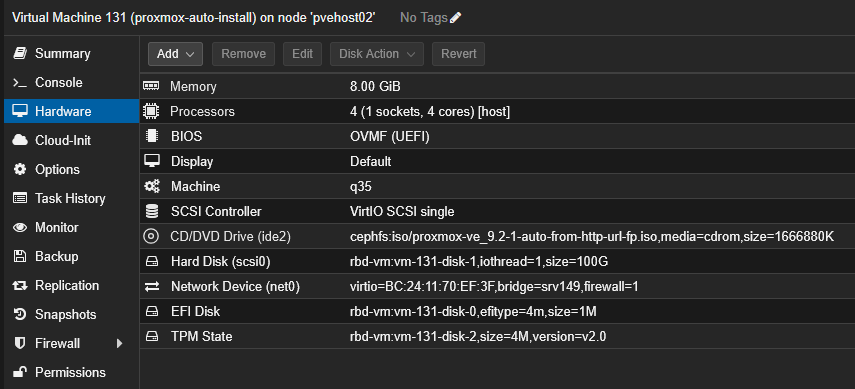
After getting the ISO uploaded, I created a new VM to test the automated installation for Proxmox VE Server 9.2. Below, you can see the hardware configuration along with the custom ISO I uploaded from the proxmox-auto-install-assistant creation process.
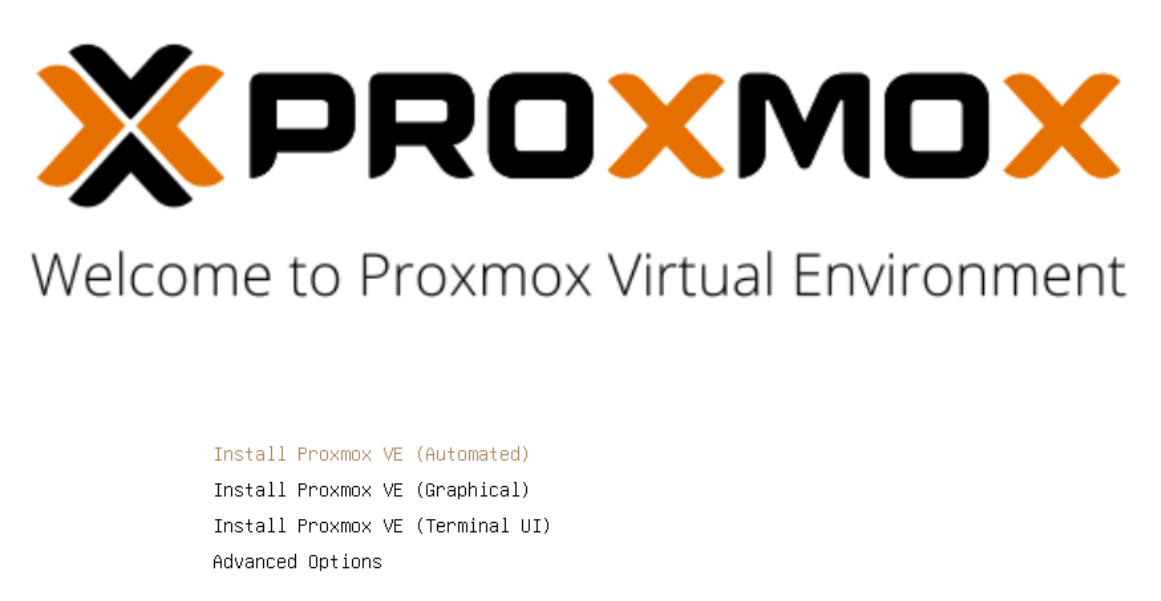
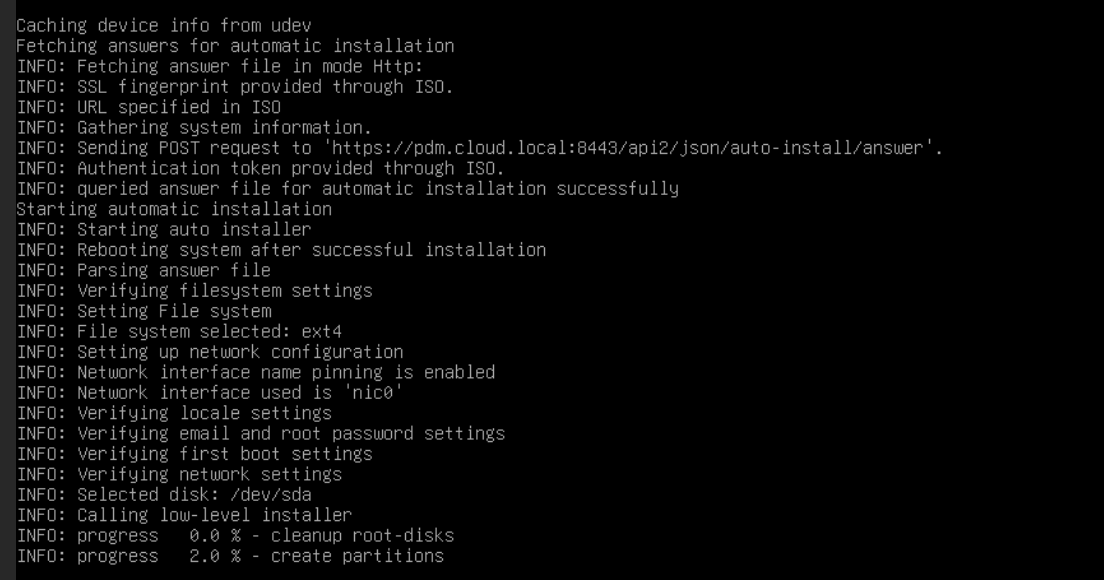
Now, I booted the VM from the automated installation ISO and you will see that Proxmox GUI on the first few seconds of the installation, defaults to the “automated install”.
After the installation kicked off, it was obvious the automated installation was working as I saw it start copying files and setting things up.
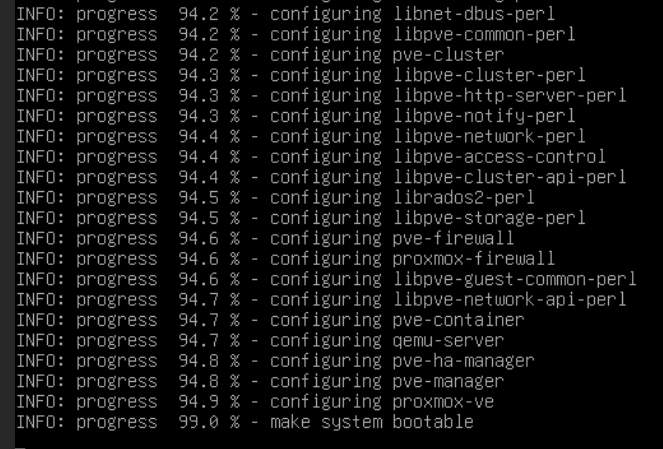
After not too long, it rebooted and I saw the normal Proxmox VE Server boot screen.
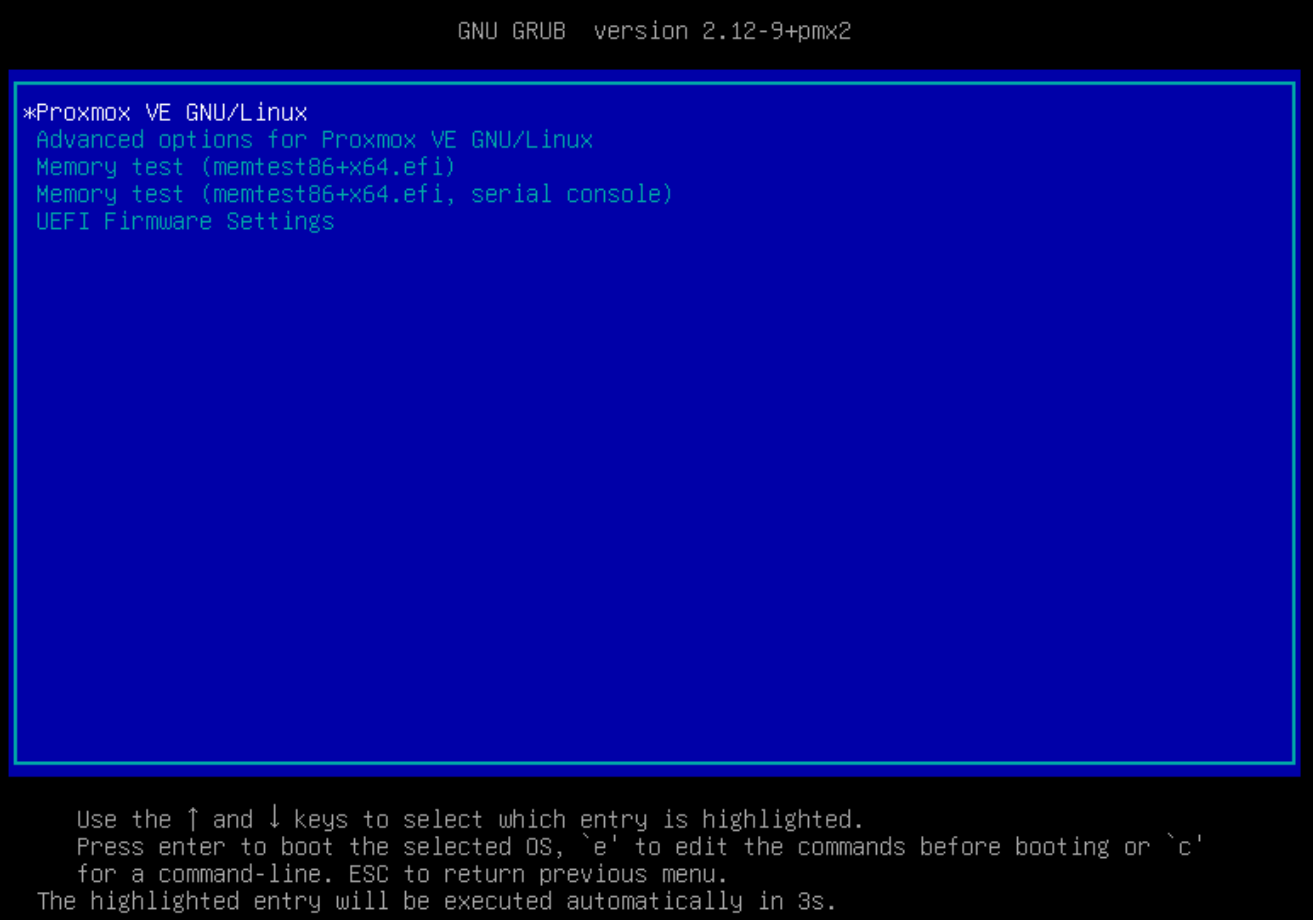
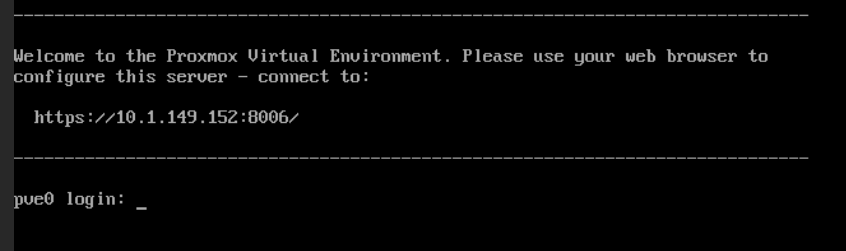
The server booted successfully after a fully automated installation!
Wrapping up
The new Proxmox automated installs and answer file creation process as part of Proxmox Datacenter Manager 1.1 is super powerful. It allows us to have what we need to easily create a syntax-correct answer file with a simple wizard. Then with the proxmox-auto-install-assistant tool, you can easily create the custom ISO which you can boot from to take advantage of the automated install by means of the answer file. The process was actually much easier than I thought it might turn out to be. So much so, I am never going back to manual installations after this. It is too easy to use the automated installation if you ask me to not use it. What about you? Have you tried out this process as of yet in your home lab or production environment?
Google is updating how articles are shown. Don’t miss our leading home lab and tech content, written by humans, by setting Virtualization Howto as a preferred source.
About The Author


I have templates created for common VMs and containers. Even easier to click Clone and be done. But the new PDM functionality is a nice addition.
They should expand on the post hook capabilities:
implement the execute runOnce type of scripts after 1st boot to run stuff or mount storage space and do more stuff.
eg, after cluster join, run scripts from snippets/folder on shared storage to:
-install ovs
-create network interfaces/network config changes
-install ceph
-etc
or am I not understanding something.
My iso starts in atest VM but an answerfile is not found.
Fetching answer file via http failes.
Has anyone a hint for me?
Thanks