There comes a point where when you use the right tools and architect things the right way, your home lab can absolutely start feeling like an enterprise-grade environment. When this happens, it is a great feeling because it usually means things are highly available, performs well, and you have great management capabilities across the board. In this post, I want to walk through the exact tools that I am using and the combination thereof that made the shift for me. These are not just picks out of thin air. These are actually tools that I have used in my home lab and continuing to use that have played a role in making the lab environment enterprise grade.
Proxmox VE
Everything starts here. You need to have a foundation where you build things on top of. For me, full on in 2026, this is Proxmox. I have been a VMware fanboy since circa 2004-ish which tells my age and have had many miles behind me with the solution. I think technology-wise it is still the best out there. But, following closely on the heels of VMware (after the Broadcom debacle) for me is Proxmox.
I made the switch in my home lab running all of my “production” home lab workloads on it and haven’t regretted it since. Honestly many of the things I was worried about in the beginning have either not been issues at all or were things I didn’t understand well enough on the outset.
It hasn’t take much time to get a comfort level with Proxmox as I have been running my production lab on it for months now and it hasn’t let me down once. I was worried about stability, it has been rock solid. I was worried about performance. It has performed beyond my expectations and on par with VMware. I was worried about storage. Running Ceph on top of Proxmox has been a breath of fresh air and has worked phenomenally well.
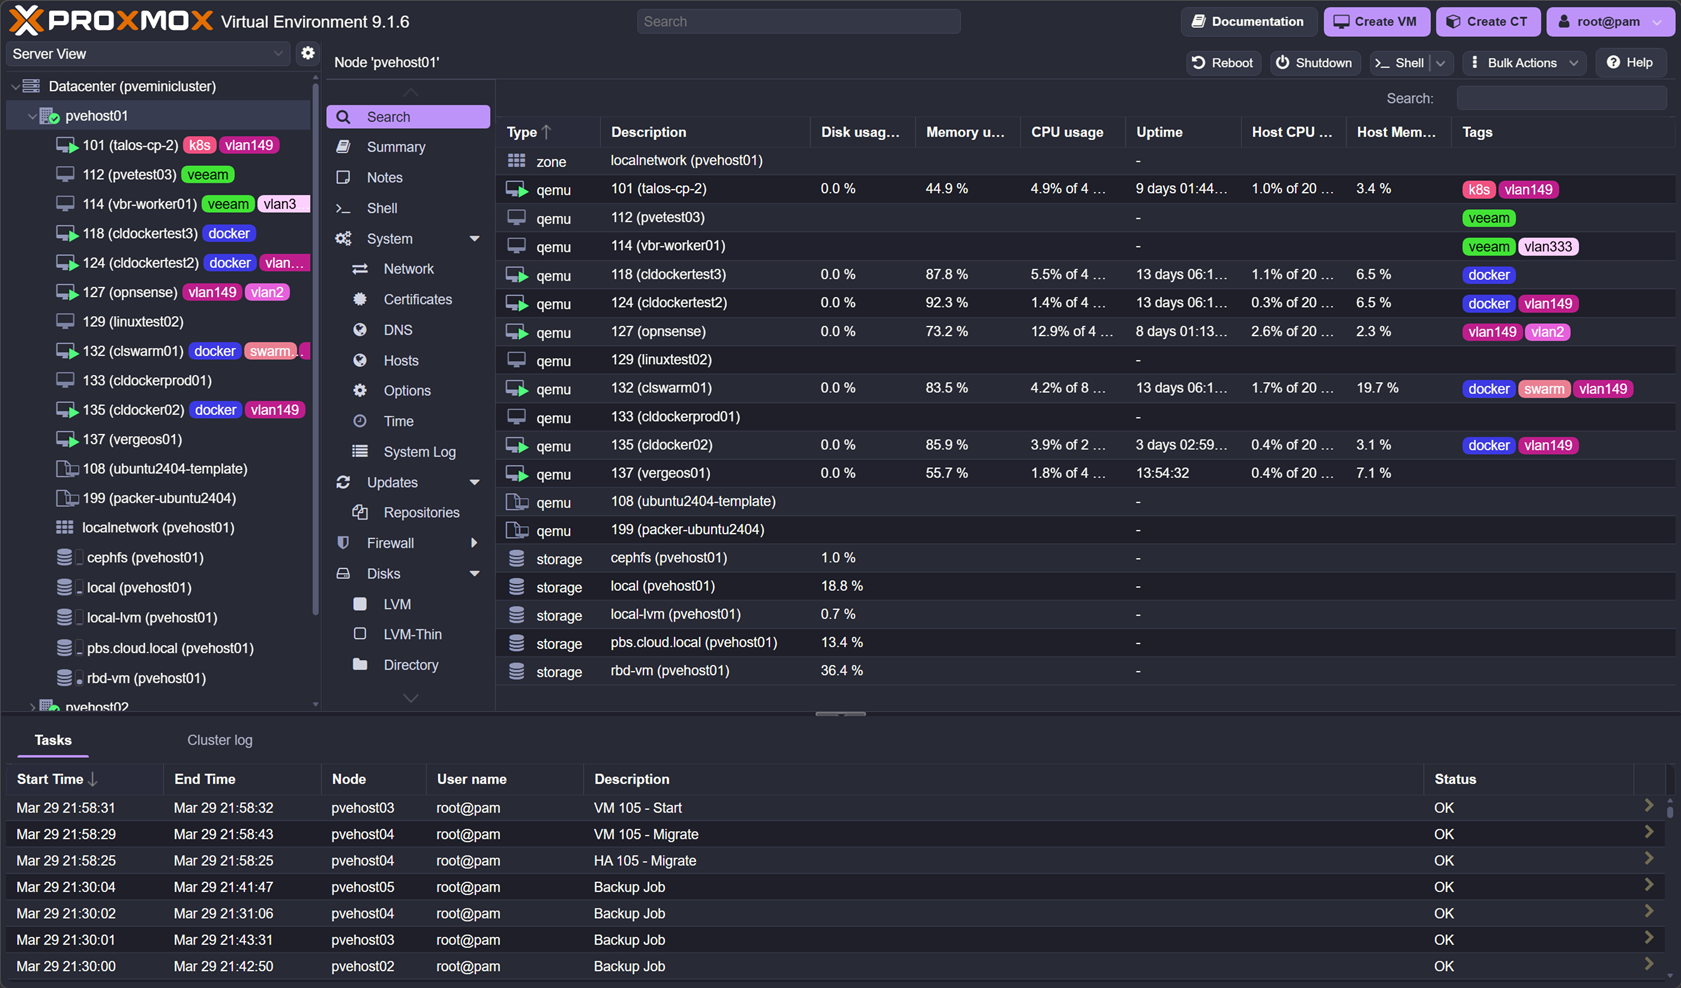
With Proxmox VE Server, my home lab started to feel like an enterprise environment when I stood up the physical Proxmox VE Server cluster on 5 Minisforum MS-01 mini PCs with 10 gig networking. Proxmox with Ceph forms the base of everything I do, including running virtual machines, container hosts, and Kubernetes.
Check out my full setup with Proxmox, Ceph, Talos, etc: I Built a 5-Node Proxmox and Ceph Home Lab with 17TB and Dual 10Gb LACP.
Ceph (RBD + CephFS)
The storage that is the base of my home lab is Ceph. This is made up of both RBD and CephFS. Moving to Ceph for me was arguably the biggest leap forward towards an enterprise feel in my environment. As we know with a proper Proxmox cluster, you need shared storage. With Ceph, this gives you software-defined shared storage between Proxmox nodes that allows workloads to migrate between each node.
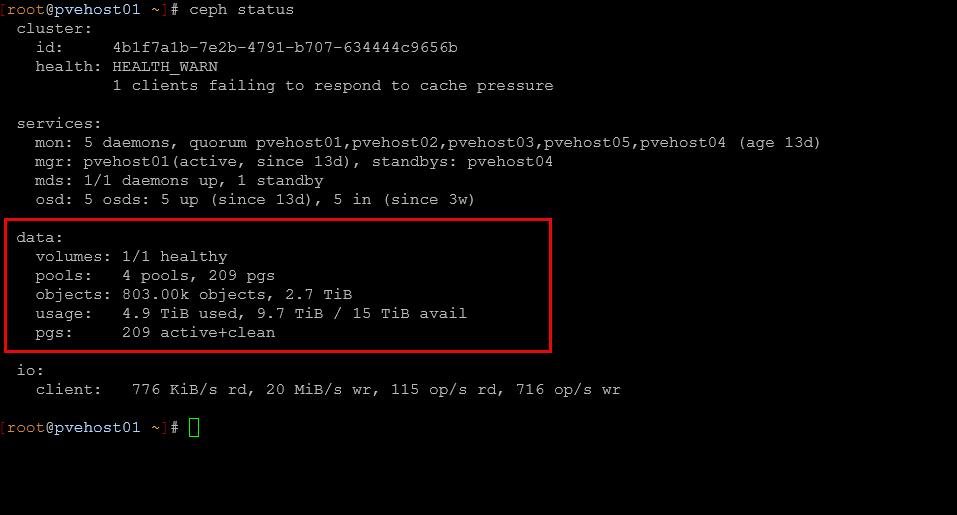
This opens up the ability to perform maintenance and patching without any downtimes for workloads. This in itself makes your lab feel very enterprise in nature. For my setup, RBD handles block storage for virtual machines, then CephFS provides shared file storage across nodes and services.
Ceph also forces you to think differently about storage. Concepts like replication, failure domains, and performance tuning are part of your day-to-day thinking but all in all, performance is already very good out of the box. Once you experience this, going back to local storage feels extremely limiting.
See how I am getting almost 1 million IOPs with Proxox and Ceph with enterprise drives: Consumer vs Enterprise SSDs in the Home Lab: I Benchmarked Both in Ceph.
Intel vPro (out-of-band management)
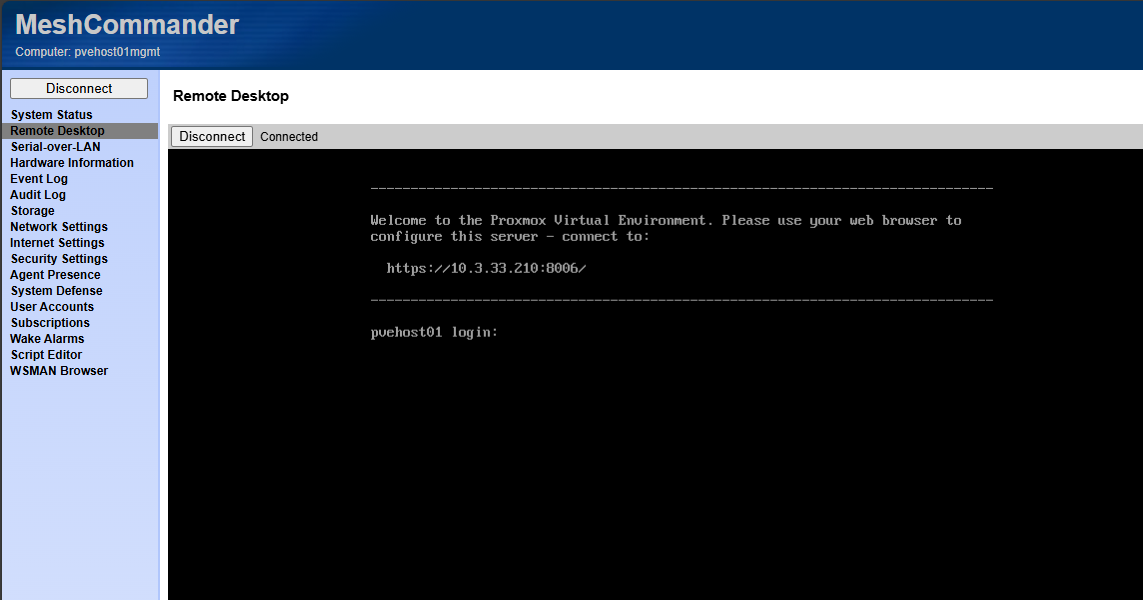
This is one of the things that just makes you feel like you are in an enterprise datacenter when you are able to have out of band management for your Proxmox nodes. I used to have this with my Supermicro servers, but since moving to mini PCs, this was something I was lacking until I looked back into Intel vPro.
I am currently using the Minisforum MS-01 mini PCs and these have the Intel vPRO built into the Intel Core i9-13900H processors that I am running in my environment. Out-of-band management changes everything. With Intel vPro, I can power systems on and off, access remote consoles without needing an IP based KVM switch, and troubleshoot issues even when the operating system is down. I do not need physical access to the machine.
This becomes incredibly important when you start pushing your lab harder. Testing kernel updates, breaking networking, or experimenting with GPU passthrough all become less risky when you have a way to get into your node, even when things are down. You always have a way back in.
This is one of the first things that made my home lab feel like a real datacenter. It removes that fear of getting locked out and gives you confidence to experiment more aggressively.
Check out my post on Intel vPRO setup and how I am using it: This Made My Mini PC Home Lab Feel Enterprise Grade: Intel vPro with AMT.
Talos Linux with Omni
In running Kubernetes in the home lab, I have settled on Talos Linux. Talos has been getting more and more widely known. It is an immutable Kubernetes solution that provides one of the most secure offerings out there by default. The only way you can “talk” to the Talos Linux distro is by API. You can’t SSH into the nodes and just start installing things. While this can make things a little more difficult on the frontend, it makes things feel WAY more secure and more enterprise in purpose and feel.
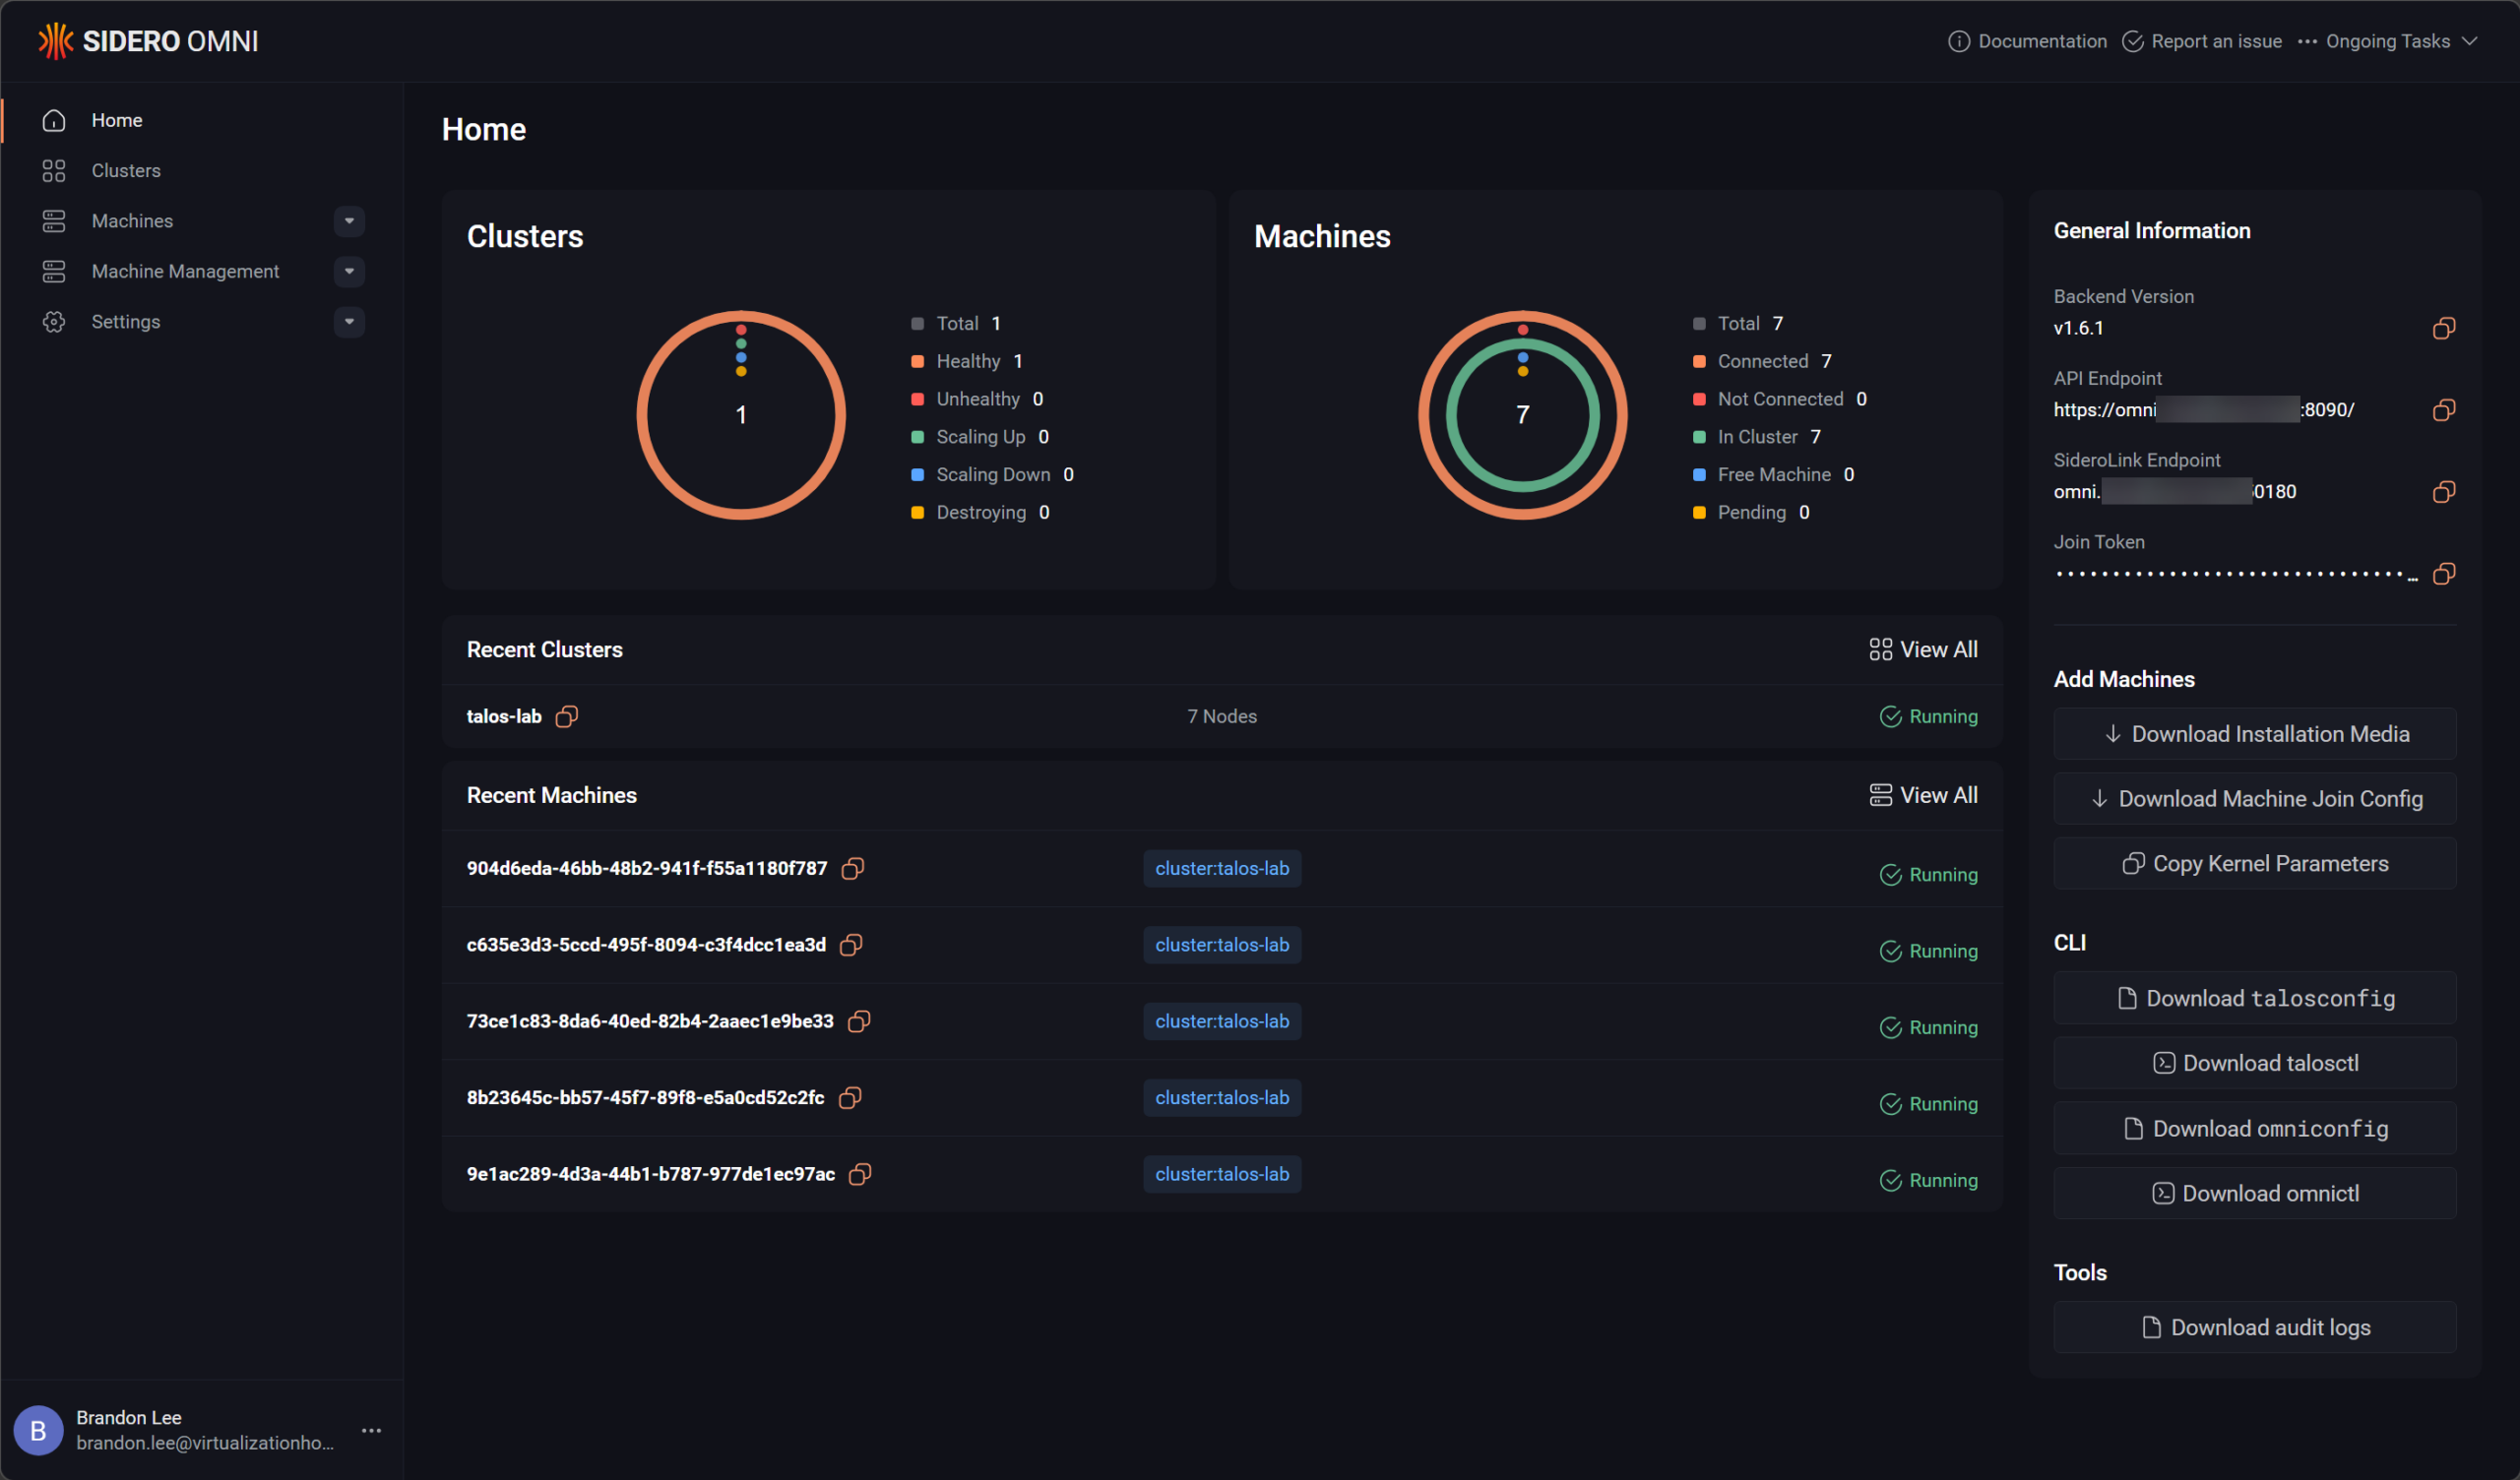
Then, when you pair that with an installation of Omni, the management platform for Talos, it gets really slick. Omni totally takes the heavy lifting out of lifecycle operations for Talos Linux Kubernetes. This setup eliminates a huge amount of drive and manual work on your part. I think it fits nicely with being able to have a clean and very predictable environment that you can use to host your containerized workloads.
From a containerized perspective, this is where my home lab started to feel like something much closer to what modern production environments look like.
Check out my posts here on Talos, Omni, Kubernetes in the home lab, etc:
- How to Install Talos Omni On-Prem for Effortless Kubernetes Management
- Why Talos Omni Kubernetes Has Changed My Home Lab
Traefik
When you start to run most of your workloads in containerized environment, either in Docker or Kubernetes, you will want to do yourself a favor and start using a reverse proxy for SSL termination and ingress. Traefik is my favorite solution out there, especially if you want to do things with infrastructure as code and codify your ingress configurations.
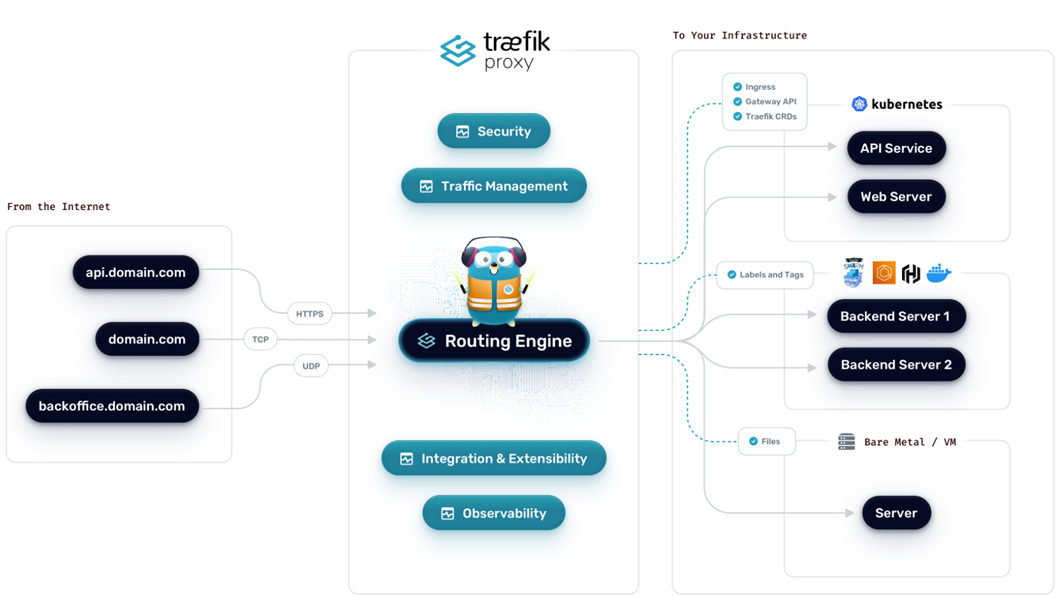
It acts as a reverse proxy and ingress controller and has service discovery and traffic routing capabilities based on rules that you define. It also handles TLS automatically with Let’s Encrypt so this one thing handles a lot of the complexity that you typically have to do manually without the automation of Traefik and Let’s Encrypt.
This makes your home lab feel not only a lot easier to use, but absolutely more professional at the same time. Services in this configuration will be more organized, secure, and predictable.
Check out my post on switching from Nginx Proxy Manager over to Traefik, why I did it, and the benefits: I Replaced Nginx Proxy Manager with Traefik in My Home Lab and It Changed Everything.
GitLab
When you are running your home lab like an enterprise and especially using Kubernetes or Docker Swarm with Docker compose, you will definitely want to keep your configs stored inside git. It is the only way to do it right. Everything flows through your code repos.
My self-hosted repository of choice is Gitlab. It allows me to store my code, configurations, deployments, etc. This allows you to have a level of discipline that is hard to have otherwise. It makes you flow all your deployments through your code repository.
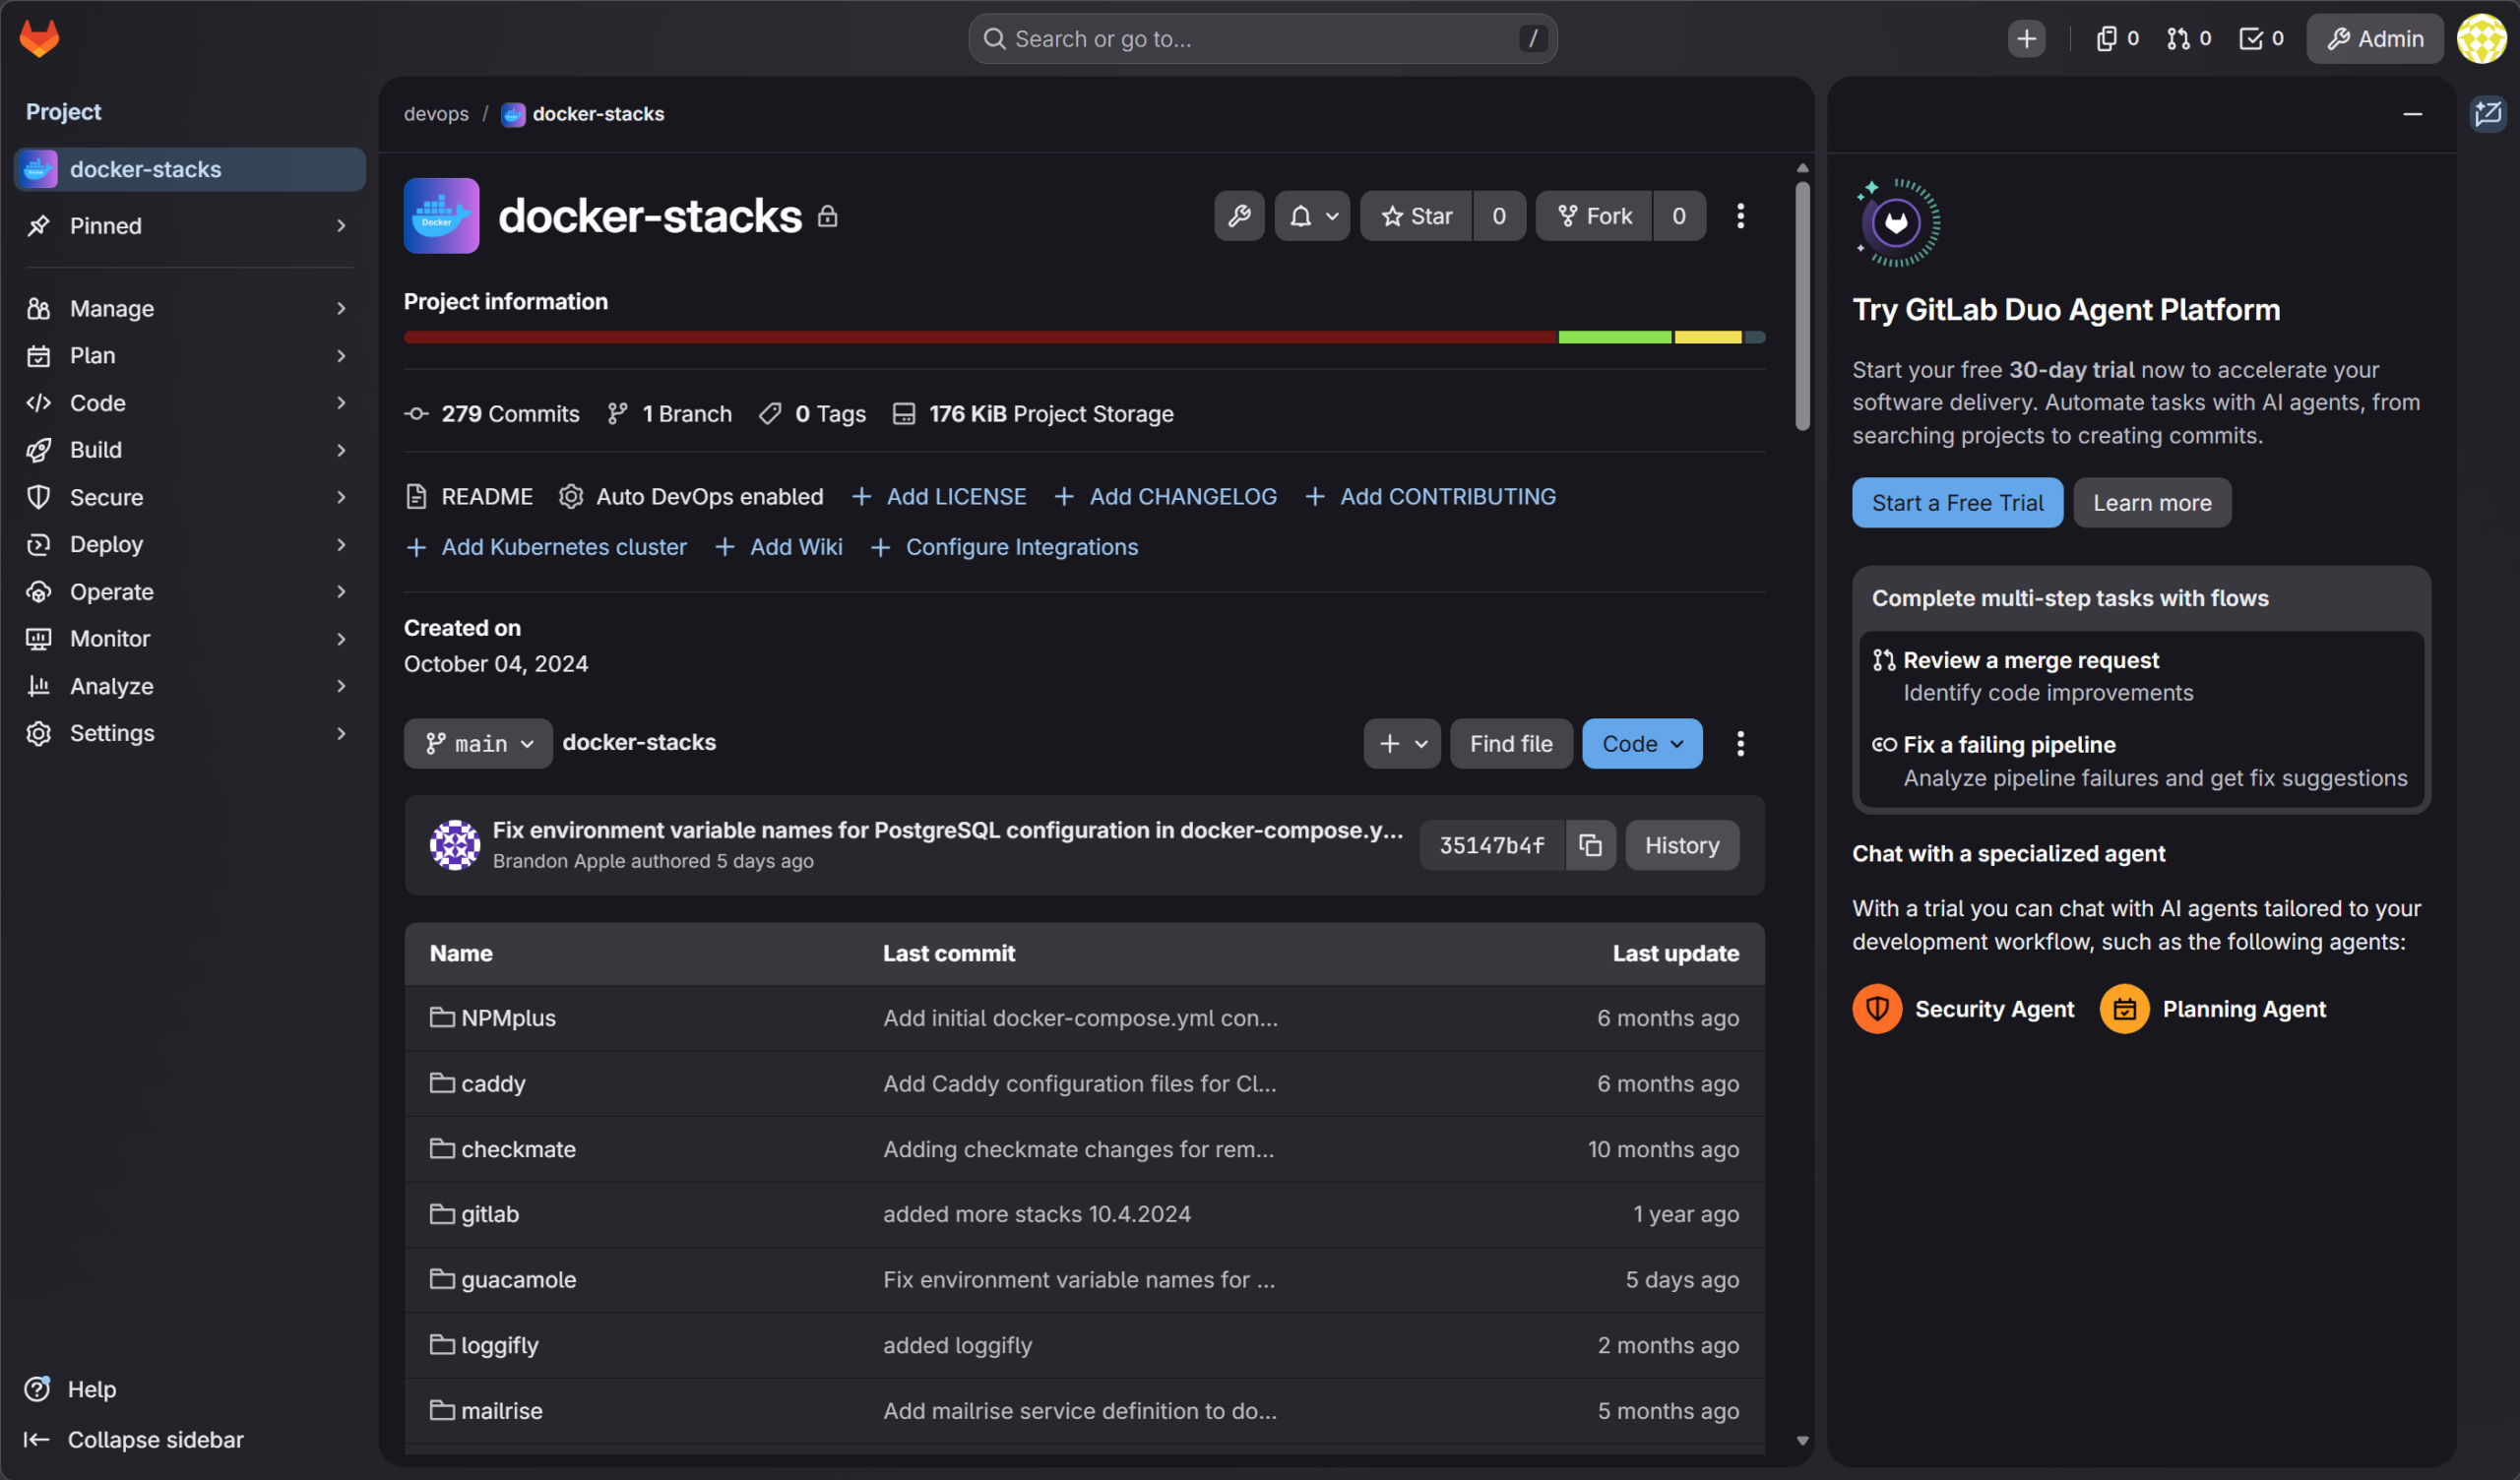
GitLab in this setup becomes the control plane for all of my workflows and deployments. Instead of manually deploying containers or making changes directly on systems, everything flows through GitLab pipelines or with Kubernetes, it is ArgoCD, but it gets its config that it synchronized from Git. Code, configuration, and deployments are all tied together.
With this setup, you start thinking in terms of:
- Version-controlled infrastructure
- Repeatable deployments
- Automated testing and validation
GitLab also gives you a built-in container registry, which integrates nicely with your pipelines and Kubernetes environment. This is where manual work starts to disappear from your home lab.
In case you are wondering how you don’t run into a chicken/egg scenario that if you are hosting your own GitLab instance, how do you make sure you aren’t locked out if your GitLab instance isn’t running? I actually run a cloud instance of GitLab and also an on-premises version. I have my on-premises version synchronized with the Cloud version in a pull configuration. All updates to my critical repos for deployments are stored in the cloud, then synchronize locally.
See how you can install Gitlab, the Gitlab runner, and even the GitLab registry (which can be a bear to get going): Installing GitLab, Runner, and Container Registry on Your Home Server.
Netdata
When it comes to monitoring in an enterprise worthy way, Netdata is my tool of choice. It does the job when it comes to keeping an eye on my critial physical and virtual resources. Whether this is a Proxmox node or a Docker host. Netdata keeps a check on the environment.
In this case, I like having the control plane for the monitoring tool in the cloud. This helps me to still catch things if all of the home lab resources go down (which would take down my on-premises monitoring). But Netdata would still catch it since it is positioned in the cloud.
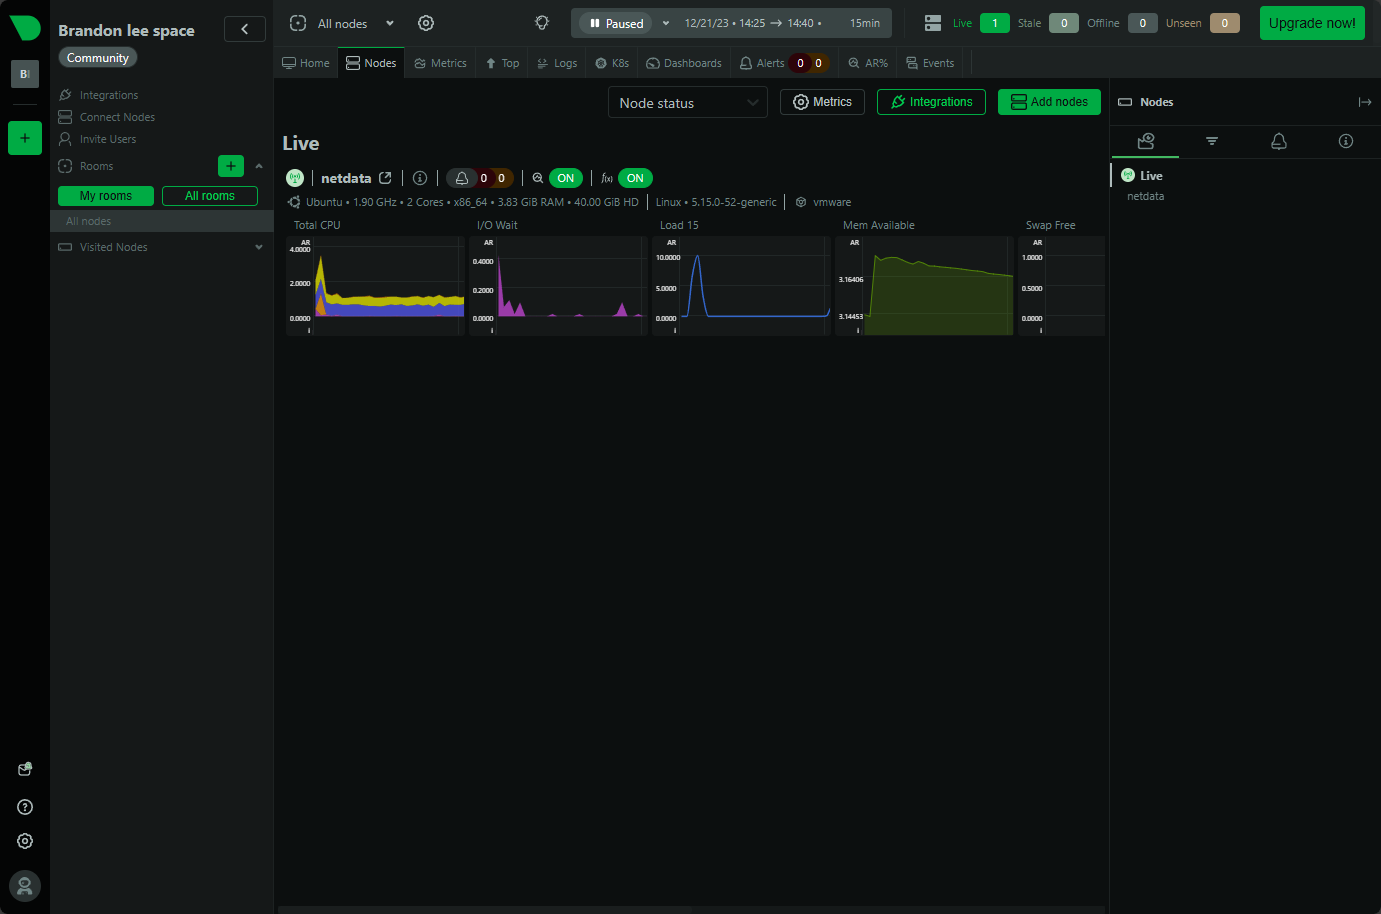
With almost zero config using Netdata, you can start getting real-time metrics for things like CPU, memory, disk, network, and other things like container metrics in an easy to read dashboard.
I think this is really useful when you have things in your home lab like Ceph and Kubernetes. Performance with these systems can be harder to diagnose than other traditional systems.
See how you can use Netdata to monitor Kubernetes: Kube node metrics with Netdata Kubernetes monitoring.
ArgoCD
Argo CD is where everything comes together for me with deployments. I wrote up a detailed blog on how I now no longer manually deploy things in the home lab. Everything is deployed from git by Argo. Argo watches a configured Git repo and synchronizes your Kubernetes environments with your Git repos that you want to have as the source of truth for those clusters.

This eliminates the need for deploying things manually. If something drifts or changes unexpectedly like if someone were to manually change something, Argo CD detects that deviation and it will automatically bring things back into sync with the Git repo and the config that exists there.
I think this is a huge shift in how you operate your home lab environment. Instead of you pushing changes, you define the changes, and then using GitOps with Argo, these declarative configs are put into place.
Check out my post on how I am now deploying in an automated way from a Git repo using Argo CD: I Stopped Deploying Containers Manually. This Changed My Home Lab.
Veeam and Proxmox Backup Server
The two backup solutions that I trust in my home lab at the moment dealing with my Proxmox data and container persistent volumes are Veeam and Proxmox Backup Server. Backs in my opinion even in the home lab are NOT optional. Once you start hosting real services and data, you need to have a second and third copy of this data stored outside the environment.
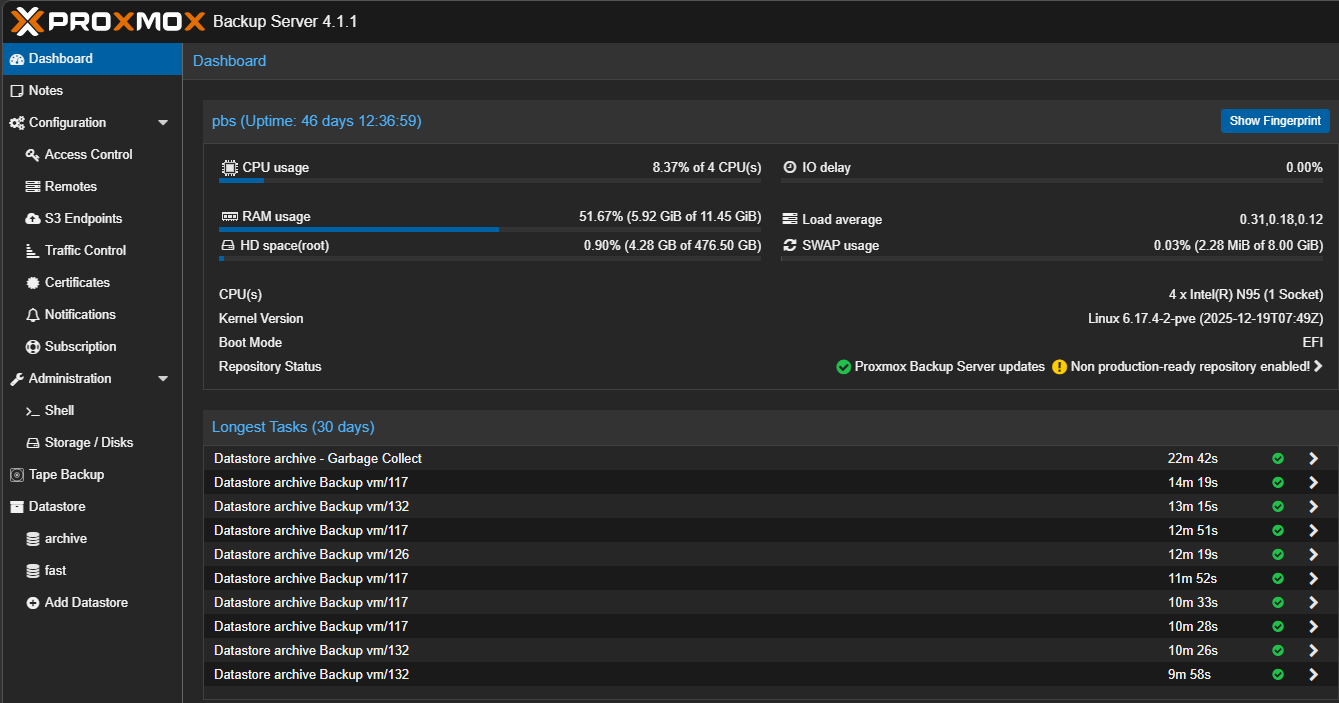
I use both Veeam and Proxmox Backup Server. I think each of these complement each other well. Veeam doesn’t need any other solution and I could easily just operate on Veeam solely. But, since I wanted to learn PBS better as well and also complement my backup strategy I have already in Veeam.
Proxmox Backup Server provides gives you fast and efficient backups for virtual machines with features like deduplication and incremental backups. Veeam is another layer of protection on top of this. You get agent-based backups as well.
Having this solid backup approach gives you flexibility and confidence. You can recover from many different types of failures and events, whether this is a corrupted VM, deleted data, or a larger issue in the environment.
Check out how I am using a Beelink ME Pro as my Proxmox Backup Server in the home lab: Why Your NAS Is the Perfect Proxmox Backup Server.
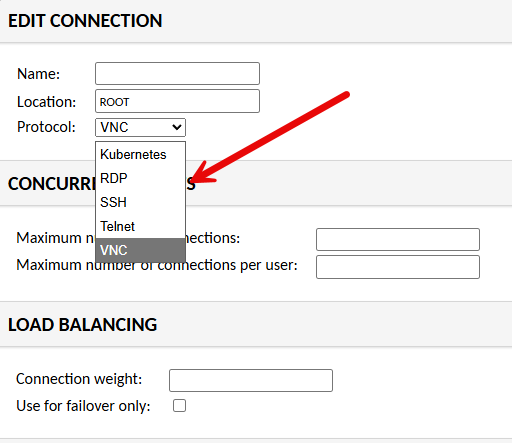
Twingate and Guacamole
I wrote about this setup recently for remote access. When your home lab can feel like production, you likely have a way to access it remotely and in a secure way. I have settled in on Twingate for now for my remote access connection. It is zero-trust, and it is free for up to 5 users which is great. It feels like a super modern solution also.
So, don’t expose your services directly to the Internet unless you have an absolute need to do that. Use a zero-trust model with something like Twingate that is controlled and authenticated with modern authentication factors like 2FA.
Also, I have recently added a Guacamole solution on top of Twingate for a way to funnel down traffic even further and control the entry point into some of my more critical areas of the home lab. This dramatically improves security.
When you have a way to access your home lab that is zero-trust, 2FA-enabled, and you have a secure jump point once you get into the network, it definitely feels enterprise grade.
See how to install Guacamole and use it in the home lab for access: I Changed How I Access My Home Lab and This Fixed Everything.
Wrapping up
Individually, each of these tools we have looked at is powerful. But when you combine them all together, they give you a very enterprise grade solution. Below is a summary of how I think these work together to make your setup enterprise grade:
- Proxmox and Ceph provide the infrastructure
- Talos and Argo CD are tools that control how workloads run and deploy
- Traefik and Twingate handle access and networking
- GitLab gives you automation and single source of truth
- Netdata provides monitoring and visibility
- Veeam and Proxmox Backup Server protect your data
- vPro makes sure you always have access to control your nodes
This combination is what made my home lab feel enterprise grade for me. Each home labber will maybe have different things that are important to them. But, I think, the basic building blocks are the same when it comes to security, protecting your data, and secure access. Let me know if these solutions are ones you are running in your home lab. Or are there others that you have found that make your home lab feel enterprise?
Google is updating how articles are shown. Don’t miss our leading home lab and tech content, written by humans, by setting Virtualization Howto as a preferred source.
About The Author