
With so many enterprise organizations switching from VMware over to Nutanix due to the 10-15x price increase brought about by Broadcom, it is a great idea to start learning Nutanix skills if you don’t have any experience with Nutanix so far. Also, many in the home lab are switching over to mini PCs due to the great hardware these now include and the cost savings from an energy consumption standpoint. Let’s look and see how we can install Nutanix Community Edition on a Mini PC and the steps/hurdles involved.
What is Nutanix Community Edition (CE)?
In case you have not heard about it, Nutanix Community Edition (CE) is a great way to start learning Nutanix. It is a free to download version of Nutanix that allows you to kick the tires on Nutanix in the home lab. Also, it has very liberal restrictions. You can run up to a 4 node cluster and there aren’t any limitations that I could find on RAM and CPU, etc.
Just sign up for a free Nutanix account and download the Nutanix Community Edition ISO to get ready to start loading up Nutanix in the home lab.
Hurdles and challenges
I will say that running Nutanix Community Edition in the home lab on a mini PC is not without its challenges mainly due to the hardware requirements of the solution. What I mean by that is that primarily, you need the following:
- Intel 2.5 G network adapters – The mini PC I am using is equipped with Intel i226v network adapters which don’t have a driver in Nutanix CE. I thought this may be a deal breaker. However, I found a very helpful blog post that already covered this issue and had a workaround by way of a modded .ko file that you can add to your Nutanix CE environment during the installation process.
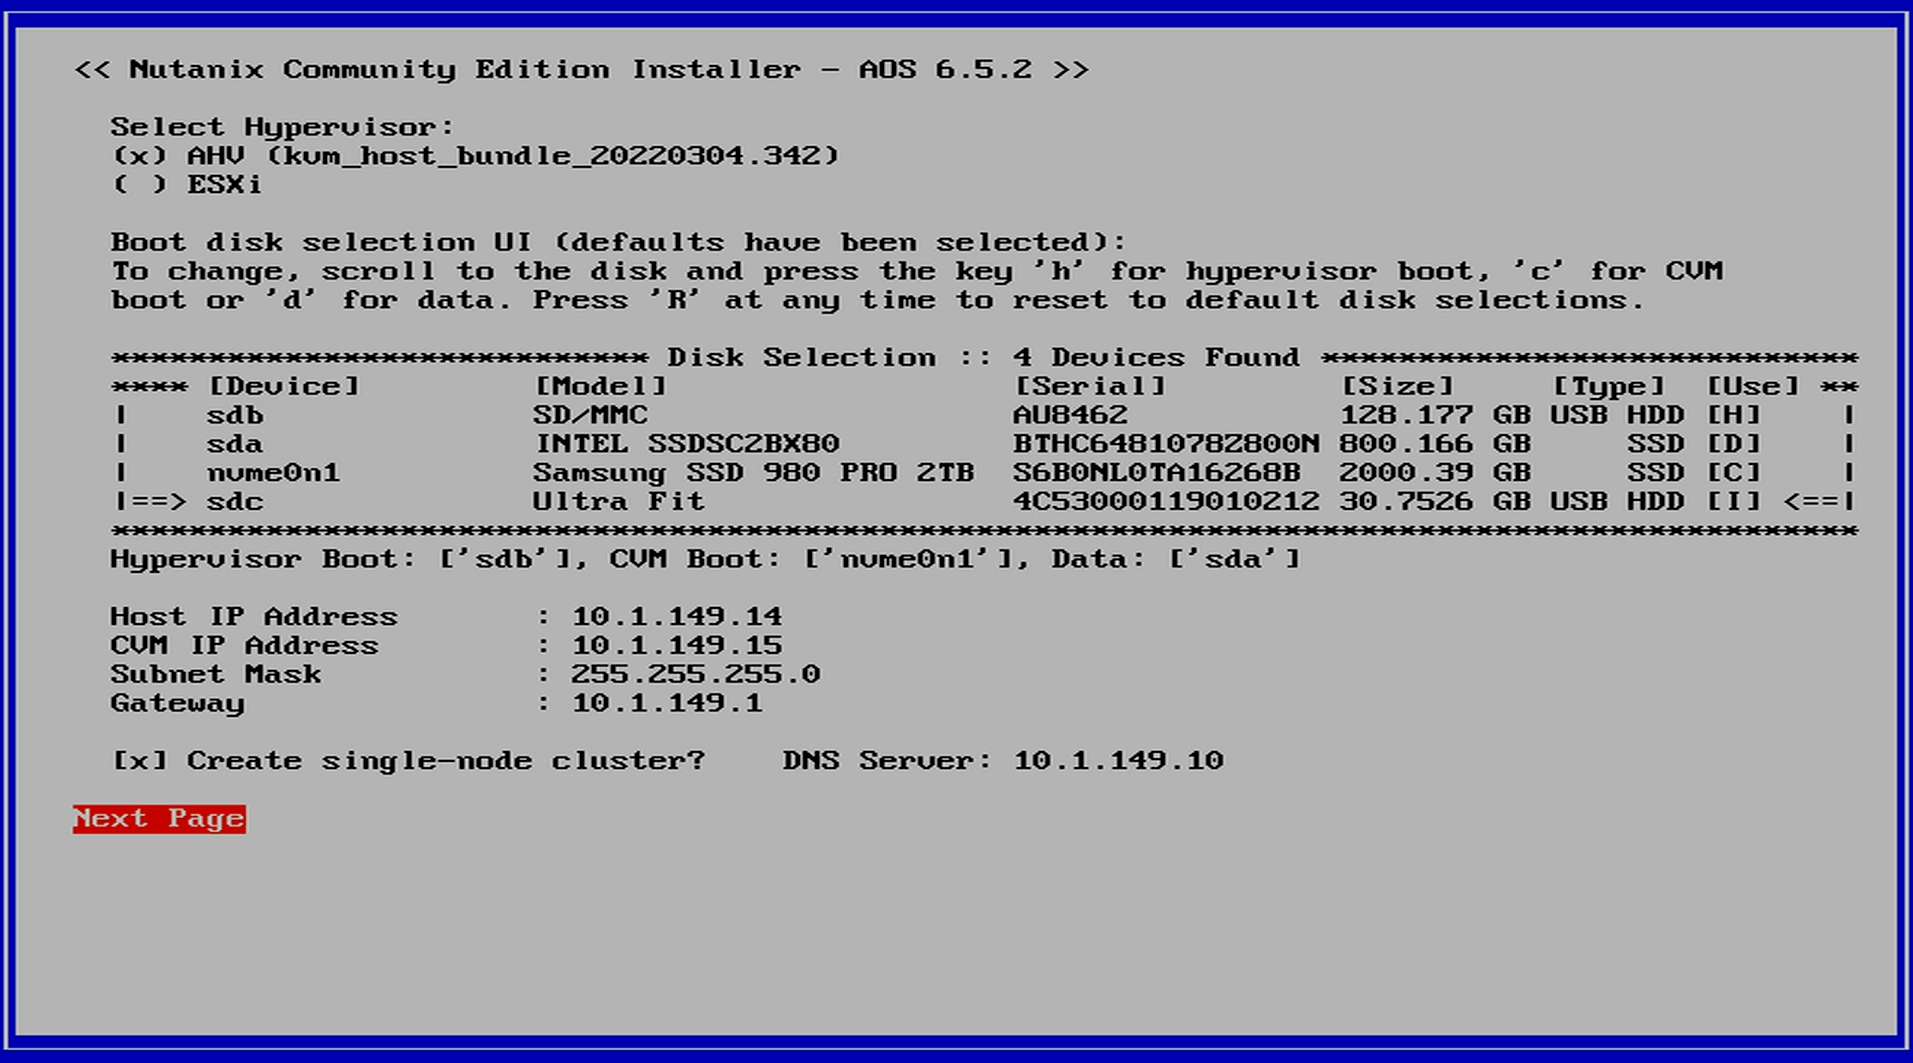
- 3 hard disks available – I would say that by in large, most mini PCs have (2) hard disks, some only 1. Some have (2) M.2 slots. Others have (1) M.2 slot and the possibility to add (1) SATA SSD. There are some options like the Minisforum MS-01 that has (3) M.2 slots, which is the best, I believe, on the market right now.
- What are the 3 disks used for? These are used for the following: (1) for the hypervisor, (1) for the CVM VM, and (1) for data.
- You need lots of RAM – RAM is needed for the Nutanix solution, especially for the CVM, which consumes 50 GB of RAM out of the box.
- Hybrid processors – Nutanix makes note that hybrid processors with the performance and efficiency cores are not supported. No hacky way of bypassing this is noted or that I have seen. You will want to turn off your efficiency cores or use a Ryzen-based CPU.
Missing Intel 2.5 G network adapter
the first hurdle is the missing 2.5 G network adapter driver that presents in the following error when you are booting from a Nutanix ISO on your mini PC:
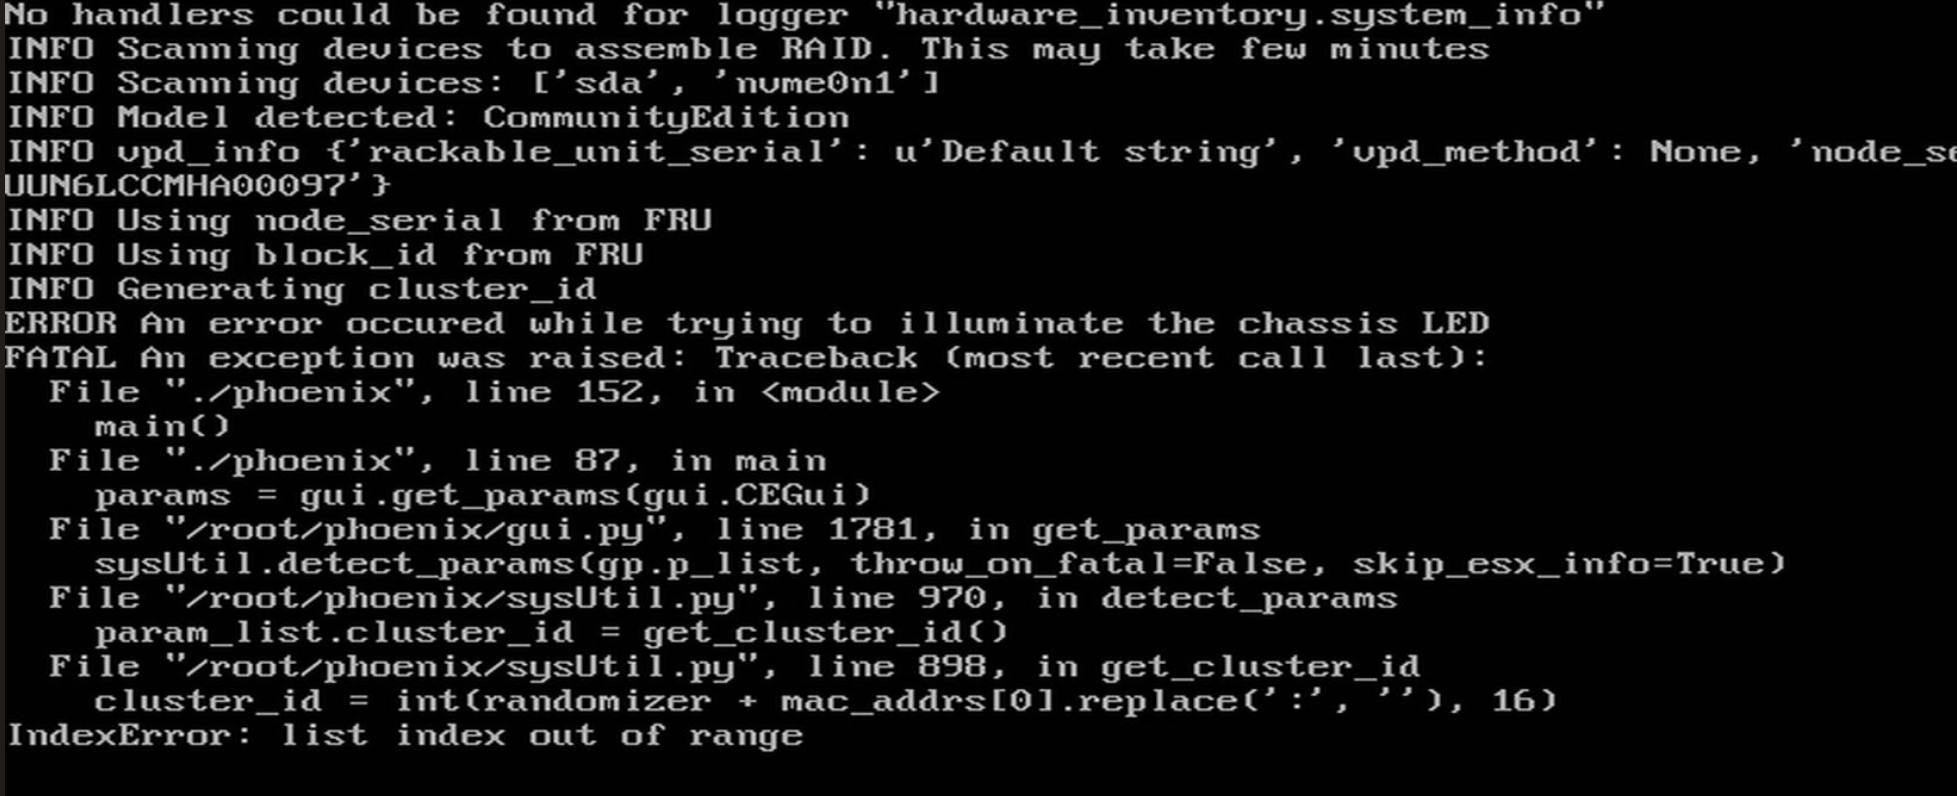
You will find the links to either build or download the modified .ko file for the Intel network adapter from this blog: Resolve Intel NUC 12th Gen network adapter issue during Nutanix CE installation (svenbergendahl.com).
Once you have the modified .ko file for the Intel 2.5 G network adapter, you will need to mount your USB drive that you have the file on and remove the old module and add the new one.
Quick primer on how to mount a USB drive in Linux
Run the following commands. First, we need to find the USB driveY
lsblk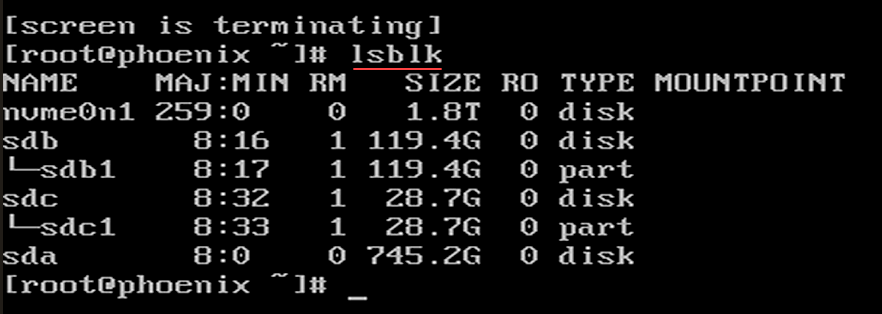
Once you identify your USB drive device, run the following to create a mount directory:
mkdir /mnt/usb-driveNow, mount the USB drive to your mount directory:
mount /dev/sdb1 /mnt/usb-driveNow, change to your USB mount directory and you should be able to do an ls command to see your files there.

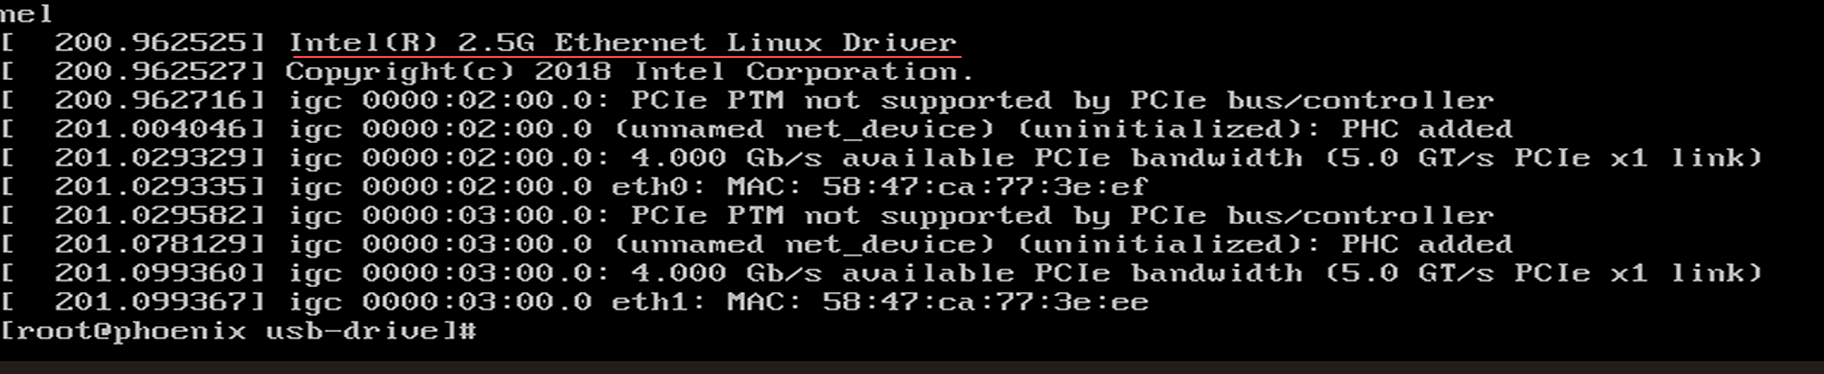
Now we will remove the current igc driver and load the new one.
rmmod igc
insmod ./igc-patched.ko
Then we run dmesg to see if we see that the Intel adapter is detected, and it is.
Re-run the installer
After you implement the workaround above, you need to kick the installer off once again. To do that, run the following command:
./ce_installer && screen -r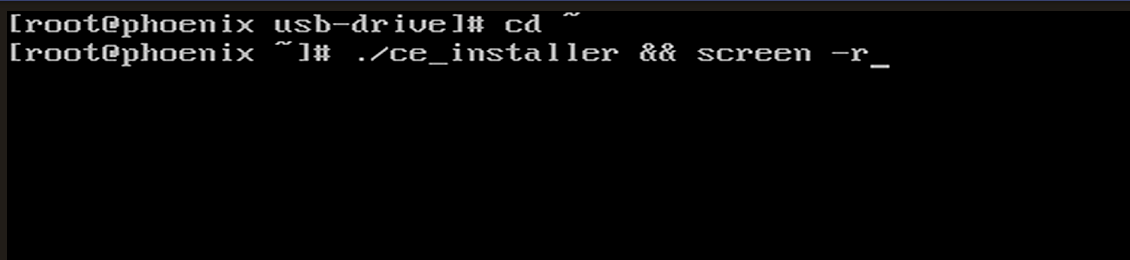
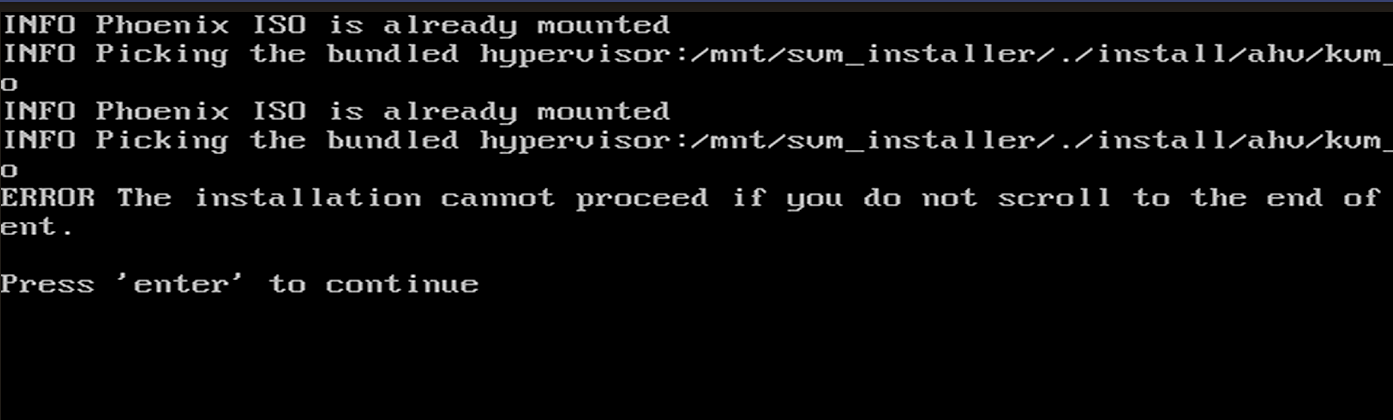
Agree to the Nutanix Community Edition EULA. You will need to page down on this screen through the EULA.
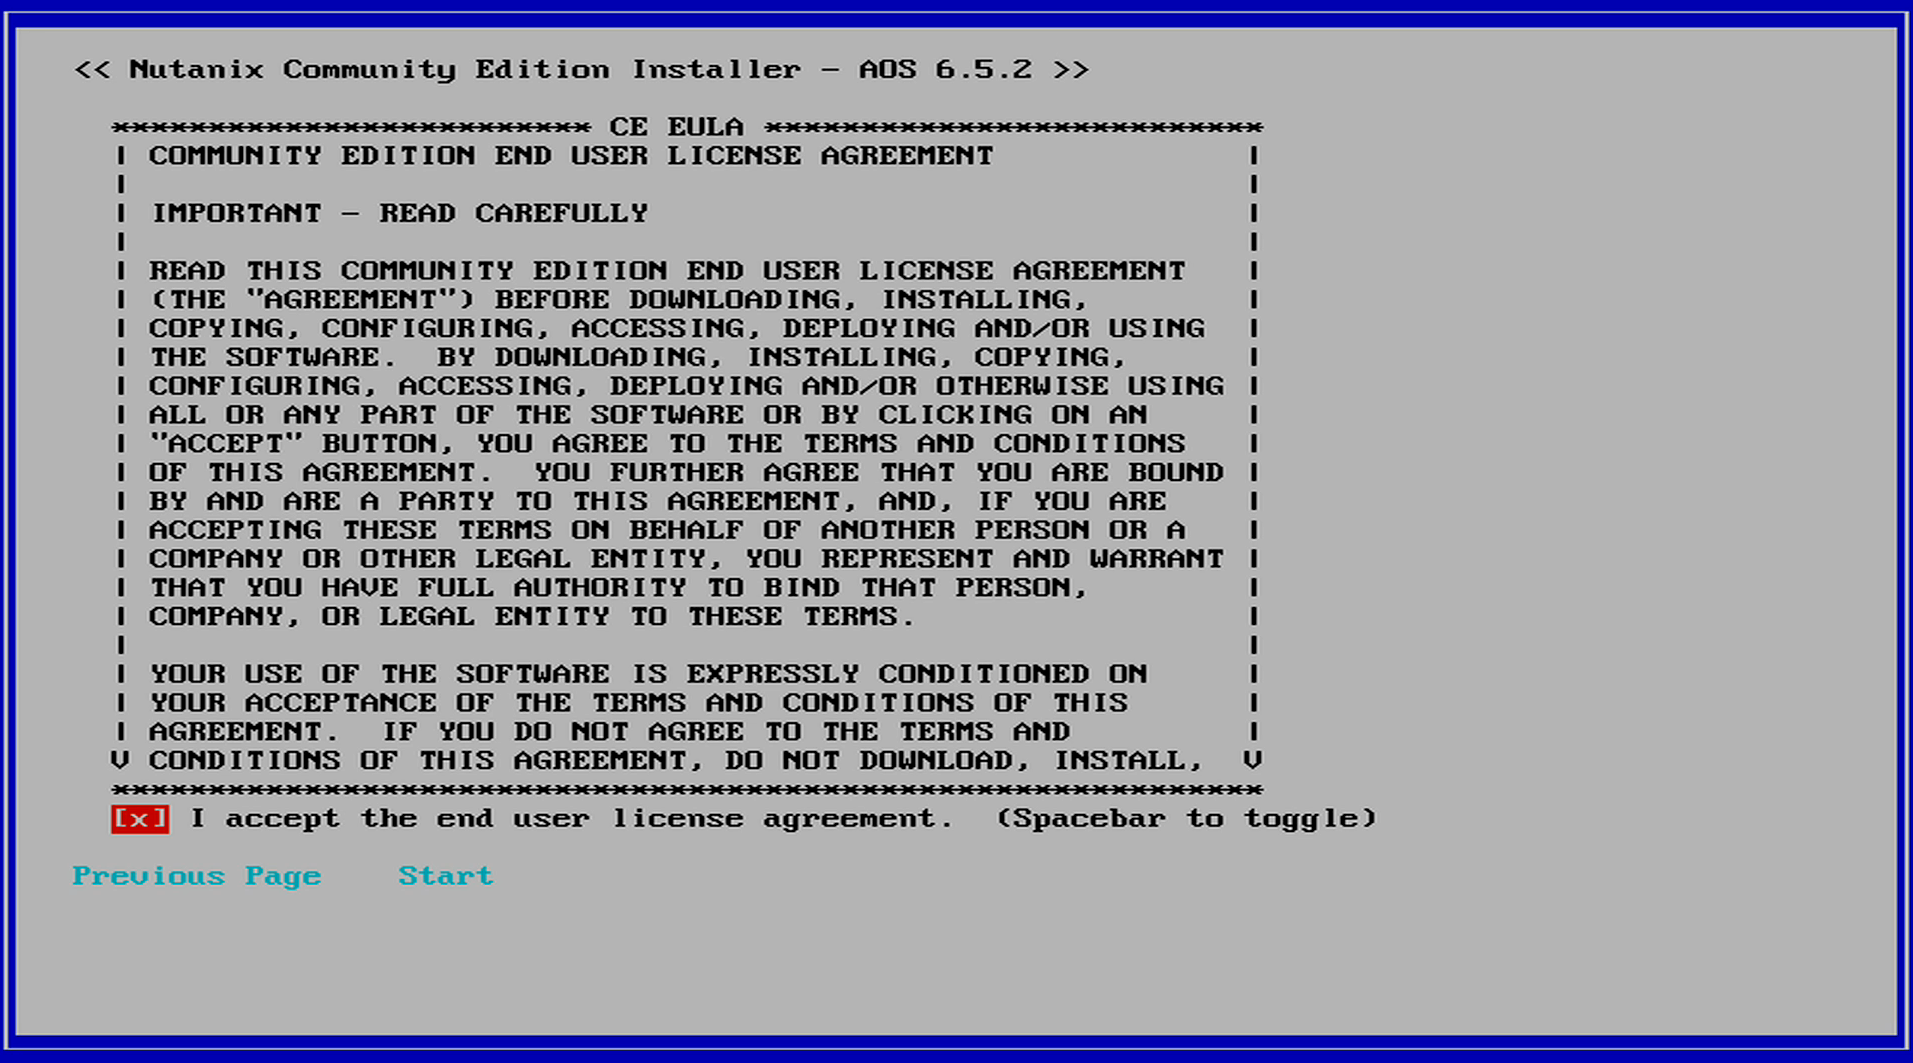
Something that is super silly is it will let you go past the screen, but then fail on the next installation screen saying you haven’t accepted the EULA.
Adding a third drive
There are ways of course to add a third drive to your mini PC, via an external drive attachment. Currently, I am testing with a simple USB drive that I used to boot my ESXi hosts from. I am waiting on some USB NVMe adapters to plug into my USB-C 10 gig port on the mini PC I am testing with, but will have to wait for a couple of days on those.
So, I am using the following disk layout:
- CVM – on an SSD
- Data – on an NVMe drive
- Hypervisor – on a USB drive
Or, at least the above is what I tried first, and I will explain that statement below.
I am not sure if I needed to, but followed the recommendation on this blog post about modifying the minimum.py file to take out the line referencing isdiskUSB.
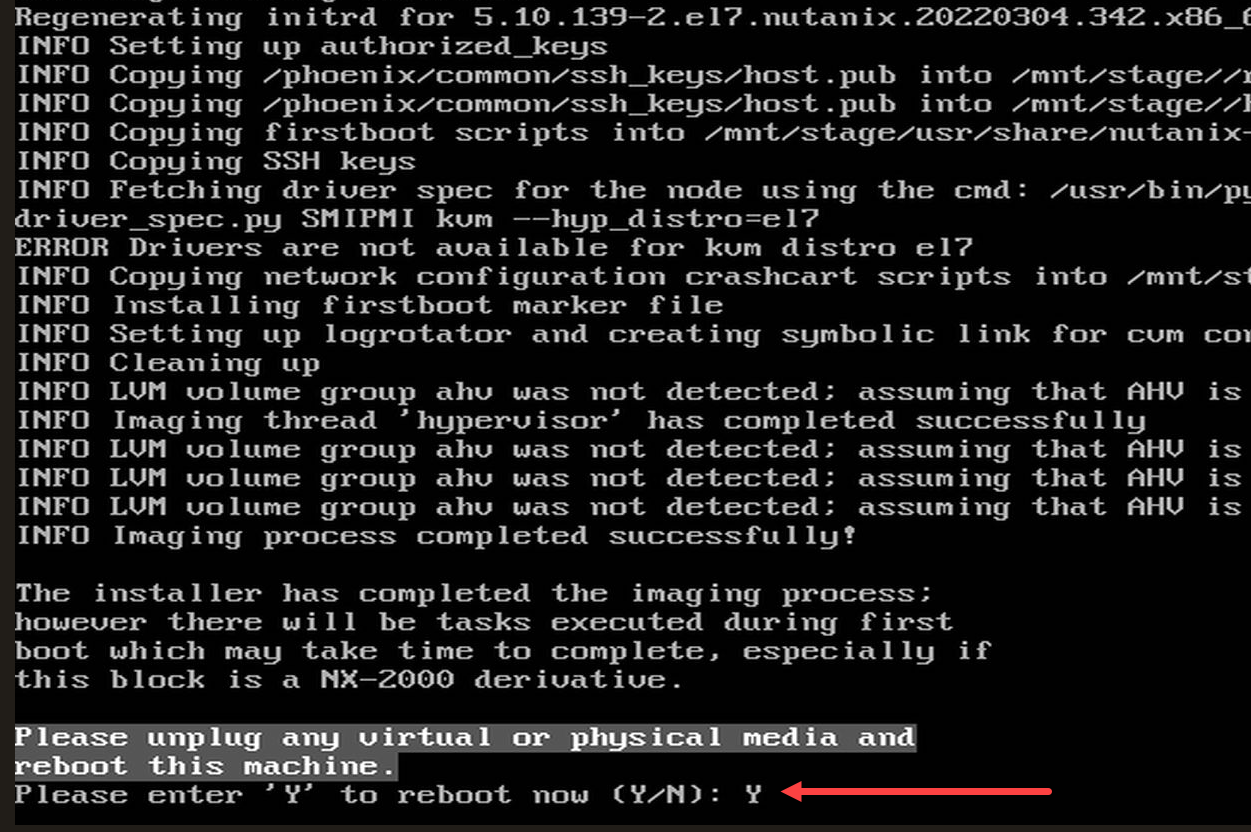
Problems after booting
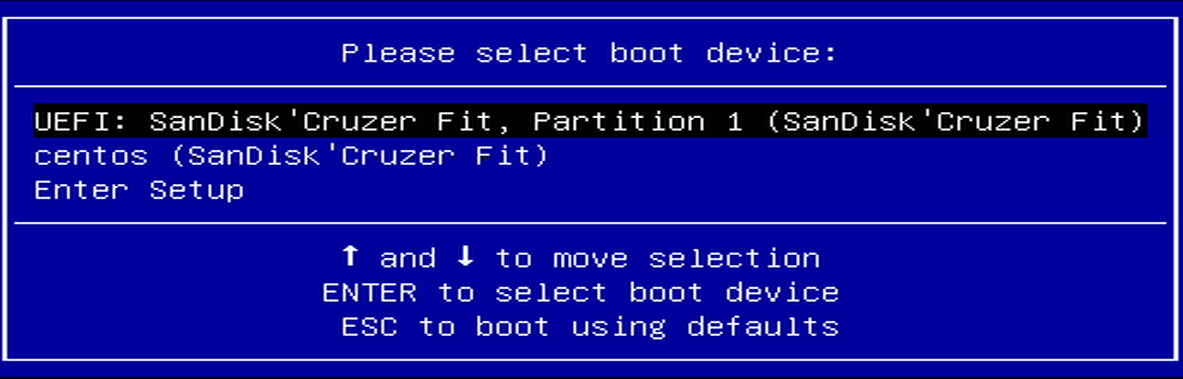
After the installer finished successfully, I thought I was on the home stretch. However, I had to allow the system to boot once and create the default init boot order. Then go in the BIOS and change to this boot device.
Where I am stuck
I had the error that the AHV firstboot script failed to start.

I investigated this quite a bit, and made some progress although I don’t think it is the right progress.
The first boot scripts failed due to the fact that the CVM virtual machine wouldn’t start. The reason it wouldn’t start is due to a PCI device that it was complaining about:
error: Hook script execution failed: internal error: Child process (LC_ALL=C PATH=/usr/local/sbin:/usr/local/bin:/usr/sbin:/usr/bin /etc/libvirt/hooks/qemu NTNX-10d65799-A-CVM prepare begin -) unexpected exit status 1: Could not detach device : 0000:01:00.0
You can see the CVM powered off or the state it is in with the command:
virsh list --all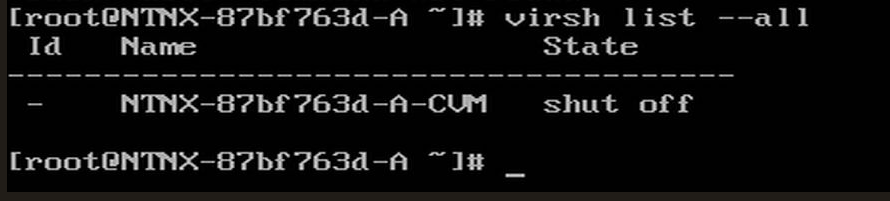
I was able to hack my way around this and get the CVM to power on, by commenting out the following in the CVM config file. However, I am not sure what the ramifications of this are really, or why this is passed through, unless it gives the CVM passthrough access to a physical device. This device is an NVMe drive in the mini PC. The CVM is loaded on another disk, so puzzling still. I know a Nutanix guru could help here.
<!--
<hostdev mode='subsystem' type='pci' managed='yes'>
  <source>
    <address domain='0x0000' bus='0x01' slot='0x00' function='0x0'/>
  </source>
  <alias name='hostdev0'/>
  <address type='pci' domain='0x0000' bus='0x00' slot='0x08' function='0x0'/>
</hostdev>
-->
More to come
While I made quite a bit of progress, the errors and problems are a bit puzzling with the CVM device. I will keep you guys posted on any workarounds I find for this. So far, I can get the CVM powered on, but no connectivity. Also, trying to rerun the first boot scripts manually gives the error that these have already run. So in a catch 22 at the moment. Fun times in the home lab!
Nutanix installation on server hardware
If you want to see the full installation on server hardware and the video, check out my blog and video here:
Blog: Nutanix Community Edition for Home Lab
More in this topic


Discuss this in the Community
Google is updating how articles are shown. Don’t miss our leading home lab and tech content, written by humans, by setting Virtualization Howto as a preferred source.
About The Author
