Configure Meraki to Azure Site to Site VPN
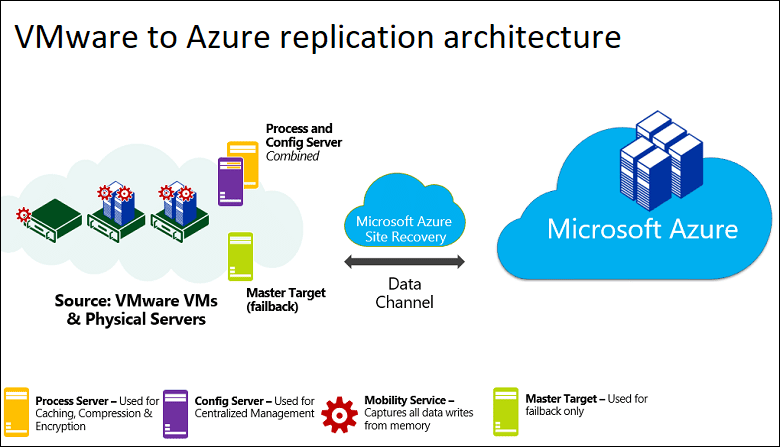
Lately, I have been playing around a lot with Azure as there is a lot of momentum, development, and enthusiasm around the platform. Since I run the Meraki MX security device at home, I wanted to play around with the site to site VPN functionality from Meraki to Azure. Meraki is notoriously easy to setup with most functions and the site to site VPN is pretty straightforward. However, there were a few little caveats/requirements that I encountered with Azure on the site to site VPN configuration. These weren’t difficult to overcome and were related more to my lack of experience with setting up Azure networking and the requirements of the virtual networking configuration on the Azure side. Let’s look at how to Configure Meraki to Azure Site to Site VPN.
Configure Meraki to Azure Site to Site VPN
The configuration of Azure site to site VPN involved configuring:
- Azure vNet network
- Configuring an address space – This address space will need to encompass your subnet and your Gateway subnet (we will explain this below).
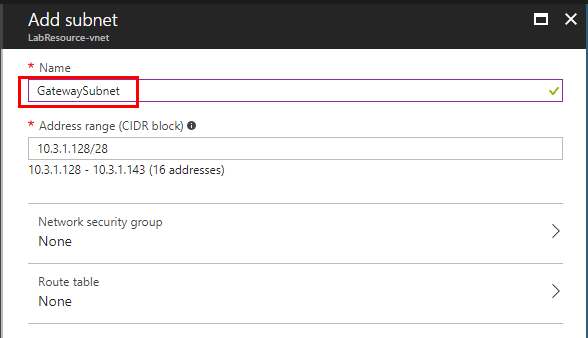
- Gateway subnet – This is a specific subnet used by the virtual network gateway that are used by the VPN gateway services. When you create a gateway subnet, it must be named ‘GatewaySubnet’. Naming a subnet ‘GatewaySubnet’ tells Azure where to create the gateway services. If you name the subnet something else, your VPN gateway configuration will fail. The size of the GatewaySubnet that you specify depends on the VPN gateway configuration that you want to create. While it is possible to create a GatewaySubnet as small as /29, it is recommended that you create a larger subnet that includes more addresses. Using a larger gateway subnet allows for enough IP addresses to accommodate possible future configurations.
- You have to configure an External IP address for the Azure VPN to use as the WAN address to connect the Meraki site to site VPN.
Configure Azure Address Space and Gateway Subnet
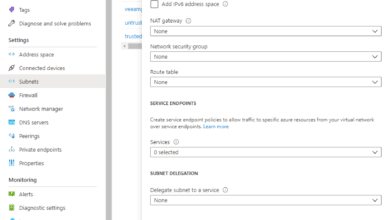
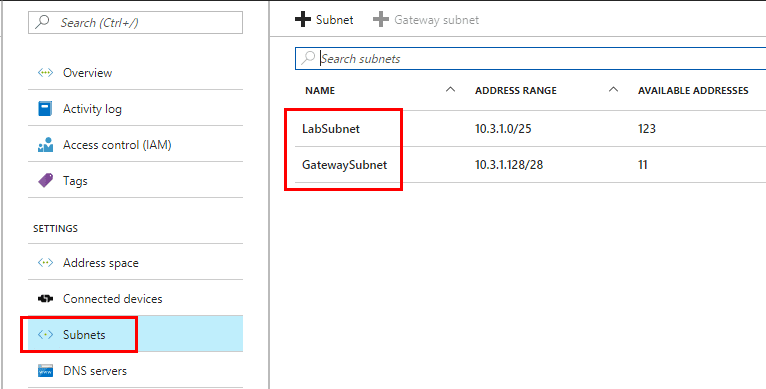
We are going to assume for the purposes of this post, you have already setup an Azure vnet. However, we need to give attention to the Address space as this was one area that gave me fits at first. The Address space must contain both the regular subnet AND the Gateway subnet. In other words, the network space you create is basically a supernet that includes both the subnets you create for subnet and Gateway subnet. Hopefully the screenshots will help with this.

Notice our Subnets. As you can see, I have setup a subnet and a Gateway Subnet. You can only have one Gateway subnet, so you see it greyed out below.
To step back though, let’s look at creating the Gateway subnet. As mentioned in the outset, the name has to be GatewaySubnet for it to work correctly. Your Address range also must fall in the address space you created earlier.
Create Azure Virtual Network gateway for site to site VPN
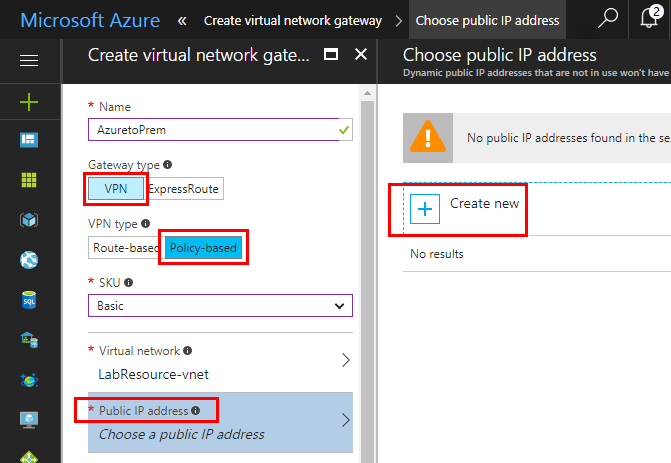
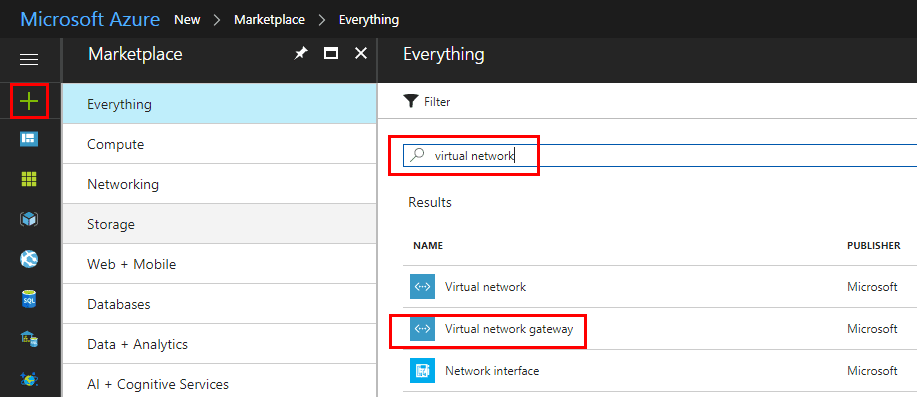
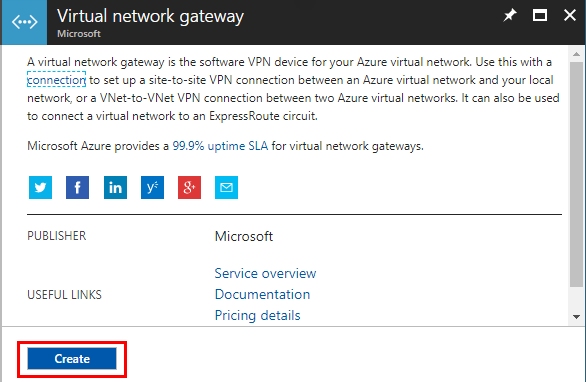
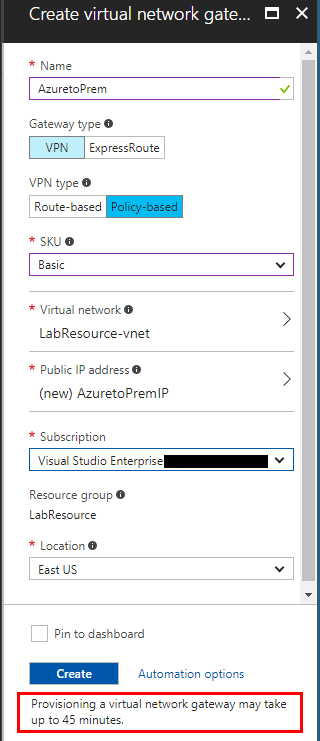
Now that we have our address space, subnet, and gateway subnet in place, let’s look at actually creating the Azure Virtual Network Gateway. Hit the green + sign in the Azure portal. Search for virtual network or similar and you should see the Virtual network gateway listed.
Since the Meraki can only use the IKE1 VPN type, we need to create a Policy-based VPN. This will be compatible with the Meraki VPN. Also, we need to create a public ip address for the connecting partner. Choose the Create new and we can provision the IP.
After naming the new public IP resource, we can create it.

Once we have everything populated, note at the very bottom the timeframe it takes to provision a new virtual network gateway – up to 45 minutes. So this is definitely one you want to kick off and go grab some coffee, etc.
All we have left to do on the Azure side is configure the connection for the remote site (our on premise Meraki MX security device in my case).
Setup Connection from newly created Azure virtual network gateway
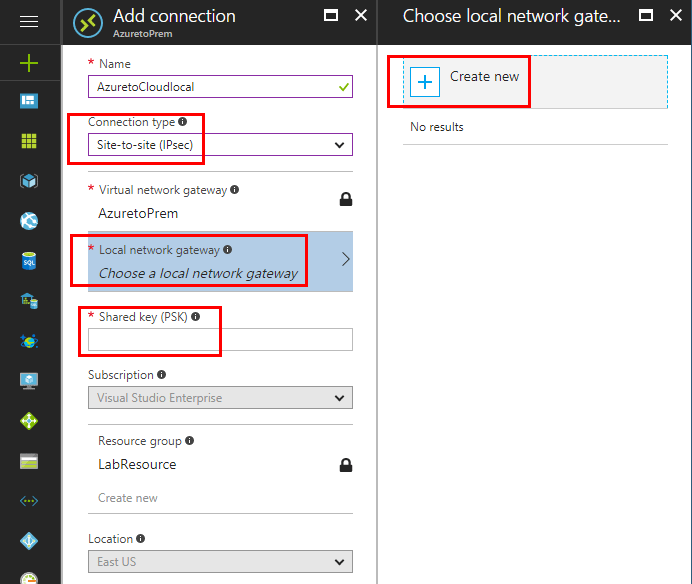
Click the Azure virtual network gateway and choose Connections.

Here we setup the actual connection to our on premise Meraki device. Choose the Site-to-site (IPsec) connection type. Also, we click teh Local network gateway to configure the IP address we will connect to from Azure. Also important, enter the shared key passphrase which needs to be a strong password.
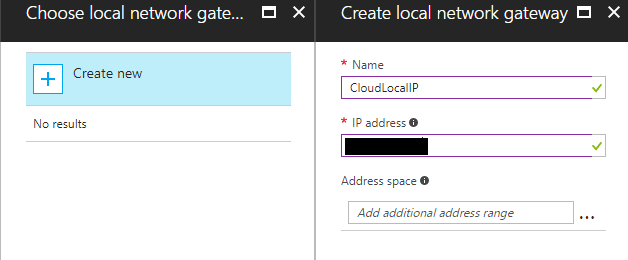
Setting up the local network gateway is straightforward. We simply need to provide a name and IP Address. Also, configure the local on premise Address space that you want to connect with the local network gateway.
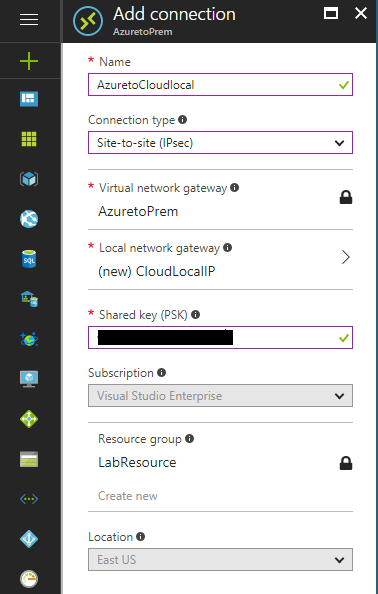
With everything populated, we are ready to create the connection.
Configuring your Meraki site to site VPN to Azure
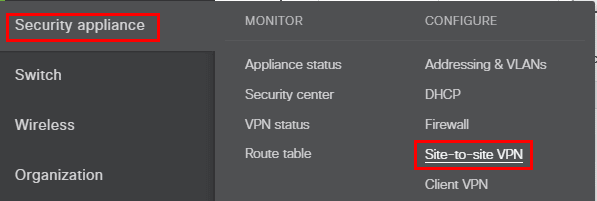
On the Meraki side of things, we have just a few considerations to get the Azure VPN to work. Choose Security appliance >> Site-to-site VPN.
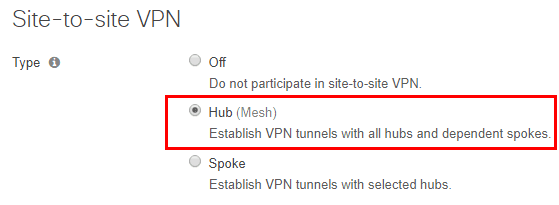
Here I chose the Hub (Mesh) architecture.
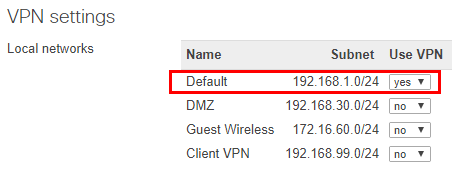
Choose which subnets you want to be able to participate and present to the VPN.
In the Non-Meraki VPN peers, we setup the connection to Azure. There are a couple of fields here to pay attention to. Be sure to choose Azure on the IPsec policies as this configures all the presets for Azure automatically. Additionally, enter the same Preshared secret key you entered on the Azure side. Another key here in the Private subnets be sure to enter the “supernet” address range subnet and not either the individual subnet or gateway subnet range.

We can also setup both inbound and outbound rules for the site-to-site connection.

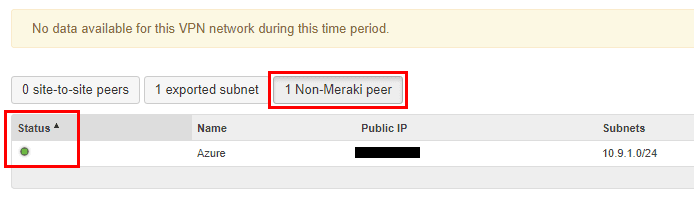
Checking the Azure to Meraki Site to Site VPN status
To check the status of the Azure to Meraki site-to-site VPN, we click the Security appliance >> VPN status link.
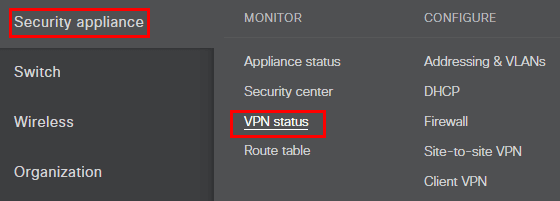
Click the Non-Meraki peer button. You should see a “green” light indicating the VPN is successfully established.
To check the Meraki logs, look at the Security appliance >> Event log.
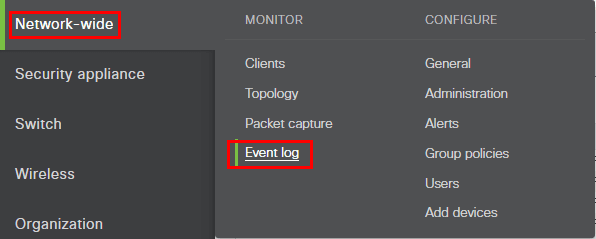
We should see the “msg: IPsec-SA established” entry in the log.

Thoughts
The steps to configure Meraki to Azure site to site VPN are pretty straightforward, however, be sure to pay attention to detail, as one setting amiss will cause the connection to fail. Understanding the GatewaySubnet and the settings required there should help most who may run into issues with this part of the setup. So far the test VPN I have established has been rock solid and no issues have been discovered in my test environment so far.