Update Nakivo Backup and Replication V7 Appliance
Among many of the things to like about the Nakivo Backup & Replication v7 product is the easy and intuitive nature of the processes and operations in the product. This includes the backup mechanism. Updating the Nakivo Backup & Replication appliance is an extremely intuitive and straight forward process. The process for the appliance update is outlined here and is the process I used to update my NBR v7 appliance in my lab environment. Let’s take a look at how to update Nakivo Backup and Replication v7 appliance.
Update Nakivo Backup and Replication v7 appliance
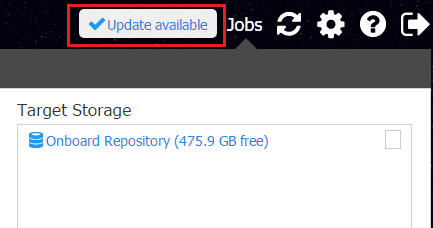
You can easily see that you have an update pending as you see the Update available button in the upper right hand corner of the Nakivo Backup & Replication v7 interface. Click the Update available button.
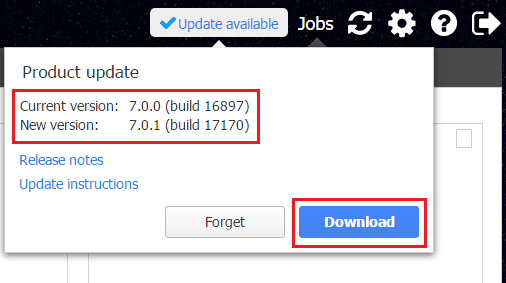
The Product update box is extremely helpful and full of information about the update right at your fingertips including release notes and update instructions. Also, you handily see the current version of the product and the New version that is available. The Download button is a direct link that takes you to the update page to pull down the correct update.
When you click the Download button, you are taken directly to the download link for the patch. Here we choose which version of the product we are updating. Since I am using the Virtual Appliance, I choose the Virtual Appliance and Linux Updater.

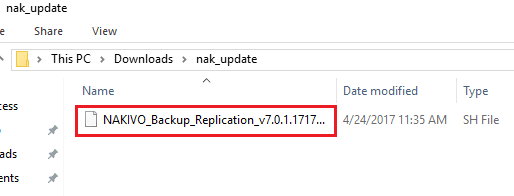
The update is downloaded to the directory we choose.
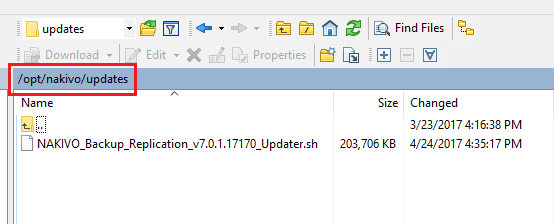
Now, we simply need to copy up the updater.sh file to the appliance. We need to upload it to the /opt/nakivo/updates directory. In this example I am using WinSCP to copy up the file to the server. Make sure that you have binary transfer mode selected to upload the file.

Here we see the file in the /opt/nakivo/updates directory after we have it uploaded.
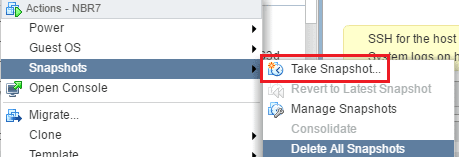
Since we have the appliance running in VMware, we want to take a snapshot before we actually run the updater script. So, let’s take care of getting the snapshot created.
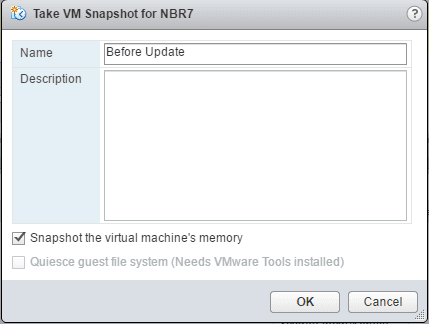
Give the snapshot an intuitive name that we can recognize if we need to go back.
Now, we need to connect to the console of the virtual appliance and select the Software update option.
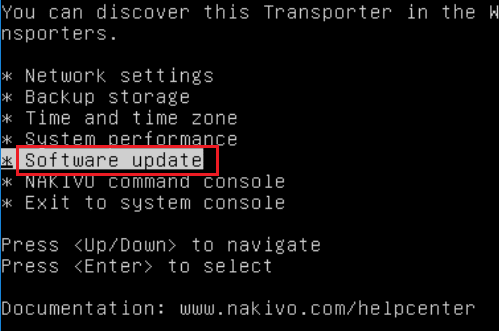
The appliance will automatically see the update that we have copied to the updates directory.
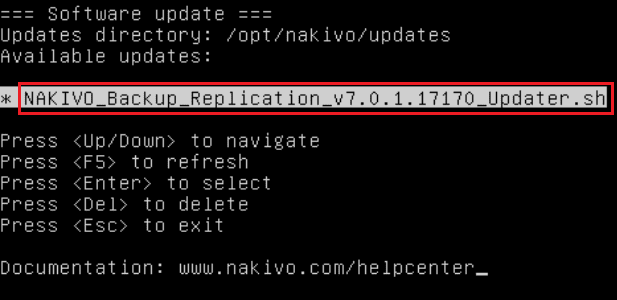
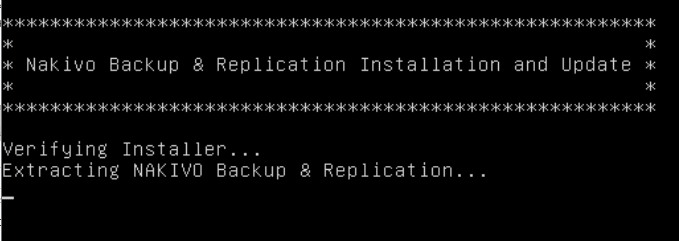
When we select the update that is listed, it will unpack the update and begin the update process which will have a few prompts for us to answer.
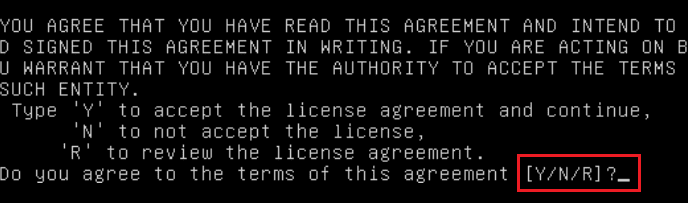
We will first need to agree to the license agreement that prompts us. Simply enter a ‘Y’ to agree to the license prompt.
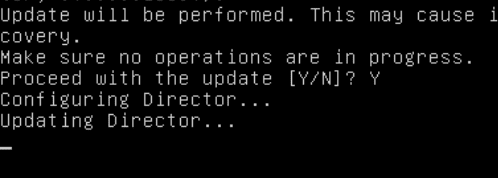
Finally, we are prompted to proceed with the update. Note As the updater script warns us, we need to make sure there are no jobs running before we proceed with the process. After we have verified no jobs are running, we simply enter ‘Y’ again to start the update.

The update operation begins and you will see the components being upgraded.
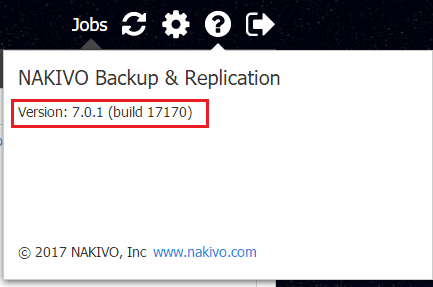
Once the update is finished, we can log back into the Web UI and we will can now check our version to make sure we are now running the current version contained in the update. Click the “question mark” button to see the version information. As we see below, we now are running the current version 7.0.1 (build 17170).
Note Don’t forget at this point to do the housekeeping necessary and delete the snapshot that was taken on the appliance before the update process was ran.
Thoughts
The update process for the Nakivo Backup & Replication v7 appliance is super easy and “just works”. This follows suite with all the processes in the product – they are rock solid. Nakivo Backup & Replication keeps getting better and better with each release and v7 is no exception. Check out Nakivo and download a trial copy of the Backup & Replication appliance.