Recently in upgrading a production vSphere 5.5 environment to 6.0, I have been working through the individual infrastructure pieces left over to upgrade. I spun up a new vRealize Operations Manager Appliance to take the place of the current vCenter Operations Manager 5.8.5 vapp that was currently running in the environment. The way to get up and running on vRealize Operations Manager VROPS is to do a side by side migration by standing up the new VROPS appliance and then migrating data from the 5.8.X environment over to your new VROPS appliance.
Part of this process for me at the end after migrating data was to assume the IP Address of the old VCOPS 5.8.5 appliance. VMware has a KB article written that describes in a few steps how to update the IP Address of the VROPS appliance here: https://kb.vmware.com/selfservice/microsites/search.do?language=en_US&cmd=displayKC&externalId=2108696, however, I think it leaves a lot to be desired in the information presented there and skips over a few things I had to do to properly update the address on my vRealize appliance.
In the configuration of my new vRealize Operations Manager appliance, I simply let it pull a DHCP address from the network to get up and running quickly and be able to migrate the data from the other vApp.
How I was able to Change vRealize Operations Manager 6 appliance IP Address
The first thing that I recommend:
Take a Snapshot of your vRealize VM
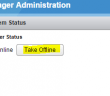
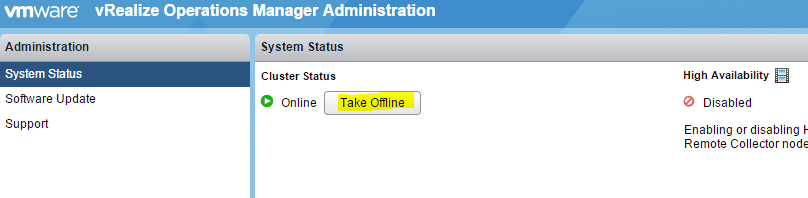
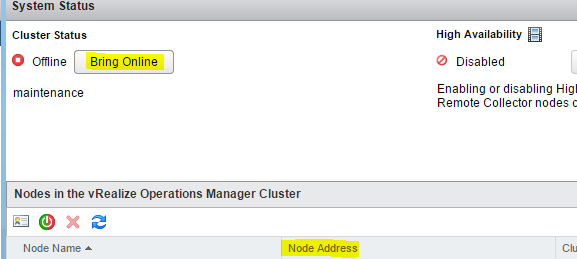
Then, take the cluster status offline:
Part of the instructions VMware has posted to change the IP says:
- Use the Linux operating system to change the IP address as you normally would.
Other blog posts on changing the IP Address that I have seen via Google show to simply change the properties of the VM itself and set the IP address there along with running the ./vcopsConfigureRoles.py –adminCS command and changing the casa.db.script properties. However, this did not work for me.
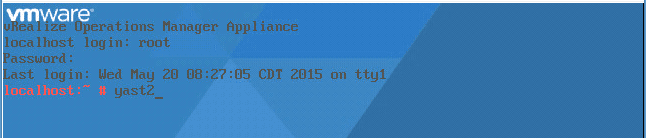
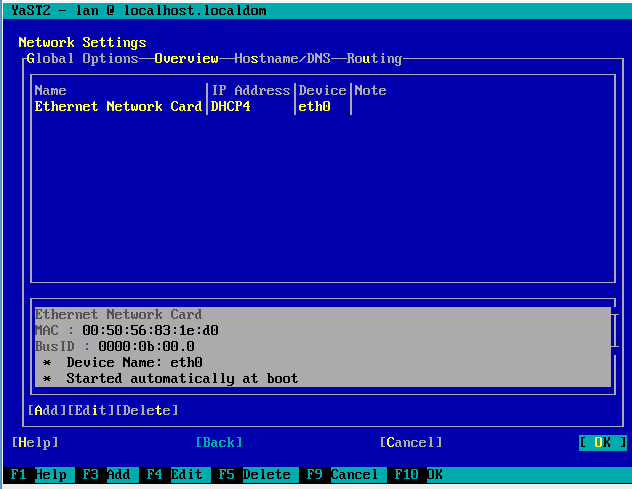
My VM always booted with the DHCP address. Instead I used the built in SUSE linux configuration utility yast2
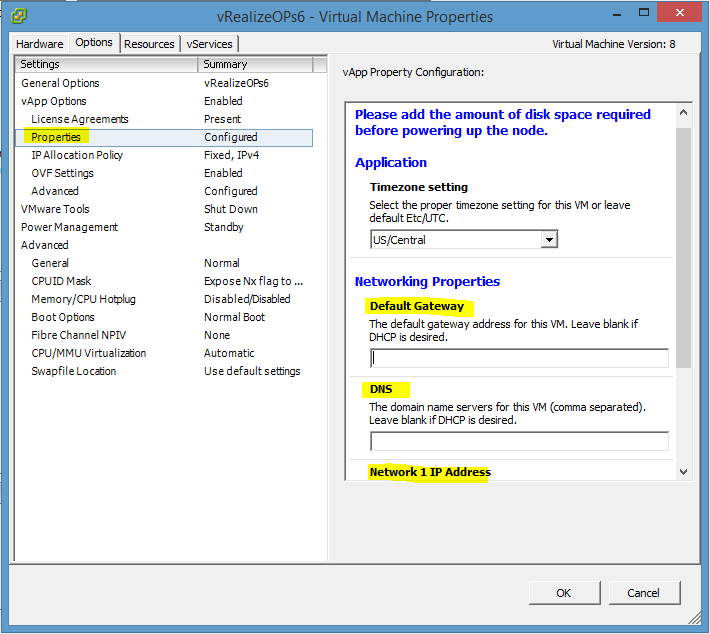
Below is a shot of the properties of the vRealize VM where under options you are able to set the vApp Options which includes the IP address properties.
I logged in as root which you will need to do and then launched the yast2 command. Note The first time you login as root, it is a blank password. It will then prompt you to change it which you can do from the commandline.
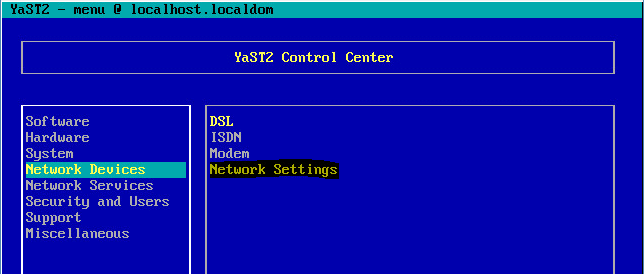
In the yast2 configuration utility, navigate to the Network Devices and then Network Settings menu.
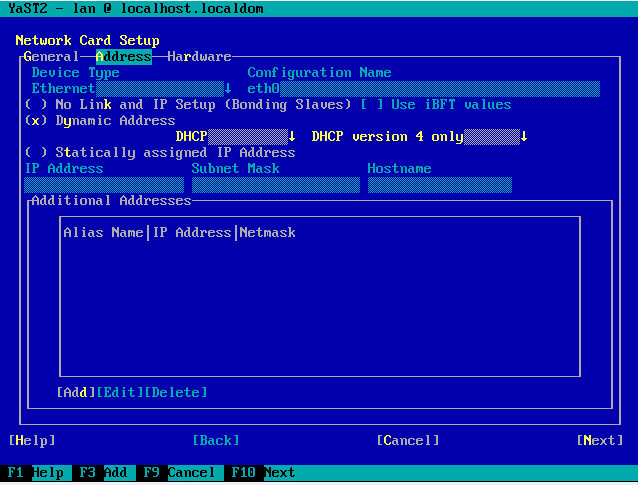
Hit your F4 key to Edit the network settings which for me was set to DHCP4. Tab down to the Statically Assigned IP Address and select it.
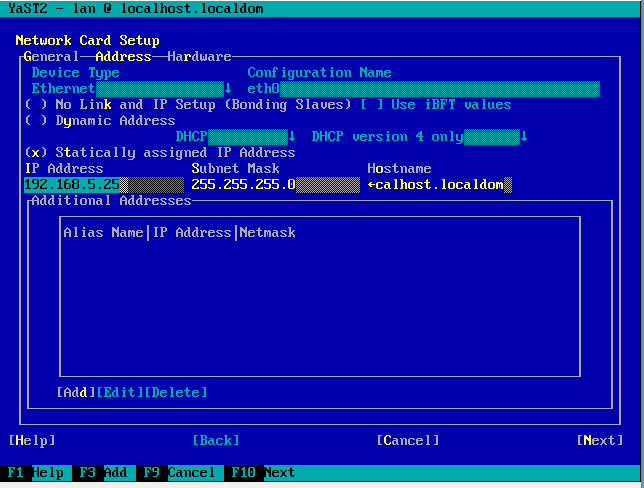
Plugin your static IP address information and hit F10
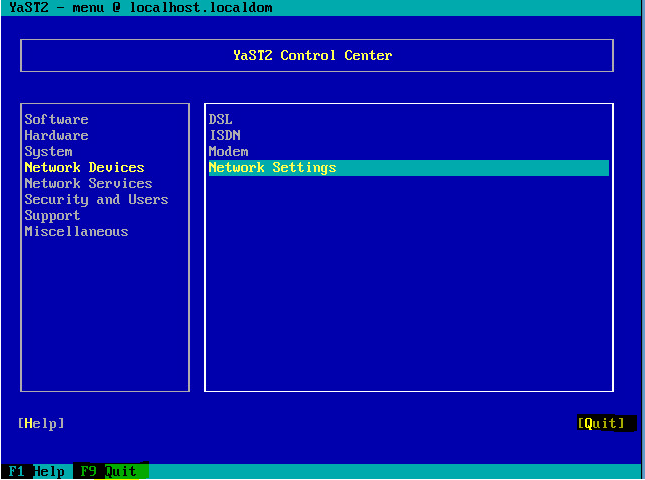
Hit F10 again to confirm, then once you get back out to the main screen, simply hit F9 to quit. At this point your IP should be manually set. You can enter ifconfig to check the IP Address if you want.
Changing config files and Database script properties
At this point the machine should be sitting on the IP address you want to configure. However, according to the KB there are a couple of other commands we need to run.
- Stop the CaSA service by entering the following command.
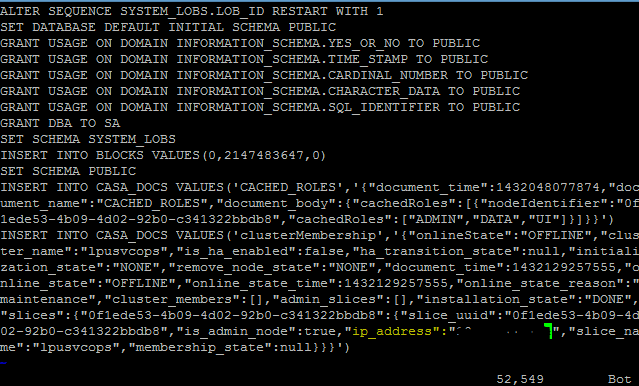
service vmware-casa stop - Open the following file in a text editor.
/storage/db/casa/webapp/hsqldb/casa.db.script - Locate any instances of the old IP address, and update them to the new IP address.
- Save and close casa.db.script.
- If the IP address did not appear in casa.db.script, start and stop the CaSA service by entering the following commands.
service vmware-casa start
service vmware-casa stop - Start the CaSA service by entering the following command.
service vmware-casa start - Navigate to the following directory.
/usr/lib/vmware-vcopssuite/utilities/sliceConfiguration/bin - Run the following command.
./vcopsConfigureRoles.py –adminCS {new-IP-address}
The script updates the IP address in the following files. Alternatively, you could edit the files with a text editor.
/usr/lib/vmware-vcopssuite/utilities/sliceConfiguration/data/roleState.properties
/usr/lib/vmware-vcops/user/conf/gemfire.properties
/usr/lib/vmware-vcops/user/conf/persistence/persistence.properties - Use the vRealize Operations Manager administrator interface to bring the cluster online.
Problems
After doing all of the above, I could correctly get to the web admin interface address and see everything properly. However, when I attempted to bring the cluster online, it hung on Awaiting Analytics. After letting it sit for 15 minutes or more, I new something was wrong. One handy feature of the appliance is the Support link which lets you see the various logs. In looking at the Analytics log, I saw errors about “could not connect to gemfire, could not bind to address “old address” so I new that something was still referencing the old address in the appliance.
After doing some digging, there were two files that needed updated in addition to the files that are referenced in the KB article:
/usr/lib/vmware-vcops/user/conf/gemfire.locator.properties
/usr/lib/vmware-vcops/user/conf/gemfire.native.properties
The old IP address was set in the bottom of both files in bind-address=192.x.x.x
I updated both files, then restarted the service service vmware-casa restart after which I was able to bring the cluster online
Final Thoughts
The process to change the IP Address on the vRealize Operations Manager appliance was VERY painful. It seems a little silly that it is this manual and the KB didn’t reflect the other files that needed changed in my case. Let me know if this post helps you guys or you have run into something similar.
More in this topic


Discuss this in the Community
Google is updating how articles are shown. Don’t miss our leading home lab and tech content, written by humans, by setting Virtualization Howto as a preferred source.
About The Author

it took me a while to find the “use ALT-F1 to get to the console”. after that all these steps worked great.
Everything worked great! Thank you!