With the recent release of Exchange 2010 Service Pack 2, we wanted to see how well the upgrade process for SP2 works on an Exchange 2010 SP1 environment. Take a look at the steps and screenshots below of the SP2 upgrade procedure.
Downloading the file
The first thing we have to do is get the file from Microsoft. You can download Service Pack 2 for Exchange 2010 here. Save the file to the desktop or some other location of your choosing. Right click the file and choose Run as administrator. This process will actually prompt you to extract the executable to a folder of your choosing.


For test purposes, we chose to simply extract to an SP2 folder on the desktop of our server. The executable file is around 535MB and the extracted folder size is about 1.41GB.

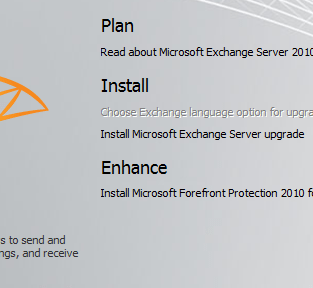
Then you simply run the setup.exe file found in the extracted folder.

Running the Setup
The screenshots below are of the actual setup process when we execute the setup.exe file to begin the upgrade.


We saw an interesting error below other than the Internet namespace issue which is due to the fact that we are on an isolated network. The upgrade process checks if it is a CAS server whether or not the IIS 6 WMI Compatibility component is installed and if not, the upgrade process will not let you process. So on our CAS server, we quickly went to Server manager and added this role service to our server and all was good thereafter.

The screenshot below is after we added the II6 WMI Compatibility service that it was looking for so then we see we only get the error about Internet connectivity.

Below the upgrade process begins.


The upgrade process finishes. Note after hitting the Finish button on the upgrade process on both our CAS/HUB and our Mailbox servers, we were not prompted to reboot in the test environment, however, the installer may prompt you in your server environment depending on what checks it may run and files/services it may see being used or needing bounced, so test thoroughly in your individual environments.

After we finished the upgrade, a quick look at the version number for our Exchange environment now quickly reveals the new Version number of 14.02.0247.005.
Final Thoughts
All in all the upgrade process was very straightforward and we ran into no gotchas along the way besides the IIS 6 WMI problem we detailed above, however, this is a quick and easy fix. As always, thoroughly test in your own testlab to make sure SP2 doesn’t cause any issues in your particular environment. All outward appearances from this install is that it is fairly quick and painless and there is some very appealing enhancements that make this service pack worthy of implementing in Exchange 2010 environments.