iVentoy: Setup Network Boot of ISO Files Made Easy

Quick Summary
- Unlike other tools that require a separate USB drive for each ISO file or operating system (Rufus), Ventoy allows you to load multiple ISO files onto a single USB drive and directly boot ISO files to install OS solutions.
- Making a single boot disk out of a 64 GB USB drive doesn’t make much sense, but storing multiple ISO images and having the ability to boot from those from a single USB device does.
- It also includes a MAC filter that allows you to configure either permit mode or deny mode for filtering clients able to connect to the iVentoy server.
If you are like me, you used Rufus for years to “burn” ISO image files to a bootable USB drive. However, once I discovered Ventoy, I moved to using it for all my USB boot needs. It is a great tool, and we will talk about its advantages here. However, recently iVentoy was released that brings all the Ventoy goodness to network boot, which is great! Let’s look at iVentoy, the ultimate network boot and OS install tool that you may want to use in your production environment or home lab.
Table of contents
What is Ventoy?
Ventoy makes it easier than ever to create multi-boot USB drives. Unlike other tools that require a separate USB drive for each ISO file or operating system (Rufus), Ventoy allows you to load multiple ISO files onto a single USB drive and directly boot ISO files to install OS solutions.
To me, Ventoy makes so much more sense now that we have large USB drives in the realm of 32 GB and larger. Making a single boot disk out of a 64 GB USB drive doesn’t make much sense, but storing multiple ISO images and having the ability to boot from those from a single USB device does.
What if we can have this functionality as a PXE server that can boot multiple ISO files like Ventoy can do from a USB drive? In steps iVentoy.
What is iVentoy?
iVentoy takes the core functionality of Ventoy and extends this to the network side of things for a client machine. Described by the developer as an “enhanced version of the PXE server,” iVentoy boots and installs multiple operating systems on multiple machines over the network.
It supports many different operating systems, including Windows versions, WinPE, Linux, VMware vSphere, and more, all over the network.
- You can download iVentoy here: iVentoy.
Ventoy Licensing: Free and Pro editions
iVentoy comes in two editions – a free-for-home edition and a commercial edition. The free version is limited to a maximum of 20 clients and does not support ARM64.
On the flip side, the commercial edition, priced at $49, has no client limit and allows commercial use, as well as ARM64 support. The licensing model allows for both home lab use in the free form and commercial use with the Pro license of the product.
| Diff | Free Edition | Pro Edition |
|---|---|---|
| Commercial use | NO | YES |
| Max Client Number | 20 | No Limit |
| ARM64 Support | NO | YES |
| Cost | Free | $49 |
Auto installation
With iVentoy, another feature you can take advantage of is auto installation technologies with an install script for various operating systems, including:
Windows auto installation supported (unattend.xml)
Linux auto installation supported (Linux installation via cloud-init, etc)
Install script automatically solves various installation inputs to automate the installation of your operating system fully.
File Injection Feature
A feature to note is iVentoy’s file injection capability. This allows for the addition of files to the ISO without the need to modify or repack the ISO file itself. It’s a handy feature when there’s a need to add drivers, scripts, or other files to the ISO.
ISO Internal Files
Also, iVentoy provides a way to browse and view the internal files of an ISO. This is crucial for verifying the contents and ensuring the right ISO is being used, especially in a multi-OS environment.
Legacy BIOS and UEFI Mode
iVentoy’s support for both Legacy BIOS and UEFI mode makes it able to handle both types of BIOS configurations for older hardware or the latest machines.
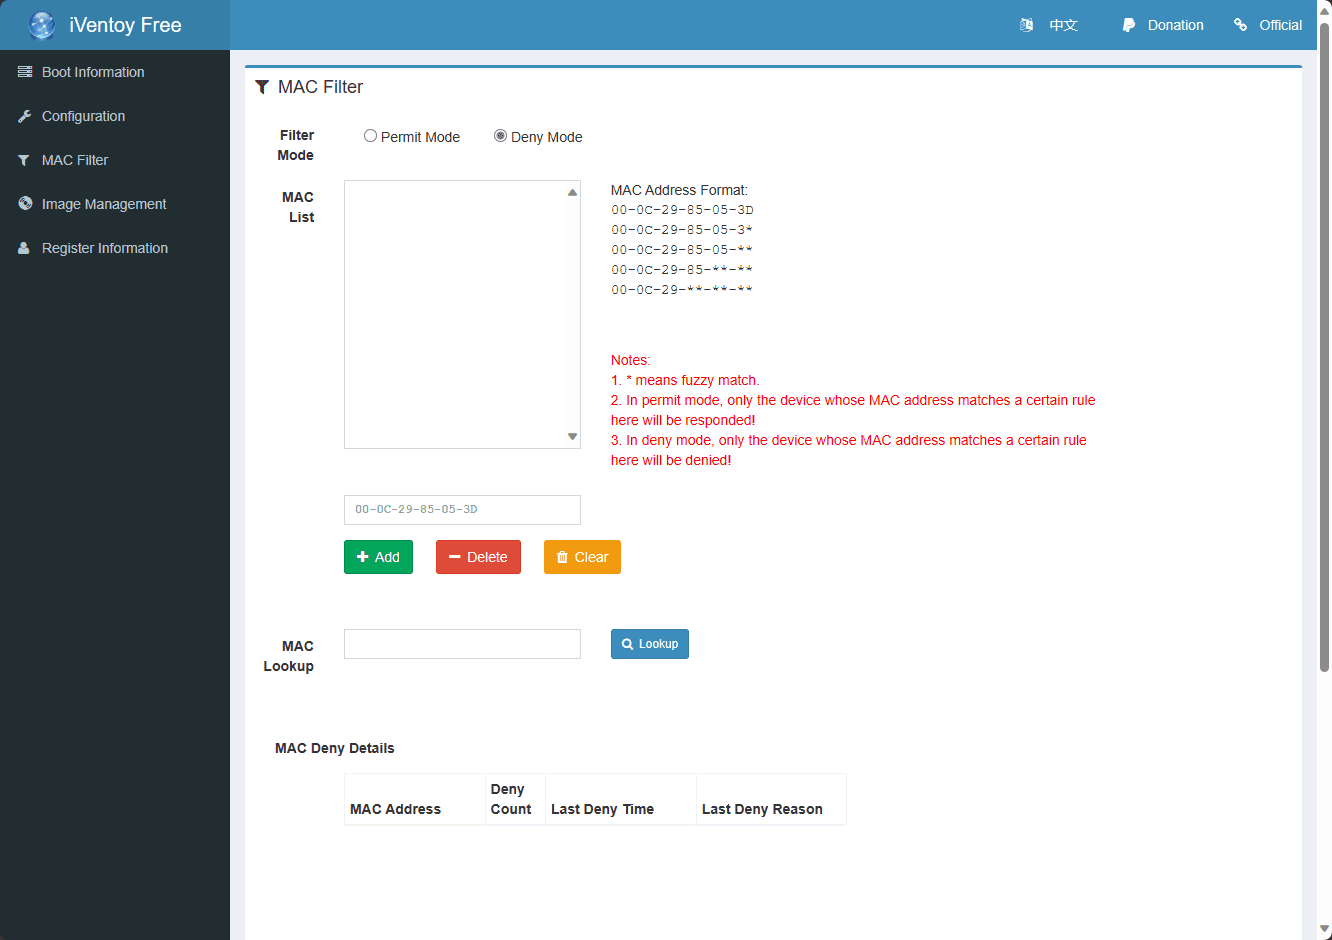
MAC address filtering
It also includes a MAC filter that allows you to configure either permit mode or deny mode for filtering clients able to connect to the iVentoy server.
Below, we see the MAC address filtering status. By default, it is set to Deny mode. But you can invert this with the Permit mode.
Key Technical Features of iVentoy
Notice the following features of iVentory:
Cross-platform Support: iVentoy is designed to run both on Windows and Linux
Direct Boot from ISO Files: Similar to Ventoy, iVentoy allows for direct boot from ISO files without the need for extraction. This feature saves time and simplifies the boot process.
Native Boot Menu Style: iVentoy comes with a native boot menu style for Legacy and UEFI modes
Support for Legacy BIOS and Various UEFI Modes: iVentoy supports x86 Legacy BIOS, IA32 UEFI, x86_64 UEFI, and ARM64 UEFI modes
Support for Over 110 Different OS Versions: iVentoy has support for over 110 different versions of Windows, WinPE, Linux, and VMWare
Comparing iVentoy and Ventoy
While iVentoy is an evolution of Ventoy, the two are distinct software, each with unique features. iVentoy is a new netboot solution that takes Ventoy’s bootable USB drive concept to the network level, allowing for network boot and installation of operating systems. On the other hand, Ventoy remains a go-to tool for creating bootable USB drives with multiple ISO files.
One significant difference is the licensing model. Ventoy is open-source. iVentoy comes with a free-for-home edition and a Pro edition.
Setting Up iVentoy on Linux: A Step-by-Step Guide
Setting up iVentoy on a Linux system is a straightforward process. Here’s a step-by-step guide to get you up and running with iVentoy on Linux:
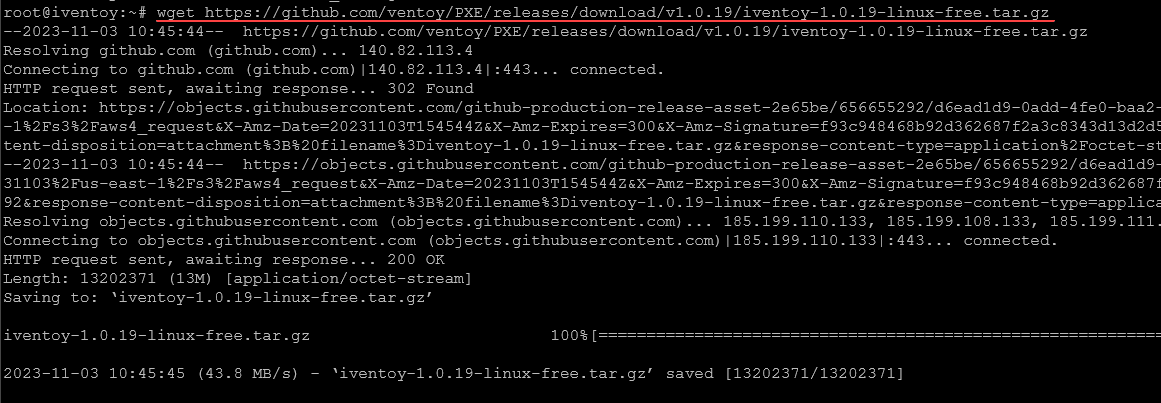
1. Download and extract the iVentoy package
Download the iVentoy package suitable for your Linux system from the official website.
I am using an Ubuntu Server 22.04 LTS VM to host iVentoy. So to download the iVentoy package, you can do the following:
wget https://github.com/ventoy/PXE/releases/download/v1.0.19/iventoy-1.0.19-linux-free.tar.gzReplace the version in the command above with the latest version found here: Releases · ventoy/PXE (github.com).
To extract the downloaded .tar.gz file you can do the following:
tar -xzf iventoy-1.0.19-linux-free.tar.gz
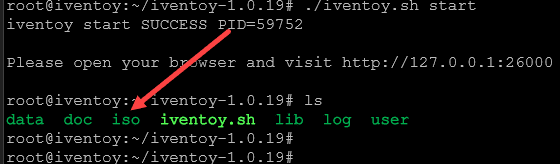
2. Start iVentoy
To start iVentoy, you can run the following command:
##Start once
./iventoy.sh start
##Autostart
./iventoy.sh -R start
3. Navigate to the iVentoy web UI
To navigate to the iVentoy web UI, you enter your server with port 26000. As you can see below, the dashboard shows basic information about your server. You will see that it will pick a default range of IP addresses from the same subnet the server is located.
The 20 IP addresses it has earmarked lines up with the free edition limit of 20.

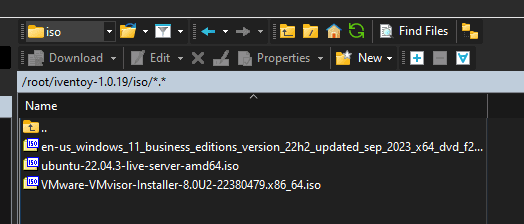
4. Add ISO files
To start serving out PXE boot with ISO files ready to install, we need to add our ISOs to the iso folder in the iVentoy folder that we extracted (same folder where we ran the .iventoy.sh file).
Below, I have added 3 new ISOs to the folder.
5. Refresh image management
Now that we have added the ISO files to the ISO folder, we need to refresh the image management.
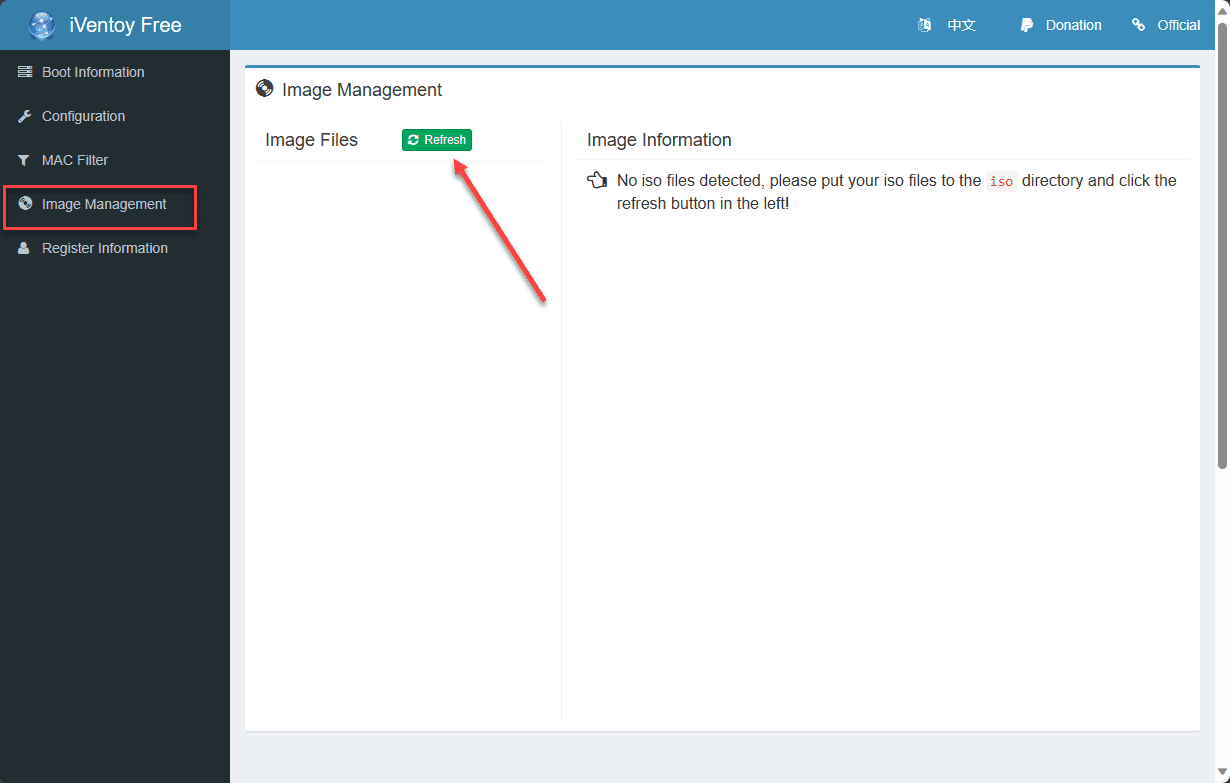
You should see the ISOs you uploaded appear in the page.

6. Start iVentoy
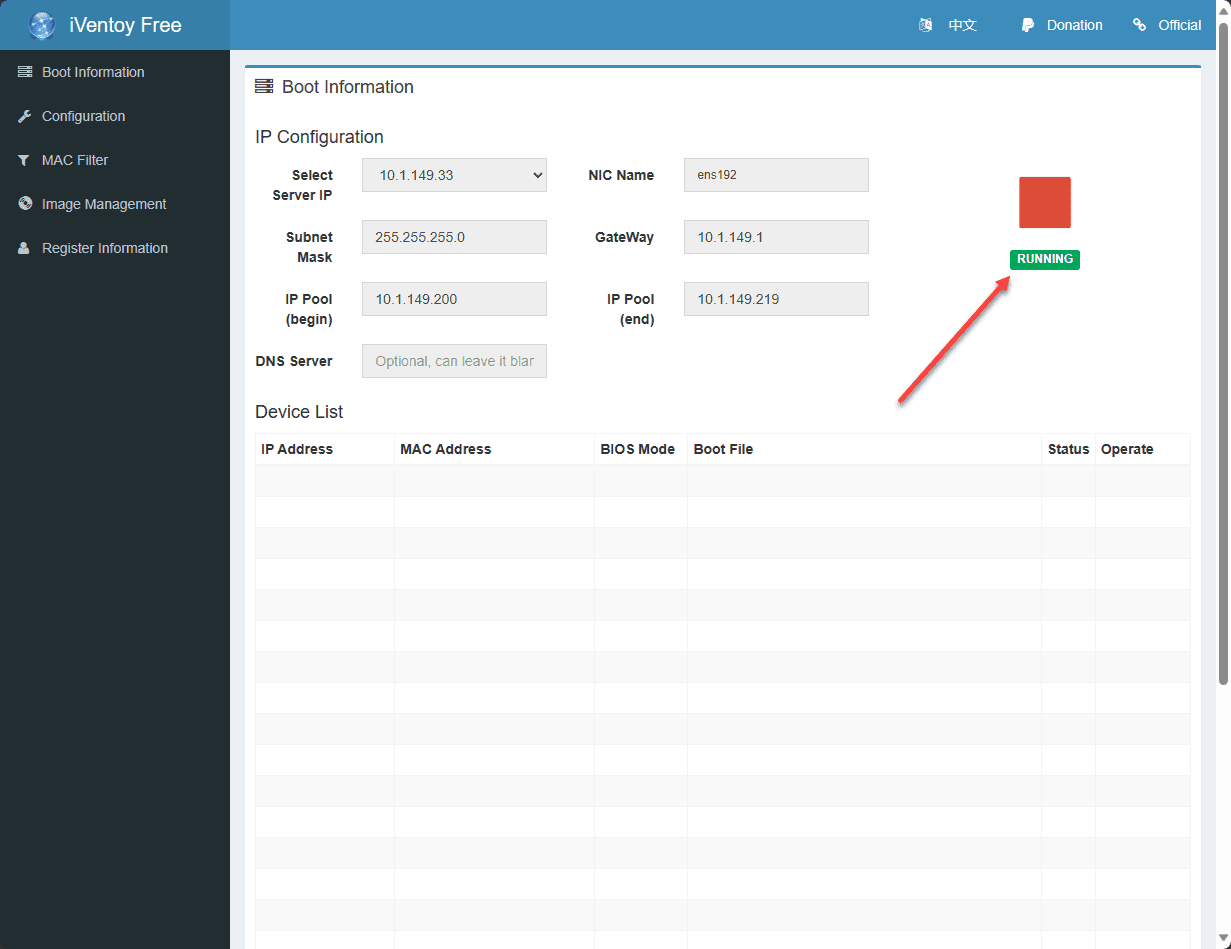
Now that we have images in our folder and have the process refreshed, we can start the boot sever. Navigate to the Boot information screen and click the green play button.
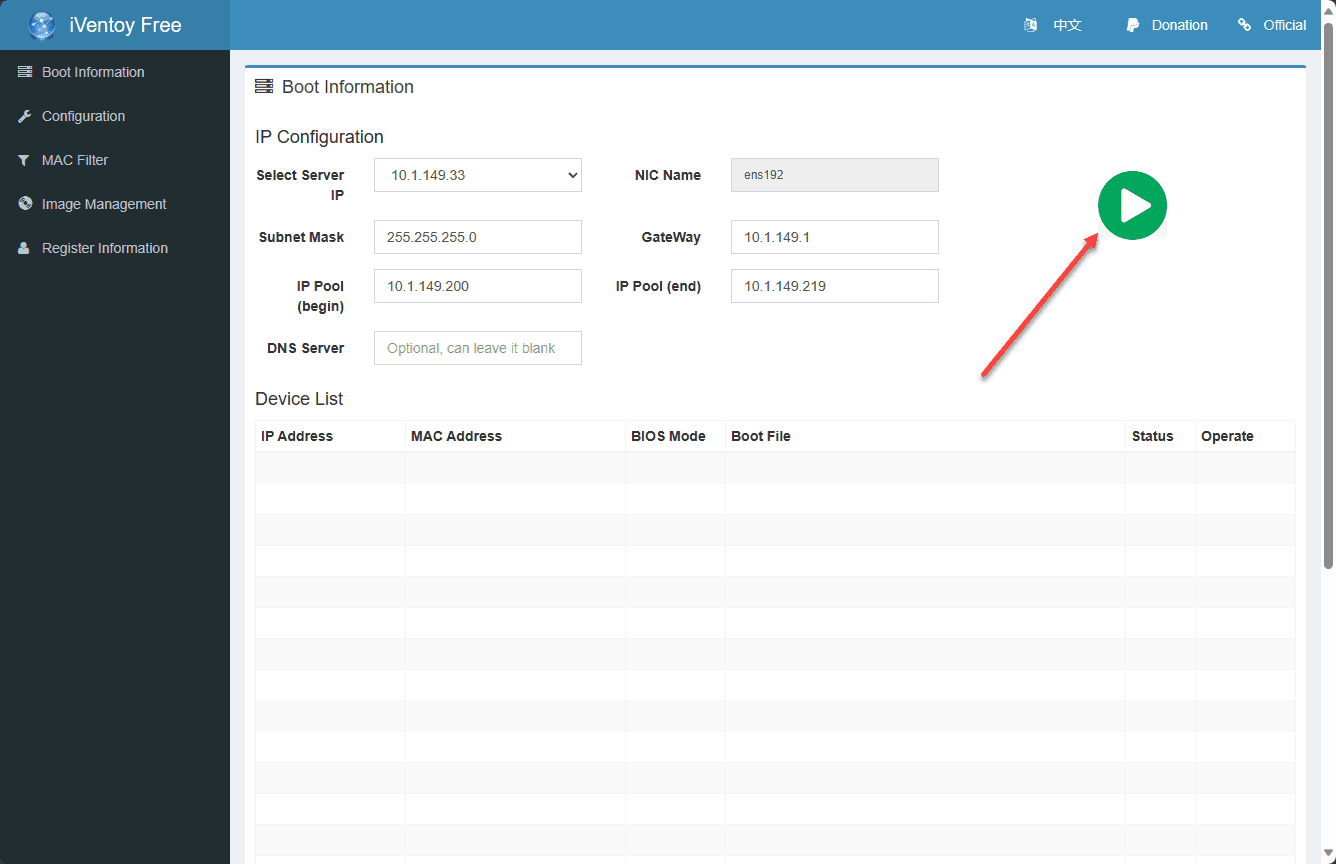
The server now shows to be running.
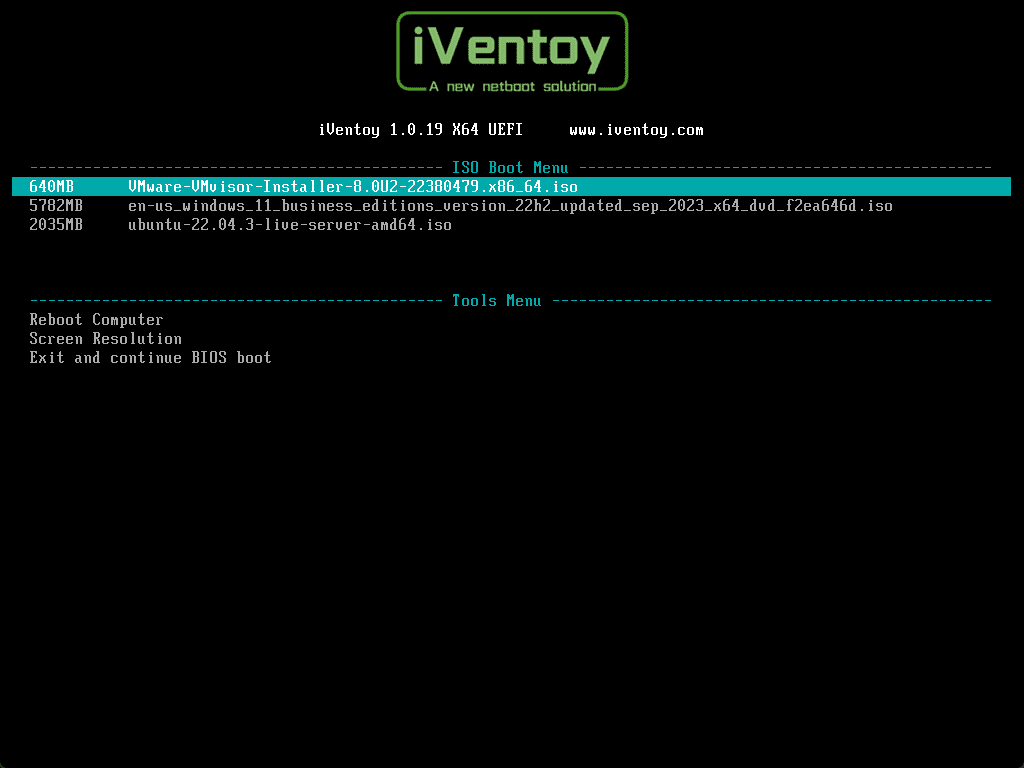
7. Boot your client machine from the network (PXE server or PXE boot)
Finally, at this point, we should be able to boot our client machine from the network and get a response from the iVentoy server. Boot your client device and select PXE boot.
Once your client connects, you can jump back to the iVentoy web UI and see the connected client, which ISO they are using and other details.
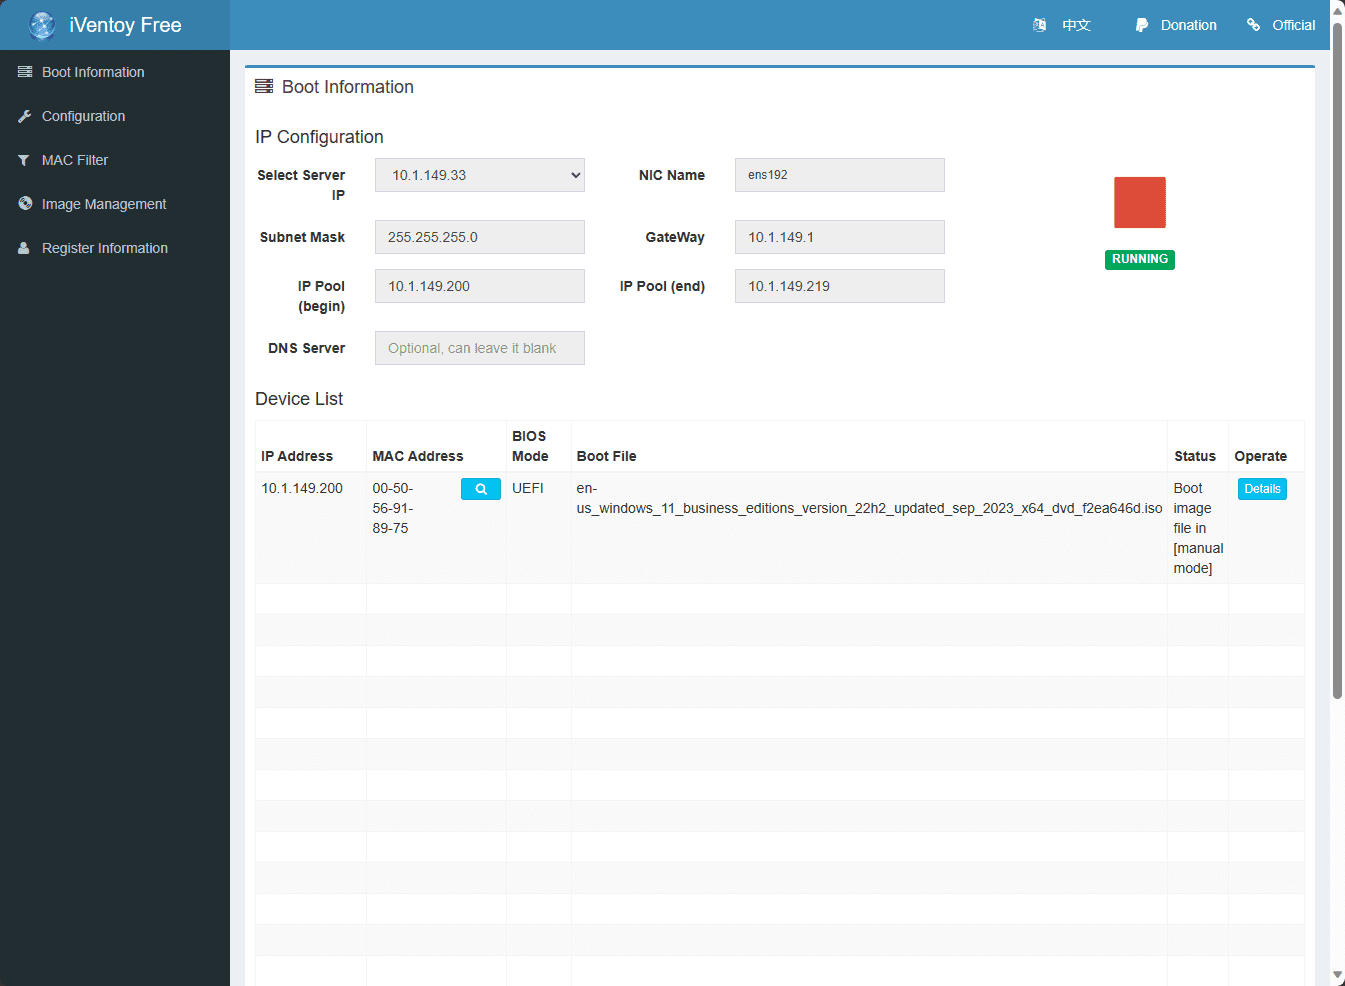
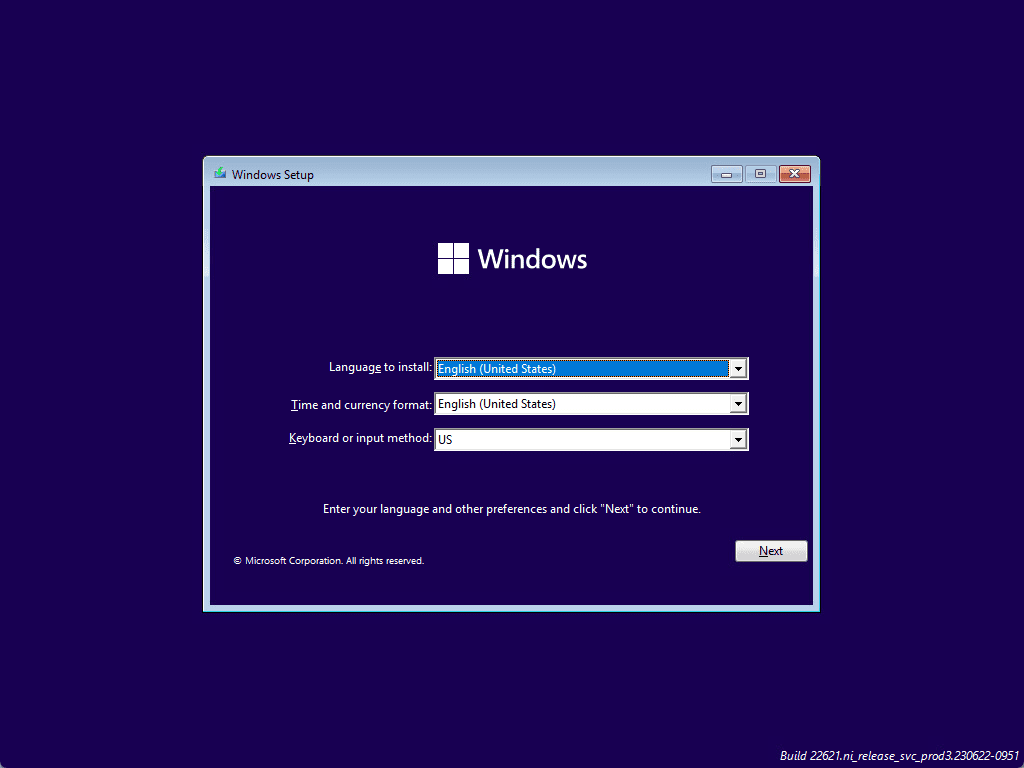
From the client side, the client boots successfully from the Windows 11 ISO.
Other considerations
Note the following other considerations.
Booting Mechanism
iVentoy utilizes the PXE (Preboot eXecution Environment) booting mechanism to allow network booting. This feature is specially optimized for PXE scenarios.
Supported Modes and Systems
iVentoy supports x86 Legacy BIOS, IA32 UEFI, x86_64 UEFI, and ARM64 UEFI modes. This support should cover most hardware configurations and architectures. It also supports Windows, WinPE, Linux, and VMWare.
Configuration and Management
You manage iVentoy with a web GUI. The web GUI can be accessed from any machine on the network. As shown, this is where you manage your ISO files, set the server IP, and configure the IP pool for the PXE service.
Security Considerations
It’s important to note that iVentoy does not support secure boot in UEFI mode. Before using iVentoy, you must disable secure boot in the BIOS. Also, by default, it looks like iVentoy is configured with an HTTP connection and not HTTPS. Keep this in mind, as you will need to use a reverse proxy or some other means to protect your connection to the server.
DHCP Proxy and Third-Party DHCP Servers
While iVentoy does not support DHCP Proxy, it can work together with third-party DHCP servers, which is crucial for network booting scenarios.
Windows Driver Missing Issue
For standard Windows ISO files, there might be instances of driver missing issues, which is something to be mindful of when using iVentoy for network booting with Windows ISO files.
Wrapping up
Overall, the iVentoy project looks to have a lot of merit for those that want to have the Ventoy functionality in a network boot format. You can connect 20 clients to iVentoy with the free version, but it is important to note that the free version has some limitations, including you can’t use the ARM64 support or use it for commercial use. However, as easy as this makes booting and using ISO images across your network, it definitely may be purchase-worthy for the home lab or production.