Working with SSL certificates can be VERY frustrating especially between operating systems and webservers. A popular choice among businesses or clients who may have multiple webservers is the wildcard certificate. Many misunderstand the wildcard certificate in how they utilize the certificate in their environment and how they can go about installing the certificate on multiple web servers.
Most system administrators are accustomed to submitting a CSR request to the SSL provider and then received their signed certificate back. This is a simple concept with single hostname certificates. However, when you purchase a wildcard certificate, the process is a bit different.
In this example, we will look at a possible scenario with using Godaddy as the certificate authority. After you have submitted the first CSR, the wildcard certificate gets generated. Many assume that you keep submitted CSRs and rekeying the certificate on the Godaddy site. However, if you rekey the certificate, you will break the previous server(s) SSL installations. Wildcard certificates must be exported from a server in your environment that you have already installed it on. For instance if you had created the CSR in IIS and want to install the certificate on a Tomcat server, you will need to export the certificate from the Windows server and then import it on the Tomcat server.
Below is the process for exporting the certificate from IIS:
Getting the MMC Certficates console opened:
- Start > Run
- Type in MMC and click OK
- Go into the File Tab > select Add/Remove Snap-in
- Click on Certificates and click on Add.
- Select Computer Account > Click Next
- Select Local Computer > Click Finish
- Click OK to close the Add/Remove Snap-in window.
Now begins the wizard process:
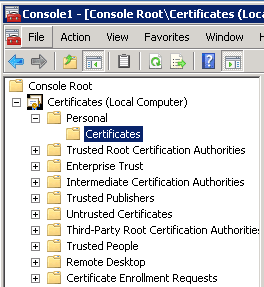
Drill down to Certificates (Local Computer) > Personal > Certificates
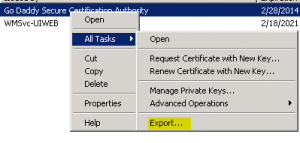
We then want to right click the certificate that we want to export which is the Godaddy Secure Certificate, choose “All Tasks” and then “Export.”
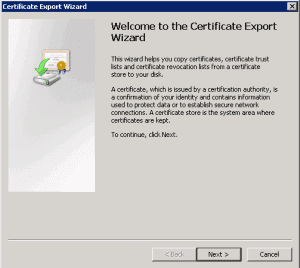
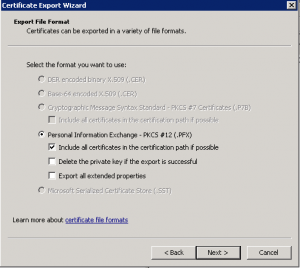
The export wizard now begins:
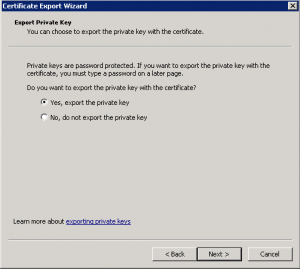
This step is important because we want to export the private key as well or the certificate won’t work:
Next, choose “include all certificates in certification path”
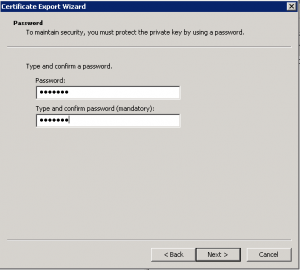
Choose a password….don’t forget the password as it will be needed later
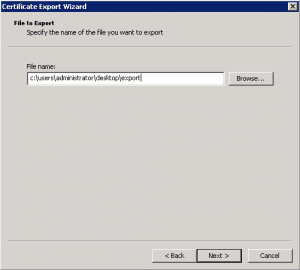
Choose an export location:
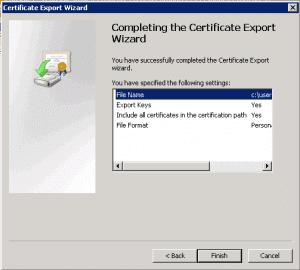
You will then receive the summary page:
Install OpenSSL:
Since we were working with a Windows box, we installed OpenSSL which is a free download onto the box. This allowed us to have access to the command line tools that we need for the next part.
Commands:
- Type openssl pkcs12 -in yourexported.pfx -out yourfile.pem. (“yourexported.pfx is the file that we created in the export process above. This will convert the PFX file to a PEM file. OpenSSL will ask you to enter the password that is used in the export process. It will also ask you to create a new password for the .pem file
- Using a text editor (we are fond of Notepad++ you need to separate the files into the private key and the certificate. The private key will being with the line: —–BEGIN RSA PRIVATE KEY—– and it will end with the line —–END RSA PRIVATE KEY—–
The certificate will begin with the line: —–BEGIN CERTIFICATE—– and end with the line: —–END CERTIFICATE—–
****Note**** in the above “certificate” file that you are extracting, you most likely will have a sequence of “BEGIN CERTIFICATE” and “END CERTIFICATE” because we exported the entire certificate chain in the export process so don’t let that confuse you. - Save the above files as “yourencryptedkey.key” and “yourcert.crt” naming them whatever you want, just pay attention to the extensions.
- Using OpenSSL we will decrypt the private key: openssl rsa -in tempkey.key -out yourkey.key (OpenSSL will prompt you for the RSA password which is the password used when converting from the .pfx file to the .pem file above.
GUI Keystore Explorer for Tomcat:
Since we were running Tomcat on a Windows box, we downloaded a very handy free program below called “Keystore Explorer.” This program provides a GUI interface to keystore management in Tomcat.
***Note, this step assumes that you have already created your keystore in Tomcat….if you have not done this, you will need to stop here and create the keystore
- Godaddy documents this step as:
- keytool -keysize 2048 -genkey -alias tomcat -keyalg RSA -keystore tomcat.keystore
Adding your key pair to the keystore:
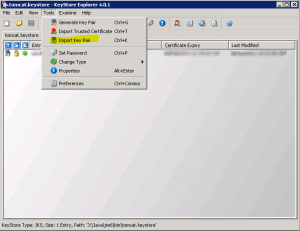
After opening the keystore file…then navigate to Tools > Import Key Pair option shown below:
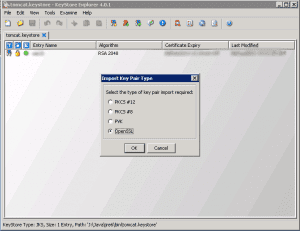
Chose OpenSSL
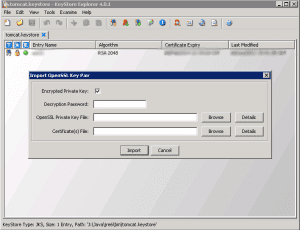
The Utility then allows you to set your Decryption Password, OpenSSL private key file, and Certificate files. You will use the files here that you just created using the OpenSSL toolkit….simply plugin the locations of your files. You can either use the encrypted private key or the unencrypted key depending on what you want to do here. Either way you can specify the password and the checkbox next to “Encrypted Private key”
After you import the files you need to Save your keystore file within the Keystore Explorer which will write the files to the keystore
Making changes to the server.xml file to enable SSL:
- The final step in the process is simply making SSL enabled in Tomcat’s server.xml file…..to do this simply uncomment the SSL connector and add the lines to point your connector to your keystore that has the newly imported keys as well as the keystore password:
<Connector port=”443″ protocol=”HTTP/1.1″ SSLEnabled=”true”
maxThreads=”150″ scheme=”https” secure=”true”
clientAuth=”false” sslProtocol=”TLS”
keystoreFile=”c:\java\jre6\bin\tomcat.keystore”
keystorePass=”yourkeystorepass”
Thoughts, Conclusion
Installing certificates can cause system and web administrators fits. However, knowing the correct process with the different kinds of certificates saves tons of time. Be sure to thoroughly read all documentation provided by your certificate authority as well as the particular web server software you are using to avoid any problems in installation and configuration.






One Comment