Getting a Docker host up and running is a great thing to do in your home lab environment. It allows you to start running containers and testing out things much more easily using containerized infrastructure. With that, if you have never stood up a Docker host before, there are a few tweaks that I would definitely recommend on the frontend so as to avoid problems later. Whenever I deploy a new Docker server, there are a handful of things I always configure now before I start spinning up containers on the defaults. These are the first five things I change on every Docker host.
Configure log rotation immediately
This is one that you can definitely reap the benefits of quickly when you are spinning up a new Docker host. It relates to logging. By default when Docker stores container logs, it uses the json-file logging drive. This is fine for small environments and for testing things. But if you have systems that will be up and running for a long time in the home lab (probably so), these logs can definitely consume a ton of space and eat up your disk space.
So for example, every time you run:
docker logs containernameDocker is actually reading from those JSON log files stored under the following location:
/var/lib/docker/containersThe problem is that Docker does not automatically limit log growth unless you configure a limit here. I have seen single containers generate gigabytes of logs over time without anyone noticing. Eventually your Docker host will start having issues, especially if Docker is running from the root filesystem as it will fill up.
One of the very first things I configure now is Docker log rotation in /etc/docker/daemon.json.
Below is an example of how to implement this in your daemon.json file:
{
  "log-driver": "json-file",
  "log-opts": {
    "max-size": "10m",
    "max-file": "5"
  }
}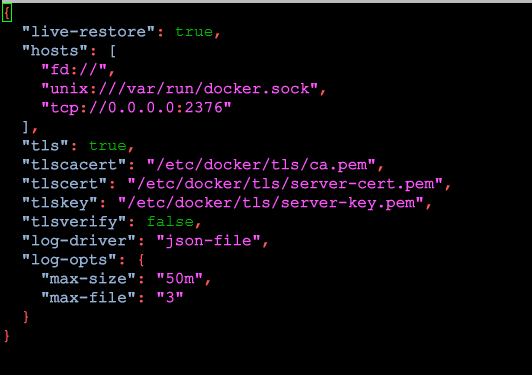
This configuration above tells Docker to:
- Rotate logs after 10 MB
- Keep only 5 rotated files
After making changes, you will need to restart Docker. You can do that with the following:
sudo systemctl restart dockerThis single tweak can save you from one of the most common Docker operational problems. If you don’t want to set this globally, you can also configure logging individually per container in your Docker Compose by adding this section:
logging:
  driver: json-file
  options:
    max-size: "10m"
    max-file: "5"
I strongly recommend making this part of your standard Docker deployment process from day one as you will thank yourself later.
Move Docker storage intentionally
Most, including myself, when you start out running docker, most will just simply leave the default location for Docker. And, this is fine to just get started out learning about running Docker and containers in general. However, Docker running on the root disk will start consuming free space on the system disk because everything gets dumped into the default storage path.
By default Docker stores:
- images
- writable layers
- volumes
- build cache
- logs
- metadata
under the following location here:
/var/lib/docker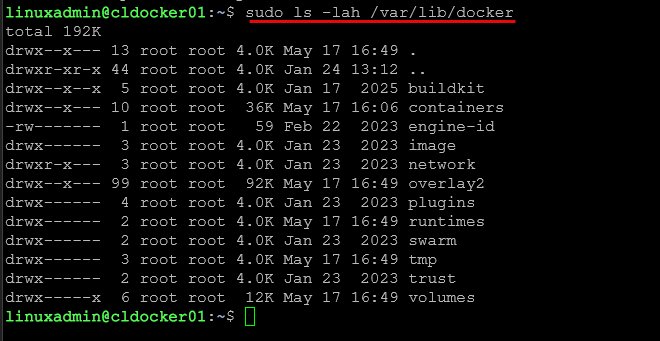
Again, this works out fine to start out with, especially on a fresh Ubuntu or Debian server. But as time goes along, this directory can become enormous.
If you are running things like AI workloads, large container images, databases, media apps, CI/CD, build pipelines, etc, you can burn through storage very quickly. On many of my Docker servers I intentionally move Docker storage to a separate dedicated disk or mounted volume.
You probably already see the rationale for this. But, if we move the Docker storage to a different mounted volume, there is no way that our system disk will be filled up. This means that even though if our Docker disk fills up and causes Docker to crash, it won’t also affect the operating system. This is key as it is generally worse to have your OS disk fill up than simply your Docker disk.
You can configure this using the data-root option in your daemon.json file that we mentioned earlier, located at /etc/docker/daemon.json.
Example:
{
  "data-root": "/docker-storage"
}
Then restart Docker:
sudo systemctl restart dockerIf you are already trying to save space and running a small boot drive to begin with, this is a recommended tweak or change that will save you painful migrations later.
Enable restart policies for containers
This is an option that many see in docker run commands or docker compose but they don’t really understand why it is needed or how to use them. That is restart policies. The restart policy is a purpose-built construct that says to Docker what it needs to do if a container fails for any reason whatsoever. This may be due to a container crashing, a host crashing, app crashing, etc. Anything that causes the container to stop
If you are not using restart policies, containers can stay offline indefinitely until you manually notice the issue. Make the restart policy a part of every deployment.
In Docker Compose one of the most common restart policies is the following:
restart: unless-stoppedOr sometimes:
restart: always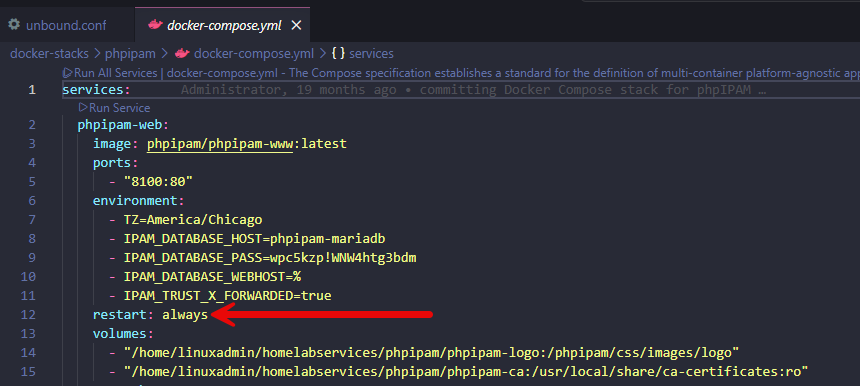
With either of these, it allows services to recover automatically after:
- Docker daemon restarts
- server reboots
- crashes
- unexpected failures
For infrastructure services especially (thinking services like DNS, DHCP, IPAM, or something else), having services restart on a crash or some type of other event is crucial. Without restart policies, you are basically creating a risk of downtime if something happens.
One thing I especially appreciate about Docker is how resilient services become once restart policies are configured correctly. Hosts can reboot and most workloads will recover automatically with no intervention which is nice.
Add monitoring before problems happen
This is another thing that I “change” or setup from the beginning and that is monitoring containers before problems happen. I have a tried and true monitoring stack that I like to use now that helps me monitor my Proxmox hosts and Docker containers and this makes it a 1/2 punch to help monitor the underlying infrastructure platform and then the containers themselves.
I use a tool called Pulse to monitor my Proxmox hosts. It also has native Docker container monitoring built into the solution as well. Read my full breakdown of Pulse here:
On top of this, I have monitoring using tools like:
- Netdata – For host level visibility, Netdata is still one of my favorite tools because it gives instant insights
- Dozzle – For quick log visibility, Dozzle is fantastic because it provides a very simple real time log viewer for Docker containers.
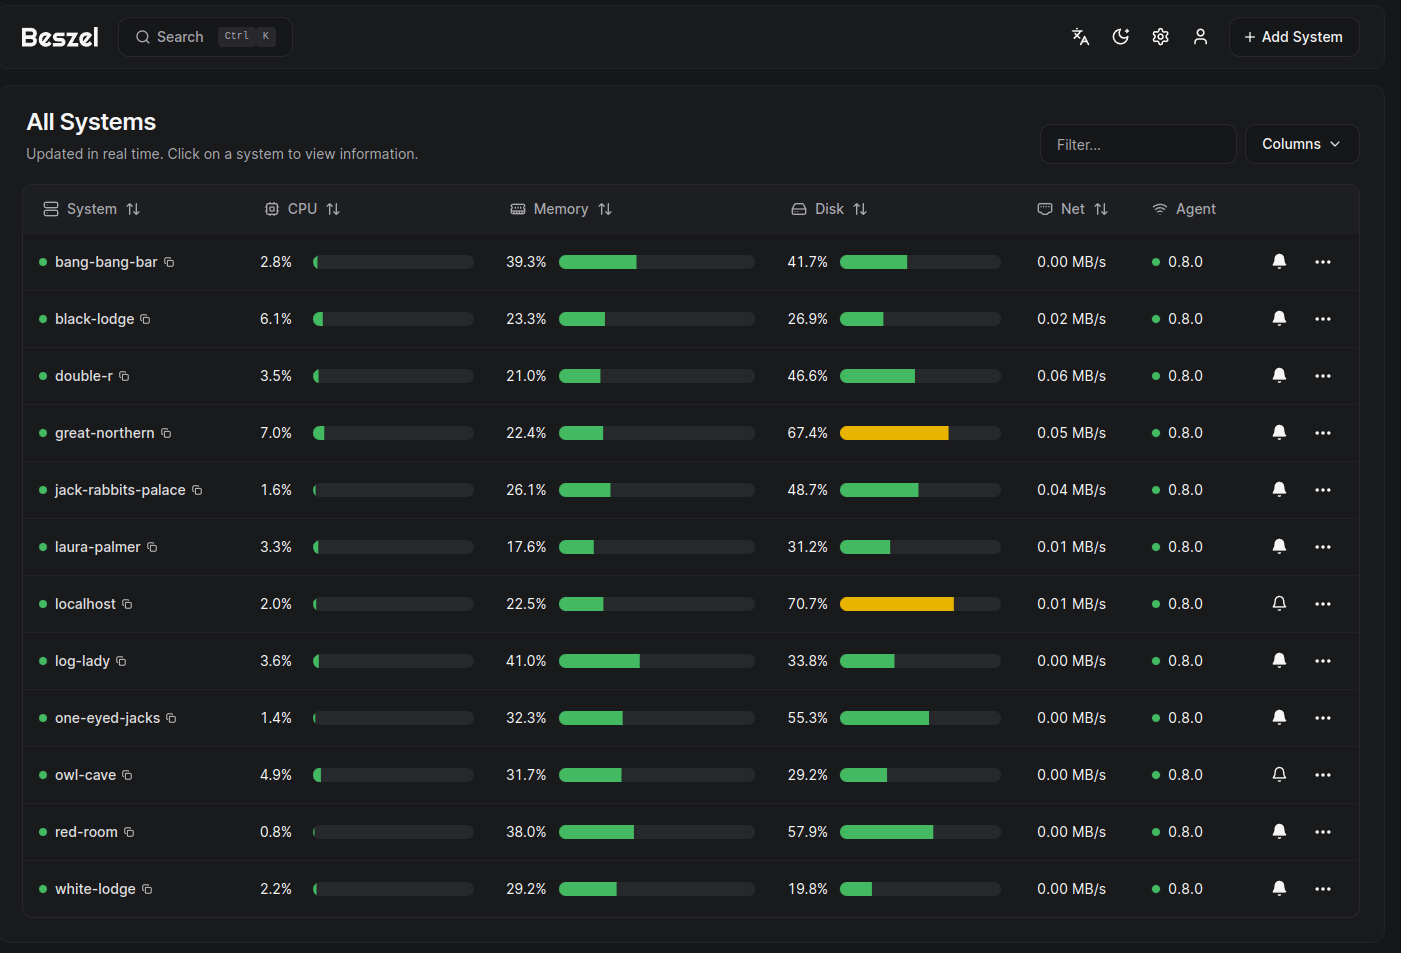
- Beszel – I am newer to Beszel, but it is great so far and very easy to setup to have visibility
These all provide lightweight monitoring that helps round out what I am getting with pulse.
Create a cleanup strategy for your Docker environment from the beginning
One of the first things that I feel like I didn’t know when starting out with Docker is that you need to routinely “clean up” your Docker environment. If you don’t you will have things like:
- Old images
- Dangling layers
- Unused networks
- Build cache
- Stopped containers
- Abandoned volumes.
All of these things add up over time. This is one of the reasons you will see forum posts about “my docker server is losing disk space, what do I do”. Now, I intentionally build cleanup into my Docker workflow. A lot of great tools now that you can use in the home lab have some type of cleanup built into them like Portainer, Komodo, Beszel, etc.
I have also setup a CI/CD pipeline on a schedule that connects to each of my docker hosts and runs the prune command to free up space. See how I did this in this post:
Some useful commands to know if you want to do your cleanup manually which is great if you already have a disk space issue are the following:
Remove unused images:
docker image pruneRemove unused containers:
docker container pruneRemove unused volumes:
docker volume pruneRemove everything unused:
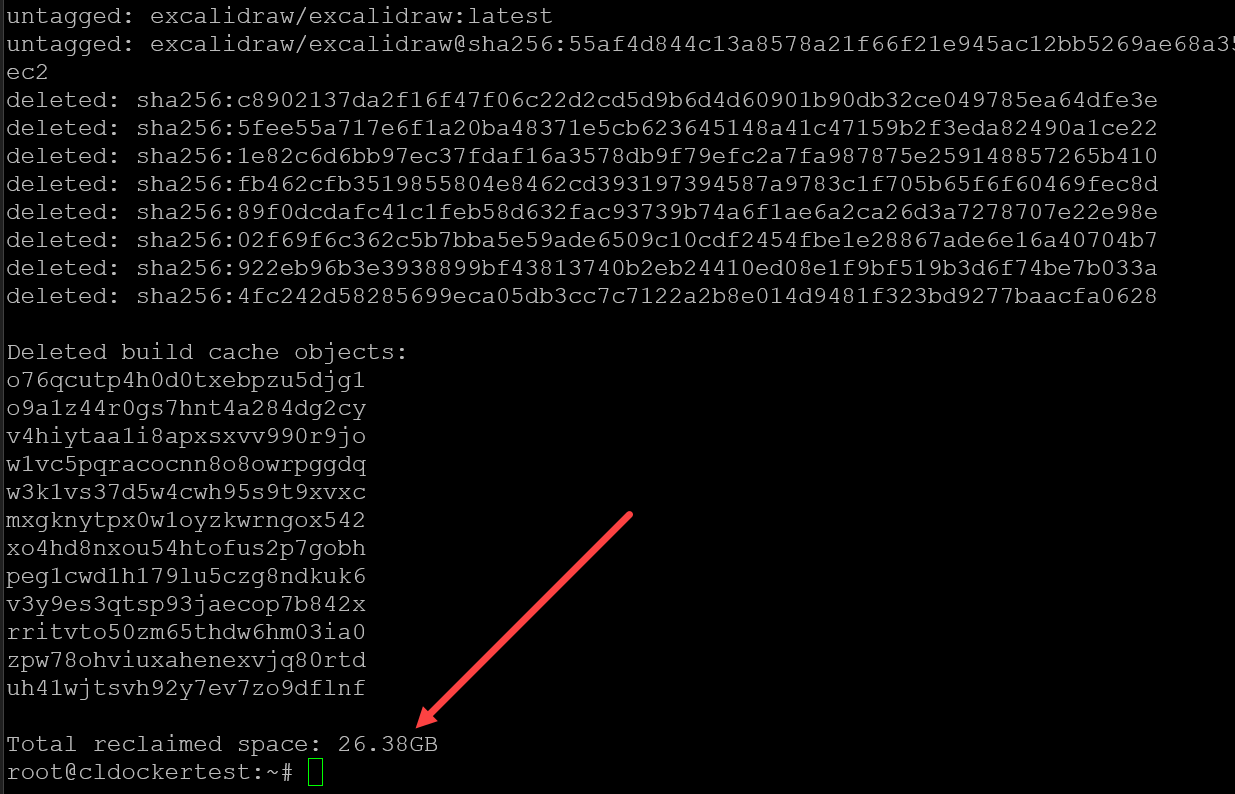
docker system prune -aYou do need to be careful with aggressive cleanup commands in production environments because you can accidentally remove cached images or unused volumes you still need. For instance, if you have a container stopped that you actually need, and you run something like docker system prune -a -f, this forces the cleanup of all stopped containers, including images, volumes, etc. So, moral of the story is DO be careful.
However, regular cleanup is essential for the long term health of your Docker environment. You can also periodically review the space used by Docker artifacts with the following command:
docker system df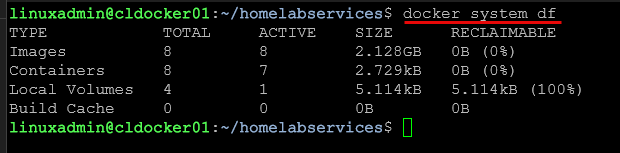
Wrapping up
Docker is a fantastic tool to use in the home lab environment. However, there are definitely changes that you can make over the defaults that can help make things even better using it. These are 5 things that I have learned from experience in my environment that have definitely made things better for me and now I consider them to be best practice in my environment. How about you? Are there certain changes that you make that you feel are important outside of what I have covered here? Be sure to let me know in the comments section below.
Google is updating how articles are shown. Don’t miss our leading home lab and tech content, written by humans, by setting Virtualization Howto as a preferred source.
About The Author


Brandon, I have asked before, but you didn’t respond. Perhaps I should rephrase. Maybe your answer requires a separate article? But what are the pros and cons with docker compared to proxmox own handling of vm’s and lxc’s? I find docker simply adds layers of complexity, especially networking and vlans, whereas the proxmox hypervisor is designed to do the same thing, but without the layers of complexity. I have a mini pc hosting managment lxc and vm’s. A production beast node, for shared nextcloud, etc. And bare metal PBS node for backups. It’s a small homelab, not enterprise grade network. Why do I need extra layers and complexities?
Rick,
This is a tough one to explain in short order. Let’s step back a moment. You are right, there are multiple ways to “skin a cat” in enterprise IT. There is never just one way to do something. There are always going to be multiple ways to provision infrastructure and applications. You are accurate to say that you can do everything you can do in Docker in the context of home lab with Proxmox, VMs, and LXCs, and then the bare metal nodes. I am going to be interested to see how Proxmox OCI containers offering matures with future releases as well as I think this is also going to be super interesting. Docker provides a way to have “app” containers that are lighter weight than even LXC. LXC is more akin to “light” VMs, whereas Docker is more the virtualization of the “app”. The beauty of Docker is that you can run it anywhere, on-premises, cloud, NAS, ARM, x86/x64, and it is a standardized way to run your apps. This is the big reason that you see it so much in the enterprise and cloud. It provides everything you need to run that specific application all in one package. OCI containers may change this in Proxmox, but you still with LXC have to install your application inside the LXC. It is just the vehicle that allows you to run the application. Once you have the Docker host running, you can have a new app up and running in seconds, fully configured, all prerequisites installed, and you can take that same configuration and run it in the cloud if you want outside of on-premises. Does it add some complexity and extra hoops to jump through with networking? Yes. But again, I think most of us have more complexity in our home labs than we would agree we need. Learning Docker as a skill and methodology is something you can take anywhere. LXCs have their place, but in the world of applications, this is where Docker has won and shines. Kubernetes also works with containerd which is the runtime engine underneath Docker. In the end, everything is a tool that solves a problem in a specific way. It is always about choosing the right tool for the job. Can LXCs do some things better than Docker? Absolutely. But can Docker do things better than LXCs? Yes. Hopefully this helps. But in the end, the answer is always the standard contractor answer of “it depends.”
Brandon