
There are many great operating systems out there for home lab, including Ubuntu Server, Fedora, Debian, and others. But there is one that you may not have tried as of yet. It is quietly building a great community following as it allows you to have a declarative approach to your Linux installs for home lab and servers. The OS is called NixOS and it might just be the best home lab operating system you haven’t tried yet. But, let’s change that!
What is NixOS?
NixOS is a Linux distribution that stands on its on. It isn’t based on another distro, but is built from the ground up around the Nix package manager. If you haven’t heard of this, it is package management system that treats your entire operating system like code. Instead of you having to manually install and configure software, you define everything in a single configuration file. What this means is you describe your system declaratively. With this file, you tell NixOS what you want to install instead of how you want to install it.
The difference in how this works can be a game changer in the home lab. I have been on a journey of having declarative builds and other things in the home lab. This means you can destroy and rebuild things with code. NixOS is built in such a way that it fits perfectly into this kind of mindset and way of building your home lab and production environments.
With NixOS, you can have a single configuration file and be certain all of your machines will “look” the same way after you apply that single configuration file.
Differences underneath the hood
NixOS might seem like any other Linux distro when you just first look at it. But its underlying differences change everything about how you manage your systems. Here’s what makes it stand out:
- Declarative: Every part of your NixOS system, from the bootloader to users to installed packages, is defined in a text file (configuration.nix). You don’t have to do any manual steps or tweaking or remembering what commands you ran six months ago.
- Reproducible: You can rebuild an exact replica of your setup on new hardware, in a VM, or on another node. It’s like having an Ansible playbook and an OS installer rolled into one.
- Atomic upgrades and rollbacks: NixOS can switch between entire system generations. If an update breaks something, reboot to the previous working configuration in seconds.
- Version control: The way NixOS builds everything around the configuration.nix file, it means your system configuration file can live in Git. You can see what changed, revert commits, or share your setup with others.
- Isolation and immutability: Packages are installed in unique directories and also the system doesn’t really upgrade the same way other servers do. It basically does a new install when you run an upgrade making the system itself immutable.
For home lab users, these features of NixOS are a game changer and mean less time re-configuring and more time doing other learning in your lab.
Installing NixOS in Proxmox
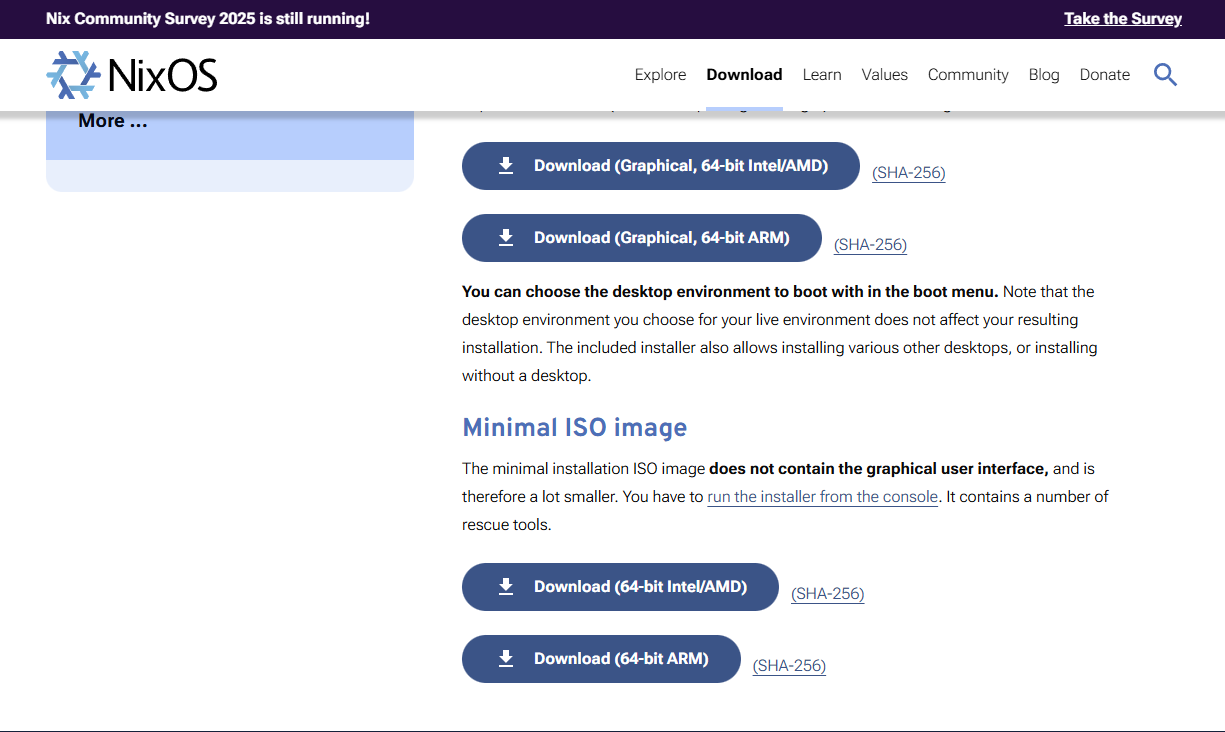
First of all, you will need the media for the NixOS install. You can download that here: Download | Nix & NixOS. For a home lab OS I am downloading the Minimal ISO image for my purposes. The minimal ISO image as the description says, does not contain the graphical user interface. This is much more appropriate for a server type node in the home lab and doesn’t install a lot of “bloat” that you don’t need. Also, it allows you to be in full control of all the components.
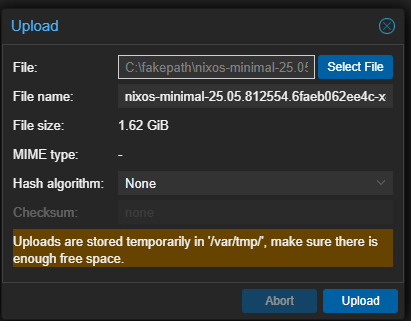
I am not showing all the screens here, but just wanted to show the main ones. First, I uploaded the NixOS minimal ISO to my Proxmox VE Server.
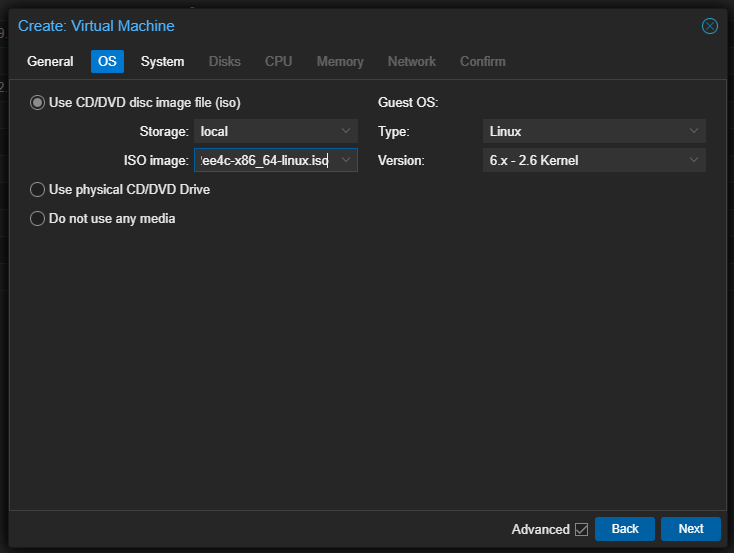
Then we use the ISO for the ISO image configuration in Proxmox.
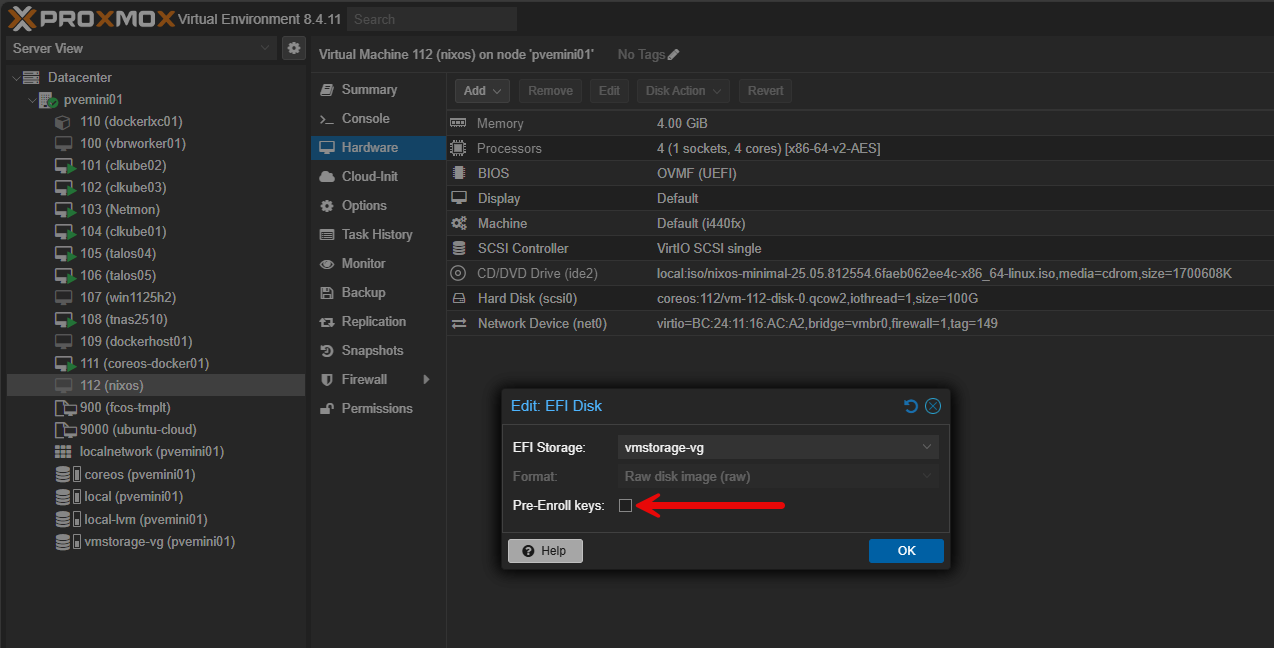
Be sure on the system configuration in Proxmox to setup the VM as OVMF (UEFI) as the BIOS type. I will head off the issue I had down below as I will detail here. Make sure you uncheck Pre-Enroll keys for the EFI Storage. If you don’t do this, it will preload with Microsoft boot keys and your NixOS ISO won’t boot under the UEFI configuration.
Below we are booting from the NixOS ISO.
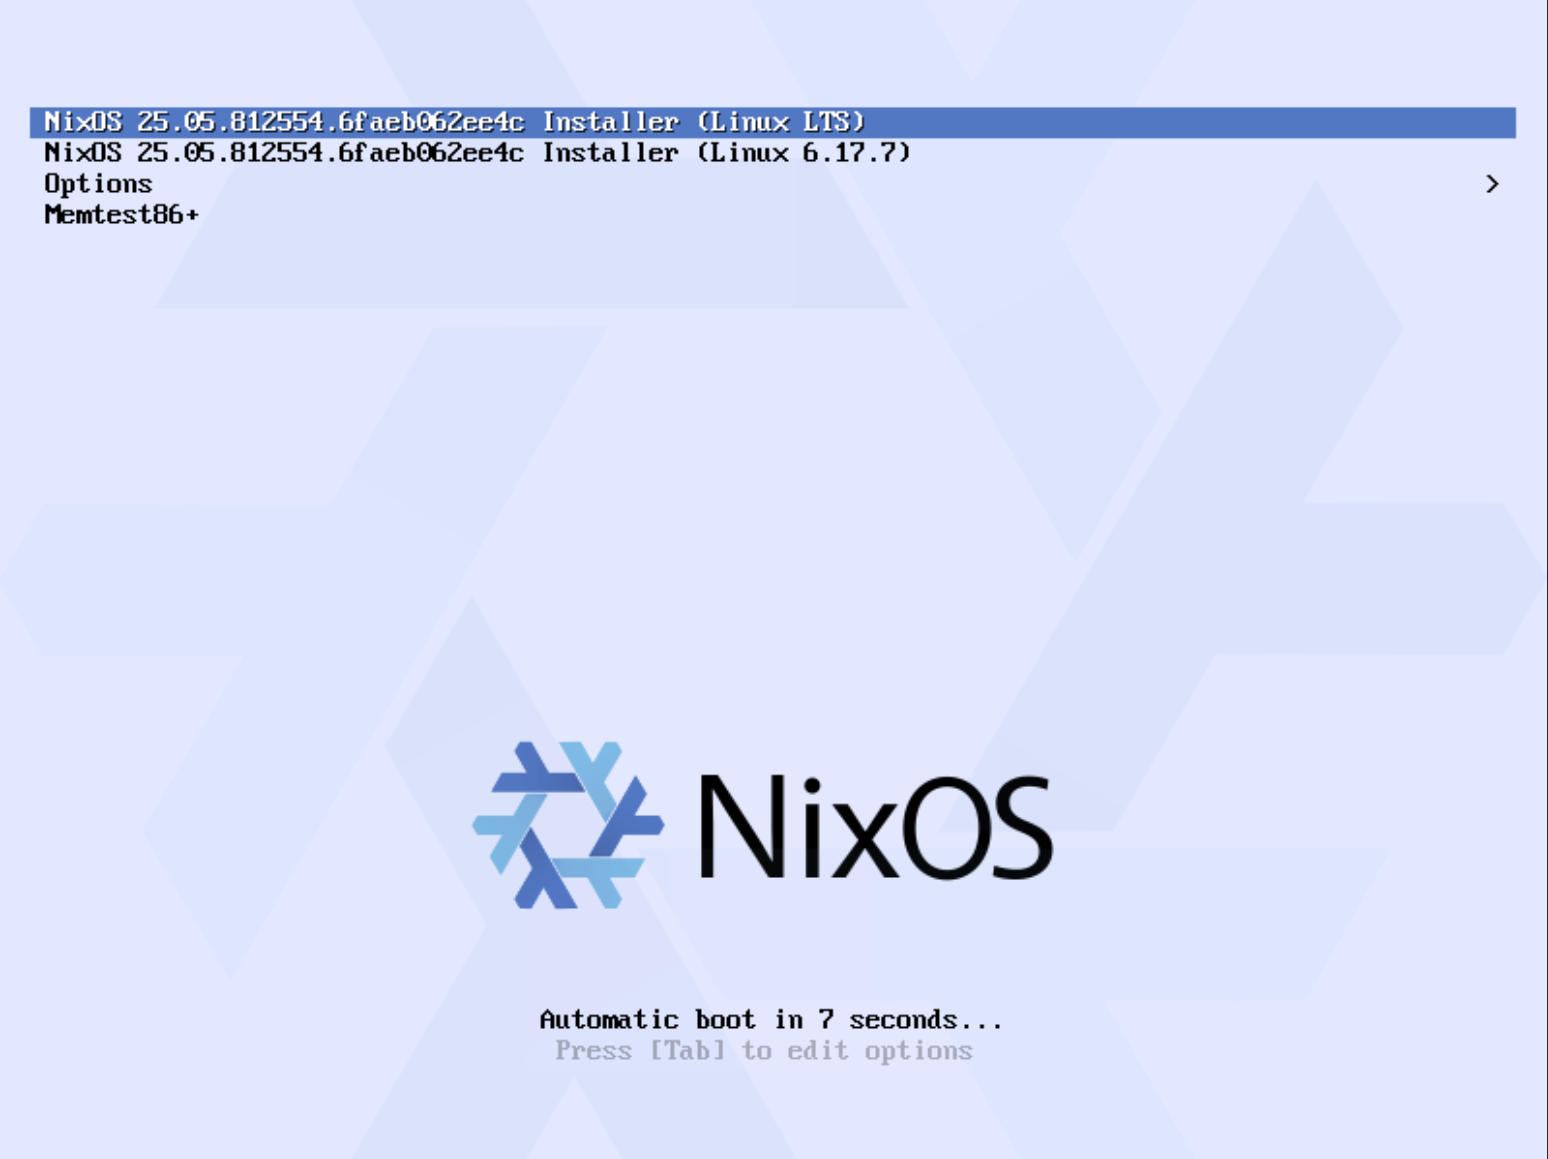
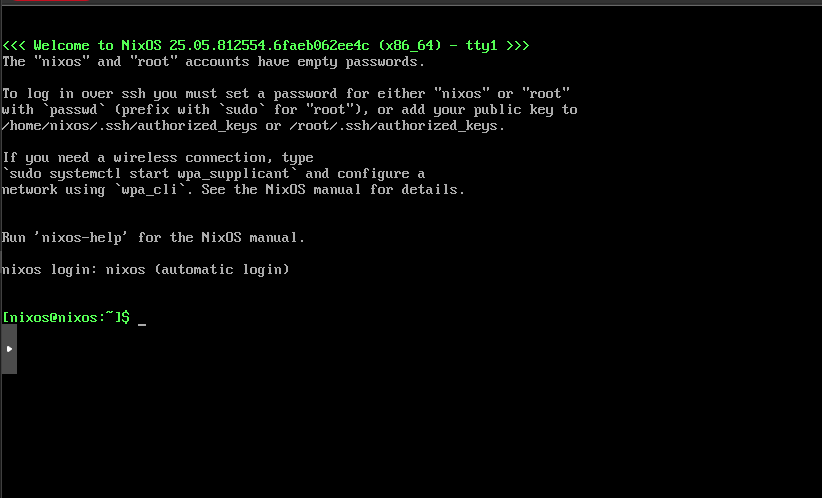
NixOS boots by default into a “Live” environment.
Preparing NixOS storage
Now that we have booted from the ISO, we need to prepare our local storage for the installation of NixOS. Below are the steps:
#Create the EFI partition
sudo -i
fdisk /dev/sda
g
n
1
{press Enter}
+512M
t
1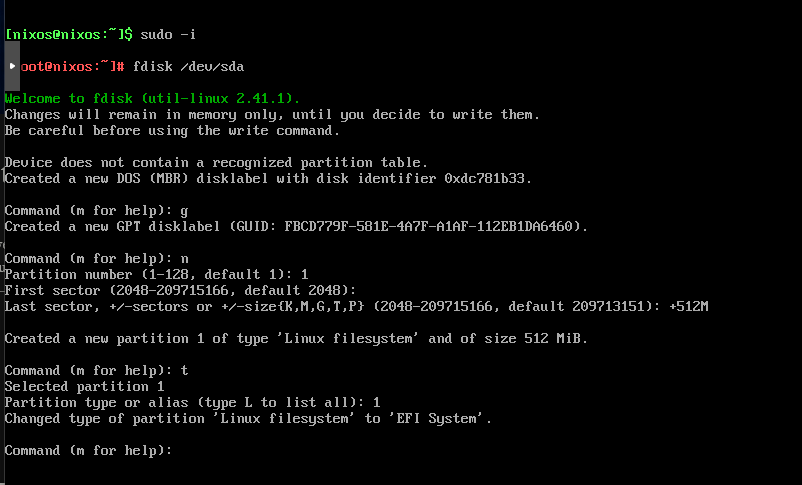
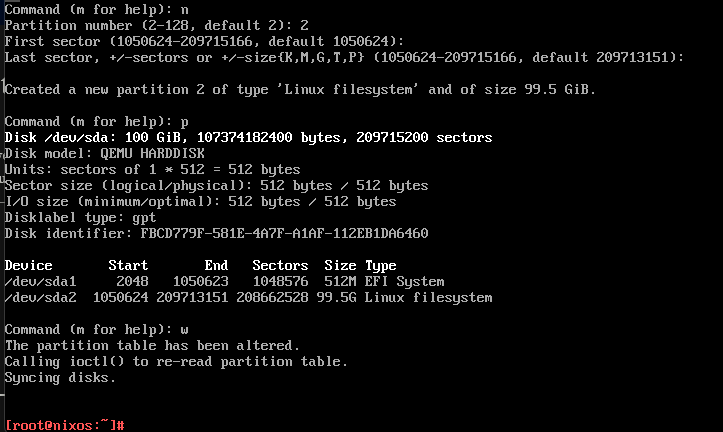
Next, we create the remaining storage for our NixOS system:
#Create the remaining storage
n              # new partition
2
<enter> <enter> # use rest of disk for root
w              # write and exit
Formatting the partitions
Now we need to format the partitions.
mkfs.fat -F32 /dev/sda1
mkfs.ext4 /dev/sda2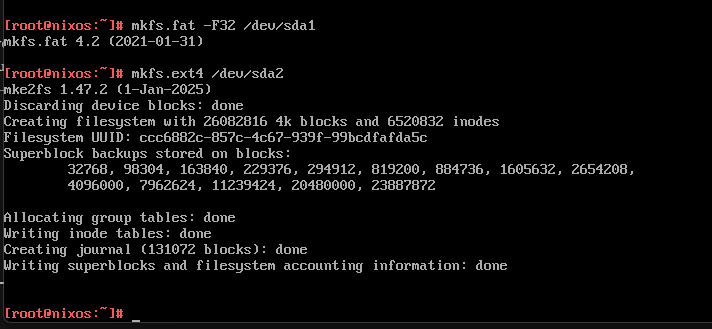
Generating the NixOS config, beginning install, and UEFI issues
So, now that we have the storage configured and formatted, we need to create our mount for the ISO files and generate our config.
# Create the mount points
mount /dev/sda2 /mnt
mkdir -p /mnt/boot
mount /dev/sda1 /mnt/boot

# Generate the config
nixos-generate-config --root /mnt
Next, run the NixOS install command:
nixos-installSince I didn’t configure the NixOS VM in Proxmox with the right UEFI settings, I received the error below. I ran a quick test to see if it was UEFI or BIOS/Legacy. Sure enough, I had missed that detail:
test -d /sys/firmware/efi && echo "UEFI" || echo "BIOS/Legacy"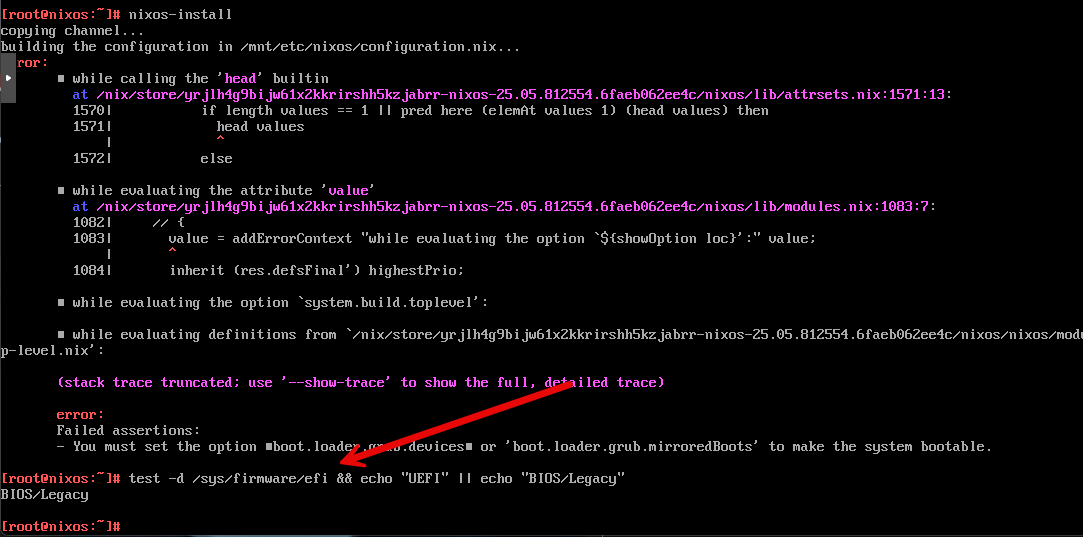
So again, reposting this screenshot so if you see this, you will know what to do:
- Reconfigure as OVMF (UEFI) system
- Uncheck the “Pre-enroll keys” option for EFI storage
If you had the same oversight on your configuration, after you correct it in Proxmox, rerun the NixOS install command:
nixos-install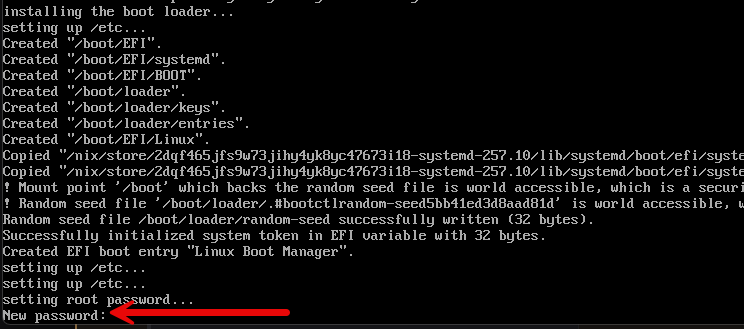
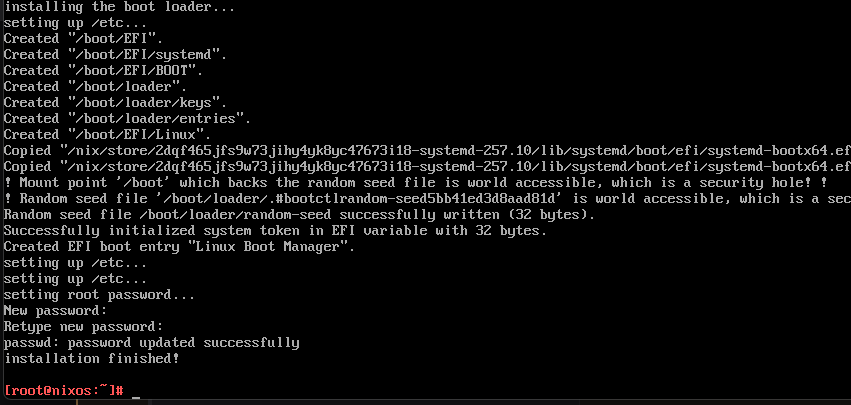
Finally, reboot your system to instantiate booting from the hard disk
rebootNixOS configuration file
So, now let’s talk about the NixOS configuration file. This is the heart and soul of NixOS and what makes it special. The file is located here:
/etc/nixos/configuration.nixBelow is a simple example configuration.nix for you to look at. In this file, it does a few things. You will note it is enabling the qemu-guest agent for Proxmox and setting the guest agent to enabled. It is installing a few packages like vim, git, wget, etc. It sets the timezone and configures an additional user, linuxadmin. For testing and ease of use, I am also setting OpenSSH to allow root login with a password.
# Edit this configuration file to define what should be installed on
# your system. Help is available in the configuration.nix(5) man page, on
# https://search.nixos.org/options and in the NixOS manual (`nixos-help`).

{ config, lib, pkgs, modulesPath, ... }:

{
  imports = [
    ./hardware-configuration.nix
    (modulesPath + "/profiles/qemu-guest.nix")
  ];

  # Use the systemd-boot EFI boot loader.
  boot.loader.systemd-boot.enable = true;
  boot.loader.efi.canTouchEfiVariables = true;

  # Enable the qemuGuest service
  services.qemuGuest.enable = true;

  # Time zone
  time.timeZone = "America/Chicago";

  # System packages
  environment.systemPackages = with pkgs; [
    vim
    git
    wget
    curl
    htop
    btop
  ];

  # User configuration
  users.users.linuxadmin = {
    isNormalUser = true;
    extraGroups = [ "wheel" ];
    password = "linuxadmin";
  };

  # OpenSSH configuration
  services.openssh = {
    enable = true;
    settings = {
      PermitRootLogin = "yes";
      PasswordAuthentication = true;
    };
  };

  system.stateVersion = "25.05";
}
After you update your configuration.nix file, you need to rebuild your nixos configuration. How do you do that? Well, it is fairly simple. Just use the following command:
sudo nixos-rebuild switchThis rebuilds and switches over to the new configuration. So, let’s say I want to install Docker in my NixOS configuration above. I just simply add Docker to the list of system packages. So:
# System packages
  environment.systemPackages = with pkgs; [
    docker
    vim
    git
    wget
    curl
    htop
    btop
  ];
Then, I execute the rebuild command again:
sudo nixos-rebuild switch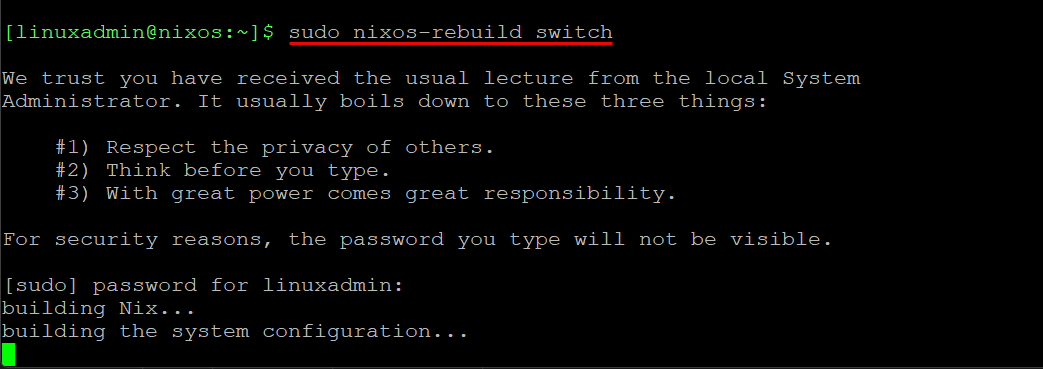
After the rebuild completes, you will see the message about the new configuration being in place.
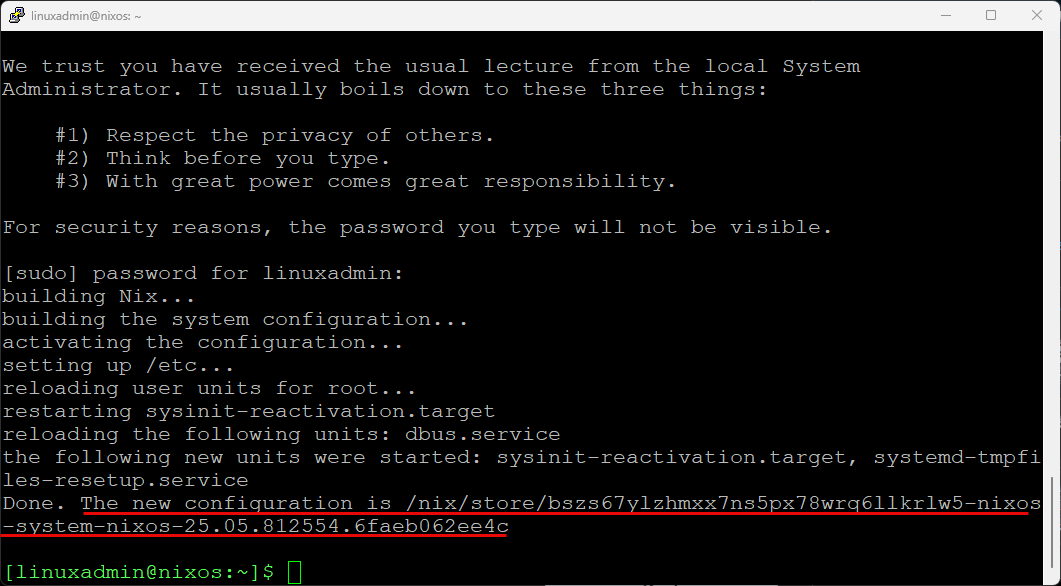
After the rebuild was successful, I ran the docker command to see if it is now installed, and it is! Very cool.

What I like about all this outside of the ease of getting things up and running and installing packages is that you can take this config file and commit it to your git repo and you will always have a record of your configuration and changes and version these.
Updating NixOS is a little different than on Ubuntu or Fedora because nothing is updated in place; instead, you rebuild the entire system from an updated Nix channel or flake. Everything (system packages, kernel, and configs) is reproducibly rebuilt in a single transaction.
Here’s how it works depending on whether you’re using the traditional channel setup or a flake setup.
How do you upgrade NixOS and packages?
This is a common question that comes when you start thinking through managing and maintaining NixOS. So, you don’t really upgrade the OS and packages. Instead you are really installing the newest version of the OS and the packages.
The first step is to update your channel definition:
sudo nix-channel --updateThis gets the latest Nix packages and system definitions for your current release. After that step, you rebuild your system, using the command below:
sudo nixos-rebuild switch --upgradeThis is a special command that does the following:
- –upgrade first updates the Nix channel – This is short for running: sudo nix-channel –update. This fetches the latest revision of your current channel (i.e, nixos-24.05).
- Then it rebuilds your entire system – The command compiles or downloads all your system components based on the new channel’s package definitions:
- Linux kernel and system libraries
- NixOS modules (services, networking, etc.)
- All environment.systemPackages
- Anything else you declare in /etc/nixos/configuration.nix
- Finally, it switches to the new generation – The new configuration is activated right away and boot entries are updated. The old generation is still kept for rollback purposes.
You can look at the active generation with this command:
sudo nix-env --list-generations --profile /nix/var/nix/profiles/system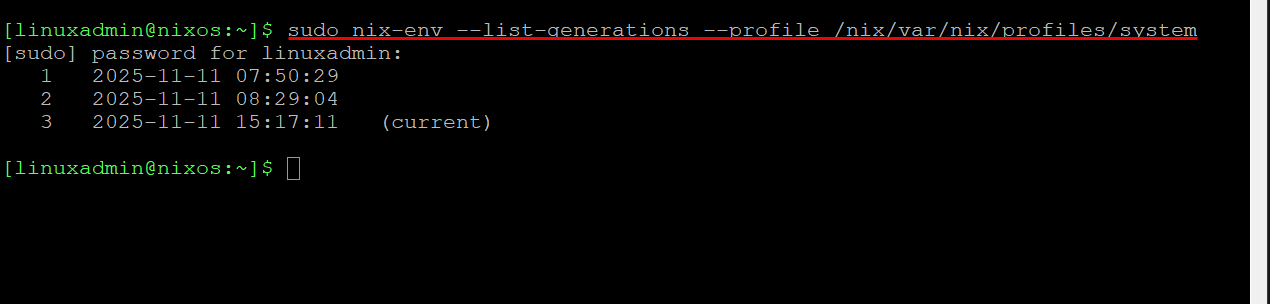
Each generation is like a restore point. If something breaks, reboot and pick an older one from the boot menu.
NixOS Anywhere
There is another pretty cool tool in the arsenal of NixOS and that is NixOS Anywhere. This allows you to deploy it to multiple systems in an automated way
The NixOS Anywhere tool is a companion tool to NixOS that lets you install or reinstall NixOS remotely using SSH. This can be ideal for home lab users when you have multiple nodes or remote machines. Instead of booting these manually with a USB stick or ISO
NixOS Anywhere is a companion tool that lets you install or redeploy NixOS remotely over SSH. It’s ideal for home lab users who have multiple nodes or remote machines. Instead of booting each one manually with a USB stick or ISO, you can run a single command from a management workstation.
You can run something like this:
nixos-anywhere --flake .#server01 [email protected]That command connects to the target host over SSH. It then partitions the disks, copies your configuration, and installs NixOS. After it reboots, the remote system comes up fully configured.
The main difference between NixOS and NixOS Anywhere is that NixOS is the operating system itself. NixOS Anywhere is an installer and deployment tool that automates installation. It’s like the difference between Ubuntu and MAAS or PXE boot automation. You still end up running NixOS. But you skip the manual install process.
This may be great if you have a cluster of Proxmox VMs or multiple bare metal nodes. NixOS Anywhere lets you carry out the installation as code. That makes it super easy to spin up new servers with your configurations.
When does NixOS make sense and when does it not?
So, should you use NixOS for absolutely everything? Well, I think it is very good for a lot of different use cases. But, here are a few things to think about and scenarios where it might fit better than others.
| When NixOS makes sense | When it might not |
|---|---|
| You want to automate and have reproducible infrastructure | You want a graphical installer or GUI tools (the full NixOS has this, but minimal does not) |
| You run multiple servers or rebuild often | You lean heavily on vendor-specific DEB or RPM packages |
| You like to experiment with infrastructure-as-code | You don’t want to learn a new syntax for configuration |
| You want a minimal, stable Linux base for Docker or Kubernetes | You don’t like to edit configuration files |
Wrapping up
NixOS is one of the more exciting home lab operating systems that I have tested out in the lab environment. It has all the features and capabilities that you would expect from a solid Linux distribution that gives you Infrastructure as Code capabilities. The fact that in a single configuration file you can define the entire setup of the operating system, including installed packages is very neat. Also, the OS and system files are immutable so you can’t directly edit these which I think it great. The whole concept of thinking is different than the traditional operating systems most of us are used to dealing with. How about you? Are you currently running NixOS? Going to try it? Let me know in the comments.
Google is updating how articles are shown. Don’t miss our leading home lab and tech content, written by humans, by setting Virtualization Howto as a preferred source.
About The Author


This is super interesting. I have wanted to try out Nix but just haven’t. This will be a good tutorial to start out with.
I don’t think I want to live in a command line to do things over and over again The whole idea behind proxmox is you can live in a command line but you have a web-based interface for a lot of these similar activities so why would I want to build a platform within a platform and do a bunch more typing config files and everything else can use Ansible or other things to manage your templates within proxmox. No thank you…
Nevada,
I understand where you are coming from. However, NixOS isn’t meant to replace Proxmox, but rather live as a guest OS that you can use as a Docker host, Kubernetes node, etc. It’s pretty cool that you can take a single config file and use it to provision another node and know that you have exactly the same configuration based on the configuration.nix. But anyways, it isn’t for everyone, and many may want to stick with something more familiar like Ubuntu Server, etc.
Brandon
> NixOS is the Best Home Lab OS
That is pretty subjective and debatable. Like for me, the best home lab OS is the one that offers the most performance and is also responsive even under heavy load. And for me (and I suspect many others), CachyOS is the most performant, at least amongst distros that offer pre-compiled binaries.
I like that CachyOS offers znver4 architecture binaries, and comes with several optimised CPU schedulers (I use scx_tickless, which is optimised for virtualisation and sever workloads). If/when NixOS can similar level of optimisations, I might consider switching, until then, I’ll stick with CachyOS.
@d3Xt3r I am definitely going to give CachyOS a spin in the lab this weekend. Looks promising! Do they offer it as a server distro as well? Just seeing the desktop downloads.
They don’t have a separate server edition, but you can choose “no desktop” during the install (if you don’t want a GUI), and then install and switch to the LTS kernel for more stability. If you choose btrfs you also get automatic snapshots. I value performance more so I use XFS and have a clone of the main OS installed on a separate partition, with a pacman hook that does an rsync before updating the OS – basically an A/B partition setup like how Android does updates on some devices.
I use Cockpit as the web GUI to manage the system, and Incus for most of VM and container needs.
Very cool! I have Cachy fired up in a VM on my workstation currently test driving. There is a lot to like here. I did see the option to install without a desktop as well. Great pointers on setting it up for performance, backups, and running VMs. Much appreciated!
Brandon
@d3Xt3r, I used your comment here in the CachyOS Linux post today with your notes on creating a server style variant of CachyOS. Very good notes.
Brandon
So much political nonsense going on with this distro. No matter what side you are on, I’d stay away from this OS until they get normal people who primarily care about a good product instead of activist community statements and other nonsense.
For me the build using the minimal ISO would crash out with a ‘killed’ message if a swap partition wasn’t added first.
Mark,
Interesting. I didn’t see this but I just used the recent release. Did you just try with the latest ISO?
Brandon