
Proxmox VE 9 is the latest in the release of Proxmox VE Server now that it is generally available. Many are now looking at upgrading their Proxmox VE 8.x instances to 9. However, outside of the new features and capabilities, you want to be sure your Proxmox VE 9 server is secure properly. Out of the box, things are fairly good to start, but it’s not hardened for every production environment or even home lab use cases for that matter. There are a few extra steps that can exponentially reduce the attack surface. Let’s look at security hardening steps for Proxmox VE 9 that you may want to take.
Secure SSH access
Like any Linux-based operating system that is accessible by SSH, this is an area that you definitely want to tighten up and lock down as most attackers will focus on brute forcing SSH to breach a server. SSH access is convenient to have on your Linux-based servers but it is definitely a security risk if not secured properly.
The best practice recommendation for Proxmox VE 9 server and Linux in general is to disable SSH access for root and create a normal user with sudo privileges for making connections. Also move away from password authentication over to SSH key based auth.
Key based authentication is a much more secure way to authenticate to your Proxmox VE 9 server. You can edit the following file and make the changes below.
On your Proxmox node, edit /etc/ssh/sshd_config and set:
PermitRootLogin no
PasswordAuthentication no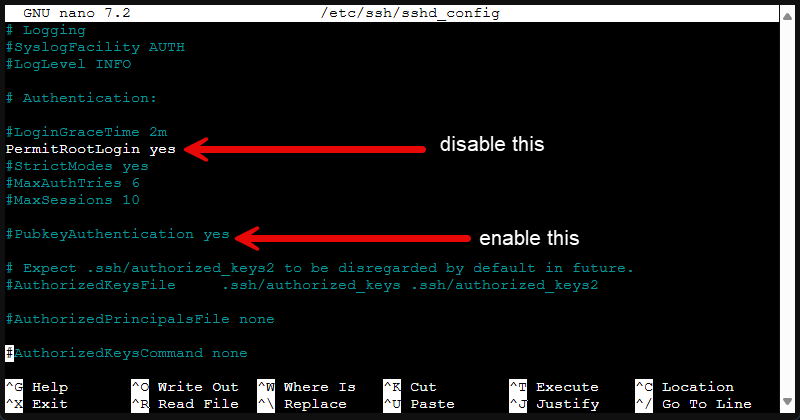
Then restart the SSH service.
service ssh restartYou can also consider changing the default SSH port to something non-standard. However, these days with the hacking and scanning tools available, plus AI, security through obscurity isn’t a replacement for key-based authentication. It might just buy you some time if that.
To defend against brute force attempts, tools like Fail2ban can monitor and block repeated failed login attempts. For step-by-step guidance, Proxmox documents SSH configuration in the Proxmox VE admin guide.
Enable and Proxmox firewall and configure it
Another tool we have at our disposal with Proxmox is the Proxmox firewall. The firewall for PVE has settings that can be applied at the datacenter level and the node level. This gives you fairly fine-grained control over your nodes and how they can communicate at the network level.
What types of policies might work? A good rule of thumb that many like to implement is to configure a default deny-all policy and then whitelist only the ports and services that you need. However, be careful with a deny-all. At a minimum, you need to whitelist:
- Proxmox web interface (8006/TCP)
- Cluster communication (like corosync ports)
- Storage protocols (NFS, iSCSI, CIFS), and SSH.
Everything else should be blocked. For clusters, you can apply rules globally at the datacenter level. Then override or extend at the node level if needed. Using groups makes it easier to apply firewall rules across nodes in your lab or production.
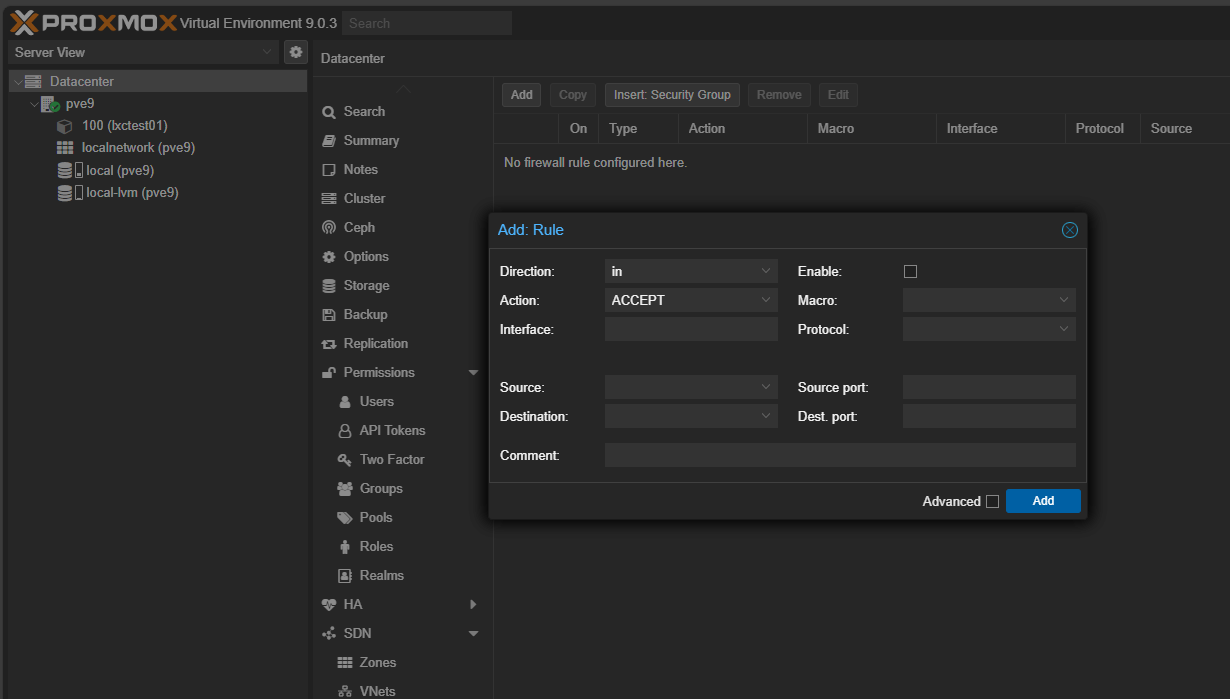
Navigate to Datacenter > Firewall > Add to add a new firewall rule or at the host level at PVEHost > Firewall > Add.
Proxmox provides a detailed firewall reference worth reviewing if you haven’t worked with the built-in firewall before.
Protect your web Interface with a proper SSL certificate
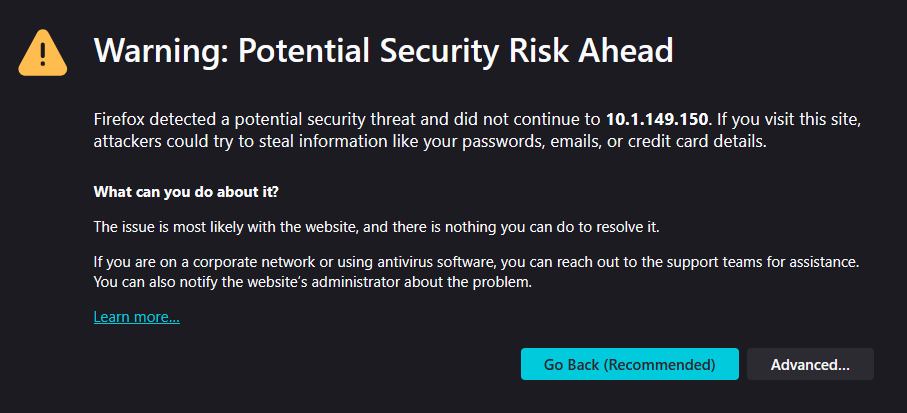
One of the good things with Proxmox is that it does come out of the box with SSL enabled on the default web interface port 8006. However, this is a self-signed certificate that is added during the installation. For a production system or “production” home lab node, you should replace this with a cert from a trusted Certificate Authority (CA). Having a trusted cert in place helps you to know you are connecting to the endpoint you expect.
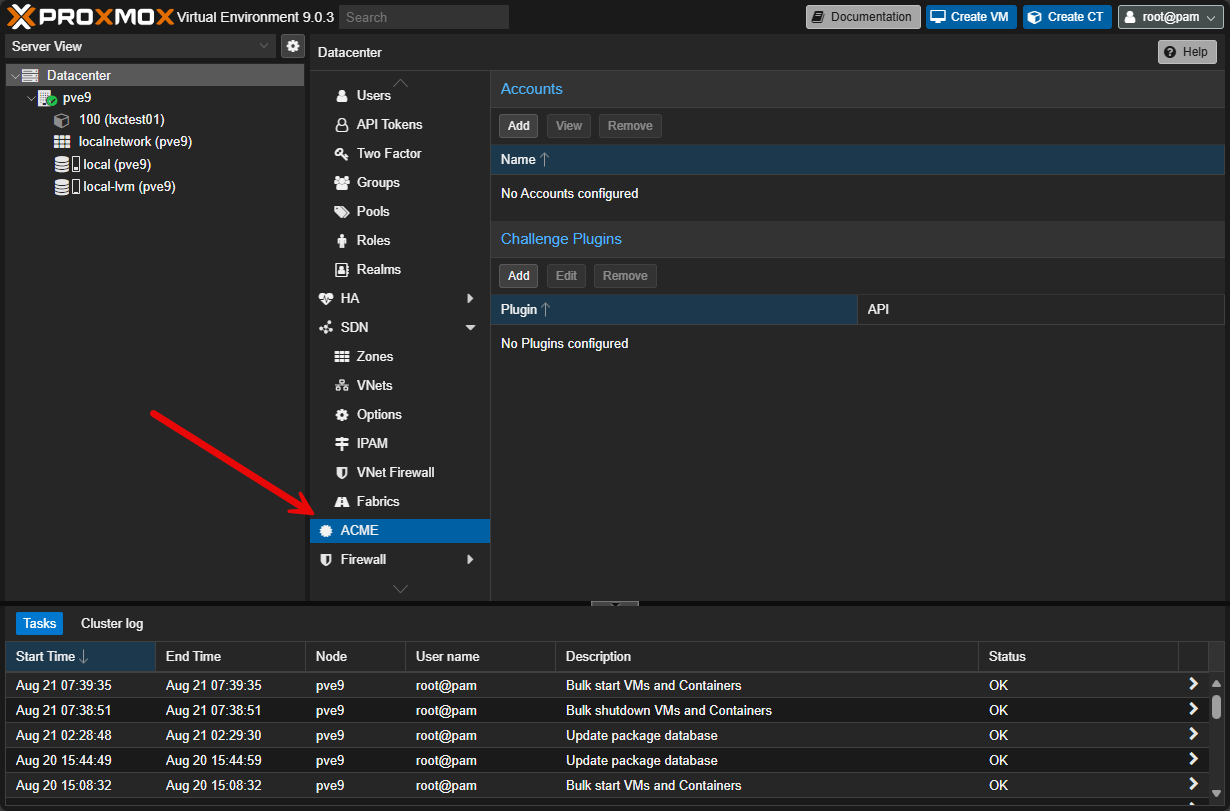
Let’s Encrypt support is built into Proxmox and can be added directly in the GUI here: Datacenter > ACME. If your Proxmox VE 9 nodes are air-grapped without Internet connectivity, you can use the DNS challenge method.
Another option you can entertain is putting a reverse proxy like Nginx or Traefik in front of the cluster. This will allow you to automate and manage TLS certificates in one place for all your nodes and have good TLS policies. Proxies can also do other things like rate limiting, WAF, etc.
Enforce strong authentication with 2FA
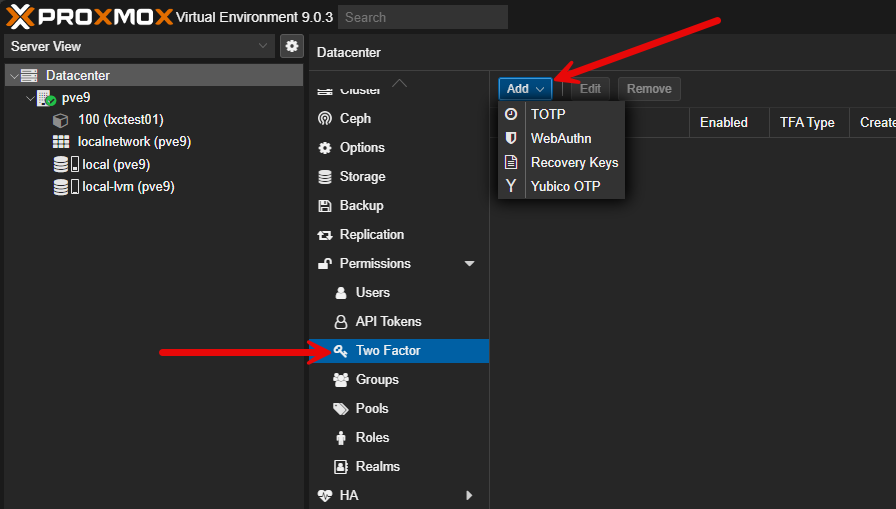
Even with TLS, usernames and passwords aren’t enough. Proxmox supports two-factor authentication methods including TOTP (Google Authenticator or Authy), WebAuthn (security keys), and Yubikeys. Enabling 2FA for your admin accounts significantly reduces the chance of compromise even if credentials are leaked.
This is an area that I think Proxmox is worlds ahead of vSphere (why? this is so simple?) and that is they have 2FA built-in. By default a single Proxmox VE node can have 2FA enabled under Datacenter > Permissions > Realms. A really good rule of thumb is to turn on 2FA on the root@pam account and then create individual user accounts for daily admin work. These accounts should also have 2FA enabled.
Keep Proxmox VE 9 updated
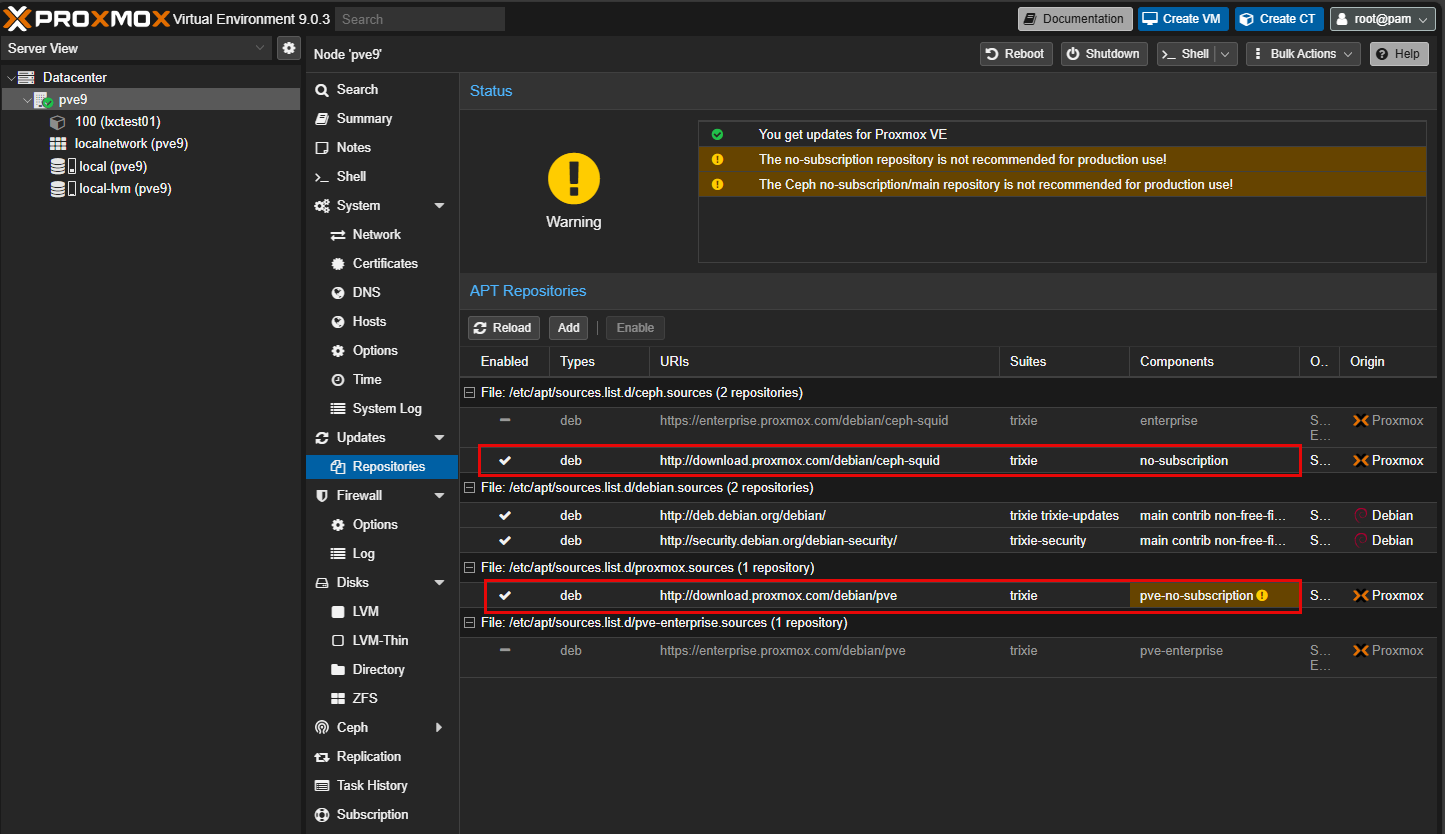
This is a simple but very effective security hardening practice with Proxmox. Keep your Proxmox VE 9 server updated. So many times, hackers take advantage of unpatched vulnerabilities to compromise servers, including hypervisors. If you have a subscription, use the enterprise repo. However, even if you don’t have a subscription, you can hit the no-subscription repos and still get updates to your PVE servers. So, either way you are protected.
See how you can add the no-subscription repos in my post here: Proxmox Update No Subscription Repository Configuration.
Alos, a really good practice is setting up unattended-upgrades for critical security patches. This is especially good for the underlying Debian OS. Don’t forget that container templates, guest tools, and kernels also need updating. A really good practice to keep in mind is to schedule regular patching windows and test upgrades in non-production environments. Then once fully tested, you can roll these into production.
Check out the official Debian Wiki on learning how to set up unattended-upgrades here: UnattendedUpgrades – Debian Wiki.
Also, as another tip, I like taking advantage of nested virtualization in Proxmox and running a nested PVE server to see how the updates and upgrades go, before I implement these in “production” home lab or other environments. You can always YOLO it, but you will feel much more confident having tested it a time or two.
Use role-based access control
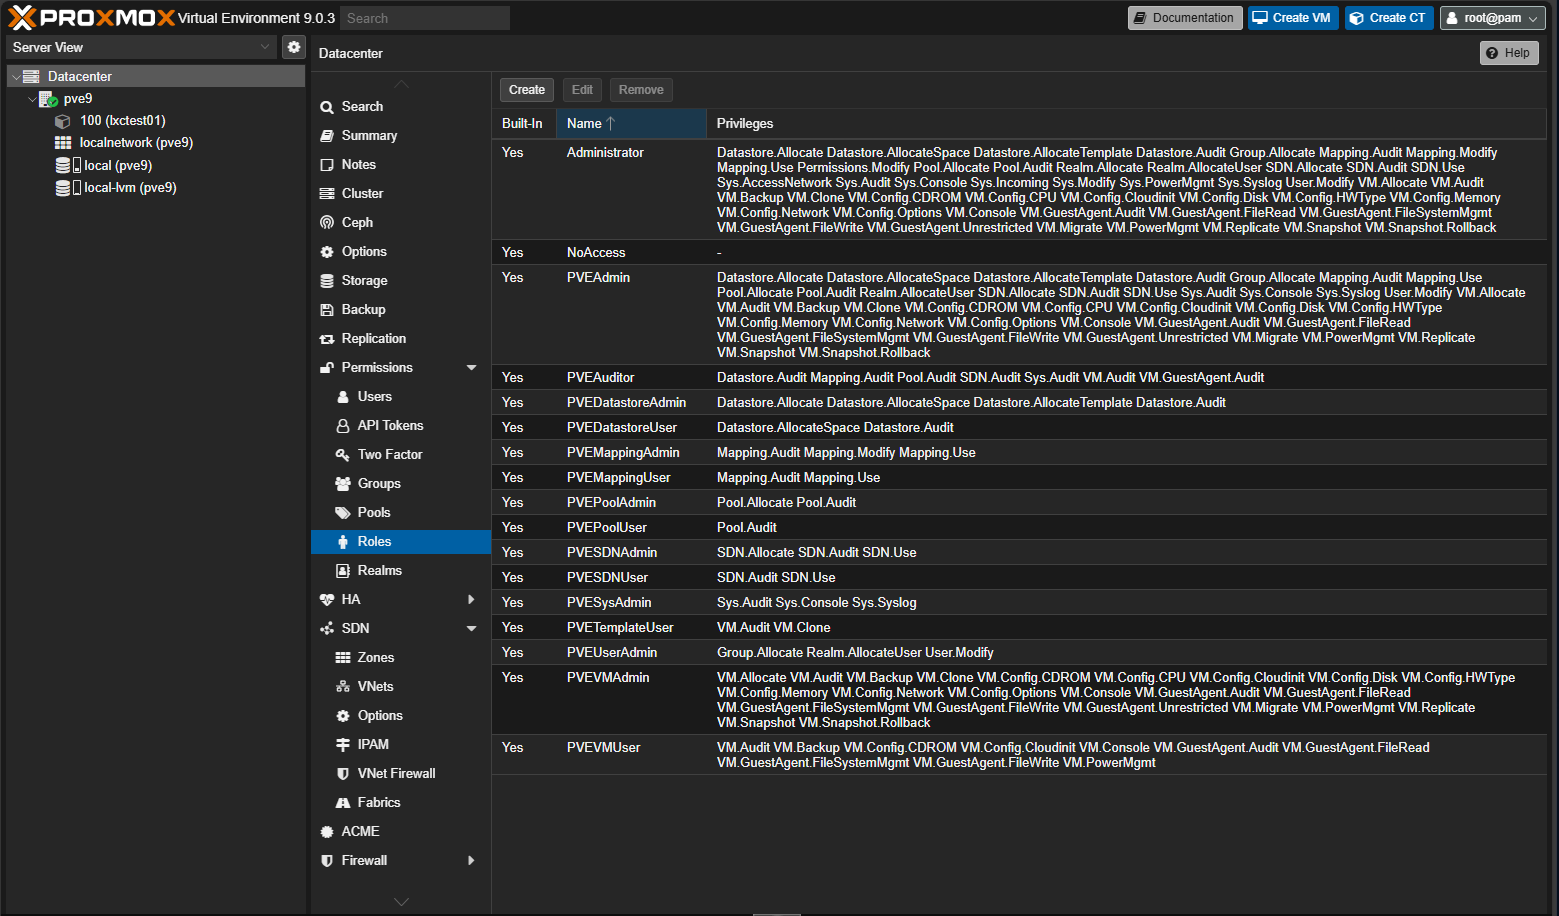
We are all guilty of using root for everything in Proxmox. However, make yourself use the RBAC model that is actually already built into the Proxmox VE solution. You can assign roles to users or groups. Instead of having a user account that has full privileges, create different accounts for things like Backup Operating, VM Admin, or simply Viewer.
Assign permissions to these accounts depending on what you need to do with them. If an account is compromised, then the blast radius is much smaller and the damage the account could do is limited.
To configure, go to Datacenter > Permissions. Again, check out the RBAC documentation for user management that explains how to create and assign roles.
Secure storage and backup access
In addition to locking down the hypervisor itself, be sure to secure your storage area networks for storage that is connected with NFS and iSCSI. Lock down the LUNs so that only your Proxmox nodes can connect. Restrict NFS exports by IP range and require authentication as well. On the Proxmox side, be sure to use strong creds for storage connections and rotate these periodically.
Backups can also be a target that deserves extra attention. If you are using Proxmox Backup Server (and you should be) you can enable client-side encryption so backups are protected when they are at rest. PBS also has immutable backup settings that help protect against things like ransomware attacks or accidental deletion or modification.
Monitor logs and metrics
Keeping your Proxmox VE Server monitored is a great way to secure the environment. Hardening includes visibility. You can configure your Proxmox nodes to forward syslog messages to a centralized syslog server so you have access to all your logs from a single location.
Keep an eye out for repeated failed login attempts or unexpected reboots on your servers. You can also enable email notifications in Proxmox for different types of events like failed jobs or login failures.
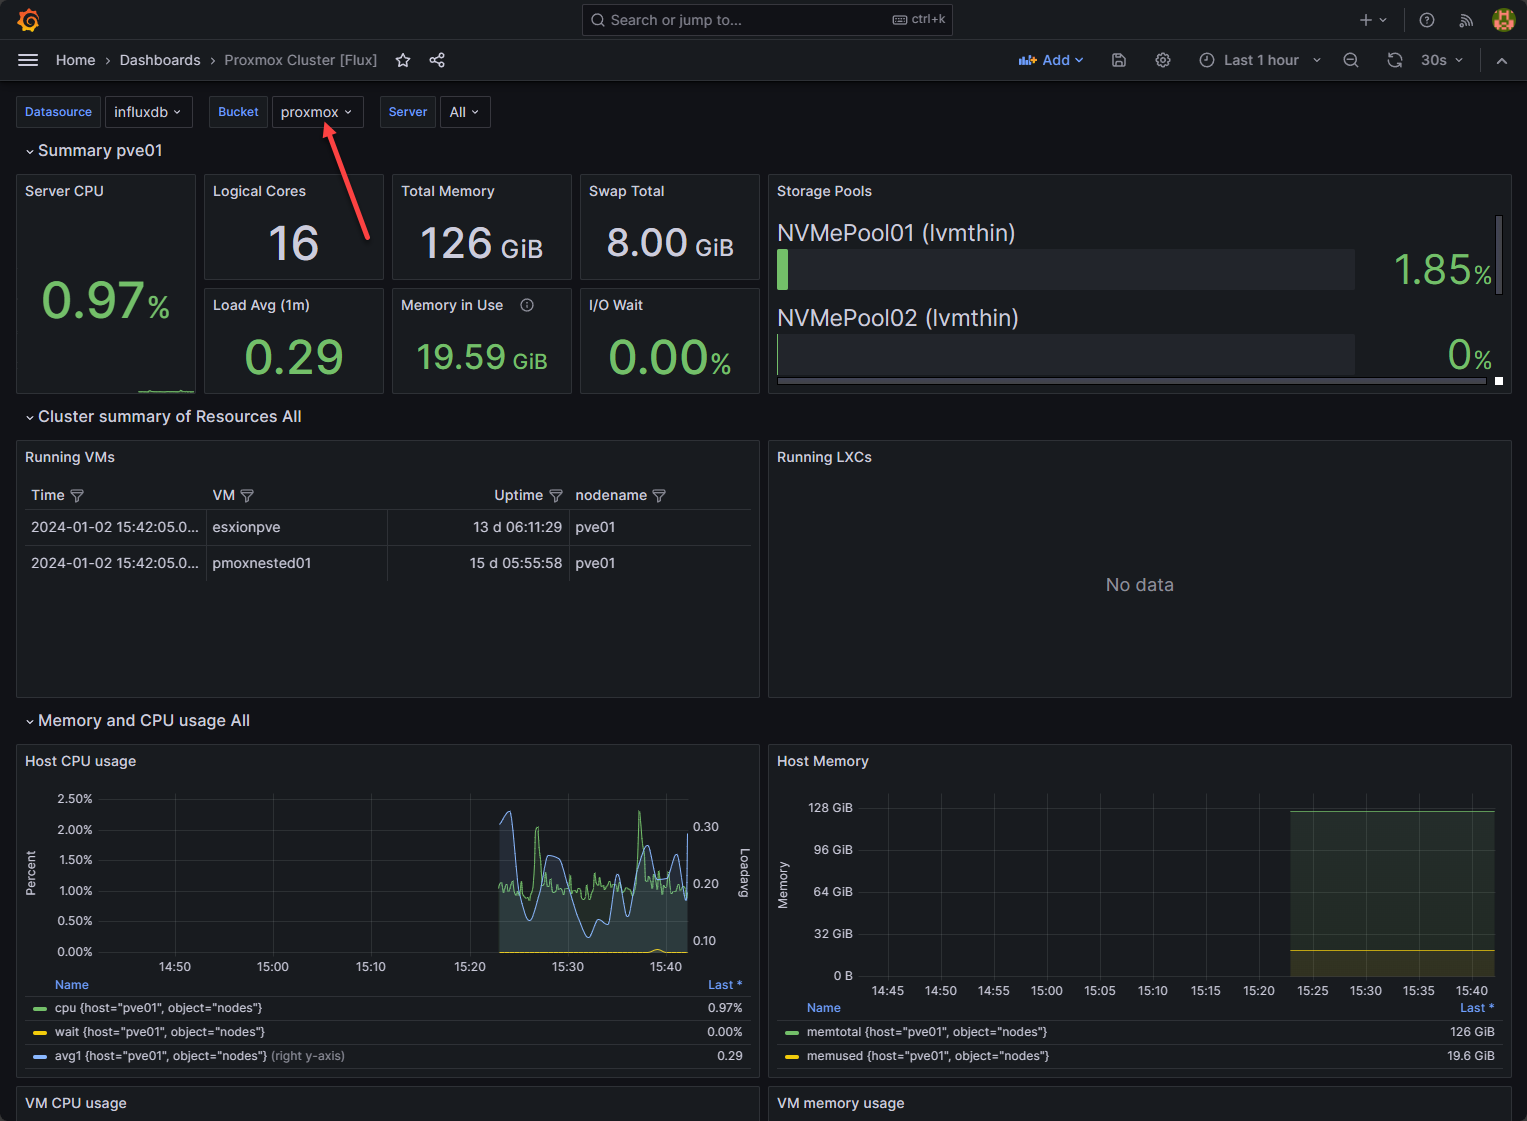
For monitoring in the home lab, integrating Proxmox with Prometheus and Grafana can give you a powerful way to track metrics. You can also use tools like Netdata to alert on unusual patterns. It makes it easier to spot things like a sudden spike in SSH traffic or failed logins. The goal is to catch suspicious activity early.
You can check out my detailed walkthrough of how to get this setup here: InfluxDB Grafana Docker-Compose Configuration: Proxmox Monitoring Example.
Harden the Proxmox host OS
Since the default Proxmox installation ISO installs Proxmox VE 9 on top of Debian, general Linux hardening guidance applies. This includes things like:
- Removing unnecessary packages and services
- Enabling AppArmor profiles to restrict processes
- Disable unused hardware like onboard audio or serial ports
- Enable Secure Boot
These small steps help to reduce your attack surface even further and the number of entry points into the system.
Implement basic physical and network security
This is an obvious one that often gets overlooked. Secure the physical location of your Proxmox servers. Lock down access to iKVM or management interfaces like iDRAC, IPMI, ILO, and others if you are using enterprise server gear with these included. Also, implement strong and unique passwords for these management interfaces that are different than your other administration accounts.
Always place your Proxmox management interfaces on a dedicated VLAN that is separated from your VM traffic and from other general traffic on the network. This makes it harder for a compromised VM or guest networks to attack the host.
Use a UPS to help offset any power disruptions that may come from power outages or other issues with utility power.
Video
Wrapping Up
Proxmox VE 9 is shaping up to be a great addition to the lineup of hypervisors in the Proxmox family. However, security is still an area where we can’t just accept the defaults if we want to have the most secure environment as possible.
As we have seen in this post, there is a lot of low-hanging fruit when it comes to hardening Proxmox VE 9 like hardening SSH, using the Proxmox firewall, enforcing 2FA, using trusted certs and others. What security recommendations do you make when it comes to Proxmox VE 9 or Proxmox in general. Let me know in the comments.
Google is updating how articles are shown. Don’t miss our leading home lab and tech content, written by humans, by setting Virtualization Howto as a preferred source.
About The Author


Thanks for the timely overview! With Proxmox 9 now available, are there any community or official automated checks aligned with CIS benchmarks for Proxmox? That could help admins validate hardening more efficiently.
Desain,
Thank you for the comment! I think the community tools are gradually getting up to speed with Proxmox VE 9. So I suspect we will see tools updated soon.
Brandon
Thank you for this article
“Another option you can entertain is putting a reverse proxy like Nginx or Traefik in front of the cluster”
Were you able to actually make this working? I’ve been trying that for months now but no matter what I do, all solutions with a reverse proxy always end up in an 401 ticket not found response after login. No matter what software I use, it’s always the same
And
https://github.com/0x4D31/finch